Page is loading ...

RocketFish RF-HTN102 Wi-Fi Invite Home Hub
User Manual

2
Preface
RocketFish reserves the right to modify this document at any time without obligation or notification of any person or organization of such revisions or changes.
Manual Revisions
Trademarks
©2010 RocketFish. RocketFish and the RocketFish logo are trademarks of Best Buy Enterprise Services, Inc. Other brands and product names are trademarks or registered
trademarks of their respective holders.
Revision Date Description
1.0 November 23, 2010 First Draft
2.0 December 9, 2010 Second Draft
3.0 December 21, 2010 Third Draft
4.0 December 22, 2010 Fourth Draft

3
Table of Contents
Preface........................................................................................................................................................................................................................................................................2
Manual Revisions....................................................................................................................................................................................................................................................2
Trademarks.............................................................................................................................................................................................................................................................2
Product Overview.......................................................................................................................................................................................................................................................5
Package Contents ...................................................................................................................................................................................................................................................5
System Requirements ............................................................................................................................................................................................................................................ 5
Introduction................................................................................................................................................................................................................................................................6
Features..................................................................................................................................................................................................................................................................7
Hardware Overview................................................................................................................................................................................................................................................8
Hardware Overview (Continued) ...........................................................................................................................................................................................................................9
Installation................................................................................................................................................................................................................................................................12
Connecting the Hub to your Network......................................................................................................................................................................................................................13
Configuration............................................................................................................................................................................................................................................................14
Web-based configuration utility...........................................................................................................................................................................................................................17
Accessing the web-based configuration utility ................................................................................................................................................................................................18
Checking the General Status of the Hub ..........................................................................................................................................................................................................19
Checking the Wireless Network Status ............................................................................................................................................................................................................19
Checking the Traffic Statistics...........................................................................................................................................................................................................................21
Accessing the System Log...............................................................................................................................................................................................錯誤
錯誤錯誤
錯誤! 尚未定義書籤
尚未定義書籤尚未定義書籤
尚未定義書籤。
。。
。
Hub Administration ............................................................................................................................................................................................................錯誤
錯誤錯誤
錯誤! 尚未定義書籤
尚未定義書籤尚未定義書籤
尚未定義書籤。
。。
。
Adjusting the Time and Date Settings............................................................................................................................................................................錯誤
錯誤錯誤
錯誤! 尚未定義書籤
尚未定義書籤尚未定義書籤
尚未定義書籤。
。。
。
Changing the Administrator Account...............................................................................................................................................................................................................22
Changing the Host Name of the Hub................................................................................................................................................................................................................23

4
Changing the IP Address of the Hub.................................................................................................................................................................................................................24
Remote Management ......................................................................................................................................................................................................................................24
Backing up and Restoring Hub Settings............................................................................................................................................................................................................26
Updating the Firmware of the RF-HTN102.......................................................................................................................................................................................................26
Rebooting the Hub ...........................................................................................................................................................................................................................................27
Configuring Wireless Settings...............................................................................................................................................................................................................................28
Connecting to a Wireless Network...................................................................................................................................................................................................................28
Configuring Advanced Wi-Fi 2.4GHz Settings...................................................................................................................................................................................................31
Configuring Advanced 5GHz Wi-Fi Settings......................................................................................................................................................................................................33
Configuring WPS (Wi-Fi Protected Setup)........................................................................................................................................................................................................14
Disabling and Enabling WPS ...........................................................................................................................................................................................錯誤
錯誤錯誤
錯誤! 尚未定義書籤
尚未定義書籤尚未定義書籤
尚未定義書籤。
。。
。
Troubleshooting ...................................................................................................................................................................................................................................................35

5
Product Overview
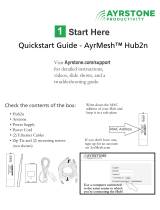
Package Contents
RF-HTN102 Wi-Fi Invite Home Hub Ethernet Cable (1M RJ45) Quick Start Guide
Power Adapter (12V DC 1.25A) CD-ROM with Manual
System Requirements
Network requirements
• an Ethernet-based Cable or DSL Modem
• IEEE 802.11n or 802.11a/b/g wireless clients
• 10/100Mbit Ethernet cable
Web-based configuration utility requirements
A computer with:
• a Windows, Mac or Linux-based operating system
• an installed Ethernet adapter
• A CD-ROM drive
Browser requirements:
• Internet Explorer 6 or higher
• Mozilla Firefox 3.0 or higher
• Safari 3 or higher

6
Introduction
Congratulations on your purchase of the RocketFish RF-HTN102 Wi-Fi Invite Wireless Hub. We hope that you will enjoy using this product to enhance your home network,
but before you begin, please take a moment to read through this manual to learn all the features of the device.
The RF-HTN102 is a high performance wireless hub designed to easily fit into your network and provide you with an easy way to connect all your devices and enjoy
multimedia and games throughout your home.
SUPERIOR SPEED
Supporting 802.11a/b/g/n, the RF-HTN102 provides a blazingly fast wireless transfer speed so that you can enjoy the latest multimedia to its full. When connecting using
802.11n you can experience speeds exceeding that of 100Mbps wired Ethernet connections.
BETTER PERFORMANCE
The RF-HTN102 can operate at both 2.4GHz and 5GHz spectrums allowing you to choose which frequency performs best for you. If you have compatible hardware, you can
switch to operate on the 5GHz frequency to avoid crowding of the 2.4GHz spectrum and improve the stability and speed of your wireless connection.
INCREASED SECURITY
Using the included Wi-Fi Protected Setup (WPS), you can set up your wireless connection simply and securely. The RF-HTN102 supports both PBC and PIN methods of
securely setting up the device. You can choose to use either WPA or WPA2 encryption methods to protect your network from intruders.
EASY SETUP
The Wi-FI Protected Setup (WPS) and Wi-Fi Invite features allow you to easily connect to a wireless router such as the RocketFish RF-HTN104.

7
Features
• Faster Wireless Networking - The RF-HTN102 provides up to 300Mbps
*
wireless connection with 802.11n wireless routers. This capability allows users to
participate in real-time activities online, such as video streaming, online gaming, and real-time audio. The performance of this 802.11n wireless hub gives you the
freedom of wireless networking at speeds 650% faster than 802.11g.
• Compatible with 802.11a, 802.11b, and 802.11g Devices - The RF-HTN102 is fully compatible with the IEEE 802.11a, 802.11b, and 802.11g standards, so it can
connect with existing 802.11a, 802.11b, and 802.11g PCI and USB network adapters.
• Advanced Wi-Fi Configuration – The RF-HTN102 allows you to fine-tune your wireless settings to optimize performance for your specific environment.
•
Restrict Remote Access – You can specify which computers on the LAN have access to the administration tool.
* Maximum wireless signal rate derived from IEEE Standard 802.11a, 802.11b, 802.11g, and Draft 802.11n specifications. Actual data throughput will vary. Network conditions and
environmental factors, including volume of network traffic, building materials and construction, and network overhead, lower actual data throughput rate. Environmental conditions will
adversely affect wireless signal range.

8
Hardware Overview
FRONT PANEL

9
Hardware Overview (Continued)
REAR PANEL

10

11
Hardware Overview (Continued)
LED Indicators
INDICATOR STATUS DESCRIPTION
Solid Light Router is ON Power
Light Off Router is OFF
Connect Blinking Light WPS or Wi-Fi Invite connection in progress
Solid Light Hub is connected to router
Blinking Light
Data is being sent and received between the hub and a
remote router.
Wireless
Light Off Hub is not connected to router
Device 1 -4 Solid Light A device is connected to the network jack

12
Installation
This section will walk you through installing the wireless hub. Placement of the hub is very important. Be sure not to place it in an enclosed space like a cabinet, closet, attic,
garage or any other area where there is not ample ventilation.
The RocketFish RF-HTN102 wireless hub allows you to access your network via a wireless connection from anywhere within its operating range. However, keep in mind that
there are factors that affect the signal strength and range of your connection. The number of objects the signal must pass through together with the number of radio
frequencies in the area will have an effect on the range. Remember these tips to maximize the wireless range of your network:
1. Keep the number of walls or ceilings that the signal must pass through to a minimum. Each wall or ceiling that the signal must pass through will have an adverse
affect on the range of your network.
2. Be aware of the direct line between the devices. A wall that is at an angle will mean that signal needs to pass through a greater surface area than the normal
thickness of the wall.
3. Building materials make a difference. Try to position access points, routers and computers so that the signal passes through open doorways or through drywall.
Materials such as glass, metal, steel, walls with insulation, bodies of water such as fish tanks, mirrors, file cabinets, brick and concrete will degrade your wireless
signal.
4. Keep your wireless hub at least 3-6 feet (1-2 meters) away from other devices which generate radio frequencies.
5. If you choose to operate the wireless hub on the 2.4GHz spectrum, be aware that this is more commonly used than the 5GHz spectrum and is therefore susceptible
to interference from devices such as microwaves and cordless phones. Try to keep the base station of your cordless phone as far away as possible from the wireless
hub as the base station will transmit a signal even if the phone is not in use.

13
Connecting the Hub
Connect the Hub
1. Position your hub close to your router which is
already online. Connect an Ethernet cable from your
computer to one of the DEVICE ports on the back of
the hub.
2. Connect the supplied power adapter into the POWER
receptor on the back of the hub and then plug into a
power outlet or surge protector. Verify the power
light is lit.
3.
Make sure that your computer has an IP Address of
192.168.1.XX and a Subnet of 255.255.255.0. Refer to
the Troubleshooting section of the user manual for
more information.
4.
Open a web browser, enter http://192.168.1.50 and
then press Enter. When the login window appears,
set the user name to admin and leave the password
box blank. Click
to continue the setup. Please
refer to the user manual for more detailed
installation information and advanced features.
5. When you have completed the setup, move the hub to desired location and connect the power adapter. Connect the devices you want to use into the DEVICE ports
on the back of the hub.

14
Using Wi-Fi to connect to a router
You can connect the Wi-Fi Invite Home Hub to your router using either Wi-Fi Invite or Wi-Fi Protected Setup (WPS). Once a Wi-Fi connection is successfully established, you
are ready to begin using your Wi-Fi Invite Home Hub.
Using WPS
The Wi-Fi Protected Setup (WPS) system is a simplified method for:
• Securing your wireless network during the initial setup
• Adding a new device to the network
There are two simple methods to securely add a device to your network via WPS:
• Push Button Configuration (PBC) method
• Personal Identification Number (PIN) Code method.
Both of these WPS methods greatly reduce the time it takes to get a new device on your network while using WPA2 encryption.
To connect to a wireless router using the PBC method:
1. Position the router and hub together for the initial Wi-Fi connection procedure.
2. Power on the router and wait approximately 1 minute for it to start before powering on your Wi-Fi Invite Home Hub.
3. Press the CONNECT button on the front of the Wi-Fi Invite Router. On other brands of routers, there will be a similar button for the WPS function.
4. Press Connect next to PBC near the bottom of the screen, or hold down the Connect button on the front of your Wi-Fi Invite Hub for approximately 3 seconds. The
two devices will connect within 2 minutes.
5. Place the hub in the desired location when the connection is successful.
To connect to a wireless router using the PIN Code method:

15
1. Position the router and hub together for the initial Wi-Fi connection procedure.
2. Power on the router and wait approximately 1 minute for it to start before powering on your Wi-Fi Invite Home Hub.
3. Locate the PIN number on the bottom of the Wi-Fi Invite Home Hub and make a note of it.
If you are unable to find it, you can:
Reset the PIN to the default by clicking Reset PIN Code to Default.
OR
Generate a new PIN Code by clicking Generate New PIN Code.
4. Enter the PIN Code into the PIN Code field of the Wi-Fi Invite Home Router’s WPS page and click Connect.
5. Press the Connect button on the front panel of the Wi-Fi Invite Home Hub. The two devices will connect within 2 minutes.
6. Place the hub in the desired location when the connection is successful.
Tip: To make sure that the connection was successful, click
, then click Wireless Status in the menu on the left. If the connection was successful, CONNECTED and the
router’s SSID are displayed.
To Turn Off WPS
• Click Disable WPS and then click
, or click to cancel.
Note: WPS is enabled by default. If you turn it off, then want to turn it back on, click Enable WPS.
Using Wi-Fi Invite
To join a network using Wi-Fi Invite:
1. Place the hub and router close to each other for the setup procedure and power them on. The first time the router detects a signal from a Wi-Fi Invite hub within
range, it displays the following screen:

16
2. Select the Invite function to continue by pressing the center button on the control pad. The router will scan for wireless clients in range and show a list of
discovered devices after a few moments.
3. Select the host name of the device you want to invite from the list by pressing the right direction button on the control pad. For the Wi-Fi Invite Home Hub, this will
be RF-HTN102 by default.
4. On your RocketFish Wi-Fi Invite Home Hub, you should see the CONNECT button flashing if you have invited it successfully. If the CONNECT button is not flashing,
confirm that you have invited the correct device from the router and try again. Press the CONNECT button on the front to accept the invitation. Within 2 minutes,
the router will connect with the hub and display “WIFI invite connection established!”. If it does not establish a connection, try repositioning the router or the client
and try again.
5. Place the hub in the desired location when the connection is successful.

17
Web-based configuration utility
After you have made an initial Wi-Fi connection to your router, you might need to adjust settings on the hub. This section explains how to adjust the configuration using the
web-based configuration utility.
If you successfully established a Wi-Fi connection, go to Configuring the hub on page 17 to continue.
If you were unable to establish a Wi-Fi connection, follow these steps to connect directly to the hub. Before you begin, make sure that your computer is connected to the
hub using an Ethernet cable. Connect one end of the cable to the network adapter on your computer and the other end to one of the network jacks on the back of the Wi-Fi
Invite Home Hub.
Setting the computer’s IP address
The RF-HTN102 does not have a DHCP Server. Therefore, the first time you connect your computer to the hub, the hub will not be able to give you a local IP address. You
will need to manually set your IP address to a local one in order to connect to the hub.
- Click Start > Settings > Control Panel. Select Network Connections. Select the connection profile which is connected to the hub, most likely labeled
Local Area Connection.
- Select Internet Protocol (TCP/IP) and click Properties. Select the radio button Use the following IP address and give the connection a local IP address
which is not in use already e.g. 192.168.1.111. Set the Subnet Mask to 255.255.255.0. Click OK twice.
- Try to connect to the web-based configuration utility again.

18
Configuring the hub
This section will describe how to set up the RF-HTN102 using the web-based configuration utility.
Accessing the web-based configuration utility
To access the web-based configuration utility, open a web browser, such as
Internet Explorer and enter the IP address of the hub (192.168.1.50) .
Enter admin in the User Name field and leave the Password field empty for
the initial setup process.
Press the Enter key or click
to complete the login.

19
Checking the General Status of the Hub
After logging in, the Device Basic Status screen is displayed. This is the
home screen, denoted by an icon of a house. This screen displays the
device uptime and the version of firmware
The menu on the left side of the screen allows you to select various status
screens which provide information about the status of the various
functions of the hub.
Checking the Wireless Network Status
Wireless Status – 2.4GHz Band & Wireless Status – 5GHz Band
This section shows the details of the 2.4GHz and 5GHz wireless connection
including the mode it is running in and the current supported standards
(a/b/g/n), the Network Name or SSID, the MAC address of the wireless access
point, the channel it is operating on, authentication mode and type of
encryption.
Connection Status
This section displays the current status of the wireless hubs connection to the
router. If connected, it will state CONNECTED and list the BSSID of the router it

20
is connected to.
/