Page is loading ...

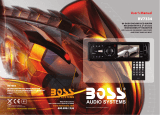
H-CMD4015
MULTIMEDIA DVD/CD/MP3 RECEIVER WITH BUILT-IN 4.3” TFT DISPLAY AND TV TUNER
Instruction manual
DVD/CD/MP3- 4,3” TFT-

2
Dear customer!
Thank you for purchasing our product. For safety, it is strongly recommended to read this manual carefully
before connecting, operating and/or adjusting the product and keep the manual for reference in the future.
Table of contents
Table of contents...............................................................................................................................................2
Important safeguards .........................................................................................................................................3
Accessories........................................................................................................................................................4
Installation/connection.......................................................................................................................................5
Electrical Connection.......................................................................................................................................10
Unit controls....................................................................................................................................................12
General operations...........................................................................................................................................16
Using the touch screen control.........................................................................................................................20
Radio Operations.............................................................................................................................................33
Disc operations................................................................................................................................................40
USB Operations...............................................................................................................................................53
SD/MMC Memory Card Operations................................................................................................................54
AV In Operations ............................................................................................................................................55
GPS Operations (Option).................................................................................................................................55
TV Operations.................................................................................................................................................56
Handling and cleaning discs ............................................................................................................................58
Troubleshooting guide.....................................................................................................................................59
Specification....................................................................................................................................................60

3
Important safeguards
Using the device at temperature below -10º may cause the breakage of the device.
Before using, please, heat up the passenger compartment to the recommended temperature!
Read carefully through this manual to familiarize yourself with this high-quality car stereo system.
Disconnect the vehicle's negative battery terminal while mounting and connecting the unit.
When replacing the fuse, be sure to use one with an identical amperage rating. Using a fuse with a higher
amperage rating may cause serious damage to the unit.
DO NOT attempt to disassemble the unit. Laser beams from the optical pickup are dangerous to the eyes.
Make sure that pins or other foreign objects do not get inside the unit; they may cause malfunctions, or
create safety hazards such as electrical shock or laser beam exposure.
If you have parked the car for a long time in hot or cold weather, wait until the temperature in the car
becomes normal before operating the unit.
DO NOT open covers and do not repair yourself. Consult the dealer or an experienced technician for help.
Make sure you disconnect the power supply and aerial if you will not be using the system for a long period
or during a thunderstorm.
Make sure you disconnect the power supply if the system appears to be working incorrectly, is making an
unusual sound, has a strange smell, has smoke emitting from it or liquids have got inside it. Have a
qualified technician check the system.
The unit is designed for negative terminal of the battery, which is connected to the vehicle metal. Please
confirm it before installation.
Do not allow the speaker wires to be shorted together when the unit is switched on. Otherwise it may
overload or burn out the power amplifier.
Install the unit horizontally. Install the unit more than 30 degree vertically may result in worse
performance.
Do not block the cooling fan exit to ensure sufficient heating dissipation of this unit, failure to do this
may result in damage to this unit.

4
Accessories
HEXAGON NUT 1 PCS
MOUNTING BOX 1 PCS
LEFT KEY 1 PCS
RIGHT KEY 1 PCS
METAL BAR 1 PCS
CONNECTOR ISO 1 PCS
PLAIN WASHER (=5mm) 1 PCS
CARRY CASE 1 PCS
GPS EXTERNAL ANTENNA 1 PCS
SPRING WASHER (=5mm) 1 PCS
TV ANT WIRE 1 PCS
AV IN WIRE 1 PCS
SCREW (5X5mm) 4 PCS
SCREW (5X25mm) 1 PCS
CUSTOMER INFORMATION 1 PCS
WARRANTY CARD 1 PCS
INSTRUCTION MANUAL 1 PCS
GPS NAVIGATION INSTRUCTION MANUAL 1 PCS

5
Installation/connection
Notes:
Choose the mounting location where the unit will not interfere with the normal driving function of the
driver.
Before finally installing the unit, connect the wiring and make sure that the unit works properly.
Consult with your nearest dealer if installation requires the drilling of holes or other modifications of the
vehicle.
Install the unit where it does not get in the driver's way and cannot injure the passenger if there is a sudden
stop, like an emergency stop.
If installation angle exceeds 30° from horizontal, the unit may not perform properly.
Avoid installing the unit where it would be subject to high temperature, such as from direct sunlight, or
from hot air, from the heater, or where it would be subject to dust, dirt or excessive vibration.
Din Front/Rear-Mount
This unit can be properly installed either from 'Front' (conventional DIN Front-mount) or 'Rear' (DIN Rear-
mount installation, utilizing threaded screw Holes at the sides of the unit chassis). For details, refer to the
following illustrated installation methods.
Remove the mechanism transit screw before installation
Before install the unit, must remove the two screws with label "REMOVE SCREW".
1. DIN FRONT-MOUNT (Method A)
Installation Opening
This unit can be installed in any dashboard having an opening as shown below (DIN standard):
Installing the unit
Be sure you test all connections first, and then follow these steps to install the unit.

6
1. Make sure the ignition is turned off, and then disconnect the cable from the vehicle battery's negative (-)
terminal.
2. Disconnect the wire harness and the antenna.
3. Press RELEASE button to remove the control panel.
4. Lift the top of the outer trim ring then pull it out to remove
it.
5. Use the two supplied release keys to remove the unit from
the mounting bracket. Insert the left ("L") and right ("R")
release keys as far as they will go (with the notches facing
up) into the appropriate slots at the middle left and right sides
of the unit. Then slide the sleeve off the back.
6. Mount the sleeve by inserting the sleeve into the opening
of the dashboard and bend out the tabs located around the
sleeve with a screwdriver. Not all tabs will be able to make
contact, so examine which ones will be most effective. To
secure the sleeve in place, bend out the appropriate tabs so
that they make contact with the dashboard.
7. Reconnect the wire harness and the antenna and be careful not to pinch any wires or cables.
8. Slide the unit into the sleeve until it locks into place.

7
9. To further secure the unit, use the supplied metal strap
to secure the back of the unit in place. Use the supplied
hardware (Hex Nut (M5mm) and Spring Washer) to
attach one end of the strap to the mounting bolt on the
back of the unit. If necessary, bend the metal strap to fit
your vehicle's mounting area. Then use the supplied
hardware (Tapping Screw (5x25mm) and Plain Washer)
to attach the other end of metal strap to a solid metal part
of the vehicle under the dashboard. This metal strap also
helps ensure proper electrical grounding of the unit.
Ensure that you install the short part of the mounting bolt
to the back of the unit and the other long part to the
dashboard.
10. Reconnect the cable to the vehicle battery's negative (-) terminal. Then replace the outer trim ring and install
the unit's front panel.
Dismantling the unit
1. Make sure the ignition is turned off, and then disconnect the
cable from the vehicle battery's negative (-) terminal.
2. Press RELEASE button to remove the front panel.
3. Lift the top of the outer trim ring then pull it out to remove it.
4. Insert both of the supplied keys into the slots at the middle left
and right sides of the unit then pull the unit out of the dashboard.
5. Remove the metal strap attached to the back of the unit (if
attached).

8
2. DIN REAR-MOUNT (Method B)
If your vehicle is a Nissan, Toyota, follow this mounting instruction. Use the screw holes marked T (Toyota), N
(Nissan) located on both sides of the unit to fasten the unit to the factory radio mounting brackets supplied with
your vehicle.
Fasten the unit to the factory radio mounting brackets. Align the screw holes on the bracket with the screw
holes on the unit, and then tighten the screws (5x5mm) on each side.
Note:
The outer trim ring, mounting sleeve and the metal strap are not used for method of installation.
REMOVING AND PROTECTING DETACHABLE FRONT PANEL
The front panel of the unit may be removed as a theft deterrent. After removing the front panel, use the case
provided to keep the front panel from getting damaged.
1. Press the RELEASE button to release the front panel.

9
2. Pull off the front panel from the main unit.
Store the front panel in the protective case provided for safe keeping.
TO ATTACH THE FRONT PANEL
First fasten the right side of the front panel onto the bracket of main unit. Then slightly push
the left side of the front panel to attach the main unit.

10
Electrical Connection
Note: The parking wire is connected with brake signal; for safety, the programs can be seen on the monitor
after braking the car.

11
Connecting the reversing line to taillight on the car
After connecting, when you start up the reverse gear, the unit will receive the picture from car rear view
camera.

12
Unit controls
Front panel
1. POWER/MUTE button
2. MENU button
3. RELEASE button
4. AF/REG button
5. EJECT button
6. TA button
7. BAND button
8. DISPLAY button
9. AS/PS button
10. PTY button
11. USB jack
12. PLAY/PAUSE button
13. IR sensor
14. Touch screen
15. AV in jack
16. VOL+/VOL-, PREVIOUS/NEXT buttons
17. SOURCE button

13
Inner panel
18. Card slot for GPS
Map card
19. Disc slot
20. LED indicator
21. RESET button
22. SD/MMC Memory card slot

14
Remote control
1. POWER/LIGHT button
2. MODE/SMART button
3. SETUP button
4. SUB-T button
5. ANGLE button
6. PREVIOUS/NEXT, FAST REWIND/
FAST FORWARD/Cursor buttons
7. ENTER button
8. DISPLAY button
9. ZOOM button
10. BAND button
11. Digit buttons
12. 9/PTY button
13. 7/TA button
14. 8/AF/REG button
15. RPT button
16. 0 button
17. SOURCE button
18. EJECT button
19. SYS/DVD/TV switch
20. INFO button
21. DVD MENU button
22. MUTE button
23. TITLE button
24. VOL+/VOL- buttons

15
25. AUDIO button
26. PLAY/PAUSE button
27. STEP button
28. STOP button
29. GOTO/AS/PS button
30. PROGRAM/LO/DX button
31. RDM/MO/ST button
32. A-B button
Changing the battery
1. Press the catch and at the same time pull out the battery tray (pic. 1).
2. Insert the 1 lithium battery, type CR2025 (3V) battery with the stamped (+)
mark facing upward. Insert the battery tray into the remote control (pic.2).
Warning:
Store the battery where children cannot reach. If a child accidentally swallows the battery, consult a doctor
immediately.
Do not recharge, short, disassemble or heat the battery or dispose it in a fire.
Do not expose or bring into contact the battery with other metallic materials. Doing this may cause the
battery to give off heat, crack or start a fire.
When throwing away or saving the battery, wrap it in tape and insulate; otherwise, the battery may give off
heat, crack or start a fire.
Pic. 1 Pic. 2

16
General operations
Reset the Unit
Operating the unit for the first time or after replacing the car battery, you must reset the unit. Remove the front
panel at first, and then press RESET button on the inner panel of the unit with a pointed object, (such as a
ballpoint pen) to set the unit to initial state.
Note: When some errors occur on the display, you can also press RESET button to resume to normal, and it
will erase some memorized functions.
Turning the Unit On/Off
Press any button (except RELEASE) on the unit to turn it on or press POWER button on the RC. After inserting
a disc, the unit will automatically start playing. Keep pressing POWER button on the unit or RC more than 2
seconds to turn off the unit completely. There is a Start-up screen on the touch screen when you turn on the
unit, then switch to TUNER or DISC playing mode.
TFT ON/OFF
Press POWER/LIGHT button on the RC to turn the display on or off. This function prevents the driver from
bright light of the display when driving at night.

17
Volume Control
Press VOL+/VOL- button on the RC or on the unit to increase/decrease the sound level.
Mute Function
Press MUTE button on the RC or on the unit to turn off the sound. The corresponding icon appears on the TFT.
Press it again to resume the previous volume level.
System (SYS) DVD/TV joyswitch
Move the joyswitch to SYS, DVD or TV, to use the buttons on the remote control served for system, DVD or
TV playback. Otherwise you will not able to use the buttons.
Source choose
Press SOURCE button on the unit to enter the source menu and choose the source by touching the
corresponding icon: USB, DISC, TUNER, TV, SD, GPS, AV1, AV2.
Press MODE button on the RC to switch the sources after each pressing.
Note: BT, IPOD, and CDC modes are not available.

18
Dual zone
Pressing and holding SMART/MODE button on the RC, you can turn on or off the dual zone playing mode.
After turning on dual zone playing mode, press SMART/MODE button to select the playback mode for rear
zone: MEDIA => TV => AV1 => AV2.
Last Position Memory
During the media playback (DISC, USB, SD/MMC CARD), if you turn off the unit and then switch on it, the
unit will resume playing from the point that it was interrupted.
During the media playback (DISC, USB, SD/MMC CARD), if you switch to other mode, and then return the
previous mode again, the unit will resume playing from the point that it was interrupted.
Ejecting/Loading
Note: Before removing a disc from the disc slot, you should retract the TFT screen, otherwise, the loaded disc
can not be removed from the disc slot when you press the EJECT button.
Press EJECT button to flip down the panel, now you can load the disc.
Press EJECT button to flip down the panel. Press it one more time to eject the disc.
To adjust the angle of TFT Screen
Poke at the TFT screen to adjust the gradient of the TFT screen, so as to achieve an optimal viewing angle.

19
System Information Display
In media playback mode, TV or auxiliary AV1/AV2 input mode, press the DISP button on the remote control,
the TFT screen will show such kind of system information, such as real time, volume level, current playback
mode of rear zone etc.

20
Using the touch screen control
The Touch Screen Control allows fingertip control of virtually all functions. Alternatively, you could also
operate with ease with the user-friendly integrated big function buttons that are prominently visible.
To access the main control interface
In every playback mode, when you press the SOURCE button in the head unit, or click the icon on the
touch screen, the main control interface will pop up.
To select a source (Media, GPS, TV, AV 1, AV 2 or Radio), click the relevant icons on the touch screen.
Click the icon to return to previous playback and exit the main control interface.
To access the tools setup interface
In every playback mode, when pressing MENU button on the head unit or click the icon on the touch
screen, the tools setup interface will pop up.
/