Page is loading ...

Operating - and Installation Instructions
Air Conditioner roof top unit
Cool Top Trail 34
- Outdoor unit HGN47080009
- Indoor unit HGN47090009, HGN47090012
More information https://www.caravansplus.com.au

Cool Top Trail 34
2
TR
Table of Contents
1 Introduction 3
1.1 Purpose of the document 3
1.2 Using this document 3
1.3 Use of symbols and highlighting 3
1.4 Warranty and liability 3
2 Safety 3
2.1 Intended use 3
2.2 Safety information 3
2.3 Qualifications of installation and maintenance
personnel 4
3 Scope of Delivery 5
4 Installation instructions 5
4.1 General 5
4.2 Installation requirements 5
4.3 Different cut-out sizes 5
4.4 Installation position 6
4.5 Roof reinforcement / power supply 7
4.6 Installation of the adaptor frame 8
4.7 Installation of the outdoor unit 9
4.8 Connecting the power supply 9
4.9 Installation of the air distributor mounting bracket 10
4.10 Connection of the air inlet duct 10
4.11 Installation of the air distributor assembly 10
4.12 Holder remote control 12
4.13 System test 12
5 Operating instructions 12
5.1 Before usage 12
5.2 Achieving effective heating and cooling 12
5.3 Condensation 13
5.4 Choosing and using a generator 13
5.5 Remote control 13
5.6 Switching the unit ON/OFF 14
5.7 Setting the temperature 14
5.8 Setting the fan speed 14
5.9 Setting the operation mode 14
5.10 Setting the clock 15
5.11 Setting the timer 16
5.12 Activating the timer 16
5.13 Sleep function 17
5.14 Units of temperature change 17
5.15 LED lights 17
5.16 Reset of the remote control 17
5.17 Operation at the air distributor 18
5.18 Adjusting the air outlets 18
6 Maintenance 19
6.1 Filter 19
6.2 Batteries of the remote control 19
6.3 Bolt check 19
6.4 Regular usage 19
6.5 Cleaning 19
6.6 Heat exchangers 20
7 Troubleshooting guide 20
8 Disposal 21
9 Technical Specifications 21
10 Wiring schematic 22
11 CE-Declaration 22
More information https://www.caravansplus.com.au

Cool Top Trail 34
3
1 Introduction
1.1 Purpose of the document
These operating - and installation instructions are part
of the product and contain all the information re-
quired to ensure correct and safe installation and use.
1.2 Using this document
XRead these instructions before installing and operat-
ing the unit.
XKeep these instructions ready to hand.
XHand these instructions on to the following owner
or user of the unit.
1.3 Use of symbols and highlighting
Explanation
DANGER
Indicates a hazard with a high level of risk
which, if not avoided, will result in death or
serious injury.
WARNING
Indicates hazard with a medium level of risk
which, if not avoided, could result in death
or serious injury.
CAUTION
Indicates hazard with low level of risk
which, if not avoided, could result in minor
or moderate injury.
NOTE
Indicates possible damage to the product or
a special technical feature.
Separate documentation available.
Requirement for the next action.
Action to be taken.
1.4 Warranty and liability
The statutory warranty period applies. If the product
is defective, please contact the service partner in your
country. Our experts will be happy to help you and
will discuss the warranty process with you in more de-
tail.
Webasto shall not assume liability for defects or dam-
age that are the result of the installation and operat-
ing instructions being disregarded.
This liability exclusion particularly applies for:
■Installation by untrained personnel.
■Improper use, contrary to the intended use.
■Repairs not carried out by a Webasto service work-
shop.
■Use of non-original spare parts.
■Conversion of the unit without permission from
Webasto.
■Mechanical damage to the equipment.
■Failure to comply with installation and operating
instructions.
■Operation with voltage levels other than specified in
the technical data.
■Damage to the remote control resulting from leak-
ing batteries.
■Damages arising from contact with unsuitable sub-
stances (e.g. chemical products, unsuitable cleaning
agents).
■Damages caused by abnormal environmental or
unsuitable operating conditions.
■Damages resulting from improper transport.
2 Safety
2.1 Intended use
The Cool Top Trail 34 is designed for installation in
caravans or motor homes and vehicles with habita-
tional compartments.
It is not suitable for installation in construction ma-
chines, agricultural machines or similar equipment.
It is not intended to be used in boats or to be exposed
to strong vibrations.
It is not suitable for houses or appartments.
It may not be operated in vehicles while driving.
2.2 Safety information
WARNING
Danger of electrocution!
■Always switch off the 230V power and
disconnect the mains before working on
the system.
■Make sure the external 230V electric
supply socket of the vehicle is effectively
grounded in accordance with your local
regulations.
–Failure to ground the unit correctly may
cause electric shock or fire.
■Test the air-conditioner for leakage cur-
rent after installation.
■Immediately turn off the air-conditioner
and isolate power supply if there is any
unusual odour, smoke or fire detected.
■The fuse for the air conditioner can be
found on the electronic control unit. It
must only be replaced with an identical
fuse T 5A 250V.
More information https://www.caravansplus.com.au

Cool Top Trail 34
4
WARNING
Danger of injury or death!
■Do not use the air conditioner near flam-
mable fluids or in closed rooms.
■Make sure no combustible objects are
stored or installed near the air outlet.
Keep a distance of at least 50cm.
■Do not reach into the air openings or in-
sert any foreigh objects into the air condi-
tioner. Do not operate the air conditioner
without cover.
■Do not remove or open the upper cover
of the air conditoner in the event of a
fire. Use appropriate extinguishing agents
instead. Do not use water to extinguish
fires.
■The air conditioner must be installed
securely so that it remains attached to the
roof.
■Always wear the recommended protective
clothing during installation, e.g. goggles,
gloves.
■Check whether the roof of the vehicle is
able to support the weight of the installer
as well as the air conditioner before climb-
ing onto it.
CAUTION
■There may be wires between the roof and
the ceiling. When cutting into the roof,
make sure the power is isolated to pre-
vent risk of electric shock.
■Do not spray any paint or insecticide on
the surface of the air conditioner.
■In case unit is equipped with lights: Con-
nect the LED lights only to the DC power
lead provided from the air-conditioner.
Connection to any other power supply
may damage the LED lights.
■Electrical devices are not toys. Keep elec-
trical appliances out of reach of children
or infirm persons. Do not let them use the
appliances without supervision.
■Persons whose physical, sensory or mental
capabilities or whose lack of experience
and knowledge prevent them from using
the device safely should not use it without
supervision or instruction by a responsible
person.
CAUTION
■Never drive through automatic car washes
with a roof air conditioner installed
■If faults occur in the air conditioner’s
refrigerant circuit, the device must be
checked by a specialist company and
properly repaired. The refrigerant must
never be released into the air.
NOTE
■Keep the air inlet and outlet of the indoor
and outdoor units of the air conditioner
clear.
■Isolate the power supply if you do not use
the air conditioner for a long time.
■Install the air conditioner in compliance
with the instructions of this manual.
–Incorrect installation methods or altera-
tion of the product may cause damage
to the product or personal injuries to
the user.
■Clean the filter of the air-conditioner reg-
ularly. A dirty filter decreases the air flow
and leads to poor heating and cooling
performance.
■Ask the vehicle manufacturer if a techni-
cal inspection is required after fitting the
air conditioner and whether the height of
the vehicle entered in the vehicle docu-
ments needs to be updated.
■Switch off the air conditioner via the
mains only in case of danger.
■Contact after-sales service personnel in
case of unit faults.
2.3 Qualifications of installation and
maintenance personnel
Installation and maintenance personnel must have the
following qualifications:
■Corresponding qualification for working on techni-
cal / electrical systems.
■Certified to work on refrigeration conditioning sys-
tems.
■Hold current licenses for such work.
More information https://www.caravansplus.com.au

Cool Top Trail 34
5
3 Scope of Delivery
The system will be delivered in 2 packages.
XCheck the delivery on completeness and damage.
Outdoor unit Qty
1
2
3
1. Outdoor unit
2. Air inlet duct
3. Operating- and Installation instructions
1
1
1
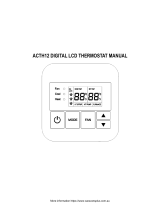
Indoor unit Qty
LOCK
MODE
FAN
SLEEP
SET TIME
HOUR/MIN
TIMER
°C/°F
DISPLAY
DIM
LIGHT
2
1
6
7
8
9
5
10
1. Adaptor frame (standard delivery:
360x360mm)
2. Air distributor mounting bracket
3. Air distributor (option: with LED lights)
4. Return air filter
5. M8x120mm hex head bolt
6. Metal clamping bar
7. Large M8 washer
8. Air distributor ST4.2*19 pan head screw
9. Countersunk head ST4.2*16-C self-tapping
screw
10. Remote control with holder and
batteries (2xAAA)
1
1
1
1
4
4
4
4
10
1
4 Installation instructions
4.1 General
■Thoroughly read and understand this manual before
installation.
■Do not add any other parts or modify the product in
the installation.
■Consult Webasto or the local distributor in case of
unusual applications or installation conditions that
are not specifically covered by this manual.
WARNING
In case a heater exhaust pipe is mounted
through the roof nearby the A/C unit then
the exhaust pipe needs to be extended
10cm above the A/C unit.
4.2 Installation requirements
■The vehicle roof shall be able to support the weight
of the air conditioner.
■The minimum thickness of roof is 25mm; the maxi-
mum thickness of roof is 70mm.
■The roof shall be level and smooth.
4.3 Different cut-out sizes
The standard scope of delivery is supplied with an
adaptor to suit a a 360x360 mm cut-out.
If a larger cut-out is preferred, it is possible to
purchase as an optional extra a 400x400 mm
adaptor.
More information https://www.caravansplus.com.au

Cool Top Trail 34
6
4.4 Installation position
850
1122
100
100
100
100
F
Fig. 01: Installation direction of the outdoor unit
Before the installation, consider the installation
position:
■Make sure that intended location does not interfere
with existing structures and cables.
■The air conditioner shall be installed as close as
possible to the centre of the roof.
■The installation position of the outdoor unit shall
be consistent with the traveling direction (F) of the
vehicle.
■Make sure that there is sucient room on the in-
side of the vehicle to install air distributor.
■Consider the installation position of the air distribu-
tor and ensure that outlets of the air distributor are
at least 400mm away from cupboards, walls and
bulkheads that can redirect conditioned air back
to the return air intake. If an outlet is closer than
400mm from an obstruction, then it should be
sealed closed. Failure to do this will result in a unit
that frequently cycles on and off.
■The cut-out shall avoid roof cladding joints where
ever possible.
■Choose an installation position between two longi-
tudinal supports or sections, if existing.
■There shall be a space of 100mm minimum all
around the roof top unit to ensure suitable air flow
and access for maintenance.
WARNING
When a hatch with safety ventilation func-
tion is replaced by the cir conditioner it
must be ensured that the safety ventilation
is restored in another location.
NOTE
Angle of inclination of the air conditioner
shall not be greater than 5° (=8,8%) and
the rear of the cir conditioner shall not be
higher than the front.
More information https://www.caravansplus.com.au

Cool Top Trail 34
7
(400)
360
354
(154)
174
575
1122
850 556
1
2
3
F
(400)
360
Fig. 02: Installation measures (top/bottom view)
■The figures show the required installation space
for the outdoor unit and the air distributor on the
inside for the two different cut-out versions.
■Centre the air distributor with the cut-out.
1. Position of the outdoor unit
2. Position of the air distributor
3. Square cut-out
F = Direction of travel
Measures in mm.
223
mm
575 mm
1122 mm
25-70 mm
Fig. 03: Installation measures (side view)
850 mm
556 mm
49 mm
Fig. 04: Installation measures (front view)
4.5 Roof reinforcement / power supply
1
2
Fig. 05: Roof reinforcement
The cut-out shall be reinforced with a wooden frame
using wooden bars which are at least 20mm wide. In-
sulation material may have to be removed beforehand.
This reinforcement frame is to ensure that the roof will
not crush from the installation bolts and that air con-
ditioned air does not enter the ceiling space.
1. Roof
2. Wooden bars
≥ 20 mm ≥ 20 mm
2333
1
Fig. 06: Cut-out with wooden reinforcement
1. Cut-out
2. Insulation in roof
3. Wooden bars
NOTE
The standard scope of delivery will be
supplied with an adapter to suit 360 x
360 mm cutout.
More information https://www.caravansplus.com.au

Cool Top Trail 34
8
Fig. 07: Electrical power supply cable
WARNING
Danger of electrocution
Make sure there is no voltage at electrically
operated components before working on
them.
Make sure mains power supply or power
supplied by inverters is isolated.
NOTE
Only a qualified electrician (in Germany e.g.
in accordance with VDE 0100, Part 721 or
IEC 60364-7-721) should make the 230V
electrical connection.
It is the installers responsibility to ensure that
local wiring regulations are followed when
connecting to the mains supply.
XEnsure that the 230V power supply is connected to
a residual current device.
XInstall a circuit breaker with a contact clearance of at
least 3,5mm and an all-pole insulation to protect
the power supply cable to the A/C unit and to allow
maintenance and repair work on the unit.
XProvide a 230V~ power supply cable to the cut-out.
Possibly lead the cable through the roof insulation
like shown in Fig. 07.
XDrill a hole in the wooden bar where the power sup-
ply cable shall be led through.
XRoute the power supply cable through the hole in
the wooden bar before mounting the bar.
XAttach and lay the cables so that they cannot be
tripped over or damaged.
XUse cable ducts to route cables through walls with
sharp edges.
XRespect minimum cross sections of the cable corre-
sponding to the current draw of the unit.
XDo not lay the 230V cables and 12/24V cables to-
gether in the same cable duct.
XDo not lay cables which are loose or bent next to
electrically conductive material (metal).
4.6 Installation of the adaptor frame
“This side up”
This side up
Fig. 08: Orientation of the adaptor frame
XMake sure the roof is clean, dry and free from oil or
grease.
XInsert the adapter frame into the cut-out to check if
the power supply cable is interfering with the frame.
If so, cut or drill an opening into the bottom side of
the frame so that the cable can be led through.
XConfirm orientation by starting with the “This side
up” label upwards.
More information https://www.caravansplus.com.au

Cool Top Trail 34
9
400 x 400
360 x 360
Fig. 09: Sealant paths
XTurn the part over and on the reverse side of “This
side up”, apply silicone sealant uniformly over the
path shown.
Fig. 10: Forming an effective seal
XTurn the part over again and make sure “This side
up” is up. Press down firmly over the installation
hole and remove any sealant that has squeezed out.
4.7 Installation of the outdoor unit
Fig. 11: Position the outdoor unit
XPut the outdoor unit over the installed adaptor
frame and adjust the position to make sure the four
bolt holes on the corners align.
NOTE
The outdoor unit is heavy. Always have a
second person to help carrying the unit.
Do not lift the outdoor unit by the upper
white cover. Lift it by the bottom base.
Check with the M8 bolts if the holes of the
outdoor unit are aligned with the holes of
the adaptor. If not then reposition the out-
door unit to align the holes.
Do not apply additional sealant between
the outdoor unit and the adaptor frame.
4.8 Connecting the power supply
1
Fig. 12: Location of the terminal block
XLook upward from inside the vehicle, and locate the
terminal block (1).
XConnect the power supply cable to the 3-pole termi-
nal block.
NOTE
Match the corresponding active, neutral
and the ground wire. Firmly tighten up the
screws to make sure the power line is not
loose or improperly connected, otherwise a
short circuit or fire could be caused.
NOTE
The standard scope of delivery will be
supplied with an adapter to suit 360 x
360 mm cutout.
More information https://www.caravansplus.com.au

Cool Top Trail 34
10
4.9 Installation of the air distributor mounting bracket
2
3
4
1
Fig. 13: Installation of M8 bolts
XPrepare the M8 bolts (4), washers (3) and fixing met-
al clamping bars (2) in order shown.
XLift the air distributor mounting bracket (1) toward
the air conditioner.
XInsert the M8 bolts, washers and metal clamping
bars into the 4 corner holes of the air distributor
mounting bracket. Screw the bolts into their receiv-
ing threads by hand to ensure engagement.
XEnsure all bolts are screwed in correctly for at least 2
or 3 rotations to avoid cross threading.
XEnsure the metal clamping bars align with the corre-
sponding recess in the air distributor mounting
bracket as the bolts are tightened.
XEvenly tighten up all four bolts.
NOTE
Tighten the bolts to 11Nm torque.
4.10 Connection of the air inlet duct
2
1
3
Fig. 14: Connecting the air inlet duct
XGrasp the free end of the air inlet (2) duct and pull it
down until it touches the air distributor mounting
bracket (1). Continue to pull the rim of the duct
down until it engages with the four latches (3) on
the air distributor mounting bracket.
–The duct is correctly connected when you hear
the four distinct clicking sounds of the latches and
the rim of the duct is parallel to the surface of the
bracket.
4.11 Installation of the air distributor assembly
Fig. 15: Removing the air filter
XRemove the air filter from the air distributor by push-
ing both tabs (1) inwards (2) and then downwards
(3).
NOTE
Some figures show the air distributor with
LED lights. The mounting procedure is also
applicable for the version without lights.
Fig. 16: Connecting air distributor - and outdoor unit
cables
XConnect the socket and plug of the air distributor
wires and outdoor unit.
–Note that colours of the wires match: yellow to
yellow, red to red, etc.
More information https://www.caravansplus.com.au

Cool Top Trail 34
11
Fig. 17: Attaching the air distributor assembly to the
mounting bracket
XAttach the air distributor (1) to the air distributor
mounting bracket by engaging the two parts.
– You will hear four clicks as the parts (2) connect
together.
Fig. 18: Fixing air distributor assembly to the mounting
bracket
XFix the air distributor (1) on the air distributor
mounting bracket with four ST4.2*19 pan head
screws (2).
Fig. 19: Fixing the air distributor to the ceiling
NOTE
This step is optional. The purpose of these
screws is only to close a potential gap be-
tween the air distributor and the ceiling of
the vehicle.
XRemove the screw caps (3) from around the perime-
ter of the air distributor (1).
XFix the air distributor to the ceiling using 8 counter-
sunk head screws (2).
XMount the screw caps again to the air distributor.
Fig. 20: Installing the air filter
Install the air filter (3) as shown:
XInsert the lips of the filter in the slots (1).
XMove the filter upwards and make sure the tabs en-
gage (2)
More information https://www.caravansplus.com.au

Cool Top Trail 34
12
4.12 Holder remote control
1
2
Fig. 21: Holder remote control
XInstall the holder (1) for the remote control in a con-
venient location, using 2 countersunk screws (2).
4.13 System test
XTest all air conditioner functions as described in
chapter 5.
XCheck that the condensate outlets are clear after in-
stalling the outdoor unit.
XEnter the new vehicle height and weight in the vehi-
cle documents if required.
XHand this manual over to the vehicle owner.
5 Operating instructions
5.1 Before usage
NOTE
■Before switching on, ensure that the sup-
ply voltage and frequency corresponds to
the values of the air conditioner.
■Check if amperage provided by the exter-
nal power supply is sucient.
■In order to prevent the power supply
extension cable to the vehicle from
overheating and loosing voltage please
unwind the cable drum completely.
■The extension cable shall have min. 3 x
2,5mm² cross section.
■Ensure that the air outlet and intake
grilles are not covered by cloths, paper
or other objects.
■Insert batteries into the remote control,
removing the cover on the back. Use 2
x 1,5V AAA LR3 batteries that will not
leak.
■When using the remote control point it
at the air distributor to ensure good sig-
nal transmission. The air distributor will
beep once a signal is received.
■The symbols in the display of the remote
control are visible depending on the
settings.
■Set the clock, see chapter 5.10.
■After selecting the COOL or HEAT mode,
the compressor may delay starting for 3
minutes. This is a feature to protect the
compressor.
5.2 Achieving effective heating and cool-
ing
Many factors will affect the total heat load within the
vehicle and many factors can also affect the working
efficiency of the air conditioner. Before purchasing
Cool Top Trail air conditioners, the user shall consult
with the vehicle manufacturer to understand the total
heat load of the vehicle and to choose the correct air
conditioner for the application.
The following measures are very useful to reduce the
heat load within a vehicle and improve the perfor-
mance of the air conditioner.
■Park the vehicle in the shade if possible.
■Position the vehicle with the sunshade on the sun-
side. This will reduce the exposure to direct sun-
shine.
■Close all doors, skylights and windows, close the
curtains and open the sunshade or awning.
■Turn off unnecessary electrical appliances within the
vehicle to reduce the heat-load.
■Cook outside the vehicle when possible.
■In case of exceptionally high temperatures, turn on
the air conditioner in advance during the morning.
■If vehicle interior has heated up, ventilate your vehi-
cle by opening doors and windows before starting
the A/C unit.
■Regularly clean the vehicle’s roof because dirty roofs
heat up more.
More information https://www.caravansplus.com.au

Cool Top Trail 34
13
5.3 Condensation
When warm, moist air within the vehicle meets with a
cold surface, condensation water may be formed. This
is also known as “sweating”. In this case, take the fol-
lowing measures:
■Close and seal all doors, skylights, and windows to
reduce the entrance of warm moist air.
■Operate the inside fan on high fan speed, avoid low
and auto fan speeds.
During the operation of the air conditioner, conden-
sate water will be produced and allowed to drain onto
the roof. This is normal. The amount of condensate
water is a function of air humidity. High humidity in-
side the vehicle will result in more condensate water
being generated.
Please note that losses or damage caused by
condensate water are not within warranty scope.
5.4 Choosing and using a generator
The Cool Top Trail 34 requires a mains quality AC
power source for correct operation. If you decide to
supply power using a generator you must consult the
generator supplier to confirm suitability and sizing of
the generator for your application.
Please note that damages caused by the use of a
generator are not within warranty scope.
5.5 Remote control
LOCK
MODE
FAN
SLEEP
SET TIME
HOUR/MIN
TIMER
°C/°F
DISPLAY
DIM
LIGHT
1
2
3
45
6
7
8
9
10
11
12
13
14
15
16
17
18
19
20
21
Fig. 22: Remote control overview
Display symbols:
1. Mode display
COOL/FAN/DRY/HEAT/AUTO
2. Fan speed display
Low/Medium/High/Auto
3. Lock function display
4. Sleep function display
5. Timer ON/OFF status indicator
6. Clock/Timer display
Real time clock, Time of timer
during setup.
7. Temperature display
Shows the set point tempera-
ture or the indoor temperature.
Units in °C or °F.
8. Data Transmission
Symbols shows up briefly when
the remote control transmits
data to the A/C unit.
Operation keys:
9. DIM key (Available only for
units with lights)
Selects the brightness of the
LED lights: 25%, 50%, 75%,
100%
10. LOCK key
Disables the touch control on
the air distributor when the
unit is ON. Press the key again
to unlock.
11. MODE key
Selects the operation mode
COOL/DRY/FAN/HEAT/AUTO.
12. FAN key
Selects Low/Medium/
High or AUTO fan speed.
AUTO fan speed is only
possible in COOL/HEAT
mode. With AUTO fan
speed the fan automat-
ically adjusts between
Low, Medium and High.
13. SLEEP key
Selects the sleep mode.
Only available in COOL or
HEAT mode.
14. SET TIME key
Enters CLOCK/TIMER
setting mode.
15. HOUR/MIN key
Changes between hour
or minutes settings.
16. TIMER key
Activates different timer
settings.
17. DISPLAY key
Switches the display of
the air distributor On/Off.
18. LIGHT key (Available only
for units with lights)
Switches the LED lights
on the air distributor On/
Off.
19. Up/Down keys
Adjusts the set point
temperature, clock or
timer.
20. ON/OFF key
Switches the system On/
Off.
21. °C/°F key
Selects the temperature
units, Celcius or Fahren-
heit, of the temperature
display.
More information https://www.caravansplus.com.au

Cool Top Trail 34
14
5.6 Switching the unit ON/OFF
ONOFF
Fig. 23: Switching the unit ON
XPress the key on the remote control to start the air condi-
tioner.
–The unit switches on and the display of the air distributor
shows the set temperature and operation mode.
–The display of the remote control shows the set tempera-
ture, operation mode and fan speed level.
–The previous settings are taken over.
–The indoor fan may start immediately if the unit is in fan
or cool mode. If in heating mode there will be a delay
while the inside coil heats up before the inside fan turns
on - preventing a cold draft.
–It may take up to 3 min. for the compressor to start opera-
tion. This is a feature to protect the compressor.
ON
OFF
Fig. 24: Switching the unit OFF
XTo switch the unit off, press the key again
–The unit switches off, the display of the air distributor
blanks.
–The display of the remote control shows only the clock.
It is alternatively possible to start and stop the air conditioner
by pushing the touch key at the air distributor, see chapter
5.17 for more details.
5.7 Setting the temperature
Fig. 25: Setting the temperature
XUse the / keys to change the set temperature.
–The display of the remote control as well as the display of
the air distributor will show the set temperature.
–The air conditioner will confirm the receipt of each set
value change with a beep.
–You may set the temperature between 16 and 30°C while
the unit is running.
–In FAN mode no temperature setting is possible.
5.8 Setting the fan speed
Low
level
AUTO
Medium
level
High
level
Automatic
level
Fig. 26: Setting the fan speed
XUse the
FAN
key to set the fan speed level.
–The fan speed level will directly influence the air flow
volume.
–Each push on the FAN key changes the fan level in the
sequence as shown in Fig. 26.
AUTO indicates that the Automatic FAN mode is selected. In
this mode the fan speed adapts automatically. Automatic FAN
mode is only available in operation mode COOL or HEAT.
5.9 Setting the operation mode
COOL DRYFAN HEAT AUTO
Fig. 27: Setting the operation mode
XPress the
MODE
key on the remote control to change the opera-
tion mode. The remote control shows the selected symbols
–Each push on the
MODE
key changes the mode in the se-
quence as shown in Fig. 27.
More information https://www.caravansplus.com.au

Cool Top Trail 34
15
C
Fig. 28: COOL mode
COOL mode
–In COOL mode the air distributor shows the symbol and
the vehicle will be cooled.
–Set temperature and fan speed can be selected manually.
–The compressor will switch off once the set temperature is
reached, it will automatically start up again once the room
temperature setting is exceeded.
C
Fig. 29: DRY mode
DRY mode
–In DRY mode the unit is reducing the humidity inside the
vehicle.
–Set the temperature 1°C lower than the current room
temperature.
–The air distributor shows the symbol.
C
Fig. 30: FAN mode
FAN mode
–In FAN mode the indoor air is circulated through the vehi-
cle without heating or cooling.
–The fan speed can be selected manually.
–The air distributor shows the symbol as well as the
current room temperature.
C
Fig. 31: HEAT mode
HEAT mode
–In HEAT mode the air distributor shows the symbol and
the vehicle will be heated.
–Set temperature and fan speed can be selected manually.
–The compressor will switch off once the set temperature is
reached, it will automatically start up again once the room
temperature has fallen below the set point.
NOTE
When operating in heating mode in low ambient tempera-
tures the unit will periodically defrost the outside heat ex-
changer. The air distributor will display “dF” during defrosting
and then return to heating once the defrost is completed.
C
C
Fig. 32: AUTO mode
AUTO mode
–In AUTO mode the unit automatically selects heating or
cooling mode depending on the difference between cur-
rent room temperature and set point temperature.
–Set temperature and fan speed can be selected manually.
–The air distributor shows the symbol in heating mode
and the symbol in cooling mode as well as the set
temperature.
5.10 Setting the clock
SET TIME
HOUR/MIN
SET TIME
3x
or
10s
Fig. 33: Setting the clock
XPress the
SET TIME
key so that the hours digits are flashing.
XPress the or key to set the hour.
XPress the
HOUR/MIN
key so that the minute digits are flashing.
XPress the or key to set the minutes.
XTo end the setting mode press the
SET TIME
key 3 times or wait
10 seconds until the digits stop flashing.
More information https://www.caravansplus.com.au

Cool Top Trail 34
16
5.11 Setting the timer
SET TIME
HOUR/MIN
2x
SET TIME
HOUR/MIN
SET TIME or
10s
Fig. 34: Setting the timer
The timer can be set to start and stop the unit at a pre-pro-
grammed time. In a first step these start and stop times need
to be set.
XPress the
SET TIME
key twice until
ON
shows on the upper
right side of the clock and the hour digits are flashing.
XPress the or key to set the hour when the unit should
switch ON.
XYou may also set the minutes by pushing the
HOUR/MIN
key and
using the UP or DOWN keys.
XPress the
SET TIME
key again until
OFF
shows on the lower
right side of the clock and the hour digits are flashing.
XPress the or key to set the hour when the unit should
switch OFF.
XYou may also set the minutes by pushing the
HOUR/MIN
key and
using the UP or DOWN keys.
XTo end the setting mode press the
SET TIME
key again or wait
10 seconds until the digits stop flashing. The clock time is
shown.
NOTE
The timer ON and OFF times are now set but not yet activat-
ed.
5.12 Activating the timer
Fig. 35: TIMER Modes
Before activating the timer, select the operation mode, the set
temperature and the desired fan level.
After the start and stop times are set (see chapter 5.11) one of
the three different TIMER modes can be activated:
1. TIMER
ON
mode
In this mode the unit will switch on at the desired ON time
and keep on running.
2. TIMER
OFF
mode
In this mode the unit will stop running at the desired OFF time
and will stay off.
3. TIMER
ON
/
OFF
mode
In this mode the unit will start to run at the ON time and stop
running at the OFF time.
This procedure will be repeated every day.
TIMER 10s
Fig. 36: Activating the timer
XPress the
TIMER
key repeatedly until either the
ON
or
OFF
or both symbols are flashing depending on which tim-
er mode is preferred. To confirm the selection wait 10 sec-
onds until the symbol stops flashing and lights up perma-
nently.
–The clock time shows again.
NOTE
When only the clock shows and no
ON
or
OFF
symbol,
the timer is not activated.
More information https://www.caravansplus.com.au

Cool Top Trail 34
17
5.13 Sleep function
SLEEP
Fig. 37: Setting the sleep function
The sleep function automatically modifies the target tempera-
ture value to provide a pleasant sleeping temperature. It also
helps to reduce compressor run time and thus energy con-
sumption as well as noise levels.
XPress the
SLEEP
key to activate the sleep function.
–The symbol in the display of the remote control shows
up to indicate that the sleep function is activated.
–In COOL mode the set temperature will automatically in-
crease in two steps and it will have increased by 2°C after
two hours.
–In HEAT mode the set temperature will automatically
decrease in three steps and it will have decreased by 3°C
after two hours.
–The sleep function is only available in COOL or HEAT
mode.
XPress the
SLEEP
key again to deactivate the sleep function.
5.14 Units of temperature change
°C/°F °C/°F
Fig. 38: Celsius / Fahrenheit changeover
XPress the
°C/°F
key to select the temperature units of the
temperature display: Celsius or Fahrenheit.
–You can do this in any mode.
–The display on the air distributor follows the selection
made on the remote control.
5.15 LED lights
NOTE
Function is only available for units with LED lights integrated into the air distributor.
Fig. 39: LED lights on the air distributor
XPress the
LIGHT
key to turn on the LED lights on the air distribu-
tor which serve to illuminate the interior of the vehicle.
XWhen LED lights are on you may press the
DIM
key repeat-
edly to adjust the brightness between 25% / 50% / 75% or
100%.
XTo turn off the lights, press
LIGHT
key again.
5.16 Reset of the remote control
Fig. 40: Reset of the remote control
XTo reset the remote control to factory settings take out the
batteries and put them back in.
–The clock will have to be set again.
–The timer is deactivated.
More information https://www.caravansplus.com.au

Cool Top Trail 34
18
5.17 Operation at the air distributor
C
12 3 2
Fig. 41: Display on the air distributor
1. Touch key
2. Operation mode symbols
3. Temperature display
You can control the basic functions of the air conditioner with
the key on the display on the air distributor. This is useful if
the remote control is lost or does not function.
XPress the touch screen key at the air distributor. With
each touch you cycle through the modes:
OFF COOL FAN HEAT
In cooling and heating mode the set point temperature is au-
tomatically set to 24°C and the fan speed is HIGH.
Use the remote control to select any other temperature or fan
speed.
At the air distributor you cannot select the “auto” mode, but
the display shows the “auto mode” in the right-hand top cor-
ner, once selected on the remote control.
5.18 Adjusting the air outlets
Fig. 42: Adjust the air outlet
XAdjust the direction and angle of the air outlet on one
type by moving blade around its axis. The 2 blades move
together.
More information https://www.caravansplus.com.au

Cool Top Trail 34
19
6 Maintenance
6.1 Filter
1
2
Fig. 43: Air filter
The return air filter needs periodic maintenance.
XCheck and clean the filters each week when in use to pre-
vent the filters from being blocked by dirt.
XThe filters should be washed frequently to ensure effective
cooling and heating.
XPull out the filter assembly from the air distributor by
pushing both tabs inwards and then downwards.
XLift the filter (1) upward and pull out of the air grille (2)
along the tracks.
XClean the filter and air grille with warm water and deter-
gent.
XLet it dry before installing again.
NOTE
■Replacement filters can be ordered separately.
■Never operate the air conditioner without a fil-
ter. This can cause fouling of the heat exchang-
er and lead to a loss of power.
6.2 Batteries of the remote control
Fig. 44: Remote control battery change
Change the remote control batteries (2xAAA type) when the
display of the remote control becomes unreadable and/or
blurry.
Do not dispose of any batteries with general
household waste. Return defective or used bat-
teries to your retailer or dispose of them at a col-
lection point.
NOTE
Remove the batteries from the remote control if
the remote control is not used for a long time to
prevent damage to the remote control from
leaking batteries.
6.3 Bolt check
XCheck the four bolts holding the unit to the roof for tightness 3 months after the first installation of the prod-
uct.
XInspect these bolt regularly every 12 months. Retighten to 11Nm if necessary.
6.4 Regular usage
It is recommended that the air conditioner is operated regularly to ensure good performance.
XRun the unit at least for 20-30min. every 6 months.
6.5 Cleaning
XRegularly remove leaves or other dirt from the ventilation grilles of the outdoor unit.
XRegularly clean the unit with a soft, damp cloth and mild detergent.
XClean the vehicle roof at regular intervals. A dirty roof heats up more than a clean roof.
More information https://www.caravansplus.com.au

Cool Top Trail 34
20
CAUTION
■Never drive through automatic car washes with a roof air conditioner installed.
■Do not spray into the openings of the unit with a high-pressure cleaner.
■Do not use hot cleaners and steam cleaners.
■Do not use sharp or hard objects for cleaning.
■Never use petrol, diesel, solvents or agressive cleaning agents.
6.6 Heat exchangers
Once per year have the heat exchangers cleaned by a specialist workshop.
7 Troubleshooting guide
Symptom Remedy
No air distributor display
when unit turned ON.
XCheck whether:
–the power is supplied to the vehicle and circuit breakers are on.
–the remote control battery is OK.
–the remote control is off.
–the voltage is too low.
–the amperage of the circuit breaker in the external power supply is too low.
Cooling not available. XCheck that the cooling mode is selected and the air distributor display shows .
XUse the remote control to set required temperature below the current room tem-
perature.
The compressor will delay a re-start for three minutes.
Heating not available. XCheck that the heating mode is selected and the air distributor display shows .
XUse the remote control to set required temperature above the current room tem-
perature.
More time would be needed for starting heating under extremely cold condition.
When the unit is in heating mode and the outside temperature is very low the unit
may automatically enter defrost mode. The heating will temporarily stop as the
unit warms the outside heat exchanger to remove any frost & ice. Heating will re-
sume once the outside heat exchanger has been cleared. During defrost the unit
will display “dF”.
Poor cooling capacity. XMake sure the filter is clean.
XIncrease the fan speed to high to obtain the maximum capacity.
XMake sure all the doors and windows as well as the sunroof are closed.
XUse curtains and awnings to decrease the heat load.
XCheck that the air openings of outdoor unit are not soiled or blocked.
Water dripping out of air
distributor
XUnblock condensate outlets of outdoor unit.
XCheck seal of the adaptor frame.
XPark the vehicle in a more horizontal position, with an angle < 5° (8,8%).
XIncrease the fan speed to high if condensate forms on the outside of the air dis-
tributor.
Fault codes displayed on
the panel:
- In case there is “0” or a jumbled display while on generator supply this may indi-
cate unstable voltage and current.
E0 Communication fault.
E1 Room temperature sensor fault.
E2 Indoor heat exchanger temperature sensor fault.
E3 Outdoor heat exchanger temperature sensor fault.
E4 No cooling effect. Possible root causes are:
–Insucient refrigerant amount due to piping fracture.
–Compressor fault.
–Sensor failure.
More information https://www.caravansplus.com.au
/