Page is loading ...

This Operation Guide is for 1650, 2050, and 2550. This Operation Guide mentions that 1650 is a
16 ppm (prints per minute) model, 2050 is a 20 ppm (prints per minute) model, and 2550 is a
25 ppm (prints per minute) model.
Note This Operation Guide contains information that corresponds to using both the inch and metric
versions of this machine.
This Operation Guide shows messages of the inch version. When using the metric version, see
the messages of the inch version for reference. With regard to the messages in the text, if a
message has only the difference of upper- and lower-case spelling, we show only the message
of the inch version. When there is even a slight difference in the message, we have listed the
information for the inch version followed, in brackets, by the corresponding information for the
metric version.

i
Guide to This Operation Guide
This operation guide has the following chapters. The content of each chapter is summarized
below for reference.
1 Copier Functions
This chapter explains various settings that can be made in relation to the copier functions of this
machine.
2 Printer Settings
This chapter explains various settings that can be made in relation to the printer functions of this
machine.
3 System Menu
This chapter explains the other general settings that can be made in this machine.
4 Job Accounting
This chapter explains the settings of the job accounting functions.
Appendix
This chapter includes a table of paper that can be used in this machine, a table of specifications,
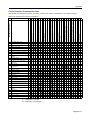
a chart which explains the combinations of functions and settings that can be used with this
machine, and glossary of terms used in this document.
Guides Supplied with This Machine
The following guides are supplied with this machine. Refer to the guides as needed.
Basic Operation Guide
This Basic Operation Guide contains explanations on the procedures for loading paper and
connection of this product, the basic procedures of copying and printing, and troubleshooting.
Advanced Operation Guide (this guide)
The Advanced Operation Guide contains explanations on copier and printer functions as well as
default settings that can be adjusted on this machine.
KX Printer Driver Installation Guide
This guide describes the procedure to install the printer driver software.
KX Printer Driver Operation Guide
This guide describes how to install and set the printer driver software.
PRESCRIBE Commands Technical Reference
PRESCRIBE is the native language of the Kyocera Mita printers. This Technical Reference
contains the information about how the printing is performed using the PRESCRIBE commands
as well as the font and emulation description. Also included is a list of permanent parameters
and their explanation needed when customizing your printer.
PRESCRIBE Commands Command Reference
Gives a detailed explanation of the PRESCRIBE command syntax and parameters with the aid
of print examples.

ii
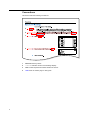
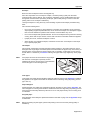
Conventions
This manual uses the following conventions:
1Bold indicates key names.
2 Courier indicates content of the message display.
3Note contain important information aside from the text.
4 Italic refers to another page or other guide.
2
3
4
1

iii
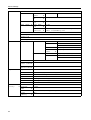
CONTENTS
1 Copier Functions ........................................................................................... 1-1
Paper Source Selection ...........................................................................................................1-2
Original Size Selection .............................................................................................................1-3
Image Quality Mode .................................................................................................................1-5
Copy Exposure Adjustment ......................................................................................................1-6
Number of Copies to Be Made .................................................................................................1-7
Zoom Copying ..........................................................................................................................1-8
Auto Zoom Ratio Selection Mode .......................................................................................1-8
Zoom Mode ........................................................................................................................1-9
Preset Zoom Mode .............................................................................................................1-9
Original Orientation ................................................................................................................1-10
Interrupt Mode ........................................................................................................................1-11
Duplex Copying ......................................................................................................................1-13
Split Copying ..........................................................................................................................1-15
Sort Copying ..........................................................................................................................1-17
Offset Copying ........................................................................................................................1-18
Staple Copying .......................................................................................................................1-19
Combine Copying ...................................................................................................................1-20
Combine Copying Modes .................................................................................................1-20
Borderline Types ...............................................................................................................1-24
Setting the Combine Copying ...........................................................................................1-24
Margin Mode ..........................................................................................................................1-26
Border Erase Mode ................................................................................................................1-27
Continuous Copying ...............................................................................................................1-28
Auto Rotation .........................................................................................................................1-29
EcoPrint Mode ........................................................................................................................1-30
Auto Selection Mode ..............................................................................................................1-31
Program Function ...................................................................................................................1-32
2 Printer Settings .............................................................................................. 2-1
Using This Machine as a Network Printer ................................................................................2-2
Menu Hierarchical Diagram ......................................................................................................2-3
Status Page Printing .................................................................................................................2-7
e-MPS Function .......................................................................................................................2-8
Printing Quick Copy/Proof-and-Hold ..................................................................................2-8
Deleting Quick Copy/Proof-and-Hold .................................................................................2-9
Printing Private Print/Stored Job .........................................................................................2-9
Deleting Private Print/Stored Job ......................................................................................2-10
Printing Virtual Mailbox Accumulated Data .......................................................................2-11
Printing Virtual Mailbox List ..............................................................................................2-11
Printing Code Job List ......................................................................................................2-12
e-MPS Detail Settings ......................................................................................................2-13
Interface .................................................................................................................................2-16
Parallel Interface ...............................................................................................................2-16
Network Setting ................................................................................................................2-17
Emulation ...............................................................................................................................2-22
Emulation Mode Selection ................................................................................................2-22
Font ........................................................................................................................................2-25
Font Selection ...................................................................................................................2-25
Font Size ..........................................................................................................................2-26
Courier/Letter Gothic Font Character Pitch ......................................................................2-27
Courier/Letter Gothic Font Setting ....................................................................................2-27
Code Set Selection ...........................................................................................................2-28
Font List Printing ...............................................................................................................2-28

iv
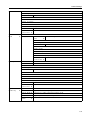
Print Configuration ................................................................................................................. 2-30
Number of Copies ............................................................................................................ 2-30
Reduction Printing ........................................................................................................... 2-31
Print Orientation ............................................................................................................... 2-31
Page Protect Mode .......................................................................................................... 2-32
Line Feed (LF) Action ...................................................................................................... 2-32
Carriage Return (CR) Action ............................................................................................ 2-33
Wide A4 ........................................................................................................................... 2-33
Print Quality ........................................................................................................................... 2-34
KIR Mode ......................................................................................................................... 2-34
EcoPrint Setting ...............................................................................................................2-35
Resolution Setting ............................................................................................................ 2-35
Print Density .................................................................................................................... 2-36
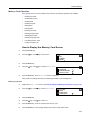
Memory Card Operation ........................................................................................................ 2-37
Reading Font Data ........................................................................................................... 2-37
Reading Macro Data ........................................................................................................ 2-38
Reading Data ...................................................................................................................2-38
Reading Program ............................................................................................................. 2-38
Writing Data ..................................................................................................................... 2-39
Deleting Data ................................................................................................................... 2-39
Deleting Font Data ........................................................................................................... 2-39
Deleting Program Data .................................................................................................... 2-40
Deleting Macro Data ........................................................................................................ 2-40
Deleting Language Data .................................................................................................. 2-40
Formatting Memory Card ................................................................................................. 2-40
Printing a Partition List ..................................................................................................... 2-41
Hard Disk Operation .............................................................................................................. 2-43
RAM Disk Operation .............................................................................................................. 2-44
RAM Disk Functions ........................................................................................................ 2-44
RAM Disk Operation ........................................................................................................ 2-44
RAM Disk Size ................................................................................................................. 2-45
Paper Handling ...................................................................................................................... 2-47
Multi-Bypass Tray Mode .................................................................................................. 2-47
Paper Source ...................................................................................................................2-48
Duplex Print Mode ........................................................................................................... 2-48
Output Destination ........................................................................................................... 2-49
Override A4/Letter ........................................................................................................... 2-49
Other Settings ........................................................................................................................ 2-51
Form Feed Timeout ......................................................................................................... 2-51
Received Data Dump ....................................................................................................... 2-52
Printer Function Resetting ............................................................................................... 2-52
Resource Protect Mode ................................................................................................... 2-53
Auto Continue ..................................................................................................................2-53
Duplex Printing Error Detection ....................................................................................... 2-54
Stapling Error Detection ................................................................................................... 2-55
Service Status Page Printing ........................................................................................... 2-56
3 System Menu .................................................................................................. 3-1
Default Setting Mode ............................................................................................................... 3-2
Copier Default Settings ...................................................................................................... 3-2
Machine Default Settings ................................................................................................. 3-12
Multi-Bypass Tray Settings .................................................................................................... 3-26
Paper Size ....................................................................................................................... 3-26
Paper Type ...................................................................................................................... 3-28
Browsing and Printing the Total Counter ............................................................................... 3-29
Report Output ........................................................................................................................ 3-31
Language Setting .................................................................................................................. 3-33
User Adjustment .................................................................................................................... 3-34
Drum Refresh .................................................................................................................. 3-34

v
4 Job Accounting .............................................................................................. 4-1
Job Accounting Mode ...............................................................................................................4-2
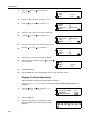
Managing Accounts ..................................................................................................................4-4
Registering a New Account ................................................................................................4-4
Setting Limit of Use ............................................................................................................4-5
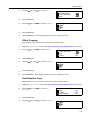
Deleting an Account ...........................................................................................................4-8
Changing Limit of Use ........................................................................................................4-9
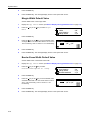
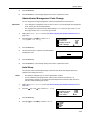
All Account Management .......................................................................................................4-10
Individual Account Management ............................................................................................4-11
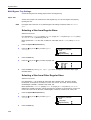
Enabling Job Accounting ........................................................................................................4-12
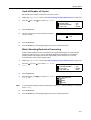
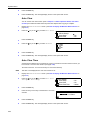
Default Settings ......................................................................................................................4-13
Copier Job Accounting .....................................................................................................4-13
Printer Job Accounting .....................................................................................................4-14
Scanner Job Accounting ...................................................................................................4-14
Fax Job Accounting ..........................................................................................................4-15
Operation against Excess over Limit ................................................................................4-16
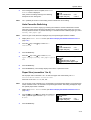
Using Job Accounting ............................................................................................................4-17
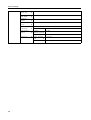
Appendix ......................................................................................................Appendix-1
Paper ...........................................................................................................................Appendix-2
Basic Specifications of Paper ................................................................................Appendix-2
Proper Paper Selection .........................................................................................Appendix-2
Special Paper ........................................................................................................Appendix-5
Specifications ..............................................................................................................Appendix-8
Main Body ..............................................................................................................Appendix-8
Copier Functions ...................................................................................................Appendix-9
Printer Functions .................................................................................................Appendix-10
Document Processor (optional) ...........................................................................Appendix-10
Paper Feeder (optional) .......................................................................................Appendix-10
Duplex Unit (optional) ..........................................................................................Appendix-11
Finisher (optional) ................................................................................................Appendix-11
Job Separator (optional) ......................................................................................Appendix-11
Environmental Specifications ...............................................................................Appendix-12
Copier Function Combination Chart ..........................................................................Appendix-13
Glossary ....................................................................................................................Appendix-16
Index ....................................................................................................................Index-1
Page is loading ...

1-1
1 Copier Functions
This chapter explains the following topics.
• Paper Source Selection
• Original Size Selection
• Image Quality Mode
• Copy Exposure Adjustment
• Number of Copies to Be Made
• Zoom Copying
• Original Orientation
• Interrupt Mode
• Duplex Copying
• Split Copying
•Sort Copying
• Offset Copying
• Staple Copying
• Combine Copying
• Margin Mode
• Border Erase Mode
• Continuous Copying
• Auto Rotation
• EcoPrint Mode
• Auto Selection Mode
• Program Function

Copier Functions
1-2
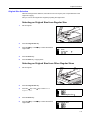
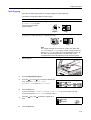
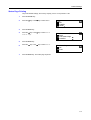
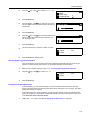
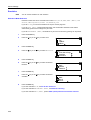
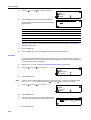
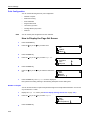
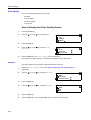
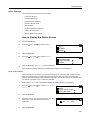
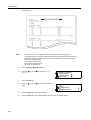
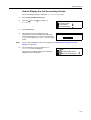
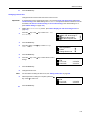
Paper Source Selection
Perform the following procedure to select a paper source (cassette or multi-bypass tray) with the
desired paper size.
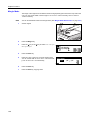
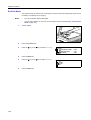
1
Set the original.
If Auto is displayed on the message display, copy
paper of the same size as the original is automatically
selected.
Notes • This auto paper selection function can be disabled. (For details, see Paper Selection on
page 3-4.)
• You can set a paper size for the cassette. (For details, see Paper Size (cassettes 1 to 4) on
page 3-13.)
• You can set a paper type for the cassette. (For details, see Paper Type (cassettes 1 to 4) on
page 3-14.)
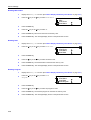
2
To change the paper size, press the Paper Select key
to select the desired paper source.
Notes • When using the multi-bypass tray, set the paper size and the paper type referring to
Multi-Bypass Tray Settings on page 3-26.
• You can set the machine to display the Bypass Paper size screen when the multi-bypass
tray is selected. (See Multi-Bypass Tray Confirmation Display on page 3-14.)
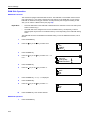
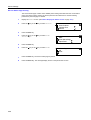
3
Press the Start key. Copying starts.
Auto
1
100%
Ready to copy.
Auto

Copier Functions
1-3
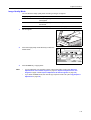
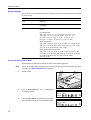
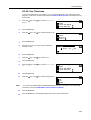
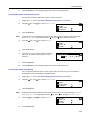
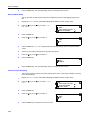
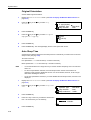
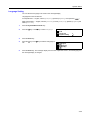
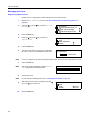
Original Size Selection
With manual original size selection, this machine can scan only the part of a specified size of the
original for copying.
Also you can use an irregular size original by inputting the original size.
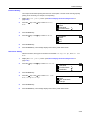
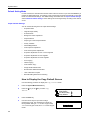
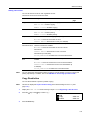
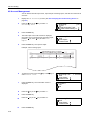
Selecting an Original Size from Regular Size
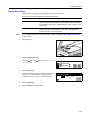
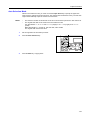
1
Set the original.
2
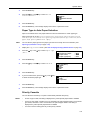
Press the Original Size key.
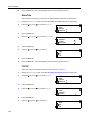
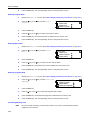
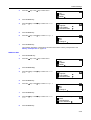
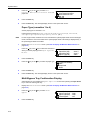
3
Press the S key or the T key to select the desired
original size.
4
Press the Enter key.
5
Press the Start key. Copying starts.
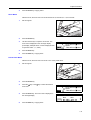
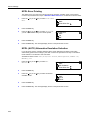
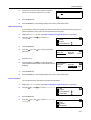
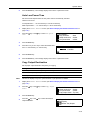
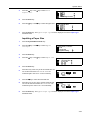
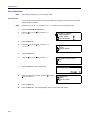
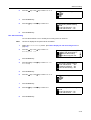
Selecting an Original Size from Other Regular Sizes
1
Set the original.
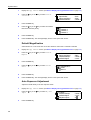
2
Press the Original Size key.
3
Press the S key or the T key to select Other
Regular Size.
4
Press the Enter key.
5
Press the S key or the T key to select the desired
original size.
Original Size:
Auto
Input size
*
Other Regular Size
Original Size:
Other Regular Size:

Copier Functions
1-4
6
Press the Enter key.
7
Press the Start key. Copying starts.
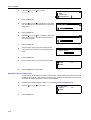
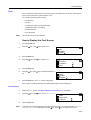
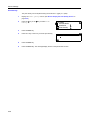
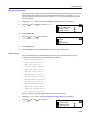
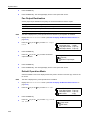
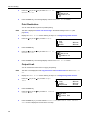
Inputting the Original Size
1
Set the original.
2
Press the Original Size key.
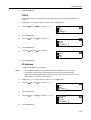
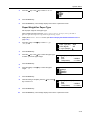
3
Press the S key or the T key to select Input size.
4
Press the Enter key.
5
Press the < key or the > key to set the vertical size.
You can set the vertical size to 2" to 11 5/8" in 1/8"
increments [50 to 297 mm in 1 mm increments].
6
Press the T key to move to the horizontal size.
7
Press the < key or the > key to set the horizontal size.
You can set the horizontal size to 2" to 17" in 1/8"
increments [50 to 432 mm in 1 mm increments].
8
Press the Enter key.
9
Press the Start key. Copying starts.
Original Size:
Auto
Input size
*
Input size
2"
2"
Input size
2"
2"

Copier Functions
1-5
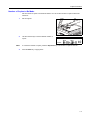
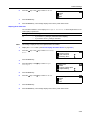
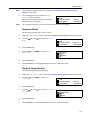
Image Quality Mode
You can select the image quality mode according to the type of originals.
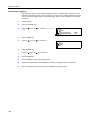
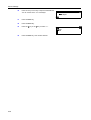
1
Set the original.
2
Press the image quality mode select key to select the
desired mode.
3
Press the Start key. Copying starts.
Note • You can adjust the copy exposure in each of the image quality modes. (See Exposure
Adjustment for Text + Photo Originals on page 3-7, Exposure Adjustment for Text
Originals on page 3-8 and Exposure Adjustment for Photo Originals on page 3-8.)
• If you select the Photo mode, the manual copy exposure mode is set. (See Copy Exposure
Adjustment on page 1-6.)
Image quality mode Description
Text + Photo Select to copy originals that contain a mixture of both text and
photographs.
Text Select to copy originals that contain large amounts of text, such as
documents.
Photo Select to copy originals that contain photographs.

Copier Functions
1-6
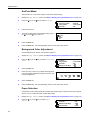
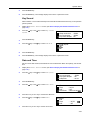
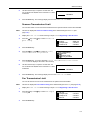
Copy Exposure Adjustment
This section explains how to adjust the copy exposure. The following modes are available for copy
exposure adjustment.
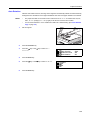
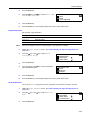
Auto Exposure Mode
Press the Auto Exposure key. The machine detects
the density of the original and sets the optimum
exposure.
Notes • You can make adjustments to the auto exposure mode if the overall copies come out too dark
or too light. (See Auto Exposure Adjustment on page 3-6.)
• If you select Photo as the image quality mode, you cannot select the auto exposure mode.
Manual Exposure Mode
Press the Lighter key or the Darker key to adjust the
exposure. The exposure display indicates the current
exposure level.
Note You can change the default setting for the copy exposure to the auto exposure mode. (See
Exposure Mode on page 3-3.)
Mode Description
Auto exposure mode The machine detects the density of the original and sets the optimum
exposure.
Manual exposure mode The operator presses the Lighter key or the Darker key to adjust the
exposure.

Copier Functions
1-7
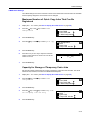
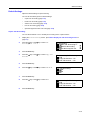
Number of Copies to Be Made
Set the number of copies to be made as follows. You can set the number of copies to 999 at the
maximum.
1
Set the original.
2
Use the numeric keys to set the desired number of
copies.
Note To cancel the number of copies, press the Stop/Clear key. The number of copies is reset to 1.
3
Press the Start key. Copying starts.
Auto
10
100%
Ready to copy.
Auto

Copier Functions
1-8
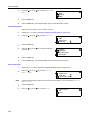
Zoom Copying
The zoom ratio can be changed to reduce or enlarge the copies. The following modes are available
for zoom copying.
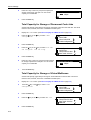
Auto Zoom Ratio Selection Mode
Original images are reduced or enlarged according to the selected paper size.
Note You can set a default setting so that the auto zoom ratio selection mode is selected when you select
a cassette. (See Default Magnification on page 3-6.)
1
Set the original.
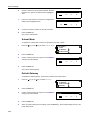
2
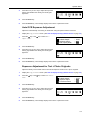
Press the AUTO%/100% key. AUTO % is displayed on
the message display.
3
Press the Paper Select key to select the copy paper.
The zoom ratio is displayed on the message display.
Mode Description
Auto zoom ratio selection
mode
Original images are reduced or enlarged according to the selected
paper size.
Zoom mode The zoom ratio can be changed from 25 % to 200 % in 1 %
increments.
Preset zoom mode A preset zoom ratio can be used to reduce or enlarge original
images.
Inch Specification
200 % (5.5 × 8.5 Æ 11 × 17), 154 % (5.5 × 8.5 Æ 8.5 × 14),
129 % (8.5 × 11 Æ 11×17), 121%(8.5×14Æ 11 × 17),
78 % (8.5 × 14 Æ 8.5 × 11), 77 % (11 × 17 Æ 8.5 × 14),
64 % (11 × 17 Æ 8.5 × 11), 50 % (11 × 17 Æ 5.5 × 8.5)
Metric Specification
200 % (A5 Æ A3), 141 % (A4 Æ A3, A5ÆA4), 127 % (Folio Æ A3),
106 % (11 × 15" Æ A3), 90 % (Folio Æ A4), 75 % (11 × 15" Æ A4),
70 % (A3 Æ A4, A4 Æ A5), 50 % (A3 Æ A5)
Metric Specification (Asia Pacific)
200 % (A5 Æ A3), 141 % (A4 Æ A3, B5 Æ B4), 122 % (A4 Æ B4,
A5 Æ B5), 115 % (B4 Æ A3, B5 Æ A4), 86 % (A3 Æ B4, A4 Æ B5),
81 % (B4 Æ A4, B5 Æ A5), 70 % (A3 Æ A4, B4 Æ B5),
50 % (A3 Æ A5)
1
100%
Ready to copy.
AutoAuto %
1
129%
Ready to copy.
AutoAuto %

Copier Functions
1-9
4
Press the Start key. Copying starts.
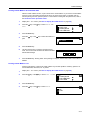
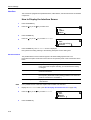
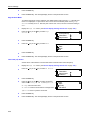
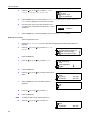
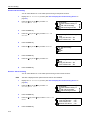
Zoom Mode
With this mode, the zoom ratio can be set between 25 % and 200 % in 1 % increments.
1
Set the original.
2
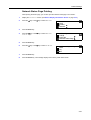
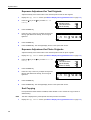
Press the Zoom key.
3
Use the numeric keys to input the zoom ratio. The
zoom ratio is displayed on the message display.
(The display example shows a screen displayed when
an operator enters 1, 1, and 8.)
4
Press the Enter key.
5
Press the Start key. Copying starts.
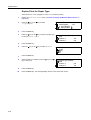
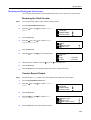
Preset Zoom Mode
With this mode, the zoom ratio can be set to one of the preset ratios.
1
Set the original.
2
Press the Zoom key.
3
Press the S key or the T key to select the desired
zoom ratio.
4
Press the Enter key. The zoom ratio is displayed on
the message display.
5
Press the Start key. Copying starts.
118%
100%:
121%:8.5x14
78%:8.5x14
Zoom:
11x17
8.5x11
100%
100%:
121%:8.5x14
78%:8.5x14
Zoom:
11x17
8.5x11
Auto
1
121%
Ready to copy.
Auto

Copier Functions
1-10
Original Orientation
You must specify the orientation of the original when using the following functions: duplex copying,
split copying (from 2-sided originals), margin mode, border erase mode, combine copying, auto
selection mode (optional), and staple copying (optional).
When the originals are set on the platen:
When the originals are set in the document processor:
Note You can change the default setting of the orientation of the original. (See Original Orientation on
page 3-18.)
1
Press the Function key.
2
Press the S key or the T key to select Orig.
direction.
3
Press the Enter key.
4
Press the S key or the T key to select Rear [Back
Edge] or Left top [Left].
5
Press the Enter key.
Original Rear Left top
Original Rear Left top
Continuous scan
Function:
End
Orig. direction : Rear
: Off
Orig. direction:
Rear
Left top
*

Copier Functions
1-11
Interrupt Mode
The interrupt mode can be used to stop output of copying or another job temporarily and to output
urgent copy or print data or received fax data. After the interrupt processing is complete, the
interrupted job can be resumed.
The following modes are available for the interrupt function.
During a Copy Job
1
Press the Interrupt key. Interrupt mode OK
[Interrupt mode] is displayed.
2
Store the originals for the current copying.
3
Set the original for interrupt copying and perform copying.
4
After the interrupt copying is complete, press the Interrupt key. The settings for the interrupted job
are restored.
5
Replace the original with the originals that have been stored. Press the Start key to resume
copying.
During Output
1
Press the Interrupt key during output. Select Interrupt mode is displayed.
Note If the machine has neither print data nor received fax data, Interrupt mode OK [Interrupt
mode] is displayed. Proceed to step 4.
2
Press the S key or the T key to select the desired
interrupt mode.
Mode Description
Interrupt copy • This mode can be used to stop copying and to make a copy of
a different original at different settings. After the interrupt copy
has been produced, the interrupted copying can be resumed at
the same settings in effect prior to the interruption.
• This mode can also be used to stop output of a job and to make
a copy of another job. After the interrupt copy has been
produced, the interrupted job is resumed.
Priority output This mode can be used to interrupt output of a job and to output
print data or received fax data with priority. After priority output is
complete, the interrupted job is resumed.
Note
To use the fax functions, the optional fax kit must be installed.
Select Interrupt mode.
Interrupt copy
Priority:Printer
Priority:Fax

Copier Functions
1-12
Note • Priority:Printer is displayed when the machine has print data.
• Priority:Fax is displayed when the machine has received fax data.
3
Press the Enter key.
If you have selected Interrupt copy, message Interrupt mode OK [Interrupt mode] is
displayed. Proceed to the next step.
If you have selected Priority:Printer or Priority:Fax, output of data starts. Proceed to
step 5.
4
Set the original for interrupt copying and perform copying.
5
After the interrupt job is complete, press the Interrupt key. The interrupted job resumes.

Copier Functions
1-13
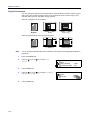
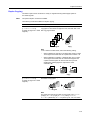
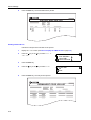
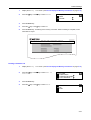
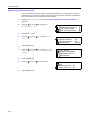
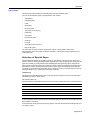
Duplex Copying
Two-sided copies can be made from a variety of originals including double-page spread or
two-sided originals.
Note The optional duplex unit must be installed.
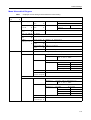
The following modes are available for duplex copying.
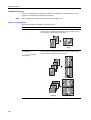
Mode Description
1 sided->2 sided
[1-sided->2-sided]
(2-sided copying from 1-sided
originals)
One-sided originals are copied onto the front and back sides of the
copy paper. If the number of originals is odd, the back side of the
last copy page is blank.
Note
In the 1-sided to 2-sided mode, select the following setting.
• Stitch at left/right of originals Æ Finished stitch at left of copies:
The images for the back side are copied without rotation...A
• Stitch at left/right of originals Æ Finished stitch top of copies:
The images for the back side are rotated 180 degrees and
copied. Finished copies can be bound at the top so that
double-page spread pages are copied in the same
orientation...B
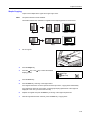
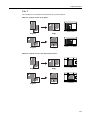
2 sided->2 sided
[2-sided->2-sided]
(2-sided copying from 2-sided
originals)
Front and back sides of originals are copied in the same way onto
both sides of copy paper.
Note
The paper sizes that can be used are A3 to A5R, Folio, 11 × 17"
(Ledger), 8
1/2 × 14" (Legal), 8 1/2 × 11" (Letter), 11 × 8 1/2",
5
1/2 ×81/2" (Statement), 8 1/2 × 13" (Oficio II), 8K, 16K, and 16KR.
Original Copy
ghi
def
abc
ghi
abc
def
ghi
abc
def
Original Copy
AB
Original Copy

Copier Functions
1-14
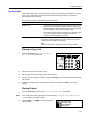
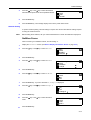
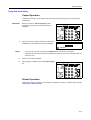
1
Set the original.
2
Press the Duplex/Split Page key.
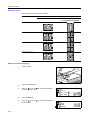
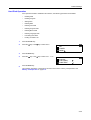
3
Press the S key or the T key to select the desired
duplex copy mode from 1 sided->2 sided
[1-sided->2-sided], 2 sided->2 sided
[2-sided->2-sided], and Book->2-sided.
4
Press the Enter key.
If you have selected 1 sided->2 sided [1-sided->2-sided], proceed to the next step.
If you have selected 2 sided->2 sided [2-sided->2-sided], or Book->2-sided, proceed to
step 7.
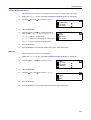
5
Press the S key or the T key to select the desired
finished stitch side.
6
Press the Enter key.
7
Press the Start key. Scanning of the original starts.
If the originals have been set in the optional document processor, copying starts automatically.
If the original has been set on the platen, a message prompting replacement of the original is
displayed. In this case, proceed to the next step.
8
Replace the original and press the Start key. Scanning of the original is performed.
9
When all originals have been scanned, press the Enter key. Copying starts.
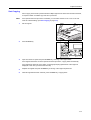
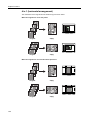
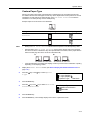
Book->2-sided (2-sided
copying from double-page
spread originals)
A double-page spread original of magazines, books, etc. can be
copied onto both sides of copy paper by pressing the Start key one
time.
Note
The original sizes that can be used are A3, B4, A4R, B5R, A5R,
11 × 17" (Ledger), 8
1/2 × 11" (Letter), and 8K. The paper sizes are
limited to 11 × 8 1/2" and 16K in the inch specifications and A4, B5,
and 16K in the metric specifications. The paper size can be
changed and the zoom ratio adjusted to fit the size of the paper.
Mode Description
Original Copy
Book
1 sided 2 sided
2 sided
2 sided
2-sided
Duplex/Split Page:
Saddle Stitch Direction:
Left side
Top side
Page is loading ...
Page is loading ...
Page is loading ...
Page is loading ...
Page is loading ...
Page is loading ...
Page is loading ...
Page is loading ...
Page is loading ...
Page is loading ...
Page is loading ...
Page is loading ...
Page is loading ...
Page is loading ...
Page is loading ...
Page is loading ...
Page is loading ...
Page is loading ...
Page is loading ...
Page is loading ...
Page is loading ...
Page is loading ...
Page is loading ...
Page is loading ...
Page is loading ...
Page is loading ...
Page is loading ...
Page is loading ...
Page is loading ...
Page is loading ...
Page is loading ...
Page is loading ...
Page is loading ...
Page is loading ...
Page is loading ...
Page is loading ...
Page is loading ...
Page is loading ...
Page is loading ...
Page is loading ...
Page is loading ...
Page is loading ...
Page is loading ...
Page is loading ...
Page is loading ...
Page is loading ...
Page is loading ...
Page is loading ...
Page is loading ...
Page is loading ...
Page is loading ...
Page is loading ...
Page is loading ...
Page is loading ...
Page is loading ...
Page is loading ...
Page is loading ...
Page is loading ...
Page is loading ...
Page is loading ...
Page is loading ...
Page is loading ...
Page is loading ...
Page is loading ...
Page is loading ...
Page is loading ...
Page is loading ...
Page is loading ...
Page is loading ...
Page is loading ...
Page is loading ...
Page is loading ...
Page is loading ...
Page is loading ...
Page is loading ...
Page is loading ...
Page is loading ...
Page is loading ...
Page is loading ...
Page is loading ...
Page is loading ...
Page is loading ...
Page is loading ...
Page is loading ...
Page is loading ...
Page is loading ...
Page is loading ...
Page is loading ...
Page is loading ...
Page is loading ...
Page is loading ...
Page is loading ...
Page is loading ...
Page is loading ...
Page is loading ...
Page is loading ...
Page is loading ...
Page is loading ...
Page is loading ...
Page is loading ...
Page is loading ...
Page is loading ...
Page is loading ...
Page is loading ...
Page is loading ...
Page is loading ...
Page is loading ...
Page is loading ...
Page is loading ...
Page is loading ...
Page is loading ...
Page is loading ...
Page is loading ...
Page is loading ...
Page is loading ...
Page is loading ...
Page is loading ...
Page is loading ...
Page is loading ...
Page is loading ...
Page is loading ...
Page is loading ...
Page is loading ...
Page is loading ...
Page is loading ...
Page is loading ...
Page is loading ...
Page is loading ...
Page is loading ...
Page is loading ...
Page is loading ...
Page is loading ...
Page is loading ...
Page is loading ...
Page is loading ...
Page is loading ...
Page is loading ...
Page is loading ...
Page is loading ...
Page is loading ...
Page is loading ...
Page is loading ...
Page is loading ...
Page is loading ...
Page is loading ...
Page is loading ...
Page is loading ...
Page is loading ...
Page is loading ...
Page is loading ...
Page is loading ...
Page is loading ...
Page is loading ...
Page is loading ...
-
 1
1
-
 2
2
-
 3
3
-
 4
4
-
 5
5
-
 6
6
-
 7
7
-
 8
8
-
 9
9
-
 10
10
-
 11
11
-
 12
12
-
 13
13
-
 14
14
-
 15
15
-
 16
16
-
 17
17
-
 18
18
-
 19
19
-
 20
20
-
 21
21
-
 22
22
-
 23
23
-
 24
24
-
 25
25
-
 26
26
-
 27
27
-
 28
28
-
 29
29
-
 30
30
-
 31
31
-
 32
32
-
 33
33
-
 34
34
-
 35
35
-
 36
36
-
 37
37
-
 38
38
-
 39
39
-
 40
40
-
 41
41
-
 42
42
-
 43
43
-
 44
44
-
 45
45
-
 46
46
-
 47
47
-
 48
48
-
 49
49
-
 50
50
-
 51
51
-
 52
52
-
 53
53
-
 54
54
-
 55
55
-
 56
56
-
 57
57
-
 58
58
-
 59
59
-
 60
60
-
 61
61
-
 62
62
-
 63
63
-
 64
64
-
 65
65
-
 66
66
-
 67
67
-
 68
68
-
 69
69
-
 70
70
-
 71
71
-
 72
72
-
 73
73
-
 74
74
-
 75
75
-
 76
76
-
 77
77
-
 78
78
-
 79
79
-
 80
80
-
 81
81
-
 82
82
-
 83
83
-
 84
84
-
 85
85
-
 86
86
-
 87
87
-
 88
88
-
 89
89
-
 90
90
-
 91
91
-
 92
92
-
 93
93
-
 94
94
-
 95
95
-
 96
96
-
 97
97
-
 98
98
-
 99
99
-
 100
100
-
 101
101
-
 102
102
-
 103
103
-
 104
104
-
 105
105
-
 106
106
-
 107
107
-
 108
108
-
 109
109
-
 110
110
-
 111
111
-
 112
112
-
 113
113
-
 114
114
-
 115
115
-
 116
116
-
 117
117
-
 118
118
-
 119
119
-
 120
120
-
 121
121
-
 122
122
-
 123
123
-
 124
124
-
 125
125
-
 126
126
-
 127
127
-
 128
128
-
 129
129
-
 130
130
-
 131
131
-
 132
132
-
 133
133
-
 134
134
-
 135
135
-
 136
136
-
 137
137
-
 138
138
-
 139
139
-
 140
140
-
 141
141
-
 142
142
-
 143
143
-
 144
144
-
 145
145
-
 146
146
-
 147
147
-
 148
148
-
 149
149
-
 150
150
-
 151
151
-
 152
152
-
 153
153
-
 154
154
-
 155
155
-
 156
156
-
 157
157
-
 158
158
-
 159
159
-
 160
160
-
 161
161
-
 162
162
-
 163
163
-
 164
164
-
 165
165
-
 166
166
-
 167
167
-
 168
168
-
 169
169
-
 170
170
-
 171
171
-
 172
172
-
 173
173
-
 174
174
-
 175
175
-
 176
176


Ask a question and I''ll find the answer in the document
Finding information in a document is now easier with AI
Other documents
-
Utax cd 1116 Operating instructions
-
Olivetti 200MF User manual
-
KYOCERA 1650 User manual
-
-
Olivetti TASKALFA 181 Owner's manual
-
Utax CD 1218 Operating instructions
-
Olivetti d-Copia 1800MF and d-Copia 2200MF Owner's manual
-
Olivetti d-Copia 52 Owner's manual
-
KYOCERA KM-5230 Instruction Handbook Manual
-
KYOCERA TASKalfa 220 Owner's manual