Air Lift 22022 Installation guide
- Category
- Car kits
- Type
- Installation guide
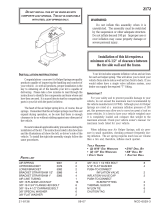
Air Lift 22022 is a front hose kit designed to enhance the performance of your vehicle's suspension system. With its durable construction and precise engineering, this kit provides several key capabilities:
-
Adjustable Air Pressure: The kit allows you to adjust the air pressure in your Polyair Springs, enabling you to customize the ride quality and handling of your vehicle. By inflating the springs to the recommended pressure range, you can improve stability, reduce body roll, and enhance overall ride comfort.
-
Leak-Proof Connections: The kit features secure fittings and a high-quality inflation valve, ensuring a leak-proof connection between the hose and the Polyair Springs. This prevents air loss and maintains the desired pressure level, providing consistent performance and reliability.

-
 1
1

Air Lift 22022 Installation guide
- Category
- Car kits
- Type
- Installation guide
Air Lift 22022 is a front hose kit designed to enhance the performance of your vehicle's suspension system. With its durable construction and precise engineering, this kit provides several key capabilities:
-
Adjustable Air Pressure: The kit allows you to adjust the air pressure in your Polyair Springs, enabling you to customize the ride quality and handling of your vehicle. By inflating the springs to the recommended pressure range, you can improve stability, reduce body roll, and enhance overall ride comfort.
-
Leak-Proof Connections: The kit features secure fittings and a high-quality inflation valve, ensuring a leak-proof connection between the hose and the Polyair Springs. This prevents air loss and maintains the desired pressure level, providing consistent performance and reliability.
Ask a question and I''ll find the answer in the document
Finding information in a document is now easier with AI
Related papers
-
Air Lift 57250 Installation guide
-
-
-
-
-
-
-
-
-
Other documents
-
 Network Computing Devices 2190 User manual
-
 AME Intl. ACCU-FLATE 24866 Operating instructions
-
 Firestone Wheelchair rr 2068 User manual
-
 Network Computing Devices NCD-5988-2 User manual
-
 Air Lift Performance MN-643 User manual
-
 Network Computing Devices 2173 User manual
-
 Network Computing Devices 2172 User manual
-
Air Lift Performance 39010 User manual
-
 Air Lift Performance 39020 ECR 6107 User manual
-
 Firestone Add Air User manual


