Page is loading ...

PART NUMBER
SERIAL NUMBER
Installation &
Servicing Instructions
Nestor Martin
IN13
IN1208 Edition B June 2010
Euroheat
Natural Energy Company
This Manual Must Always be Available to the Stove Operator
This manual must be used in
conjunction with document IN1173.
The Wood and Mutlifuel Chimney
and Installation Guide.
Exempt
Smoke
Control

© EUROHEAT DISTRIBUTORS (H.B.S) LTD. June 2010 E & OE Instructions Part number IN1208 Edition B
2
Table of Contents
The Model Range Explained ....................................................................................................... 3
Technical Data, Intermittent Operation ....................................................................................... 5
Technical Data, Continuous Operation ......................................................................................... 5
General Technical Data ................................................................................................................. 5
IT13 Dimensions ........................................................................................................................... 5
IT13 Aperture Size ........................................................................................................................ 5
Housing Construction, when Using an Existing Chimney Breast ................................................ 6
Housing Construction, without an Existing Chimney Breast ...................................................... 9
Ideal installation ......................................................................................................................... 11
The Flue ....................................................................................................................................... 12
Installation of Vent Duct Tubes .................................................................................................. 13
The Hearth and Fire Surround .................................................................................................... 14
Minimum Air Setting .................................................................................................................. 15
Remote Control Option ............................................................................................................... 16
Fitting and Removing Surround ................................................................................................. 17
Fitting Remote Control Receiver ................................................................................................ 17
Firebox Components ................................................................................................................... 18
Commissioning Check List ........................................................................................................ 20
Ensure that all joints are sealed with a suitable fire resistant sealant we recommend Fraxfill
(available from Euroheat Part No: MS9045).
Some so called “Heat Proof” mastiks will only stand a temperature of 300°C before they
start breaking down. In many cases they may give off an obnoxious smell at temperatures
much lower than this which will persist and become apparent each time the stove is lit.
Since April 2002 only Registered Competent Engineers may install solid fuel fired appliances without involving
the Local Authority Building Control Department. For more details contact HETAS. (Contact details page 3)
Euroheat would suggest only Registered Competent Engineers such as HETAS approved engineers install Euroheat
appliances.
If a competent engineer is not employed to install your appliance, building control must to contacted and a
building control number is issued.
Note: There is no remote control option available for the IN13

© EUROHEAT DISTRIBUTORS (H.B.S) LTD. June 2010 E & OE Instructions Part number IN1208 Edition B
3
Useful organizations
Solid Fuel Association 0845 601 4406 www.solidfuel.co.uk
The National Association of Chimney Sweeps 01785 811732 www.chimneyworks.co.uk
HETAS Ltd. 0845 634 5626 www.hetas.co.uk
The Model Range Explained
Thank you for purchasing your stove and helping to protect our environment. Nestor Martin and Euroheat insist
on progressive development to produce products which are market leading. Our aims are to produce stoves with
the latest innovations, user friendly operation and highly efficient for lower cost operation. When burning wood
you will be greatly assisting with reducing CO² to the environment when compared to coal, oil or gas.
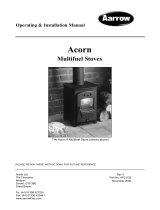
This installation manual offers user information for the Nestor Martin IN13 Insert model.
Model Identification
You will see on the front page of this document a label which confirms which model you have. This label also
advises you of the stove`s unique serial number. This information is also attached to your stove for reference.
Important
Please ensure the warranty registration form is completed if you are the installer and confirm with the user
that it is their responsibility to return it to Euroheat. In this way the model and its history will be recorded for
reference in the future. For the latest versions of manuals, technical information, accessories and spare parts visit
the Euroheat web site.
Stoves Supplied Through Euroheat Authorized Retailers.
For England, Wales, Scotland and Northern Ireland
Euroheat Distributors (H.B.S). Ltd.
Unit 2,
Court Farm Business Park,
Bishops Frome,
Worcestershire, WR6 5AY.
www.euroheat.co.uk
info@euroheat.co.uk
Whilst Euroheat are always happy to assist, please ensure you have read this manual and the chimney and
installation guide IN1173.
First contact your supplying retailer for assistance. If you find this not successful contact the Euroheat Technical
Support Team. Technical support telephone Number 01885 491117. E-mail tech@euroheat.co.uk.
Before telephoning ensure you have the stoves serial number to hand and that you are a Registered Competent
Engineer. If you are not a registered engineer seek one for assistance. A list of engineers can be obtained from
HETAS.
Euroheat unfortunately are unable to offer support for appliances which were not supplied by Euroheat.
Stoves supplied through Eireheat authorized retailers.
For Eire
Sean Murphy Heating Ltd
Kinvara
Co Galway
Eire
www.eireheat.com
sales@eireheat.com
(091)637701 Fax: (091)637797
International +353 91637701
For support for appliances supplied through Eireheat in Ireland please contact using the
details listed above.
Thermic Distribution Europe Sa
11 Rue De Lion
B-5660
Frasnes Les Couvin, Belgium.
www.nestormartin.com

© EUROHEAT DISTRIBUTORS (H.B.S) LTD. June 2010 E & OE Instructions Part number IN1208 Edition B
4
IMPORTANT
.
The installation of this appliance must comply with all local regulations, including those referring to
national and European Standards before it can be operated. The stove is not suitable for a shared flue. However,
for England and Wales, only, the coming into force on 1st April 2002 of SI 2002 No 440 exempts the householder
from this legal requirement for the installation of solid fuel fired appliance whose rated heat output is 50kW or
less in a building having no more than 3 storeys (excluding any basement) if a Competent Engineer is employed
who is registered under the Registration Scheme for Companies and Engineers involved in the Installation
and Maintenance of Domestic Solid Fuel Fired Equipment operated by HETAS Ltd. These registered Competent
Engineers may also carry out associated building work necessary to ensure that the installed appliance complies
with Building Regulations without involving the Local Authority Building Control Department.
Improper adjustment, alteration, maintenance or the fitting of replacement parts not recommended by
the manufacturer can cause injury or property damage. Do not operate the stove with faulty seals or damaged
glass.
Due to the high operating temperatures of this appliance it should be located away from pedestrian traffic
and away from furniture and draperies. Do not store paper or wood near the appliance. Any mats and rugs put
in front of the stove should be fireproof and secured to prevent the possibility of tripping.
Advise all persons as to the stove’s high surface temperatures. If it is possible for children or infirm adults
to come into contact with the stove, fit a suitable fire guard.
It is imperative that all air passageways into, out of, and within the appliance are kept clean. All permanent
ventilation into the room provided for the stove must remain clear and unobstructed at all times. Consideration must
be given to the need for extra ventilation if another heating source needing air is to be operated simultaneously.
If an extraction fan is proposed to be fitted to a connecting area of the house, after the stove has been installed,
professional advice should be sought from a qualified engineer.
The user should be advised that the appliance should be inspected regularly and the chimney cleaned at
least annually. More frequent cleaning may be required and the advice of a qualified chimney sweep should be
sought.
Our range of stoves is capable of operating with outstanding efficiency if the flue system is correct.
Because so little heat is wasted to the flue it is possible that moisture within the products of combustion will
condense if the heat losses within the flue way are too great and allow the flue gasses to cool. For this reason we
recommend that the stove is fitted with a suitable flue liner, the same diameter as the flue spigot, to prevent the
possibility of acidic damage to the fabric of the chimney and damage to the stove which will reduce the longevity
of the stove.
When correctly installed, the stove is designed to produce heat, safely. It cannot do so if the installation
is less than absolutely stable, constructed of materials suitable for such an installation and consideration has not
been given to the possibility of people with less than ideal common sense operating it.
Have the existing chimney swept by a chimney sweep. Although you will be lining the chimney, any
deposits left in the chimney will cause problems and may become a fire hazard.
Your attention is drawn to the precautions and responsibilities under the Health and Safety at Work Acts,
and whatever new legislation being introduced during the life of this document.

© EUROHEAT DISTRIBUTORS (H.B.S) LTD. June 2010 E & OE Instructions Part number IN1208 Edition B
5
IN13 Aperture Size
370mm Min
406mm Min/470mm Max
550mm Min/
580mm Max
Technical Data, Intermittent Operation
Model
Heat
Output
Wood
Refuelling
Interval
Wood
Energy
Efficiency
Wood
Heat
Output
Smokeless
Coal**
Refuelling
Interval
Smokeless
Coal**
Energy
Efficiency
Smokeless
Coal**
IN13 Wood 5 kW 0.70 hr
77.1% Net
70.2% Gross
IN13 Multifuel 5 kW 0.70 hr
77.1% Net
70.2% Gross
3.5 kW 1.05 hr
82.8% Net
75.4% Gross
Technical Data, Continuous Operation
Model
Heat
Output
Wood
Refuelling
Interval
Wood
Energy
Efficiency
Wood
Heat Output
Smokeless
Coal**
Refuelling
Interval
Smokeless
Coal
Energy
Efficiency
Smokeless
Coal
IN13 Wood 5.4 kW 1.45 hr
83.4% Net
75.9% Gross
IN13 Multifuel 5.4 kW 1.45 hr
83.4% Net
75.9% Gross
3.5 kW 4 hr
78.3% Net
71.2% Gross
General Technical Data
Model
Model
Number
Weight KG Flue
Draught
Nominal
Flue Gas
Mass Flow
g/s
Flue Gas
Temperature
Down Stream of
Flue Spigot
Free Air
Requirement
IN13 Wood IN13* 108 12pa 4.9 350
0
c 0mm²**
IN13 Coal IN13* 108 12pa 3.8 210 0mm²**
** In well sealed properties additional free
air might be required.

© EUROHEAT DISTRIBUTORS (H.B.S) LTD. June 2010 E & OE Instructions Part number IN1208 Edition B
6
Supplied with the Stove
Flue Spigot and Self-adhesive Rope
Stove Operating and
Ash Pan Tool
Approx 1.4m Self-adhesive Rope
Which may be used to form a seal between the
stove and the fireplace aperture.
1 x Heat Resistant Leather Glove

© EUROHEAT DISTRIBUTORS (H.B.S) LTD. June 2010 E & OE Instructions Part number IN1208 Edition B
7
610
525
549
Internal Diam 125 127
60
525
46
154
347
405
60
60
IN13 Dimensions
Preparation of Existing Fireplace
The old grate, the fire shield and fire back should be removed. The hearth and surrounding masonry work should
be inspected for soundness and any remedial work undertaken if required. The hearth should be level to give a
stable base for the stove to be placed on. The opening should be measured to ensure that it can accommodate
the stove, see aperture size on page 5.
Ensure that clearances to any combustible materials surrounding the aperture conform to those on page 11.

© EUROHEAT DISTRIBUTORS (H.B.S) LTD. June 2010 E & OE Instructions Part number IN1208 Edition B
8
Housing Construction, without an Existing Chimney Breast
If the property has no existing chimney or chimney breast the first consideration will be the positioning of the
flue. Taking the flue to the roof internally through the property will involve complying with many regulations
and even an external flue may be subject to planning regulations. Because there will be no existing structural
hearth, this will need to be constructed following the strict Building Regulation requirements. For these reasons
we cannot recommend that anyone without the necessary experience constructs the housing and flue system for
a multifuel insert stove.
Insulation
Steel support
Lintel
Insulating board
Insulating blocks
Because the temperatures reached by the stove’s top and side panels may reach over three hundred degrees
Celsius all materials used for constructing the housing must be both non-combustible, stable at high temperatures
and insulate any part of the building which may be affected by heat. It should be borne in mind that insulating
materials only limit the rate of heat transference from the heated surface to the unheated surface and if the
dispersal of heat from the unheated surface is less than the rate of heat transference the entire body of insulating
material will reach an almost uniform temperature.
The insulating properties of many modern houses are extremely high and many external walls are now constructed
with an inner skin of plasterboard, supported on a wooden frame which is thermally insulated from the outer
skin of brick. Having such a low thermal conductivity makes it impossible to use the outer wall as the back of the
stove’s housing unless a means of ensuring that non of the heat from the stove is transferred to the house wall.
Whilst this may sound daunting the reward will be a vast increase in heating efficiency.

© EUROHEAT DISTRIBUTORS (H.B.S) LTD. June 2010 E & OE Instructions Part number IN1208 Edition B
9
Ideal Installation
Cowl to prevent ingress
of rain, birds and to assist
with flue stabilization
Flue liner reaching to
top of the termination
and insulated
Flue liner support collar
which is required for both
flexible and single wall
liners
Weatherproof chimney
pot and parged at a
steep angle to disperse
rain water
Sound chimney
brick work
Stainless steel liner
Flexible to single wall
adapter if flexible liner
is fitted
Flue height 5m or more
Level and stable
supporting hearth
300mm Solid
section of flue
pipe
Structural lintel
Insulation may
be fitted around
the stove body if
there is enough
room within the
fireplace opening
Insulation may be fitted
above the stove body if
there is enough room
within the fireplace
opening

© EUROHEAT DISTRIBUTORS (H.B.S) LTD. June 2010 E & OE Instructions Part number IN1208 Edition B
10
The Flue
It is possible to remove the top chamber baffle to access the flue for cleaning. The flue MUST be lined. Directly
from the flue spigot a minimum of 300mm of solid stainless steel flue pipe must fitted prior to the flexible flue
liner. Bends can be utilized to achieve the correct position.
Installation of Flue Spigot to Flue Pipe
The flue spigot is mounted internally within the top of
the stove retained by four bolts, see picture below.
The top chamber baffle may be in place and will
need to be removed to gain access to fit the flue
spigot. This baffle is held in place by two bolts and
the baffle MUST be replaced once the flue has been
connected.
There is a small lenth of self-adhesive rope, supplied
with the stove, which should be fitted around the
outside of the flue spigot to form a seal when the
spigot is fitted to the stove.
A physical retention method MUST
be used at the flue spigot joint with
the flue pipe, self tapping screws
being favoured, and ensure that all
joints are sealed with a suitable fire
resistant sealant we recommend
Fraxfill (available from Euroheat Part
No: MS9045).
Some so called “Heat Proof” mastiks
will only stand a temperature of
300°C before they start breaking
down. In many cases they may
give off an obnoxious smell at
temperatures much lower than this.
4 Flue Spigot
Retaining Bolts

© EUROHEAT DISTRIBUTORS (H.B.S) LTD. June 2010 E & OE Instructions Part number IN1208 Edition B
11
The Hearth and Fire Surround
Whilst the existing regulations require the hearth to protrude in front of a solid fuel appliance by a minimum
of 250mm we strongly recommend that this distance should be 300mm. These rules make provision for the
protection of the property in the event of burning fuel falling from the fire, but the height of the fire bed in an
open fire or conventional stove is not very high and as the horizontal distance any falling item travels is, amongst
other factors, dependant upon the height from which it starts, it should be apparent that anything falling from an
insert stove positioned with its fire bed one meter above the floor will have the impetus to travel further across
the floor than the regulations allowed for. A hearth having an edge lip is preferable to a simple flat hearth in its
ability to reduce the hazard but because no hard and fast rules can be given you have to assume that Murphy’s
Law which states that “If it can, it will” applies and any combustible flooring should be kept well out of range of
the likely and even unlikely range of falling embers.
Germany has a long tradition of stoves called “Kachelöfen”, which are stoves built into a tiled structure that acts as
a heat store. The insert stove installed within its brick or block housing will behave in much the same way, using
the bricks as a heat store. Although the brickwork will never become excessively hot it will become very warm
if the stove is kept burning at a high rate. For this reason anything attached to the wall will also become very
warm. This may cause damage to oil paintings and cause accelerated ageing in photographs and we advise you
to restrict the pictures you hang on the walls of the stove housing to those which are of limited importance.
There has been a revival of interest in all forms of real fires and fire surrounds of every possible style and
material now abound but sadly not all are built to the highest standards or with materials best suited to the
high temperatures they will be subjected to. The minimum distances given in the drawing below will ensure
the surround will be subjected to safe temperatures but it will not guarantee that a fire surround made from
unseasoned wood will not shrink. If stone is to be used in any part of a fire surround it is important that both
the shape and fixing allow for the stone’s expansion as its temperature rises. Failure to make provision for the
uneven expansion a fire surround will inevitably result in the stone cracking, in general the stone surround should
comprise of four or more sections.
Minimum distance from extreme of stove
front frame to any combustible material
above the stove is 300mm and to the sides
200mm. This includes wall coverings such as
wallpaper.
All fire surrounds must be suitable for a real
fire.
All stone must have provision for uneven
expansion.
A non-combustible hearth must be provided in
front of the stove to a minimum of 300mm.
A fire guard must be fitted if children or infirm
adults are at risk of coming into contact with
the stove.
300mm
200mm

© EUROHEAT DISTRIBUTORS (H.B.S) LTD. June 2010 E & OE Instructions Part number IN1208 Edition B
12
Minimum Air Setting
The minimum air screw should be adjusted to supply the maximum air setting, by screwing it in a clockwise
direction until the shutter is fully open when resistance to further turning will be felt, before the stove is lit for
the first time. The facia plate will have to be removed to access the adjustment screw.
If this stove is intalled in a smoke exempt area the minimum setting air bleed flap must be
permanently set to a minimum opening of 14.5mm, which is the flat open to maximum.
This facility of having an adjustable minimum air setting provides a positive repeatable air setting that will give
the lowest burning rate at which the stove will continue burning when the firing rate control is turned to its
minimum position. It will also give a small feed to the air wash when the stove is burning coal, not enough to
risk damage to the grate, but enough to help keep the glass clean. It is also an important safety feature. If the
stove has been burning with a constant air supply it has been generating and burning the volatile gasses from
the fuel. If the air supply is abruptly and completely removed the fire will extinguish but the release of gasses will
continue for some time. These gasses will be above their ignition temperature and may potentially ignite all at
once if they come into contact with air. The constant air bleed that the small flap allows will keep some of these
gasses burning and prevent sudden ignition whilst the generation of gasses reduces.
Adjustment
If it is found that the fire burns for only short periods while set to the “0” position it will be most likely that the
flue draught is high. Commonly found in tall or excessive sized chimneys.
To extend the burning cycle the minimum flap can be adjusted to allow less air to enter at low settings. Adjust
the flap to give your required settings.
The facia plate will have to be removed to access the adjustment screw. Any adjustment should be only undertaken
by the commissioning engineer or under direction from the Euroheat Technical Department.
Turn the adjustment screw clockwise to increase and anti-clockwise to decrease the minimum air setting.
Important
Never operate the stove with the minimum air setting set to its closed position. If the stove
will be burning wood in a smoke control area the minimum air setting shutter must remain
fully open at all times.
Minimum Air Adjustment Screw

© EUROHEAT DISTRIBUTORS (H.B.S) LTD. June 2010 E & OE Instructions Part number IN1208 Edition B
13
Firebox Components
Removal of the Top Mica Baffle Plate
The top mica baffle is located in the top of the fire box where it sits
on the L shaped baffle support lugs which are part of the casting of
the left and right side protection plates. For easier access remove the
front fuel guard. To remove (1) slide the baffle board towards the rear
of the fire box (2) whilst lifting the rear of the board upwards. Once
the front of the board has passed the end of the L shaped support lug
(3) the front can then be dropped down and the baffle pulled down
into the main body of the fire box. It can then be angled to withdraw
it through the door.
To refit the replacement reverse the procedure.
Removal of the Upper Protection Plate
The upper protection plate is held in place by the two side protection
plates. To remove (1) lift up the plate and then (2) draw it towards
the front of the fire box.
As it is drawn forward (3) pull the front edge downwards so moving
it free of the side protection plates. It can then be angled within the
fire box to withdraw it through the door.
To refit the replacement reverse the procedure.
Removal of the Side Protection Plate
To remove (1) lift up the plate so it is higher than the lugs on the
lower side protection plates and then (2) draw it towards the centre
of the fire box.
As it is drawn towards the centre (3) twist the rear edge towards
the front of the fire box. It can then be angled within the fire box to
withdraw it through the door.
To refit the replacement reverse the procedure.
1
2
3
1
2
3
1
2
3

© EUROHEAT DISTRIBUTORS (H.B.S) LTD. June 2010 E & OE Instructions Part number IN1208 Edition B
14
Removal of the Rear Protection Plate
To remove (1) lift up the plate so it is higher than the lugs on
the grate frame and then (2) draw it towards the centre of the
fire box.
As it is drawn towards the centre twist the edge towards the
front of the fire box. It can then be angled within the fire box
to withdraw it through the door.
To refit the replacement reverse the procedure.
Removal of the Grate
To remove (1) lift up the grate so it is higher than the grate
frame and then it can be withdrawn from the fire box.
To refit the replacement reverse the procedure (2) ensuring
that the lug on the bottom of the grate locates in the riddle
arm.
Removal of the Grate Frame
With the baffle plate, log guard and side protection plates
removed. Lift out the two cast iron bottom protection plates
from either side of the grate frame. The grate frame can
then be lifted out of the stove. When refitting the cast iron
bottom protection plates ensure that the lugs are upwards.
Removal of the Top Chamber Baffle
The top chamber baffle will need to be removed to gain
access to the flue for sweeping, also when fitting the
flue system and flue spigot if fitted to the stove when
delivered.
It is secured to the top of the stove by two stainless steel
bolts. It MUST be replaced after sweeping.
Failure to fit this baffle will cause reduced performance
and may eventually damage the stove.
1
2
1
2
Cast iron bottom protection
plate with the lugs upper most

© EUROHEAT DISTRIBUTORS (H.B.S) LTD. June 2010 E & OE Instructions Part number IN1208 Edition B
15
Welcome to the World of Real Stoves
Euroheat Technical Team
Information from the Euroheat Technical Team
Euroheat and Nestor Martin have a policy of continual research and development and reserve the right to
modify its appliances without prior notice.
We make every effort to ensure that the information provided in this document is correct and accurate at
the time of printing. Continued updates occur to adapt documents to customer requirements and appliance
changes. For the latest editions of all Euroheat documentation visit our web site www.euroheat.co.uk.
We would request that you inform Euroheat of information which you feel is not provided in this document
which would assist other users in the future.
The Euroheat Technical Team

Court Farm Business Park, Bishops Frome,
Worcestershire WR6 5AY
Pre sales: 01885 491112
Technical: 01885 491117
Reception: 01885 491100
Need more info?
with over 10,000 pages of technical information, spare parts,
product shots, news and 1001 other things, - you will not find
a more comprehensive solution to your queries, whatever
time of the day.
www.euroheat.co.uk
/