Page is loading ...

BeoVision 7
Reference book


Tables of contents in the Reference book
The content of this Reference book is divided into sections. Each particular section
starts with its own detailed table of contents provided with page references. Texts
in black refers to the current section, whereas the remaining sections are described
in general terms and written in grey.
The main sections are:
– Advanced operation, 7
– Placement, sockets and connections, 15
– Tuning and preference settings, 25
– BeoLink system, 49
– Index, 58
3

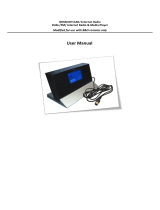
The illustration on this page shows
the content of the menu system, and
also indicates where in the Reference
book you can find further
information about the menus.
The menu available when you select
DVD is shown on the next page.
Menu overview
MENU
TUNING
EDIT CHANNELS (p. 38)
ADD CHANNEL (p. 41)
AUTO TUNING (p. 41)
MANUAL TUNING (p. 40)
LINK FREQUENCY (p. 53)
PLAY TIMER
TIMER ON/OFF (p. 8)
TIMER INDEX (p. 9)
PLAY TIMER PROGRAMMING
(p. 8)
WAKEUP TIMER (p. 10)
OPTIONS
CONNECTIONS
AV1 (p. 31)
AV2 (p. 31)
AV3 (p. 31)
AV5 (p. 31)
AV6 (p. 31)
DISPLAY 1
DISPLAY 2 (p. 31)
SOUND
SOUND ADJUSTMENT (p. 43)
SPEAKER TYPE (p. 32)
SPEAKER ROLES (p. 33)
SPEAKER DISTANCE (p. 34)
SPEAKER LEVEL (p. 35)
SOUND SYSTEM (p. 36)
PICTURE (p. 42)
CLOCK (p. 34)
MENU LANGUAGE (p. 45)
ENGLISH
DEUTSCH
FRANÇAIS
ITALIANO
ESPAÑOL
NEDERLANDS
DANSK
SVENSKA
STAND POSITIONS (p. 44)
VIDEO
AUDIO
STANDBY
STAND ADJUSTMENT (p. 28)
4

Play Mode
A-B Repeat
A (Start Point)
B (End Point)
Off
Repeat
Title Repeat
Chapter Repeat
Repeat Off
Random
Random Title
Random Chapter
Random Off
Search Mode
Title Search
Chapter Search
Time Search
Initial Settings
Digital Output
Dolby Digital Out
DTS Out
Video Output
TV Screen
Component Out
AV Connector Out
Language
Audio Language
Subtitle Language
DVD Menu Language
Subtitle Display
Display
OSD Language
On-Screen Display
Angle Indicator
Options
Parental Lock
DivX VOD
Disc Navigator
5
The extended on-screen menu system for the
DVD player.
Press DVD, then Disc Menu on Beo5 to access
the menu system. (Beo4: Press DVD, then the
yellow button, then 3).
For information about the built-in DVD player,
refer to ‘Use the DVD player’ on page 16 in the
Guide.

6

• Set the television to switch itself on and off, 8
• Wake-up Timer, 10
• Operate other equipment with Beo5 or Beo4, 12
Placement, sockets and connections, 15
Find out how to handle and place your television, where the sockets are placed,
and how to connect and register extra equipment.
Tuning and preference settings, 25
Find out how to set up your television for the first time and tune in channels. This
chapter also contains information about settings for time, date, picture and sound.
BeoLink system, 49
Find out how to connect an audio system to your television and operate an
integrated audio/video system. Find out how to make link connections, operate a
link system and set up your television in a link room.
Index, 58
Find the subject you want to know more about.
Advanced operation
This chapter tells you how to operate
your television beyond daily use.
It also tells you how to operate a
connected set-top box and other
connected video equipment.
7

Before you start …
If you connect a Bang & Olufsen audio or
video product to your television with a
Master Link cable, you can exclude or include
it in timed functions via the Play Timer menu.
For example, set the television Play Timer to
ON and an audio system’s Play Timer to OFF if
you wish timed functions to apply only to the
television.
To switch on the Play Timer …
> Press Menu to bring up the TV SETUP menu
and press to highlight PLAY TIMER. (Beo4:
Use ).
> Press the centre button to bring up the PLAY
TIMER menu, and press or to highlight
TIMER ON/OFF. (Beo4: Press GO and or ).
> Press the centre button to bring up the TIMER
ON/OFF menu. (Beo4: Press GO).
> Press or to reveal ON. (Beo4: Use or ).
> Press the centre button to store the setting.
(Beo4: Press GO).
For further information about how to switch the
Play Timer on or off for a connected Bang &
Olufsen audio or video product, refer to the Guide
enclosed with the product.
Timed play and timed standby
You can preset your television to start and
stop automatically at the same time and day
every week.
To enter settings for timed play or timed
standby …
> Press Menu to bring up the TV SETUP menu
and press to highlight PLAY TIMER. (Beo4:
Use ).
> Press the centre button to bring up the PLAY
TIMER menu and press to highlight PLAY
TIMER PROGRAMMING. (Beo4: Press GO and
).
> Press the centre button to bring up the PLAY
TIMER PROGRAMMING menu. (Beo4: Press
GO).
> Press or to move through the menu items.
(Beo4: Use or ).
> Press and use the number buttons to enter
information or press or to view your choices
for each item. (Beo4: Use the number buttons
or or ). When DAYS is highlighted,
press once to be able to move through the
days, and press or to remove a day you do
not want. (Beo4: Use and or ). Press to
move to the next day, and press to move back
to a previous day. (Beo4: Use or ). When
the weekday(s) you want are displayed, press
the centre button to accept the day(s). (Beo4:
Press GO).
> When you have filled in the required
information, press the centre button to store
your Timer settings. (Beo4: Press GO).
> Press BACK to exit all menus. (Beo4: Press
EXIT).
You can make your television switch
itself on and off automatically via the
timed play and timed standby
functions, for example, if there is a
programme you do not want to miss.
Enter as many as six Timer settings,
and bring up an on-screen list of the
Timer settings you have entered.
From this list, you can edit or delete
your Timer settings.
If your television is integrated with a
Bang & Olufsen audio or video
system with a Master Link cable,
these systems can perform the timed
play or timed standby functions as
well.
For your timed settings to be
executed correctly, ensure that the
built-in clock is set to the correct
time. For further information, refer to
the chapter ‘Set the time and date’
on page 45 in the Reference book.
Set the television to switch itself on and off
8

You can only use a source, such as A.MEM, if it is
present in your setup.
If the television is set up in a link room, Timer
programming must be carried out on your main
room television.
What’s on the TIMER PROGRAMMING
menu …
SOURCE
Depending upon what you choose, SOURCE
indicates either that a specific source is to be
switched on, or that the television is to
be switched off. Options are:
TV… To switch on the TV.
DTV … To switch on equipment registered as
DTV, such as the optional DVB-T/S module.
V.AUX … To switch on equipment registered as
V.AUX, such as a set-top box.
V.AUX2 … To switch on equipment registered
as V.AUX2.
V.MEM … To switch on a connected video tape
recorder.
DVD … To switch on the built-in DVD player.
DVD2 … To switch on a connected DVD player.
CD … To switch on a connected CD player.
N. MUSIC, N. RADIO… For access to music files
stored on a PC or to Internet radio sites. For
further information about these sources, consult
your Bang & Olufsen retailer.
A.MEM … To switch on a connected audio
recorder.
RADIO … To switch on a connected radio.
DTV RADIO … To switch on digital radio. Only
available if your television is equipped with the
optional DVB-T/S module.
STANDBY … To switch the television off. If you
have other compatible systems connected to
your television, they are switched off as well.
(CHANNEL GROUP) … Only available if your
television is equipped with the optional DVB-T/S
module and you select DTV as your source.
Choose the digital satellite channel group.
CHANNEL (Channel number) … Once your source
is chosen, choose the channel number you
want. If you have selected a channel group,
only the channels in the selected group are
accessible.
START TIME and STOP TIME … Key in the times
when you want the television to start and/or
stop playing. If you have set the Timer source to
STANDBY, it is only possible to enter a stop time.
DAYS … Select the specific weekday(s) on which
you want your Timer executed. All the
weekdays will be displayed – starting with M for
Monday.
Abbreviations for days of the week:
M … Monday
T … Tuesday
W … Wednesday
T … Thursday
F … Friday
S … Saturday
S … Sunday
View, edit or delete a Timer
Bring up an on-screen list of the settings you
have entered. From this list, you can edit or
delete your Timer settings.
To view, edit or delete your Timer settings …
> Select TIMER INDEX from the TIMER SETUP
menu to bring up your list of Timer settings.
The first Timer setting in the list is already high-
lighted.
> Press or to move the cursor to a Timer
setting you wish to edit. (Beo4: Use or ).
> To edit a setting, press the centre button and
follow the procedure described to the left.
(Beo4: Press GO).
> To be able to delete a selected setting, press the
yellow button.
> If you change your mind, press to move the
setting back into the list. You can also press
BACK to exit all menus. (Beo4: Press or press
EXIT).
> Press the yellow button a second time to delete
the setting.
TIMER PROGRAMMING
store GO
SOURCE TV
CHANNEL GROUP
CHANNEL 18 BBC
START TIME 15:40
STOP TIME 16:40
DAYS M . . TF . S
. . .
PLAY TIMER INDEX
delete
edit GO
6:00 - 7:00 TV 3
ZDF MTWTF . .
20:00-22:00 TV 15
CNN MT . . . S .
15:40-16:40 TV 18
BBC M . . TF . .
9

Wake-up Timer
You can make the television wake
you up in the morning.
The Wake-up Timer is a once-only
Timer, it lasts for one hour. Like an
alarm clock it is disabled once it has
been executed. It applies only to the
television it has been programmed
on.
Once you have made one Wake-up
Timer, the television automatically
suggests the time you entered for the
latest Wake-up Timer when you enter
a new one.
Wake-up Timers can of course also
be disabled again.
When you have programmed a Wake-
up Timer, the television cannot be
part of an ordinary Play Timer or
Standby Timer until the Wake-up
Timer has been carried out or
disabled.
You must choose the source and channel
number of your Wake-up Timer as well as the
start time.
To enter settings for a Wake-up Timer …
> Press Menu to bring up the TV SETUP menu
and press to highlight PLAY TIMER. (Beo4:
Use ).
> Press the centre button to bring up the PLAY
TIMER menu and press to highlight WAKE UP
TIMER. (Beo4: Press GO and ).
> Press the centre button to bring up the WAKE
UP TIMER menu. (Beo4: Press GO).
> Press or to move through the menu items.
(Beo4: Use or ).
> Press and use the number buttons to enter
information or press or to view your choices
for each item. (Beo4: Use the number buttons
or or ).
> When you have filled in the required
information, press the centre button to store
your Wake-up Timer. (Beo4: Press GO).
> Press BACK to exit all menus. (Beo4: Press
EXIT).
What’s on the WAKE UP TIMER menu …
SOURCE
Depending upon the option you choose,
SOURCE indicates that a specific source is to be
switched on. Options are:
TV… To switch on the TV.
DTV … To switch on equipment registered as
DTV, such as the optional DVB-T/S.
V.AUX … To switch on equipment registered as
V.AUX, such as a set-top box.
V.AUX2 … To switch on equipment registered
as V.AUX2.
V.MEM … To switch on a connected video tape
recorder.
DVD … To switch on the built-in DVD player.
DVD2 … To switch on a connected DVD player.
CD … To switch on a connected CD player.
N. MUSIC, N. RADIO… For access to music files
stored on a PC or to Internet radio sites. For
further information about these sources, consult
your Bang & Olufsen retailer.
A.MEM … To switch on a connected audio
recorder.
RADIO … To switch on a connected radio.
DTV RADIO … To switch on digital radio. Only
available if your television is equipped with the
optional DVB-T/S module.
(CHANNEL GROUP) … Only available if your
television is equipped with the optional DVB-T/S
module and you select DTV as your source.
Choose the digital satellite channel group.
CHANNEL (Channel number) … Once your source
is chosen, choose the channel number you
want. If you have selected a channel group, only
the channels in the selected group are
accessible.
START TIME … Key in the time when you want
the television to start.
ON/OFF … Change the ON/OFF setting to OFF if
you wish to delete the Wake-up Timer.
You can only use a source, such as A.MEM, if it is
present in your setup.
Enter a Wake-up Timer
WAKE UP TIMER
store GO
SOURCE TV
CHANNEL GROUP
CHANNEL 21 BBC
START TIME 07:00
ON / OFF ON
10

Check or delete a Wake-up Timer
You can call up the settings for the Wake-up
Timer to check the time or to disable the
Wake-up Timer by setting it to OFF.
To change settings for a Wake-up Timer or
delete it …
> Press Menu to bring up the TV SETUP menu
and press to highlight PLAY TIMER. (Beo4:
Use ).
> Press the centre button to bring up the PLAY
TIMER menu and press to highlight WAKE UP
TIMER. (Beo4: Press GO and ).
> Press the centre button to bring up the WAKE
UP TIMER menu. (Beo4: Press GO).
> Press or to move through the menu items.
(Beo4: Use or ).
> Use or to change settings or press and
enter a new time with the number buttons.
Change the ON/OFF setting to OFF if you wish
to delete the Wake-up Timer. (Beo4: Use or
or use the number buttons).
> When you have made your changes, press the
centre button to store them. (Beo4: Press GO).
> Press BACK to exit all menus. (Beo4: Press
EXIT).
PLAY TIMER
select GO
TIMER ON / OFF OFF
TIMER LIST
TIMER PROGRAMMING
WAKE UP TIMER 07:00
11

The main functions of your equipment can be
operated with the Beo5 remote control. Not
all functions may be supported by Beo5. The
available services and functions are shown in
the Beo5 display when you activate the
equipment.
> Press a source button, for example DTV, to
switch on connected equipment.
> Press the button on the Beo5 display that
activates the function you want.
Example of a Beo5 display used to operate a set-
top box.
Example of a Peripheral Unit Controller menu. The
Beo4 buttons are shown to the left on the menu,
and the functions they control are shown to the
right. The menu may also list buttons on the
remote control included with your connected
equipment.
The built-in Peripheral Unit Controller
acts as an interpreter between
connected video equipment, such as
a set-top box, video recorder or DVD
player, and your Bang & Olufsen
remote control.
Use the Bang & Olufsen remote
control to gain access to the
functions offered by your non-Bang &
Olufsen equipment.
When you switch on the equipment,
the functions are available via the
Beo5 display, or via a menu-overlay
on the television screen, if you use a
Beo4 remote control.
For instruction in the various
functions offered by your equipment,
please refer to the product’s own
user’s guide.
Not all connected video equipment are
supported by Bang & Olufsen. For further
information about supported equipment,
contact your Bang & Olufsen retailer.
Operate other equipment with Beo5 or Beo4
Use the Beo5 remote control
PROGRAM GUIDE
RADIO/TV MODE
MENU
INFORMATION
PROGRAM GROUPS
SUBTITLE LANGUAGE
AUDIO LANGUAGE
SETUP
PROGRAM LIST
1
2
3
4
5
PROGRAM GUIDE
RADIO/TV MODE
MENU
INFORMATION
PROGRAM GROUPS
SUBTITLE LANGUAGE
AUDIO LANGUAGE
SETUP
PROGRAM LIST
1
2
3
4
5
DTV
Sky
i Interactive Help
Slow Box office Services
R TV Guide
12

Use equipment menus
Once you have activated connected
equipment, you can operate its own menus
with your remote control.
While equipment menus are shown …
> Press or to move the cursor up or down.
(Beo4: Use or ).
> Press or to move the cursor left or right.
(Beo4: Use or ).
> Press the centre button twice to select and
activate a function. (Beo4: Press GO).
> Press the centre button and then or to step
between menu pages or step in channel lists.
(Beo4: Press GO and or ).
> Press STOP to exit menus, or return to a
previous menu*.
> Press and use the number buttons to enter
information in menus or services when relevant.
(Beo4: Use the number buttons).
> Press BACK to exit menus, enter or exit
different modes, such as radio. (Beo4: Press
EXIT).
> Use the coloured buttons as indicated in the
menus of your connected equipment.
*Depending on the source you have selected, you
may have to press BACK twice instead of STOP to
return to a previous menu. (Beo4: Press EXIT
twice instead of STOP).
Use the Beo4 remote control
If you have a Beo4 remote control, some
functions are available directly via Beo4
when you switch on the equipment.
Additional functions are available through a
Peripheral Unit Controller menu that you
bring up on the screen. In this menu you can
see which Beo4 buttons activate specific
services or functions.
> Press a source button, for example V MEM, to
switch on connected equipment.
> Press MENU to bring up the Peripheral Unit
Controller menu.
> Press the number button that activates the
function you want, or press one of the coloured
buttons to activate a function.
The Peripheral Unit Controller menu cannot be
displayed on the television screen in the link room.
Press GO and then the number button that
activates the function you want or press a
coloured button to activate a function.
When you have selected connected equipment as
a source, press MENU twice to bring up the
television main menu.
Direct Beo4 operation
If you know which Beo4 button activates the
function you want, you can activate the
function without bringing up the Peripheral
Unit Controller menu first.
While your equipment is on …
> Press one of the coloured buttons to activate a
function.
> Press GO and then or to step up or down
through, for example, set-top box channels.
> Press and hold GO to bring up the Program
guide or the ‘Now/Next’ banner on the screen if
you are using a set-top box that supports these
functions.
13

14

Placement, sockets and connections
We expect your Bang & Olufsen
retailer to deliver, install and set up
your products.
However, in this chapter, you can find
out how to place and connect your
television. It also gives you an
overview of the connection panels.
We recommend that you follow the
procedure described below when you set
up your television:
– Unpack and place your television as
described on the following pages
– Consider the appropriate surroundings
for your television.
– Connect the cables, additional
equipment, and speakers as described
on the following pages
– Connect the television to the mains.
This procedure is described in detail on
the following pages.
Advanced operation, 7
All you need to know about using your television beyond daily use, such as how to
operate timed play and timed standby functions, a connected set-top box, and a
connected recorder
Placement, sockets and connections, 15
• Set up the television, 16
• Connection panels, 20
• Sockets for temporary connection, 22
Tuning and preference settings, 25
Find out how to set up your television for the first time and tune in channels. This
chapter also contains information about settings for time, date, picture and sound.
BeoLink system, 49
Find out how to connect an audio system to your television and operate an
integrated audio/video system. Find out how to make link connections, operate a
link system and set up your television in a link room.
Index, 58
Find the subject you want to know more about.
15

Set up the television
For information about the connection
panels, refer to pages 20–22. Never lift the television holding only the
front glass. The television is NOT designed to
stand on its own, it must be supported until
mounted on the chosen stand or bracket.
– Avoid placing your television in direct sunlight
or direct artificial light, such as a spotlight, as
this may reduce the sensitivity of the remote
control receiver. Also if the screen is overheated,
black spots may appear in the picture. These
spots disappear again, once the television cools
down to normal temperature.
– Make sure that the television is set up, placed
and connected in accordance with this Guide.
To prevent injury, use Bang & Olufsen stands or
wall brackets only.
– The television is developed for indoor use in dry,
domestic environments only. Use within a
temperature range of 10–40°C (50–105°F).
– Do not place any items on top of the television.
– Always place your television on a firm and
stable surface.
– Do not attempt to open the television. Leave
such operations to qualified service personnel.
Allow enough space below the screen for adequate
ventilation. Make sure not to cover the fans. If the
television is overheated a warning will appear on
the screen; switch the television to standby, not
off, in order for the television to cool down to
normal temperature.
If you have a motorised stand or a wall bracket,
leave enough space around the television to allow
it to turn and tilt freely.
Handling your television
16

The television can be placed in several ways,
some are illustrated to the right. Please contact
your Bang & Olufsen retailer for further
information.
When you mount the television on one of the
floor stands or wall brackets, you can tilt the
television up and down, as well as turn it left
or right on some of the stands. Note,
however, that only some stands can be
turned and tilted with the remote control,
other stands can only be tilted manually.
While mounting the television on the stand or
bracket, you can use the packaging to support
the products. This eases the mounting.
Once the loudspeaker and television are both
mounted on a stand or bracket, do not carry
them by holding the loudspeaker.
Placement options
Placement of connection panels
1 Cover for card reader (DVB-T/S) and for sockets
for temporary connection, such as camera and
headphones sockets. Push in to open, push
again to close.
2 Mounting bracket for stand or wall bracket.
3 Covers for the connection panel. Here you also
find the mains supply connection. Pull out at
the bottom to remove.
1
2
3
17

>> Set up the television
The diagrams on this page outline how to set
up the television with video sources and loud-
speakers.
The diagrams on the opposite page outline
how to expand your setup, for example in a
home cinema system with a projector and a
home automation system.
Video signals
Connect your video signal sources, such as cable,
antenna, or satellite to the sockets mentioned on
the diagram.
Loudspeakers
Use Bang & Olufsen Power Link speakers. Use the
cables enclosed with the speakers. Longer cables
are available from your Bang & Olufsen retailer.
If you loop the signals from speaker to speaker,
remember to set the L – R switch on each looped
speaker in a pair to different settings.
Additional video equipment
The sockets on the main connection panel allow you
to have many different types of video equipment
connected at the same time. We expect your
Bang & Olufsen retailer to deliver, install and set
up your products.
Connections
IR-transmitters
In order to operate non-Bang & Olufsen products
with your Bang & Olufsen remote control, attach
a low-power IR-transmitter to each of the
products. Plug each IR-transmitter into the
corresponding socket marked PUC on the main
connection panel.
Equipment with HDMI™ input
Equipment with HDMI input can be connected to
any of the four HDMI sockets, regardless of the
particular AV socket group to which you have
connected the equipment. For further information
about how to set up connected equipment for
use, refer to the chapter ‘Register additional video
equipment’ on page 30.
This diagram shows types of additional video
equipment that can be connected to the television
at one time, as well as the source name you can
choose for the equipment in the CONNECTIONS
menu, which is described on page 30.
POWER LINK 1
SUB
POWER
LINK
2–6
DVB-S
DVB-T ANT 3
ANT 2
ANT 1
AV 5
MASTER LINK
VGA
BeoMedia
[PC]
AV 6
AV 2
AV 1
Camera
[CAMERA]
Digital Satellite
[DTV]
HDR
[VMEM]
18

Audio system
If you have a Bang & Olufsen audio system with a
Master Link socket, you can connect it to your tele-
vision. Use a Master Link cable, and connect it to
the Master Link socket on the main connection
panel. Refer to ‘Connect your audio system to the
television’ on page 50 in the Reference book.
Home cinema setup with projector and a
home automation system
The television also supports the use of a projector.
You can also connect a home automation system
to the television, and thereby control room lights
and curtains.
If the built-in receiver for the remote control signals
(IR-receiver) is hidden behind the lowered projection
screen, you must set up an external IR receiver, as
well. The IR-receiver is available as an optional
accessory from your Bang & Olufsen retailer.
Mains supply connection
Connect the television to the wall outlet. Use the
~ socket on the main connection panel. A tiny, red
light appears in the IR-receiver. The television is in
standby mode and ready to be used*.
The television can only be switched off completely
by disconnecting it from the wall socket.
The supplied mains cord and plug are specially
designed for the television. If you change the plug
or in any way damage the mains cord, it will affect
the TV picture quality!
PROJECTOR OUT
PUC 1+2
IR-IN
CINEMA CONTROL
Home
Automation
system
ML
19
*Note! It takes the television 20 seconds to start
up and become ready for use.

Connection panels
The connection panels on your
television allow you to connect signal
input cables as well as a variety of
extra equipment, such as a video
recorder or a linked Bang & Olufsen
music system.
Any equipment you connect to these
sockets must be registered in the
CONNECTIONS menu. For further
information, refer to the chapter
‘Register additional video equipment’
on page 30.
For further information about
connecting speakers in a surround
sound setup, refer to the chapter ‘Set
up the television’ on page 16.
PROJECTOR OUT (DVI-D OUT)
Sockets for connection of a projector.
HDMI-IN (A – D)
HDMI™ (High Definition Multimedia Interface)
sockets for connection of an HDMI video source
or a PC. Sources connected to these sockets can
be registered to any of the AV sockets. Supported
formats are: TDMS HDMI, 50 and 60 Hz, 480p,
576p, 600p, 768p, 576i, 480i, 720p, 1080p,
1080i.
AV 1
21-pin socket for the AV connection of a primary
recorder or set-top box. You can also connect other
types of extra video equipment.
AV 2
21-pin socket for the AV connection of a secondary
recorder or additional video equipment.
AV 3
21-pin socket for the AV connection of additional
video equipment.
The television keeps a signal path open between a
recorder connected to the AV1 socket and a
recordable source connected to the AV3 socket.
This allows you to set the source on AV3 to switch
on automatically, as well as set a recorder on AV1
for timed recording of the source on AV3, provided
your connected equipment supports these functions.
AV 5
Socket group for the AV connection of additional
video equipment.
PUC (AV 1 – AV 3, AV 5)
For IR control signals to external equipment
connected to one of the AV sockets.
POWER
LINK
CENTRE
1
1 (SUB)
2
3
4
5
6
MASTER LINK
STAND
AV 5
R INL IN
VIDEO
IN SPDIF PUC
SPDIF
SPDIF
PUC Y
Y
Pb
Pb
PrSPDIF
Pr
AV 1
AV 3
AV 2
CONTROL
PUC
PUC
TTL RS232 PUC 1+2 IR-IN
HDMI INDVI-D OUT
APROJECTOR OUT B C D
DTV DATA
CINEMA
CONTROL
VGA IN
1
Analogue
DVB-S
DVB-T
2
3
ANT
LINK TV
OUT
20
/