Supermicro L3 Configuration manual
- Category
- Networking
- Type
- Configuration manual
This manual is also suitable for

L2 / L3 Switches
Access Control Lists (ACL)
Configuration Guide
Revision 1.0

ACL Configuration Guide
Supermicro L2/L3 Switches Configuration Guide
2
The information in this USER’S MANUAL has been carefully reviewed and is believed to be accurate. The vendor
assumes no responsibility for any inaccuracies that may be contained in this document, makes no commitment to
update or to keep current the information in this manual, or to notify any person or organization of the updates.
Please Note: For the most up-to-date version of this manual, please see our web site at www.supermicro.com.
Super Micro Computer, Inc. (“Supermicro”) reserves the right to make changes to the product described in this
manual at any time and without notice. This product, including software, if any, and documentation may not, in
whole or in part, be copied, photocopied, reproduced, translated or reduced to any medium or machine without
prior written consent.
IN NO EVENT WILL SUPERMICRO BE LIABLE FOR DIRECT, INDIRECT, SPECIAL, INCIDENTAL, SPECULATIVE OR
CONSEQUENTIAL DAMAGES ARISING FROM THE USE OR INABILITY TO USE THIS PRODUCT OR DOCUMENTATION,
EVEN IF ADVISED OF THE POSSIBILITY OF SUCH DAMAGES. IN PARTICULAR, SUPERMICRO SHALL NOT HAVE
LIABILITY FOR ANY HARDWARE, SOFTWARE, OR DATA STORED OR USED WITH THE PRODUCT, INCLUDING THE
COSTS OF REPAIRING, REPLACING, INTEGRATING, INSTALLING OR RECOVERING SUCH HARDWARE, SOFTWARE, OR
DATA.
Any disputes arising between manufacturer and customer shall be governed by the laws of Santa Clara County in
the State of California, USA. The State of California, County of Santa Clara shall be the exclusive venue for the
resolution of any such disputes. Super Micro's total liability for all claims will not exceed the price paid for the
hardware product.
FCC Statement: This equipment has been tested and found to comply with the limits for a Class A digital device
pursuant to Part 15 of the FCC Rules. These limits are designed to provide reasonable protection against harmful
interference when the equipment is operated in a commercial environment. This equipment generates, uses, and
can radiate radio frequency energy and, if not installed and used in accordance with the manufacturer’s instruction
manual, may cause harmful interference with radio communications. Operation of this equipment in a residential
area is likely to cause harmful interference, in which case you will be required to correct the interference at your
own expense.
California Best Management Practices Regulations for Perchlorate Materials: This Perchlorate warning applies only
to products containing CR (Manganese Dioxide) Lithium coin cells. Perchlorate Material-special handling may
apply. See http://www.dtsc.ca.gov/hazardouswaste/perchlorate/ for further details.
Manual Revison 1.0
Release Date: December 18, 2012
Unless you request and receive written permission from Super Micro Computer, Inc., you may not copy any part of
this document.
Information in this document is subject to change without notice. Other products and companies referred to
herein are trademarks or registered trademarks of their respective companies or mark holders.
Copyright © 2012 by Super Micro Computer, Inc.
All rights reserved.
Printed in the United States of America

ACL Configuration Guide
Supermicro L2/L3 Switches Configuration Guide
3
Contents
1 ACL Configuration Guide ....................................................................................................................... 4
1.1 What is ACL ................................................................................................................................... 5
1.2 How ACL works in Hardware ASIC ................................................................................................ 5
1.3 Types of ACL .................................................................................................................................. 5
1.3.1 MAC Extended ACL................................................................................................................ 6
1.3.2 IP Standard ACL ..................................................................................................................... 6
1.3.3 IP Extended ACL .................................................................................................................... 6
1.4 MAC Extended ACL ....................................................................................................................... 7
1.4.1 Creating MAC Extended ACL ................................................................................................. 7
1.4.2 Modifying MAC Extended ACL ............................................................................................ 10
1.4.3 Removing MAC Extended ACL............................................................................................. 10
1.4.4 Applying MAC Extended ACL to Interfaces ......................................................................... 11
1.4.5 Displaying MAC Extended ACL ............................................................................................ 12
1.4.6 MAC Extended ACL Configuration Example 1 ..................................................................... 13
1.5 IP Standard ACL ........................................................................................................................... 14
1.5.1 Creating IP Standard ACL .................................................................................................... 15
1.5.2 Modifying IP Standard ACL .................................................................................................. 16
1.5.3 Removing IP Standard ACL .................................................................................................. 17
1.5.4 Applying IP ACL to Interfaces .............................................................................................. 17
1.5.5 Displaying IP Standard ACL ................................................................................................. 19
1.5.6 IP Standard ACL Configuration Example 1 .......................................................................... 20
1.6 IP Extended ACL .......................................................................................................................... 21
1.6.1 Creating IP Extended ACL for IP Traffic ............................................................................... 22
1.6.2 Creating IP Extended ACL for TCP Traffic ............................................................................ 23
1.6.3 Creating IP Extended ACL for UDP Traffic ........................................................................... 25
1.6.4 Creating IP Extended ACL for ICMP Traffic ......................................................................... 27
1.6.5 Modifying IP Extended ACL ................................................................................................. 29
1.6.6 Removing IP Extended ACL ................................................................................................. 29
1.6.7 Applying IP Extended ACL to Interfaces .............................................................................. 30
1.6.8 Displaying IP Extended ACL ................................................................................................. 30
1.6.9 IP Extended ACL Configuration Example 1 .......................................................................... 33

ACL Configuration Guide
Supermicro L2/L3 Switches Configuration Guide
4
1 ACL Configuration Guide
This document describes the Access Control Lists (ACL) feature supported in Supermicro Layer 2 / Layer
3 switch products.
Access Control List configurations with examples are explained in this document in detail.
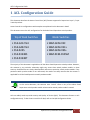
This document covers the ACL configurations for the below listed Supermicro switch products.
The majority of this document is applicable to all the above listed Supermicro switch products. However,
the contents in any particular subsection might vary across these switch product models. In those
sections, the differences are clearly identified with reference to particular switch product models. If any
particular switch product model is not referenced, the reader can safely assume that the content is
applicable for all the listed Supermicro switch product models.
In this entire document, the common term “switch” refers to any of the above listed
Supermicro switch product models unless another switch product model is named.
ACLs are widely used to provide security and Quality of Service (QoS). This document focuses on ACL
configurations only. To learn how to use ACLs for QoS, refer to the QoS Configuration Guide.
Top of Rack Switches
• SSE-G24-TG4
• SSE-G48-TG4
• SSE-X24S
• SSE-X3348S
• SSE-X3348T
Blade Switches
• SBM-GEM-X2C
• SBM-GEM-X2C+
• SBM-GEM-X3S+
• SBM-XEM-X10SM

ACL Configuration Guide
Supermicro L2/L3 Switches Configuration Guide
5
1.1 What is ACL
ACL is used to filter or redirect any particular traffic flow on the switch.
ACLs can be configured to match packets based on Layer 2 MAC, Layer 3 IP or Layer 4 TCP/UDP
parameters.
Every packet entering the switch is checked for the configured ACLs. If any packet contents match any of
the configured ACL , that packet will be handled according to the matched ACL configured action.
ACL configuration provides the following actions that can be applied on matched traffic flow.
1.2 How ACL works in Hardware ASIC
Supermicro switches implement ACL in hardware ASIC (Application Specific Integrated Circuit) to provide
line rate ACL processing for all incoming traffic.
User configured ACL rules are programmed in an ACL table in ASIC. Layer 2 MAC extended ACL and
Layer 3 IP ACL are implemented in two separate hardware tables, which are TCAM tables in ASIC.
ASIC analyzes the first 128 bytes of every received packet and extracts the packet contents for key fields
in the Layer 2, Layer 3 and Layer 4 headers. ASIC looks up the ACL tables to find a matching ACL rule for
the extracted content of the packet. ASIC compares the values of the configured fields only and it treats
all other fields as “do not care”. Once a matching ACL is found, ASIC stops looking in that ACL table.
ASIC applies the configured action of the matching ACL rule to the matched packet. This could result in it
dropping that packet, redirecting it to any particular port or simply allowing the packet to be forwarded
through the switch.
A lookup on Layer 2 ACL table and Layer 3 ACL table happens simultaneously. If any packet matches the
ACL rules of both Layer 2 and Layer 3 ACL tables, the actions configured on both ACL rules will be
applied. In this case, conflicting actions configured on Layer 2 and Layer 3 ACL tables for the same traffic
could lead to unpredictable behavior. Hence it is suggested to avoid such ACL use cases.
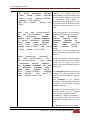
1.3 Types of ACLs
Supermicro switches support the following three different types of ACLs.
• The switch drops all packets matching this ACL
Deny
• The switch redirects all packets matching this ACL to any
configured redirect port
Redirect
• The switch permits all packets matching this ACL
Permit

ACL Configuration Guide
Supermicro L2/L3 Switches Configuration Guide
6
1.3.1 MAC Extended ACL
A MAC Extended ACL allows users to control the traffic based on fields in Ethernet MAC and VLAN
headers.
Users can configure the traffic flow based on source MAC address, destination MAC address or Ethernet
type field value. Users can also use VLAN identifiers to configure the traffic flow.
Users can choose to deny, redirect or permit the configured traffic flow using a MAC Extended ACL.
1.3.2 IP Standard ACL
An IP Standard ACL allows users to control the traffic based on the fields in an IP header.
Users can configure the traffic flow based on source IP address and destination IP address.
Users can choose to deny, redirect or permit the configured traffic flow using an IP Standard ACL.
1.3.3 IP Extended ACL
An IP Extended ACL allows users to control the traffic based on fields in an IP header, ICMP header, TCP
header and UDP header.
Users can configure the traffic flow based on source IP address, destination IP address, protocol field in
IP header, TOS field in IP header or by using a DSCP priority in an IP header.
Users can also configure the traffic flow based on ICMP message type, ICMP message code, TCP port
number or UDP port number.
Users can choose to deny, redirect or permit the configured traffic flow using an IP Extended ACL.
Three
types
of ACL
MAC Extended ACL
IP Standard ACL
IP Extended ACL

ACL Configuration Guide
Supermicro L2/L3 Switches Configuration Guide
7
1.4 MAC Extended ACL
Supermicro switches support up to 128 MAC Extended ACLs.
Users can define a MAC Extended ACL with a deny, permit or redirect action rule. A MAC Extended ACL
can be defined only with one rule. To implement multiple rule ACLs, configure multiple MAC Extended
ACLs.
There is no implied deny all rule in Supermicro switch ACLs. By default
,
all packets not
matching a configured ACL rule will be forwarded automatically. For any traffic to be denied,
it has to be configured with an explicit deny rule.
The permit rule is widely used for QoS applications. In some cases permit rules are useful when all traffic
is denied by a rule and a few specific hosts are to be permitted. In this case, permit rules have to be
created before deny rules to make sure switch hardware processes permit rules first.
MAC Extended ACLs allow users to configure the traffic flow with the following fields.
Source MAC Address
Destination MAC Address
Non-IP Protocol
Ethernet type field in an Ethernet Header
VLAN Identifier
MAC Extended ACL rules can be created and identified either a with an ACL number such as 1,2,3 or with
a name string. An ACL identifier number can be any number from 1 to 65535. An ACL identifier name
can be any string length not exceeding 32 characters.
1.4.1 Creating MAC Extended ACLs
Follow the steps below to create a MAC Extended ACL.
Step Command Description
Step 1
configure terminal
Enter the configuration mode
Step 2
mac access
-
list extended
{ <
access-list-number
>
| <access-list-name> }
Create
s
a MAC Extended ACL using
the
mac-access-list extended command.
access-list-number – can be any
number from 1 to 65535
access-list-name – any name string up
to 32 characters.
Step 3
deny { any | host <src-mac-address>}
{
any | host <dest-mac-address> } [aarp
|
amber | dec-spanning | decnet-iv
|
Configure
s
a deny ACL rule
,
a
permit
ACL rule or a redirect ACL rule.

ACL Configuration Guide
Supermicro L2/L3 Switches Configuration Guide
8
diagnostic | dsm | etype-6000 | etype-8042
| lat | lavc-sca | mop-console | mop-dump
| msdos | mumps | netbios | vines-echo
| vines-ip | xns-id | <protocol (0-65535)>
]
[ encaptype <value (1-65535)>]
[Vlan <vlan-id (1-4069)>] [priority <value
(1-255)>]
or
permit { any | host <src-mac-address
>}{
any | host <dest-mac-address> } [aarp
|
amber | dec-spanning | decnet-iv
|
diagnostic | dsm | etype-6000 |etype-8042
|
lat | lavc-sca | mop-console | mop-dump
|
msdos | mumps | netbios | vines-echo
|
vines-ip | xns-id | <protocol (0-65535
)>] [
encaptype <value (1-65535)>][ Vlan <vlan-id
(1-4069)>] [priority <value (1-255)>]
or
redirect <interface-type> <interface-id
> {
any | host <src-mac-address>}{ any
|
host <dest-mac-address> } [aarp | amber
| dec-spanning | decnet-iv | diagnostic
|
dsm | etype-6000 | etype-8042 | lat | lavc-
sca | mop-console | mop-dump | msdos
|
mumps | netbios | vines-echo | vines-ip
|
xns-id | <protocol (0-65535)>] [ encaptype
<value (1-65535)>][ Vlan <vlan-id (1-
4069)>] [priority <value (1-255)>]
The source and destination MAC
addresses are provided with the
keyword host. The keyword any is used
to refer any MAC addresses. If a source
or destination MAC address is
configured as any, the switch will not
check that source or destination MAC
address to match the packets for this
ACL.
User can configure any of the following
non-IP protocols to match for this rule.
aarp | amber | dec-spanning
|
decnet-iv | diagnostic | dsm
|
etype-6000 | etype-8042 | lat
|
lavc-sca | mop-console | mop-
dump | msdos | mumps
|
netbios | vines-echo | vines-ip
|
xns-id
Alternatively, users can configure the
protocol number to be matched for this
ACL rule.
This Non-IP protocol or protocol type is
an optional parameter. If not provided,
switch will not check the Non-IP
protocol field while matching packets
for this ACL.
The encaptype keyword can be used to
configure the Ethernet header Encap
Type field to be matched to apply this
ACL rule.
This encaptype is an optional
parameter. If not provided, switch will
not check this field while matching
packets for this ACL.
If this ACL rule is to be applied only to a
particular VLAN, user can configure
VLAN number using Vlan keyword.
This Vlan is an optional parameter. If
not provided, switch will not check
VLAN while matching packets for this
ACL.
The priority keyword lets user assign a

ACL Configuration Guide
Supermicro L2/L3 Switches Configuration Guide
9
priority for this ACL rule.
This priority is an optional parameter. It
can be any value from 1 to 255. The
default value is 1.
Redirect ACL rule needs additional
<interface-type> <interface-id
>
parameters to define the port to which
the packets matching this ACL rule need
to be redirected.
Step 4
show
access
-
lists
D
isplay
s
the configured ACL rule
s
Step 5
write startup
-
config
Optional step
–
Save
s
this
ACL
configuration to be part of startup
configuration.
Every ACL
is
applied
to
all ports by default.
A
ny ACL
that
needs to be applied only
to
particular ports needs to be configured as described in section Applying MAC Extended ACL
to Interfaces.
The below examples show various ways of creating a MAC Extended ACL.
Create a deny MAC Extended ACL with ACL number 100 to deny all traffic from MAC 00:25:90:01:02:03
SMIS# configure terminal
SMIS(config)# mac access-list extended 100
SMIS(config-ext-macl)# deny host 00:25:90:01:02:03 any
Create a permit MAC Extended ACL with ACL name acl_cw3 to permit all traffic from MAC
00:25:30:01:02:03
SMIS# configure terminal
SMIS(config)# mac access-list extended acl_cw3
SMIS(config-ext-macl)# permit host 00:25:30:01:02:03 any
Create a redirect MAC Extended ACL to redirect all packets from MAC 00:25:90:01:02:03 going to MAC
00:25:90:01:02:04 to interface gi 0/10.
SMIS# configure terminal
SMIS(config)# mac access-list extended 1
SMIS(config-ext-macl)# redirect gi 0/10 host 00:25:90:01:02:03 host 00:25:90:01:02:04

ACL Configuration Guide
Supermicro L2/L3 Switches Configuration Guide
10
1.4.2 Modifying MAC Extended ACLs
To modify a configured MAC Extended ACL, follow the same steps used to create a MAC Extended ACL.
When users modify an ACL with a deny, permit or redirect rule, the previously configured rule and its
parameters for that ACL will be completely overwritten with the newly provided rules and parameters.
The below example shows a MAC Extended ACL rule 50 that is created and later modified with different
parameters.
SMIS# configure terminal
SMIS(config)# mac access-list extended 50
SMIS(config-ext-macl)# deny host 00:25:90:01:02:03 any
SMIS(config-ext-macl)# end
# Modify this ACL’s rule 50 to deny traffic destined to a particular host MAC instead of any
SMIS# configure terminal
SMIS(config)# mac access-list extended 50
SMIS(config-ext-macl)# deny host 00:25:90:01:02:03 host 00:25:90:01:02:04
1.4.3 Removing MAC Extended ACLs
Follow the steps below to remove MAC Extended ACLs.
Step Command Description
Step 1
configure terminal
Enter
s
the configuration mode
Step 2
no
mac access
-
list
extended
{ <
access-list-
number> | <access-list-name> }
Delete
s
a MAC Extended ACL using
no
mac-access-list extended command.
access-list-number – the ACL number
that needs to be deleted
access-list-name – the name of the
ACL that needs to be deleted
Step 3
show access
-
lists
D
isplay
s
the configured ACL rule
s
to
make sure the deleted ACL is removed
properly
Step 4
write startup
-
config
Optional step
–
Save
s
this ACL
configuration to be part of startup
configuration.
The example below shows how to remove a MAC Extended ACL .
SMIS# configure terminal
SMIS(config)# no mac access-list extended 50

ACL Configuration Guide
Supermicro L2/L3 Switches Configuration Guide
11
1.4.4 Applying MAC Extended ACLs to Interfaces
MAC Extended ACLs are applied to all physical interfaces by default. If users prefer to apply any MAC
Extended ACL only to certain ports, the steps below need to be followed.
Adding MAC Extended ACL to port
Step Command Description
Step 1
configure terminal
Enter
s
the configuration mode
Step 2
Interface
<interface-type> <interface-
id>
or
interface range <interface-type> <interface-id>
….
The port or port lists on which this MAC
Extended ACL needs to be applied.
Step 3
mac access
-
group
{ <short (1-65535)> |
<string(32)> } in
Add
s
the MAC Extended ACL to this
port.
access-list-number – the ACL number
that needs to be added
access-list-name – the name of the
ACL that needs to be added
Step 4
show access
-
lists
D
isplay
s
the config
ured ACL rules to
make sure this port is added to the
required ACL.
Step 5
write startup
-
config
Optional step
–
Save
s
this ACL
configuration to be part of startup
configuration.
The example below shows applying a MAC Extended ACL rule 100 to ports gi 0/1 and gi 0/10.
SMIS# configure terminal
SMIS(config)# int gi 0/1
SMIS(config-if)# mac access-group 100 in
SMIS(config-if)# exit
SMIS(config)# int gi 0/10
SMIS(config-if)# mac access-group 100 in
Removing MAC Extended ACL from port
Step Command Description
Step 1
configure terminal
Enter
s
the configuration mode
Step 2
Interface
<interface-type> <interface-
id>
or
interface range <interface-type> <interface-id>
….
The port or port lists from which this
MAC Extended ACL needs to be
removed.

ACL Configuration Guide
Supermicro L2/L3 Switches Configuration Guide
12
Step 3
no
mac access
-
group
{ <short (1-65535)> |
<string(32)> } in
Remove
s
the MAC Extended ACL from
this port.
access-list-number – the ACL number
that needs to be removed from this
interface.
access-list-name – the name of the
ACL which needs to be removed from
this interface.
Step 4
show access
-
lists
D
isplay
s
the configured ACL rules to
make sure this port is removed from
required ACL.
Step 5
write startup
-
config
Optional step
–
Save
s
this ACL
configuration to be part of startup
configuration.
1.
When a MAC Extended ACL is removed from all the ports
it was applied
to
, that ACL
will become a switch-wide ACL (applied to all physical ports).
2. MAC Extended ACLs can be added only to physical ports like gi, ex or qx ports. They
cannot be added to Layer 3 vlan interfaces or port channel interfaces.
3. A MAC Extended ACL can be applied to many ports by following the above steps. In
the same way, many MAC Extended ACLs can be applied to a single port.
The example below shows the commands for removing a MAC Extended ACL from a port.
SMIS# configure terminal
SMIS(config)# int gi 0/1
SMIS(config-if)# no mac access-group 100 in
1.4.5 Displaying MAC Extended ACLs
Step Command Description
Step 1
show access
-
lists
or
show access-lists mac { <access-list-number (1-
32768)> | <access-list-name> ]
Enter
s
the configuration mode
access-list-number – the ACL number
that needs to be displayed
access-list-name – the name of the
ACL which needs to be displayed
The show command displays the following information for every MAC Extended ACL:

ACL Configuration Guide
Supermicro L2/L3 Switches Configuration Guide
13
Filter Priority
ACL’s c
onfigured or default priority
Protocol Type
Configured
n
on
-
IP protocol. If not configured, it shall be displayed as
zero.
EncapType
Configured
Encaptype. If not configured, it shall be displayed as zero.
Vlan Id
Configured VLAN identifier.
Destination MAC
Address
Configured destination host MAC address. Displays 00:00:00:00:00:00
for any destination MAC address
Source MAC Address
Configured
source host MAC address. Displays 00:00:00:00:00:00 for any
source MAC address
In Port List
The list of ports this ACL is applied
to
. If it is applied
to
all ports, this will
be NIL.
Filter Action
Configured ACL action rule
–
deny
,
permit
or
redire
ct
Status
Current status of the ACL. The status
should normally
be
active
. In case
of configuration errors, the ACL status may be inactive.
The below example displays a MAC Extended ACL
SMIS# show access-lists mac 100
Extended MAC Access List 100
-----------------------------
Filter Priority : 1
Protocol Type : 0
EncapType : 0
Vlan Id :
Destination MAC Address : 00:25:90:01:02:03
Source MAC Address : 00:00:00:00:00:00
In Port List : Gi0/2
Filter Action : Deny
Status : Active
1.4.6 MAC Extended ACL Configuration Example 1
This example describes the commands required to implement the following ACL requirements on the
network setup shown in Figure ACL-1.
ACL 1 – Deny all traffic going from Server A to the gateway.
ACL 2 – Redirect all vlan 20 traffic coming from the gateway to server B.

ACL Configuration Guide
Supermicro L2/L3 Switches Configuration Guide
14
Figure ACL-1: MAC Extended ACL Example 1
ACL 1 Configuration
SMIS# configure terminal
SMIS(config)# mac access-list extended 1
SMIS(config-ext-macl)# deny host 00:25:90:01:01:0a host 00:25:90:01:01:0c
ACL 2 Configuration
SMIS# configure terminal
SMIS(config)# mac access-list extended 2
SMIS(config-ext-macl)# redirect gi 0/5 host 00:25:90:01:01:0c any vlan 20
1.5 IP Standard ACLs
Supermicro switches support 128 IP ACLs, which includes both IP Standard and IP Extended ACLs.
Users can define IP Standard ACLs with deny, permit or redirect action rules. An IP Standard ACL can be
defined only with one rule. To implement multiple rule ACLs, configure multiple IP Standard ACLs.
There is no implied deny all rule in Supermicro switch ACLs. By default
,
all packets not
matching a configured ACL rule will be forwarded automatically. For any traffic to be denied,
it has to be configured with explicit deny rule.
The permit rule is widely used for QoS applications. In some cases permit rules are useful when all traffic
is denied by a rule and a few specific hosts are to be permitted. In this case, permit rules have to be
created before deny rules to make sure switch hardware processes permit rules first.
Local
Network
Server A
00:25:90:01:01:0a
Server B
00:25:90:01:01:0b
Gateway
00:25:90:01:01:0c
Gi 0/10
Switch
Gi 0/1
Gi 0/5

ACL Configuration Guide
Supermicro L2/L3 Switches Configuration Guide
15
IP Standard ACLs allow users to configure the traffic flow with the following fields.
Source IP Address
Destination IP Address
IP Standard ACL rules can be created and identified either a with an ACL number as such as 1,2 or 3 or
with a name string. An ACL identifier number can be any number from 1 to 32768. An ACL identifier
name can be any string length not exceeding 32 characters.
IP Standard ACLs and IP Extended ACLs share the
same
ACL numbers and names. Hence ACL
numbers and names across all IP Standard and IP Extended ACLs have to be unique. In other
words, the same ACL number or name cannot be used for both IP Standard ACLs and IP
Extended ACLs.
1.5.1 Creating IP Standard ACLs
Follow the steps below to create an IP Standard ACL.
Step Command Description
Step 1
configure terminal
Enter
s
the configuration mode
Step 2
ip
access
-
list standar
d
{ <
access-list-number(1-
32768)> | <access-list-name> }
Create
s
a
n IP Standard
ACL using
ip
-
access-list standard command.
access-list-number – can be any
number from 1 to 32768
access-list-name – can be any name
string up to 32 characters.
Step 3
deny { any | host <ucast_addr>
|
<ucast_addr> <ip_mask> } [ {any | host
<ip_addr> | <ip_addr> <ip_mask> } ]
or
permit { any | host <src-ip-address> | <src-
ip-address> <mask> } [ { any | host
<dest-ip-address> | <dest-ip-address> <mask>
} ]
or
redirect <interface-type> <interface-id> { any
| host <src-ip-address> | <src-ip-address>
<mask> } [ { any | host <dest-ip-
address> | <dest-ip-address> <mask> } ]
Configure a deny ACL rule or permit
ACL rule or redirect ACL rule.
The source and destination IP
addresses are provided with the
keyword host.
The keyword any is used to refer to any
IP addresses.
To configure a network IP, address and
mask could be provided.
A redirect ACL rule needs additional
<interface-type> <interface-id
>
parameters to define the port to which
the packets matching this ACL rule need
to be redirected.
Step 4
show access
-
lists
D
isplay
s
the configured ACL rule
Step 5
write
startup
-
config
Optional step
–
Save
s
this ACL
configuration to be part of startup

ACL Configuration Guide
Supermicro L2/L3 Switches Configuration Guide
16
configuration.
Every ACL
is
applied
to
all ports by default. If any ACL needs to be applied only
to
particular
ports, it needs to be configured as described in section Applying IP ACL to Interfaces.
The examples below show different ways to create IP Standard ACLs.
Create a deny IP Standard ACL with ACL number 100 to deny all traffic from IP 172.10.10.10 to IP
172.10.10.1
SMIS# configure terminal
SMIS(config)# ip access-list standard 100
SMIS(config-std-nacl)# deny host 172.10.10.10 host 172.10.10.1
Create a permit IP Standard ACL with ACL name acl_cw3 to permit all traffic from IP 172.10.10.1
SMIS# configure terminal
SMIS(config)# ip access-list standard acl_cw3
SMIS(config-std-nacl)# permit host 172.10.10.1 any
Create a redirect IP Standard ACL to redirect all packets from subnet 172.20.20.X going to IP
172.20.0.1 to interface gi 0/10.
SMIS# configure terminal
SMIS(config)# ip access-list standard 1
SMIS(config-std-nacl)# redirect gi 0/10 172.20.20.0 255.255.255.0 host 172.20.0.1
1.5.2 Modifying IP Standard ACLs
To modify a configured IP Standard ACL, follow the same steps used to create a IP Standard ACL. When
users modify an ACL with a deny, permit or redirect rule, the previously configured rule and its
parameters for that ACL will be completely overwritten with the newly provided rules and parameters.
The example below shows an IP Standard ACL rule 50 being created and then modified with different
parameters.
SMIS# configure terminal
SMIS(config)# ip access-list standard 50
SMIS(config-std-nacl)# deny 172.10.0.0 255.255.0.0 any
# Modify this ACL rule 50 to deny traffic destined to a particular host IP instead of to any.

ACL Configuration Guide
Supermicro L2/L3 Switches Configuration Guide
17
SMIS# configure terminal
SMIS(config)# ip access-list standard 50
SMIS(config-std-nacl)# deny 172.10.0.0 255.255.0.0 host 172.50.0.1
1.5.3 Removing IP Standard ACLs
Follow the below steps to remove MAC Extended ACLs.
Step Command Description
Step 1
configure terminal
Enter
s
the configuration mode
Step 2
no ip
access
-
list standar
d
{ <
access-list-
number(1-32768)r> | <access-list-name> }
Delete
s
an IP Standard ACL using
no ip
-
access-list standard command.
access-list-number – the ACL number
that needs to be deleted
access-list-name – the name of the
ACL that needs to be deleted
Step 3
show acce
ss
-
lists
D
isplay
s
the configured ACL rules to
make sure the deleted ACL is removed
properly
Step 4
write startup
-
config
Optional step
–
Save
s
this ACL
configuration to be part of startup
configuration.
The example below shows how to remove an IP Standard ACL .
SMIS# configure terminal
SMIS(config)# no ip access-list standard 50
1.5.4 Applying IP ACLs to Interfaces
IP Standard and Extended ACLs are applied to all physical interfaces by default. If users prefer to apply
any IP Standard or Extended ACL only to certain ports, the steps below need to be followed.
Adding an IP Standard / Extended ACL to a port
Step Command Description
Step 1
configure terminal
Enter
s
the configuration mode
Step 2
i
nterface
<interface-type> <interface-id>
or
interface range <interface-type> <interface-id>
….
Defines t
he port or port lists on which
this IP Standard / Extended ACL needs
to be applied
Step 3
ip access
-
group
{ <access-list-number (1-
65535)> | <access-list-name>
Add
s
the
IP Standard /
Extended ACL to
this port

ACL Configuration Guide
Supermicro L2/L3 Switches Configuration Guide
18
access-list-number – the ACL number
that needs to be added
access-list-name – the name of the
ACL which needs to be added
Step 4
show access
-
lists
D
isplay
s
the configured ACL rules to
make sure this port has added the
required ACL
Step 5
write startup
-
config
Optional step
–
Save
s
this ACL
configuration to be part of startup
configuration
The example below shows applying an IP Standard ACL rule 100 to ports gi 0/1 and gi 0/10.
SMIS# configure terminal
SMIS(config)# interface gi 0/1
SMIS(config-if)# ip access-group 100
SMIS(config-if)# exit
SMIS(config)# int gi 0/10
SMIS(config-if)# ip access-group 100
Removing an IP Standard / Extended ACL from a port
Step Command Description
Step 1
configure
terminal
Enter
s
the configuration mode
Step 2
i
nterface
<interface-type> <interface-
id>
or
interface range <interface-type> <interface-id>
….
The port or port lists from which this
MAC Extended ACL needs to be
removed
Step 3
no ip access
-
group
[
{ <access-list-number (1-
65535)> | <access-list-name> } ]
Remove
s
the
IP Standard /
Extended
ACL from this port
access-list-number – the ACL number
that needs to be removed from this
interface
access-list-name – the name of the
ACL that needs to be removed from this
interface
Step 4
show access
-
lists
D
isplay
s
the configured ACL rules to
make sure this port has been removed
from the required ACL
Step 5
write startup
-
config
Optional step
–
Save
s
this ACL
configuration to be part of startup
configuration.

ACL Configuration Guide
Supermicro L2/L3 Switches Configuration Guide
19
1.
When an IP Standard / Extended ACL is removed from all the ports it was applied
to
,
that ACL will become a switch wide ACL (applied to all physical ports).
2. IP Standard and Extended ACLs can be added only to physical ports like gi, ex or qx
ports. ACLs cannot be added to Layer 3 vlan interfaces or port channel interfaces.
3. An IP Standard / Extended ACL can be applied to many ports by following the above
steps. Same way many IP Standard / Extended ACLs can be applied on a single port.
The example below shows the commands for removing an IP Extended ACL from a port.
SMIS# configure terminal
SMIS(config)# int gi 0/1
SMIS(config-if)# no ip access-group 100
1.5.5 Displaying IP Standard ACLs
Step Command Description
Step 1
show access
-
lists
or
show access-lists ip { <access-list-number (1-
32768)> | <access-list-name> ]
Enter
s
the configuration mode
access-list-number – the ACL number
that needs to be displayed
access-list-name – the name of the
ACL that needs to be displayed
The show command displays the following information for every IP Standard ACL.
Source IP Address
Configured source host or
subnet IP address. Displays 0.0.0.0 for any
source IP.
Source IP Address
Mask
Configured source subnet IP mask. For host IP address, the mask will be
displayed as 255.255.255.255.
Destination IP
Address
Configured destination host or subnet IP address. D
isplays 0.0.0.0 for
any destination IP.
Destination IP
Address Mask
Configured destination subnet IP mask. For host IP address, the mask will
be displayed as 255.255.255.255.
In Port List
The list of ports this ACL is applied
to
. If it is applied
to
all ports, this will
be NIL.
Filter Action
Configured ACL action rule
–
deny
,
permit
or
redirect
Status
Current status of the ACL. The status
should normally
be
active
. In case
of configuration errors, the ACL status may be inactive.

ACL Configuration Guide
Supermicro L2/L3 Switches Configuration Guide
20
The example below displays an IP Standard ACL
SMIS# show access-lists ip 1
Standard IP Access List 1
----------------------------
Source IP address : 172.20.20.0
Source IP address mask : 255.255.255.0
Destination IP address : 172.20.0.1
Destination IP address mask : 255.255.255.255
In Port List : NIL
Filter Action : Redirect to Gi0/10
Status : Active
1.5.6 IP Standard ACL Configuration Example 1
This example describes the commands required to implement the following ACL requirements on the
network setup shown in Figure ACL-2.
ACL 1 – Deny all traffic going from 172.20.0.0 network to 172.100.0.0 network, but allow only server
172.20.20.1 to access the 172.100.0.1 gateway.
ACL 2 – Redirect all traffic destined to IP 172.10.0.0 network to server 172.10.10.10.
Figure ACL-2: IP Standard ACL Example 1
ACL 1 Configuration
This ACL has two rules; one to allow traffic from 172.20.20.1 and the other to deny all traffic from the
172.20.0.0 network.
A permit rule needs to be created first.
SMIS# configure terminal
SMIS(config)# ip access-list standard acl_1a
SMIS(config-std-nacl)# permit host 172.20.20.1 host 172.100.0.1
172.100.0.0
Network
Server A
172.10.10.10
Gateway
172.100.0.1
Gi 0/10
172.20.0.0
Network
Switch
Gi 0/1
Page is loading ...
Page is loading ...
Page is loading ...
Page is loading ...
Page is loading ...
Page is loading ...
Page is loading ...
Page is loading ...
Page is loading ...
Page is loading ...
Page is loading ...
Page is loading ...
Page is loading ...
Page is loading ...
-
 1
1
-
 2
2
-
 3
3
-
 4
4
-
 5
5
-
 6
6
-
 7
7
-
 8
8
-
 9
9
-
 10
10
-
 11
11
-
 12
12
-
 13
13
-
 14
14
-
 15
15
-
 16
16
-
 17
17
-
 18
18
-
 19
19
-
 20
20
-
 21
21
-
 22
22
-
 23
23
-
 24
24
-
 25
25
-
 26
26
-
 27
27
-
 28
28
-
 29
29
-
 30
30
-
 31
31
-
 32
32
-
 33
33
-
 34
34


Supermicro L3 Configuration manual
- Category
- Networking
- Type
- Configuration manual
- This manual is also suitable for
Ask a question and I''ll find the answer in the document
Finding information in a document is now easier with AI
Related papers
-
Supermicro L3 User manual
-
Supermicro SSE-X3348T/R Reference guide
-
-
-
-
-
Supermicro Intelligent Switch User manual
-
-
-
Other documents
-
Dell PowerSwitch S5048F-ON Quick start guide
-
-
Dell OS9 Owner's manual
-
-
-
-
-
-
-