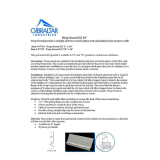
Wondercap WC4SQL is a shower drain outlet with round and square chrome brass strainers, designed for professional bathroom finishes. It features:
- Simple turn-lock mechanism: for easy strainer removal and access to the drainage system.
- Triple seal connection: between the shower pan liner and shower drain outlet for leak prevention.
- Adjustable base: to accommodate various screed heights.
- Patented 2-tier weep holes: allow water seepage from porous tile bedding into the drain.
- Anti-bacterial protection: for a hygienic connection.

Installation Instructions
SHOWER PAN LINER
(not included)
WONDERCAP 3 INCH X 2 INCH
OUTER FLANGE
Secures firmly to timber or concrete
WONDERCAP 4 INCH CAP
Stop screed and rubbish from entering the
draining system
4 INCH CHROME BRASS STRAINER
Simple turn-lock mechanism
(Strainer sold separately)
WONDERCAP 4 INCH X 3 INCH BASE
Angle and adjust to the required screed height
WONDERCAP 3 INCH INNER
FLANGE
Easy to install both the inner
and outer flanges with a
triple seal connection
1. FOR THE WOODEN SUBFLOOR INSTALLATION:
Drill or cut a 3.3/4” diameter hole in the selected drain location of the shower floor
base.
The shower drain outlet (SDO) is positioned into place and screwed down to
the wooden floor.
The plumbing is connected to the 2” socketed section as per standard drainage
installation. Prior to connection the pipe & fitting, the joints are prepared with
appropriate solvent cleaner & solvent cement.
1. PREPARATION OF THE PRE-SLOPE:
Do not remove the Wondercap base with cap. The pre-slope bedding is easily
installed to the edge of the ½” outer lip and sloped for draining the shower pan
liner from the outer walls to the SDO.
Allow the pre-slope to dry thoroughly before installing the shower pan liner and
always follow the manufacturer’s installation guidelines.
2. Remove the inner flange of the SDO and put to the side. The shower pan liner can
be installed over the SDO and as per the manufacturer’s guidelines.
3. Mark the opening of the internal inner edge of the outer flange and cut out the open
circle. The pan-liner is placed back over the SDO - confirm that the shower pan
liner finishes just short of the edge of the internal outer flange.
4. Solvent clean the inner flange and outer flange:
Apply a ½” bead of 100% silicone caulk to the edge of the outer flange below the
pan-liner and to the top side edge of the pre-cut opening of the pan-liner.
Apply solvent cement to the inside of the outer flange & to the outside of the inner
flange.
Insert the inner flange into the outer flange with a firm slight twisting motion
pushed all the way down - hold in position for a few seconds.
5. Water testing of the shower pan-liner and connection:
Install a 2” test plug or a 2” pump up test plug into the bottom of the 2” inch pipe
connection, fill the shower pan liner with water to just below the top of the curb,
test for approximately 4 hours.
Inspect for leaks and repair if required.
6. Place the Wondercap base & cap back into position and you are ready for tiling.
7. Raise the Wondercap base & cap to the required height – support the position
by applying the prepared bedding mix in & around the outside of the base - the
Wondercap cap is not removed.
Use spirit-level to level the Wondercap base & cap to the required height.
Screed approximately 1” of bedding mix to the shower base.
Install the galvanized reinforcement mesh or metal lathe over the threshold and
across the shower base.
The remaining bedding mix is then applied while maintaining the correct grade as
per building requirements.
Ensure that the base mix height allows for the thickness of the tile – the top of the
tile should be at the same height as the Wondercap cap.
8. Grout your floor & walls as required and then remove the Wondercap protective cap
- install the outer frame of the strainer with tile glue & grout - the strainer centre is
put into position and rotated into the lock position.
The strainer centre can be easily removed for access to the drainage system.
9. Our patented Wondercap 2 tier weep holes allow for water seepage to escape from
a porous tile bedding into the drain.
10. For Wondercap Round Strainers use our Wondercap cap as a template to cut your
tile or with new Square Strainer cut the desired size accordingly.
WONDERCAP
WONDERCA
P
Wondercap Tile Shower Drain Outlet
with Round & Square Chrome Brass Strainers
Our Wondercap product is easily to install, and with our new range of chrome
brass strainers, will deliver that professional finish to your bathroom.
Round Chrome Brass Strainer
Tiles
Shower
Pan Liner
Inner
Flange
Outer
Flange
Two tier weep
holes. Allows for
water seepage to
escape into drain
Triple Seal
Commection of
Shower pan Liner to
Shower Drain Outlet
Base - Adjust to various screed heights
Pre-Slope
Bedding Mix
Timber or
Concrete Floor
Drain
MR GERMIE
WITH ANTI-BACTERIAL
PROTECTION AND
HYGENIC CONNECTION
-
 1
1
Wondercap WC4SQL Installation guide
- Type
- Installation guide
Wondercap WC4SQL is a shower drain outlet with round and square chrome brass strainers, designed for professional bathroom finishes. It features:
- Simple turn-lock mechanism: for easy strainer removal and access to the drainage system.
- Triple seal connection: between the shower pan liner and shower drain outlet for leak prevention.
- Adjustable base: to accommodate various screed heights.
- Patented 2-tier weep holes: allow water seepage from porous tile bedding into the drain.
- Anti-bacterial protection: for a hygienic connection.
Ask a question and I''ll find the answer in the document
Finding information in a document is now easier with AI
Related papers
Other documents
-
MAAX 105060-000-001-000 Installation guide
-
MAAX 105055-000-001-001 Operating instructions
-
 Phillips 97718 Installation guide
-
 Lamello 144030 Specification
-
Unbranded KKB81152PVCE Installation guide
-
Schluter KK122ABSECS Installation guide
-
Unbranded KKB81152ABSAMGB Installation guide
-
Schluter KDAR/ABS/E Installation guide
-
Schluter ST-81/152 Installation guide
-
Schluter KL1BL19EB110 User manual


