Page is loading ...


Distributed by:
Copyright ©2015 Thane International, Inc. Made in China.
1. Go to freepadsforlife.com
2. Add To Cart
3. Follow Instructions
About the program:
Receive a continuous supply of Microfiber Pads every other month without you
having to re-order. You will then continue to receive FREE pads and pay only
$7.95 S&P with each shipment. You also have the added flexibility of cancelling
the program at any time. Join now and you may also qualify for special offers like
an extended warranty and other accessories.
Order now and see why the Free Pads for Life Program is not only
convenient but economical.
*Enrolling in the Free Pads for Life Program requires Thane Direct USA to charge
your debit/credit card the amount of $7.95 every 3 months until you cancel.
Enrolling on our website is FREE from service fees (phone enrollment requires
a service fee of $4.95). To place an order by phone or to cancel, please call our
customer care center at 719-948-2612 Monday - Friday, 6 am to 6 pm, and
Saturday 7 am to 3:30 pm, Mountain Time.
Thane Direct Canada Inc.
Mississauga ON L4W 5M6, Canada
www.thane.ca
Thane International, Inc.
Canton OH 44718, U.S.A.
www.thane.com
TThane Direct UK Ltd
London WC2A 3LH, UK
www.thane.tv
Keep up the steaming,
and you’ll keep up the cleaning
with FREE Pads for Life today!
H2OMOPX5 MNL ENG US R1 151111

Thank You Warranty/Parts/Service
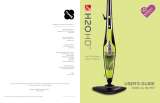
Congratulations on your choice of the H2O Mop®
Steamer; a more compact and lighter steam cleaner
that easily converts from a floor mop and carpet
cleaner into a powerful hand-held steamer.
The H2O Mop® Steamer offers a new way
of cleaning that is effective and far more hygienic
than conventional methods. The H2O Mop®
Steamer increases cleaning power by converting
water to steam and using a microfiber cloth to
enhance absorbency. Dirt and grime can be
eliminated in a matter of seconds. Cleaning with
the H2O Mop® Steamer is environmentally friendly,
as it uses active steam power without the use
or detergents. Regular steam cleaning can also
help deal with dust mites and some types of
bacteria, fungus and mildew.
It is essential that you read this entire manual
completely before using your H2O Mop® Steamer.
Doing so helps ensure proper and safe usage which
should also improve your overall cleaning results.
Thanks again for trusting the H2O Mop® brand.
THANE DIRECT USA - 1 YEAR LIMITED WARRANTY
The product you have purchased from Thane Direct USA is warranted against defects in materials and work-
manship under normal use and service to the original purchaser for one (1) Year from date of original purchase
(“Warranty Period”). Should the product prove defective during the Warranty Period, you must email or call
our Customer Service Department at [email protected] or (719) 948-1584. Do not return
the defective part or unit unless instructed to do so after contacting us. Under this limited warranty, Thane
Direct USA will replace any parts found to be defective due to a manufacturer’s defect. A shipping and pro-
cessing charge will apply to any replacement undertaken by Thane Direct USA. This limited warranty is not
transferable, extends only to personal use and does not apply to use of any product in a manner for which
it was not designed or intended, or in a manner inconsistent with directions in the user’s manual or other
instructions supplied with the product. After the expiration of this limited warranty, the cost of replacement
parts will be the responsibility of the original purchaser.
EXCEPT AS PROVIDED IN THIS WARRANTY AND TO THE EXTENT PERMITTED BY LAW, IN NO EVENT SHALL
THANE DIRECT USA OR ITS AFFILIATED COMPANIES BE LIABLE FOR ANY INDIRECT, INCIDENTAL, SPECIAL OR
CONSEQUENTIAL DAMAGES ARISING OUT OF OR IN CONNECTION WITH THE USE, MISUSE, INABILITY TO
USE OR PERFORMANCE OF THE PRODUCT, OR ANY PRODUCT DEFECT, INCLUDING ANY ECONOMIC LOSS,
PROPERTY DAMAGE, LOST PROFITS, LOSS OF ENJOYMENT OR USE, COSTS OF INSTALLATION OR REMOVAL,
OR OTHER CONSEQUENTIAL DAMAGES OF WHATEVER NATURE. SOME STATES DO NOT ALLOW THE EXCLU-
SION OR LIMITATION OF INCIDENTAL OR CONSEQUENTIAL DAMAGES. ACCORDINGLY, THE ABOVE LIMITA-
TIONS MAY NOT APPLY TO YOU.
TTO THE EXTENT PERMITTED BY LAW, THIS LIMITED WARRANTY IS THE EXCLUSIVE WARRANTY GRANTED BY
THANE DIRECT USA AND SHALL BE IN LIEU OF AND EXCLUSIVE OF ALL OTHER WARRANTIES, EITHER EXPRESS
OR IMPLIED, INCLUDING WITHOUT LIMITATION ANY WARRANTY OF MERCHANTABILITY OR FITNESS FOR A
PARTICULAR PURPOSE, STATUTORY OR OTHERWISE. THIS LIMITED WARRANTY GIVES YOU SPECIFIC LEGAL
RIGHTS. YOU MAY ALSO HAVE OTHER RIGHTS, WHICH VARY FROM STATE TO STATE.
THIS LIMITED WARRANTY DOES NOT APPLY TO DAMAGE CAUSED BY THE FOLLOWING:
1. Accident, misuse, abuse or neglect.
2. Improper or inadequate assembly or maintenance.
3. Unauthorized modification or commercial use.
4. Improper packaging in return transit.
5. Normal wear and tear.
6. Unsupervised use by children under 18 years of age.
TO OBTAIN WARRANTY SERVICE: The original purchaser should contact our customer care representatives via
e-mail at [email protected] or by phone at (719) 948-1584. Depending on the extent of the
service required, the original purchaser shall have the obligation and responsibility to:
• Pay for all service and parts not covered by this limited warranty; and
• Pay the applicable shipping and processing fee as specified by our customer care representatives.
• If you are instructed to return the product: (a) carefully package the product using adequate padding
material to prevent damage during transit--the original packaging is ideal for this purpose; (b) include your
proof of purchase, which includes the date of purchase; and (c) send to the address designated by our
customer care representatives via USPS or carrier of your choice.
FOR ALL INQUIRES REGARDING WARRANTY CLAIMS, PLEASE CONTACT
CUSTOMER SERVICE
VIA E-MAIL AT [email protected] OR BY PHONE AT (719) 948-1584.
Thane Direct USA is not responsible for any uninsured items lost
in transit or costs incurred by the customer to return the product.

20
TROUBLESHOOTING GUIDE
The unit does not
power on
Reduced steam or
no steam
Steam escapes from
connections
The cleaning cloth
becomes wet
The unit is not plugged in
or turned ON
Make sure the unit is
plugged into a properly
grounded outlet and the
Power Switch is ON.
Problem Possible Cause Solution
Blocked Steam Outlet
Debris or obstructions at
the connection points
Water Tank is empty
Attachment is improperly
connected
Lime scale deposit
The cloth gets saturated
with water
Remove Mop Head and
clean the Steam Outlet.
Remove the accessory
and check and clean
connection points.
Fill Water Tank
Turn the Steamer Appliance
OFF, allow it to cool down,
detach the accessories and
reattach them properly.
Follow cleaning procedure
to remove lime scale.
Replace with a new
cleaning cloth (optional
item) or allow cloth to
cool, wring out and
reattach. Lower
steam setting.
TABLE OF CONTENTS
Important Safeguards and Warnings ................................................... 2-3
Introduction to your H2O Mop® Steamer .............................................. 4
Key Product Features ............................................................................... 5
Optional Accessories ............................................................................. 6-7
How to Assemble the H2O Mop® Steamer Appliance ........................ 8-9
How to use the H2O Mop® Steamer Appliance ................................... 10
How to use the H2O Mop® Steamer Appliance – Floor Mop .............. 11
The H2O Mop® Steamer Appliance – Hand-Held Steamer ............. 12-13
Safety Pressure Release Valve - After Use ............................................. 14
Accessory Usage ................................................................................. 15-17
Cleaning and Maintenance ............................................................... 18-19
Troubleshooting Guide ........................................................................... 20
Warranty/Parts/Service ................................................... Inside Back Cover

IMPORTANT SAFEGUARDS AND WARNINGS
PLEASE READ ALL PRODUCT INSTRUCTIONS CAREFULLY. FAILURE TO FOLLOW
THE WRITTEN INSTRUCTIONS CONTAINED IN THIS MANUAL WILL VOID YOUR
WARRANTY, EXPOSE YOU TO UNDUE RISK AND/OR HARM AND MINIMIZE
YOUR OVERALL CLEANING RESULT.
USE YOUR H2O MOP® STEAMER APPLIANCE ONLY AS DIRECTED IN THIS
MANUAL AND ONLY WITH THE RECOMMENDED ACCESSORIES DESCRIBED
HEREIN. USE OF ATTACHMENTS AND/OR ACCESSORIES NOT PROVIDED OR
SOLD BY THE MANUFACTURER OR BY AUTHORIZED RESELLERS MAY CAUSE
FIRE, ELECTRIC SHOCK AND/OR INJURY.
AS WITH ANY ELECTRICAL APPLIANCE, BASIC PRECAUTIONS SHOULD ALWAYS
BE OBSERVED WHEN USING THIS STEAMER APPLIANCE, INCLUDING THE
FOLLOWING:
!
WARNING
1. Verify that the main voltage indicated on the Rating Plate on this Steamer Appliance
corresponds with the voltage of your electrical outlet.
2. In order to protect against risk of electric shock, only plug this Steamer Appliance
into properly grounded outlets.
3. This Steamer Appliance is designed for indoor household use only. Do NOT use and/
or store this Steamer Appliance outdoors. Commercial use voids the manufacturer’s
product warranty.
4. Do NOT leave this Steamer Appliance plugged in while unattended and/or not in use.
5. Close attention is necessary when this Steamer Appliance is used near children, pets
and/or plants. Never direct steam towards people, animals or plants as steam is by
nature hot and such steam emissions may cause scalding.
6. Do NOT allow this Steamer Appliance to be used as a toy and the Steamer Appliance
should NOT be operated and/or used by children or others that have not read this
product manual. Children should be supervised to ensure that they do NOT play with
this Steamer Appliance.
7. This Steamer Appliance should NOT be used by persons with physical, sensory or
mental impairments.
8. Do NOT handle and/or operate this Steamer Appliance and/or the plug with wet
hands and/or without shoes.
9. Do NOT immerse this Steamer Appliance in water and/or other liquid.
10. Do NOT direct or point the Steamer Appliance’s steam towards electric equipment,
appliances, or devices such as electric ovens, stove burners, household appliances
and the like.
11. Do NOT use this Steamer Appliance with a damaged Power Supply Cord or Plug,
and/or if it is not working as it should, or if it has been dropped, damaged, left
2
Step 5 – Ensure that the Main Body’s lower portion and especially the steam
outlet is aimed away from the floor and/or surrounding objects. The intent is to
have the emitting steam not contact anything. Then press the Power Switch to
the ON position.
Step 6 – Allow this Steamer Appliance to produce steam until the vinegar/water
solution is used up. To speed the process you can adjust the steam flow by moving
the Steam Regulator Dial to the high setting.
Step 7 – Repeat the above procedure as many times as necessary until a normal
steam flow is achieved.
Step 8 – Once a normal steam flow has been achieved, fill the Water Tank per
the instructions contained in this manual. Move the Main Body so the clean water
rinses the Water Tank. Then pour the water out.
Step 9 – Refill the Water Tank with water and release the steam following the
instructions contained in this manual until all the water has been dispersed and
the Water Tank is empty.
Step 10 – Refill the Water Tank per the instructions contained in this manual.
Perform a test cleaning on a suitable isolated surface area to ensure that no lime
scale debris and/or vinegar/water solution is left in the Main Body.
Use detergent to clean the accessories when they are dirty.
Wash with clean water and air dry.
To clean calcium deposits building up inside the Water Tank:
Add 1-2 tablespoons of white vinegar to a full Water Tank, close the Water Tank
cap and shake the contents. DO NOT TURN THE STEAMER ON. Let the unit sit for
a few hours. Empty the Water Tank and rinse with clean water until it rinses clear.
Cleaning blocked steamer accessories:
Due to the high mineral content of water in some areas, some calcium buildup
might develop inside the tip of the Jet Nozzle. To clean it, we recommend using
a spray lubricant. Spray a small burst or two of the lubricant inside the tip of the
Jet Nozzle. After spraying the lubricant, fill the Steamer Appliance with water and
run a continuous jet of steam through the affected accessory for several minutes
to remove the deposit. WE RECOMMEND PERFORMING THIS PROCEDURE IN A
PROTECTED AND WELL-VENTILATED AREA.
Microfiber Cloth care:
Machine wash at 60 ºC (140 ºF) / Do not bleach / Do not use fabric softener.
19

18
CLEANING AND MAINTENANCE
!
IMPORTANT WARNING
UNPLUG THIS STEAMER APPLIANCE FROM THE POWER OUTLET WHEN
PERFORMING MAINTENANCE AND/OR CLEANING THIS STEAMER APPLIANCE.
AFTER UNPLUGGING THIS STEAMER APPLIANCE LET THIS STEAMER APPLIANCE
COOL FOR A MINIMUM OF 30 MINUTES BEFORE ATTEMPTING ANY CLEANING
AND/OR MAINTENANCE.
NEVER IMMERSE THIS STEAMER APPLIANCE IN WATER AT ANYTIME!
Maintenance/Cleaning Procedure To Remove Lime Scale
Removing Lime Scale - Please follow the following procedures:
If your Steamer Appliance begins to produce steam slower than usual, or emits
steam sporadically, or stops producing steam you may need to remove lime scale
that has built up inside. It is necessary to remove lime scale on a regular basis every
25 times you use a full tank of water or at least once a month. This is especially
true in areas with hard water.
Using the Cleaning Pin
Step 1 - Once your Steamer Appliance has cooled completely, remove the Mop
Head and/or other accessory at the lower end of the Main Body as described in the
section THE H2O MOP® STEAMER APPLIANCE – HAND-HELD STEAMER.
Step 2 - Locate the small hole of the steam outlet where the Mop Head attaches to
the Main Body’s lower end.
Step 3 - Insert the Cleaning Pin’s straight end in the small hole of the steam outlet
and move the Cleaning Pin up and down while also spinning the pin between your
fingers. Repeat this process several times to ensure that all scale and/or debris has
been removed from the steam outlet.
Step 4 - Reassemble this Steamer Appliance as provided for in this manual.
Using a Cleaning Solution
Step 1 – Prepare a liquid solution of 50ml /1.5 oz white vinegar and 100ml /3 oz water.
Step 2 – Empty all water from the Water Tank. Then add the above described liquid
solution to the Water Tank.
Step 3 – Remove the Mop Head and/or steamer Accessory from the Main Body
pursuant to the directions described in this manual.
Step 4 – With the Power Switch in the OFF position, plug the Power Supply Cord
into a properly grounded electric outlet. Wait the necessary time for the LED ON/OFF
Light to turn from RED to GREEN.
outdoors, or immersed in water. If any of the above occur, this Steamer Appliance
must be replaced or repaired by the manufacturer and/or a qualified repair facility
to avoid hazard, severe injury and/or damage to property.
12. Do NOT unplug this Steamer Appliance by pulling on the Power Supply Cord and
NEVER force the Plug into an outlet/socket.
13. Do NOT pull or carry this Steamer Appliance by the Power Supply Cord. Do NOT use
the Power Supply Cord as a handle, close a door on the Power Supply Cord, or pull
the Power Supply Cord around sharp edges or corners.
14. Keep this Steamer Appliance and all parts thereof including the Power Supply Cord
away from heated objects and surfaces.
15. Do NOT use extension cords or outlets with inadequate current-carrying capacity,
and in order to avoid circuit overload, do NOT operate another electrical appliance
on the same outlet/socket (circuit) as this Steamer Appliance.
16. To disconnect this Steamer Appliance, turn the Power Switch (O/I) to the “OFF”
position, then remove the Plug from the outlet/socket by grasping the back or sides
of the Plug and gently pulling it away from the outlet/socket. Do NOT pull the Power
Supply Cord to remove the Plug from the outlet/socket.
17. Unplug the unit after each use and/or before refilling the Water Tank and/or servicing.
18. Do NOT insert any objects into openings in the Steamer Appliance and/or use it with
any of its openings blocked.
19. Store this Steamer Appliance indoors in a cool, dry place.
20. Keep your work area well lit and clear using extra caution when using this Steamer
Appliance on or near stairs, furniture, doorways, uneven surfaces, and the like.
21. Stop using this Steamer Appliance if you observe water leaking and contact a
qualified repair technician.
22. Never put hot water or any other liquids (including alcohol-based), additives,
detergents, cleaners and the like (regardless of temperature) in this Steamer
Appliance’s Water Tank. Doing so will make operation unsafe and damage this
Steamer Appliance.
23. Do NOT use the Mop Head without first attaching the Floor Cloth.
24. Always keep the steam opening clear of any obstructions. Avoid placing the steam
opening on soft surfaces to avoid blocking the steam flow. Keep the steam opening
free of lint, hair and other potential obstructions to ensure proper steam flow.
25. Do NOT use this Steamer Appliance in spaces that are exposed to flammable,
explosive or toxic vapors such as paint thinner or oil-based paint.
26. Do NOT use this Steamer Appliance on leather, wax-polished furniture or floors,
unsealed hardwood or parquet floors, unglazed ceramic floors, synthetic fabrics,
velvet or other delicate steam-sensitive materials.
27. Do NOT use this Steamer Appliance for space heating purposes or place it on or
near hot surfaces such as a hot gas or electric burner, or in a heated oven.
28. Do NOT use this Steamer Appliance for other than its intended use.
SAVE THESE INSTRUCTIONS
3

4
INTRODUCTION TO YOUR H2O MOP® STEAMER
Not all floor types are suitable for steam cleaning. ALWAYS check the use and care
instructions of your flooring manufacturer or distributor before using this Steamer
Appliance. When in doubt – consult a flooring specialist.
This H2O Mop® Steamer Appliance is designed to thoroughly clean sealed floor
surfaces, such as marble, ceramic, carpet, stone, linoleum, hardwood, laminate and
tile. To determine if your floor type is suitable test this Steamer Appliance on a small
isolated area of your particular flooring(s) prior to overall use on all your flooring(s)
surfaces. The heat and steam action may remove the wax on surfaces treated with
wax. Do not let the Steamer Appliance stand on any wood or heat-sensitive floor
for an extended period of time. Water marks, discoloration or damage to the floor
surface can occur if this Steamer Appliance is left operating too long in one place.
When using on vinyl, linoleum or any other heat-sensitive floors, use extra caution.
Too much heat can melt glue in the flooring. Use only on laminated flooring that
has been professionally installed and without any gaps or cracks that could permit
the entry of moisture.
FOR BEST RESULTS
• Sweep or vacuum floor prior to using this Steamer Appliance.
• To avoid accumulation of excess water, the Microfiber Cloth must
be clean and dry before use.
IMPORTANT
!
• Never steam at one spot for too long.
• Do NOT put hands or feet under the Mop Head or in the emitting steam.
• It’s normal to hear a “pulsing” noise during use, indicating that the Steamer
Appliance is producing steam.
• There may be some minor “spitting” of water mixed with the steam.
17
LONG STEAM
LAZER®
Easier to clean hard to
reach areas (behind
cabinets, behind the
toilet, far corners, etc.).
Attach the Long Steam Lazer
®
to the Extension
Hose by aligning the lock button on the Extension
Hose with the designated hole on the Long Steam
Lazer
®
tool and push until it locks in place.
Attached to the Extension Hose, the Long Steam
Lazer
®
can be used by itself or with the Bendable
Jet Nozzle and/or Round Brush (Nylon). Remove
the end cap before installing the Bendable Jet
Nozzle or Round Brush (Nylon).
Part and Usage Assembly Tips/Caution
BENDABLE JET
NOZZLE
Cleans tight corners and
hidden places.
HANDS-FREE
SHOULDER
CRADLE STRAP
Helps to carry the
Hand-Held Steamer.
With one hand operate
the Extension Hose with
attached accessory and
the other hand is free
which allows easier
movement as you clean.
ACCESSORY BAG
Keeps all accessories and
small parts in one place.
Easy to view the contents
and easily locate needed
tool or accessory and
reach for it.
Screw the Bendable Jet Nozzle onto the Long
Steam Lazer
®
. Remove the black plastic cap from
the top of the Long Steam Lazer
®
. Replace the
plastic cap after attaching the Bendable Jet Nozzle.
1. Undo the hook-and-loop fastener.
2. With the Shoulder Strap on the top side of
the Main Body put the Main Body through the
larger strap loop.
3. Do up the hook-and-loop fastener to secure
the Main Body in the Shoulder Strap.
4. Once the Main Body is securely placed in
the Shoulder Strap, adjust the length of the
Shoulder Strap and place it on your shoulder.
Ensure that the Shoulder
Strap is not covering the
release button at the
bottom side of Main
Body, which releases the
Extension Hose or Jet
Nozzle.
Ensure that the Shoulder
Strap is not covering the
On/Off button.
Handle with care as
tools and accessories
with sharp ends might
poke through the bag
(Scraper, Nozzle, etc.).
LOW STEAM
FOR SENSITIVE SURFACES
• Garments
• Mattresses & Pillows
• Upholstery
• Sealed Hardwood/Laminate
(may also use medium
steam setting)
MEDIUM STEAM
FOR LIGHT CLEANING
• Plastic
• Granite & Marble
• Tiles
• Slate
• Windows & Mirrors
HIGH STEAM
FOR TOUGHER STAINS
• Stainless Steel
• Porcelain Fixtures
• Carpets & Door Mats
HOT SPRAY
FOR SCRUBBING
• Concrete
• Toilets
• Sinks
• Rims

16
WINDOW CLEANING
CORAL CLOTH
Use it to clean windows,
mirrors and glass.
Install the Coral Cloth over the Window Cleaning
Tool. Do not cover the squeegee blade or scraper
when installing the cleaning cloth.
Do not use steam on
frozen windows.
Be careful when using
the steamer on glass,
as the glass may break.
Part and Usage Assembly Tips/Caution
GARMENT STEAMING
CLOTH
To steam a garment, place
item of clothing on a
hanger and steam the
garment directly. Slowly
slide the Garment Steamer
Cloth vertically over the
garment to smooth the
fabric and remove wrinkles
and odors.
Install the Garment Steaming Cloth / Lint Cloth /
Microfiber Scrubbing Cloth over the Window
Cleaning Tool. Make sure to attach the cloth to
all hooks on the Window Cleaning Tool Frame to
avoid slipping from the frame during use.
For garment steaming,
do not use steam
settings 3 and 4.
Some fabrics like leather,
suede, and velvet may
not be suitable for
steaming. Please refer to
the manufacturer’s label.
Curtains and draperies
can be steamed while
hanging.
LINT CLOTH
Slowly pass over
surface to be cleaned.
The absorbent Lint Cloth
picks up the dirt/hair
loosened by the steam.
Do not use steam
settings 3 and 4.
Do not use on
animals.
SCRAPER – RIGID
BLADE
1. Apply steam over the
area that you plan to
scrape. Repeat a few
times if needed.
2. Detach the Window
Cleaning Tool with Scraper
from the Extension Hose
and start stripping off the
wallpaper or any hardened
spills (ketchup, syrup, etc.)
from ceramic or vinyl tiles,
glass windows etc.
For removing wallpaper:
Make “X” shaped slits into
the surface of the wallpaper
with utility knife to allow
steam to soften the adhesive.
MICROFIBER
SCRUBBING CLOTH
Removes more dust
and dirt with less effort.
Effective in cleaning
stubborn smudges or
spills.
Remove the Squeegee Blade and slide the Scraper
into the Window Cleaning Tool with the grooved
side of the Scraper facing shorter plastic teeth of
the Window Cleaning Tool.
Install the Coral Cloth or Garment Cloth to the
Window Cleaning Tool with the Scraper and
attach it to the Extension Hose.
Hooks
Hooks
front
Black Tag
Tag
side
back
If using for wallpaper
removal: Cover your
floor to protect from any
water dripping. Cover
the outlets with electrical
tape to protect from any
liquids.
Selection of the steam
setting will depend on
the surface being treated.
If you are concerned
about possible drywall
damage from the steam,
start with lower steam
setting.
5
KEY PRODUCT FEATURES
1
2
3
4
5
6
7
8
9
10
11
12
13
14
15
16
Front view Back view
1 Curved Handle
2 Upper Power Supply
Cord Wrap
3 Power Supply Cord
4 Power Supply Cord Holder
5 Curved Handle Lock Button
6 Extension Handle
7 Lower Power Supply
Cord Wrap
8 Extension Handle
Lock Button
9 Power Switch (O/I) with
LED ON/OFF Light
10 Steam Regulator
11 Water Tank Cap
12 Water Tank
13 Main Body
14 Lock Button (on Main Body)
15 Safety Pressure Release Valve
16 Mop Head
17 Plug
17

6
OPTIONAL ACCESSORIES
1
6 7 8
910
2 3 4
5
1 Microfiber Mop Cloth (H2O Mop® X5™ & H2O Mop® X3™ Models)
2 Jet Nozzle (H2O Mop® X5™ & H2O Mop® X3™ Models)
3 Round Brush Head – Black Nylon (H2O Mop® X5™ & H2O Mop® X3™ Models)
4 Carpet Glider (H2O Mop® X5™ & H2O Mop® X3™ Models)
5 Cleaning Pin (H2O Mop® X5™ & H2O Mop® X3™ Models)
6 Extension Hose (H2O Mop® X5™ Model)
7 Window Cleaning Tool with Squeegee (H2O Mop® X5™ Model)
8 Window Cleaning Cloth (H2O Mop® X5™ Model)
9 Garment Steaming Cloth (H2O Mop® X5™ Model)
10 Duster with Cloth (H2O Mop® X5™ Model)
11 Measuring Cup (H2O Mop® X5™ Model)
12 Long Steam Lazer® Wand (Optional Extension Hose Attachment)
11 12
15
ACCESSORY USAGE
JET NOZZLE
Produces powerful steam
for cleaning corners and
gaps.
Insert the Jet Nozzle into the designated hole in
the Main Body until it
safely locks in place.
Make sure the Jet
Nozzle is securely
locked in place
before usage.
Part and Usage Assembly Tips/Caution
ROUND BRUSH
(NYLON)
The round nylon
brush is great for
cleaning smooth
hard surfaces,
such as toilets,
sinks, and kitchen
counters, etc. It can
be used with soap
or detergent to
clean dirty areas.
Attach the Round Brush
by screwing onto the threaded
end of the Jet Nozzle, Bendable
Jet Nozzle or Long Steam Laser®.
Round Brush can be
attached to any of
the Jet Nozzles.
Use different color
brush for particular
cleaning areas (kitchen,
bathroom, etc.).
EXTENSION HOSE
This Extension Hose is
designed for use with
Hand-Held Steamer and
with the following
attachments:
- Window Cleaning Tool
- Duster
- Bendable Jet Nozzle
- Long Steam Lazer®
Insert the designated end of the Extension Hose
into the designated hole in the Main Unit until it
locks in place.
Make sure the Extension
Hose is securely locked
into place before usage.
When in use, keep the
Extension Hose away
from your body and
avoid touching the hose
as it can get hot.
Do not pull the Extension
Hose with excessive
force, as it might cause
damage and result in a
steam leak.
WINDOW CLEANING
TOOL
Attached to the Extension
Hose and in combination
with one of the provided
cleaning cloths or scraper,
use this tool for window
cleaning, garment
steaming, wallpaper
removal, etc.
DUSTER, WITH
CORAL CLOTH
Slowly pass over
surface to be cleaned.
The absorbent Coral
Cloth picks up the dirt
loosened by the steam.
Install the Coral Cloth into the Duster frame and
attach the Duster to the Extension Hose.
Do not use steam
setting 4 when using
the Duster.
Align the lock button on the Extension Hose with
the designated hole on the Window Cleaning Tool
Frame and push in the Extension Hose until it locks
in place. Install cleaning cloth of your choice onto
the Window Cleaning Tool.
(Continued on next page)
225ml
150ml
100ml
50ml

14
SAFETY PRESSURE RELEASE VALVE – AFTER USE
steam
nozzle
safety
pressure
release
valve
This Steamer Appliance is equipped with a
Safety Pressure Release Valve that is designed
to relieve pressure inside the water heater. It
does so by discharging hot steam or water
through the Safety Pressure Release Valve if
the steam nozzle is blocked. Blockage can
sometimes occur due to lime scale buildup on
the Main Body or other reasons. Refer to the
illustration shown here to better understand
this feature.
!
IMPORTANT WARNING
Steam or water discharged from the Safety Pressure Release Valve is
very hot. At all times during use, always make sure to keep your body
parts clear of the Safety Pressure Release Valve to avoid burns or injury
by hot steam or water.
Tips for After Using Your Steamer Appliance –
• Double check to make sure the Power Switch is in the OFF (O) position.
• Unplug the Power Supply Cord from the electric outlet per this manual’s
instructions.
• Always empty the Water Tank after each use to avoid leakage and other
potential problems.
• Drain left-over water or steam before storing.
• Wrap/secure the Power Supply Cord around Upper and Lower Power
Supply Cord Wraps.
• Wipe all surfaces of this Steamer Appliance with a soft cloth.
• Store in a protected cool, dry area.
7
17
18 19 20 21 22
16
13 Hands-Free Shoulder Cradle Strap (Optional All Models)
14 Accessory Storage Bag (Optional All Models)
15 Round Brush Heads – Colored Nylon (Optional All Models)
16 Bendable Jet Nozzle (Optional All Models)
17 Microfiber Scrubbing Mop Head Cloth (Optional All Models)
18 Microfiber Coral Mop Head Cloth (Optional All Models)
19 Garment Steaming Lint Cloth (Window Cleaning Tool Accessory)
20 Microfiber Scrubbing Window Cloth (Window Cleaning Tool Accessory)
21 Round Brush Head Cloth (Round Brush Head Accessory)
22 Scraper Blade (Window Cleaning Tool Accessory)
13 14 15

8
HOW TO ASSEMBLE THE
H2O MOP® STEAMER APPLIANCE
4a 4c
4b
3
1 2
Remove all parts and pieces from the box and lay them out on the floor for
ready access. Refer to the KEY PRODUCT FEATURES page to find the parts
that match the written descriptions below. Make sure the Steamer Appliance
is unplugged at all times during any assembly process.
Steps 1, 2 and 3 – Start the assembly of your Steamer Appliance as shown in the
illustrations marked 1, 2 and 3 above.
Step 4 –Turn the Lower Power Supply Cord
Wrap to align the cord channel opening with
the cord channel in the Extension Handle.
Insert the Power Supply Cord all the way in
its cord channel, with the cord in the channel
turn the Lower Power Supply Cord Wrap to
“lock” the Power Supply Cord in place (see
illustrations 4a and 4b). Insert the Power
Supply Cord in the Power Supply Cord Holder
at the top of the Extension Handle. Insert the
Power Supply Cord into the Upper Power
Supply Cord Wrap as shown in illustration 4c.
13
Steps 5 & 6 – Release the Mop Head
from the Main Body by pressing the
Lock Button on the Main Body’s lower
portion and simultaneously pulling the
Mop Head straight down away from
the Main Body.
The Steamer Appliance is now ready to accept the Jet Nozzle or Extension Hose
attachments as instructed in the ACCESSORY USAGE section of this manual.
Hand-Held Steamer Cleaning Tips –
• Do NOT use this hand-held Steamer Appliance to clean cold or frozen
windows, glass, mirrors or similar surfaces that are subject to breaking
or cracking.
• In general, be extremely careful when using this Hand-Held Steamer
Appliance on glass avoiding too much pressure, scrubbing or force, as
by nature glass may break.
!
IMPORTANT
5 6

12
THE H2O MOP® STEAMER APPLIANCE –
HAND-HELD STEAMER
The Hand-Held Steamer is an ideal portable cleaner for use on
work surfaces, countertops, sinks, windows, mirrors, tiles, and
spot cleaning on floors, carpets and rugs. Attach the Jet Nozzle
to deliver focused cleaning power to the areas you want.
Screw the Round Brush onto the Jet Nozzle for some
scrubbing power for the baked on and caked on.
!
CAUTION
Make Sure The Steamer Appliance
Is Unplugged Before Assembly.
To Configure the Hand-Held Steamer:
1 2
3 4
Steps 1 & 2 – Locate the Lower Power
Supply Cord Wrap and turn it to “unlock”
the Power Supply Cord. Release the upper
end of Power Supply Cord from Upper
Power Supply Cord Wrap and Cord Holder
as shown in illustration 1. Remove the
Power Supply Cord from the cord channel
as shown in illustration 2.
Steps 3 & 4 – Release the Extension
Handle by pressing the Extension Handle
Lock Button as shown in illustration 3 and
simultaneously sliding out the handle as
shown in illustration 4.
9
6
5
Step 5 – Locate one Microfiber Mop Cloth and
match it up to the underside of the Mop Head as
shown in illustration 5. Take care to ensure the
fastening strips sewn into the Microfiber Mop Cloth
align with the “gripping” strips on the Mop Head’s
underside. Press and fit together ensuring a snug fit.
Step 6 (Carpet Glider) – When using this Steamer
Appliance on carpets or rugs, place the Mop Head
with a Microfiber Cloth in place into the Glider
accessory as shown in illustration 6. Do NOT
attempt to use this Steamer Appliance on
carpets or rugs without the Glider securely in
place. NEVER use the Glider on surfaces that
are prone or susceptible to scratching.
Make sure that the Steamer Appliance is unplugged from an electrical
outlet and the Power Switch (O/I) is in the “OFF” (O) position before
assembling the Steamer Appliance and/or changing the Microfiber
Cloth and/or other accessories.
!
CAUTION

10
1
45º
2
3
4
Ensure that the Steamer Appliance is unplugged. Turn the Water Tank Cap
counter-clockwise to the “OPEN” (unlock image) position and remove the Water
Tank Cap as shown in illustration 1. Angle the Steamer Appliance as shown in
illustration 2 and add water with the Measuring Cup or similar cup. Do NOT overfill
or add water directly from a faucet, hose or the like. The Water Tank capacity is
400ml/13.5 oz. Replace the Water Tank Cap into the hole on the Water Tank and
turn clockwise until the blue dot on the Water Tank Cap aligns with the “CLOSE”
(locked image) position as shown in illustration 3. Make sure the Copper Cone
inside the Water Tank is always submerged in the water (see illustration 4) while
operating the Steamer Appliance.
HOW TO USE THE
H2O MOP® STEAMER APPLIANCE
!
IMPORTANT
• Never put hot water or any other liquids (including alcohol-based), additives,
detergents, cleaners and the like (regardless of temperature) in this Steamer
Appliance’s Water Tank. Doing so will make operation unsafe and damage this
Steamer Appliance.
• Unless approved by the manufacturer, do NOT put any scented products in the
Water Tank.
• The Steamer Appliance uses tap water, but in areas with hard water use distilled
water for better performance.
LOW STEAM
FOR SENSITIVE SURFACES
• Garments
• Mattresses & Pillows
• Upholstery
• Sealed Hardwood/Laminate
(may also use medium
steam setting)
MEDIUM STEAM
FOR LIGHT CLEANING
• Plastic
• Granite & Marble
• Tiles
• Slate
• Windows & Mirrors
HIGH STEAM
FOR TOUGHER STAINS
• Stainless Steel
• Porcelain Fixtures
• Carpets & Door Mats
HOT SPRAY
FOR SCRUBBING
• Concrete
• Toilets
• Sinks
• Rims
Select one of the Steam Regulator positions
FILLING THE TANK
11
HOW TO USE THE H2O MOP®
STEAMER APPLIANCE – FLOOR MOP
Once completely assembled and filled with water, plug the Power Supply Cord into
a grounded electrical outlet. The LED ON/OFF Light should show RED indicating that
electrical power is available and the Steamer Appliance is then ready to be turned
ON and OFF.
• If the Power Switch is pressed ON before the LED ON/OFF Light has turned from RED
to GREEN, water remaining from the previous use will be forced out because there
has not been sufficient heating time to convert it to steam. This can or will cause
small water “puddles” on the adjacent surface.
• Small water puddles may also occur if the Steamer Appliance was unplugged from
the power outlet before being properly turned OFF with the Power Switch.
• Always make sure to use the Power Switch to turn the Steamer Appliance OFF after
each use before unplugging the Power Supply Cord from the electrical outlet.
!
IMPORTANT
Floor Mop Cleaning Tips
• Slowly pass over the surface to be cleaned with a steady controlled pace. The goal is
to allow the absorbent Microfiber Cloth to pick up the dirt loosened by the steam.
• Apply steam as needed using the Steam Regulator Dial and the suggested settings
contained in this manual. As a general rule less steam is better for most cleaning
jobs because of the concentrated focus. This is especially true for surfaces that you
want to leave clean and dry.
• When and if the Steamer Appliance stops producing steam when the Power Switch
is ON, it typically means that the Water Tank needs to be refilled. In such instances,
you still must turn the Power Switch to the OFF position, unplug the Steamer
Appliance as described and follow the instructions for refilling the Water Tank
contained in this manual.
Turning the Steamer Appliance ON:
Step 1 - Once plugged in, the LED ON/OFF Light should
remain RED for approximately 20-30 seconds. Do NOT
push the Power Switch while the LED ON/OFF Light is RED.
Step 2 - Wait for the LED ON/OFF Light to turn GREEN
indicating that the Steamer Appliance is ready for use.
Step 3 - Once the LED ON/OFF Light has turned GREEN, press the Power Switch to
ON (I). Within a few seconds the Steamer Appliance should start emitting steam.
Turning the Steamer Appliance OFF:
Step 1 – To turn the Steamer Appliance OFF simply press the Power Switch to the
OFF (O) position once. Almost immediately the steam will cease emitting from the
Steamer Appliance.
( O / I )
/