Page is loading ...

Thank You For Choosing Kohler Company
We appreciate your commitment to Kohler quality. Please take a few
minutes to review this manual before you start installation. If you
encounter any installation or performance problems, please don’t
hesitate to contact us. Our phone numbers and website are listed on
the back cover. Thanks again for choosing Kohler Company.
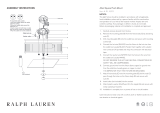
Tools and Materials
Before You Begin
DANGER: Risk of personal injury. To avoid possible
electrical shock, the electricity must be turned off at the
circuit breaker or fuse box before attempting any installation
procedure.
DANGER: Risk of personal injury. To avoid possible
electrical shock, the outlet box must be properly grounded.
WARNING: Risk of property damage. To avoid possible risk
of fire, this fixture has been rated for bulbs up to 100-watts.
Do not exceed this rating.
Observe all local electrical codes and building codes.
Carefully read these instructions before installing the fixture.
It is strongly recommended that a professional electrician install
the fixture.
This fixture is for indoor use only.
Carefully inspect the fixture for damage.
Kohler Co. reserves the right to make revisions in the design of
products without notice, as specified in the Price Book.
Electrical
Tape
Assorted
Screwdrivers
1065083-2-A 2 Kohler Co.

1. Install the Mounting Plate
DANGER: Risk of personal injury. To avoid possible
electrical shock, the electricity must be turned off at the
circuit breaker or fuse box before attempting any installation
procedure.
Carefully pull the wiring out from the outlet box and allow the
wires to hang down.
Place the flat side of the mounting plate flat against the outlet
box.
Align the mounting holes on the mounting plate with the holes
on the outlet box.
Securely tighten the mounting plate to the outlet box with the
outlet box screws.
Wires
Outlet Box
Outlet Box
Screws
Mounting
Plate
Kohler Co. 3 1065083-2-A

2. Connect the Electrical Wires
DANGER: Risk of personal injury. To avoid possible
electrical shock, the outlet box must be properly grounded.
Attach the bare copper ground wire from the fixture to the
ground wire (green or bare wire) of the outlet box.
Fasten the ground wires together with a plastic wire nut and
wrap with electrical tape.
Attach the neutral wire (white) from the fixture to the neutral
wire (usually white) of the outlet box.
Fasten the neutral wires together with a plastic wire nut and
wrap with electrical tape.
Attach the hot wire (black) from the fixture to the hot wire
(usually black) of the outlet box.
Fasten the hot wires together with a plastic wire nut and wrap
with electrical tape.
Verify all plastic wire nuts are securely fastened and wire strands
are not exposed.
Carefully place the wire connections neatly into the outlet box.
Position the back plate of the fixture over the mounting plate.
Carefully place the wire connections neatly behind the back plate.
Ground
Neutral
Hot
Fixture
Bare
White
Black
White
Black
Green or
Bare
Copper
Outlet
Plastic
Wire Nut
1065083-2-A 4 Kohler Co.

3. Complete the Installation
Secure the fixture to the mounting plate with the mounting
screws and mounting knobs. The fixture should be flush against
the finished wall.
Insert the bulb into the fixture.
Position the glass shade on the socket cup.
Hand tighten the diffuser knob.
Turn on the main electrical supply from the main fuse or circuit
breaker.
Check for proper operation.
Glass
Shade
Finished
Wall
Mounting
Plate
Mounting
Screw
Socket Cup
Mounting
Knobs
Diffuser
Knob
Kohler Co. 5 1065083-2-A
/