Page is loading ...

Network Attached Storage
TeraStation 5010
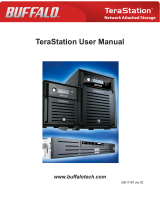
User Manual
Please make sure to read this manual before using and follow the procedure. If you have any inquiries about the
product, contact the number on the warranty statement or the packing box. Do not discard this manual, the
warranty statement, or the packing box.
Americas: www.buffaloamericas.com
Europe: www.buffalo-technology.com
Asia Pacific: www.buffalo-asia.com
35021131-05
2016.11

1
Contents
Chapter 1 Getting Started .............................................8
Diagrams ...........................................................................................8
Turning the TeraStation On and Off............................................. 11
Creating an Initialization Drive .................................................... 13
Chapter 2 Configuration ............................................. 15
Setting Up Through Initial Setup Wizard .................................... 15
Opening Advanced Settings ........................................................ 19
Opening Easy Admin .................................................................... 20
Chapter 3 Sharing Files ............................................... 23
Configuring Shared Folders ......................................................... 23
Adding a Shared Folder ...........................................................................23
Recycle Bin ................................................................................................25
Read-Only Shares .....................................................................................26
Hidden Shares ..........................................................................................26
Configuring Users ......................................................................... 26
Adding a User ........................................................................................... 26
Importing User Information ....................................................................27
Adding a Group ............................................................................. 28
Configuring Access Restrictions .................................................. 30
Local Users and Groups ...........................................................................30
Active Directory .......................................................................................31

2
Chapter 4 Managing Storage...................................... 35
RAID Modes ................................................................................... 35
Working with RAID Arrays ............................................................ 36
Using JBOD ...............................................................................................36
Changing RAID Mode ..............................................................................37
Configuring a Hot Spare ..........................................................................38
RMM (RAID Mode Manager) ....................................................................40
RAID Scanning..........................................................................................42
Adding an External Drive ............................................................. 43
Connecting an External Drive .................................................................43
Compatibility ...........................................................................................43
Dismounting Drives ...................................................................... 44
Dismounting with the Function Button .................................................44
Dismounting from Settings ....................................................................44
Checking Drives ............................................................................ 45
S.M.A.R.T. ....................................................................................... 46
Formatting Drives ......................................................................... 47
Encrypting Drives .......................................................................... 49
Erasing Data on the TeraStation Completely .............................. 49
Drive Quotas .................................................................................. 50
Quotas for Users .......................................................................................50
Quotas for Groups ...................................................................................50
Size Limits .................................................................................................51
Using the TeraStation as an iSCSI Device .................................... 54
Introduction .............................................................................................54
Creating an iSCSI Volume ........................................................................ 54
Connecting or Disconnecting Volumes ..................................................56
Using with Multiple Computers .............................................................. 58

3
Configuring Access Restrictions .............................................................58
Expanding Volume Sizes .........................................................................62
Deleting Volumes .....................................................................................63
Chapter 5 Backup ........................................................ 65
Back Up from the TeraStation ...................................................... 65
Preparing a Backup Destination .............................................................65
Configuring a Backup Job .......................................................................67
Backup Logs .............................................................................................70
Replication ..................................................................................... 72
Preparing a Replication Destination ......................................................73
Configuring a Replication Task ...............................................................73
Synchronizing Between Source and Destination Units Periodically ...76
Failover .......................................................................................... 77
Usage Restrictions ...................................................................................78
Configuring Failover ................................................................................ 79
Switching to the Backup Unit Manually .................................................82
Synchronizing Between Main and Backup Units Periodically..............82
Backing Up Your Mac with Time Machine ................................... 83
Chapter 6 Remote Access ............................................ 89
WebAccess ..................................................................................... 89
FTP .................................................................................................. 91
Cloud Storage ................................................................................ 93
Configuring Cloud Storage .....................................................................93
Uploading Files to Cloud Storage ........................................................... 95
Dropbox Sync ................................................................................ 98
Configuring a New Task ........................................................................... 98

4
Changing Dropbox Task Settings .........................................................100
Creating a Shared Link (Windows Only) ...............................................103
Chapter 7 Advanced Features .................................. 104
Email Notification ....................................................................... 104
Sleep Mode .................................................................................. 106
Wake-on-LAN .............................................................................. 107
UPS (Uninterruptible Power Supply) ......................................... 108
Port Trunking ............................................................................... 110
Offline Files .................................................................................. 111
Accessing from an NFS Client ..................................................... 112
Encrypting Data Transmission ................................................... 115
Encrypting Settings Data ......................................................................115
Encrypting FTP Transfer Data ...............................................................116
SSL Keys ..................................................................................................116
SNMP ............................................................................................ 116
Saving and Applying Settings .................................................... 117
Saving Settings ......................................................................................118
Applying Settings ..................................................................................119
Transferring Another TeraStation's Settings ............................ 120
Creating a Config File (.nas_config) ......................................................120
Transferring Settings .............................................................................121
Restoring Factory Defaults ......................................................... 122
Initializing from Settings ......................................................................122
Initializing with the USB Initialization Drive .......................................122
Resetting the Administrator Password ..................................... 123
Logs .............................................................................................. 124

5
Displaying TeraStation's Logs ...............................................................124
Transferring Logs to the Syslog Server ................................................124
Creating a Link to the Logs in the Shared Folder ................................125
Updating the Firmware ............................................................... 126
Updating Manually ................................................................................126
Updating Automatically ........................................................................127
Sending Usage Feedback ........................................................... 128
Name, Date, Time, and Language .............................................. 129
Beep Alerts .................................................................................. 132
LCD and LEDs ............................................................................... 133
Proxy Server ................................................................................ 134
Jumbo Frames ............................................................................. 135
Changing the IP Address ............................................................ 138
Boot Authentication ................................................................... 140
Note Before Use .....................................................................................140
Important Notice ...................................................................................140
Setting Up the Authentication Server on a Windows PC ....................141
Configuring Boot Authentication on the TeraStation ......................... 141
If the TeraStation Cannot Be Accessed .................................................143
Chapter 8 Replacing Drives ...................................... 146
LEDs .............................................................................................. 146
Drive Replacement Procedure ................................................... 147
Using JBOD or a Redundant RAID Mode Other Than RAID 0 and
TeraStation Is On ....................................................................................147
Using a Redundant RAID Mode Other Than RAID 0 and TeraStation Is
Off ...........................................................................................................150
Using RAID 0 ........................................................................................... 150

6
Using a Hot Spare ...................................................................................151
Replacing a Non-Malfunctioning Drive ..................................... 151
Chapter 9 Utilities ...................................................... 153
NAS Navigator2 for Windows ..................................................... 153
Mounting as a Network Drive ...............................................................156
Changing the IP Address .......................................................................157
NAS Navigator2 for Mac ............................................................. 158
Mounting as a Network Drive ...............................................................160
Changing the IP Address .......................................................................161
NovaBACKUP ............................................................................... 162
Chapter 10 Appendix ................................................ 163
TeraStation Does Not Boot Properly ......................................... 163
Booting the TeraStation in Emergency Mode ......................................163
Power LED Keeps Blinking ....................................................................163
Cleaning the Dustproof Filter .................................................... 164
LCD Panel ..................................................................................... 166
Modes .....................................................................................................166
Errors .......................................................................................................167
Status ......................................................................................................168
Default Settings .......................................................................... 170
Specifications .............................................................................. 170
Chapter 11 Regulatory Compliance Information .... 172
For Customers in the United States ........................................... 172
For Customers in Europe ............................................................ 172


Chapter 1 Getting Started
Diagrams
Depending on the number or type of drives in the unit, the model name will be different. Check the sticker on the
packing box for your unit's model name.
TS5410DN
13456
10
9
8
11
2 7
13
12
19
20
14
15
16
17
18
23
26
24 25
8

9
TS5410RN
13 21 13 22
3456
13
1
10 13 12 15
7 89
14 22 15 20 19 141816 17
23
26
24 25
TS5210DN
1 3456
19
20
13
1816
15
14
12
10
9
11
2 7
8
17
23
26
24 25
1 Power Button ( )
To power on, connect the power cable and wait for 10 seconds, then press the power button. To power off,
press and hold the power button for 3 seconds.
2 Power LED
When the TeraStation is on, the LED glows green.

10
3 Info LED
If there is a status message, the amber info LED will light up. Check the LCD panel to see the status message.
4 Error LED
If there is an error, the red error LED will light up. Check the LCD panel to see the error message.
5 LAN1 LED
When LAN port 1 is connected, this LED glows green. It blinks when the connection is active.
6 LAN2 LED
When LAN port 2 is connected, this LED glows green. It blinks when the connection is active.
7 LAN3 LED
When LAN port 3 is connected, this LED glows blue. It blinks when the connection is active.
8 LCD Panel
This display shows the status of many TeraStation settings. It also displays errors and messages when available.
9 Display Button
Switches between the different display modes. Also, if the TeraStation is beeping, press this button to stop it.
10 Function Button
Use this button for dismounting USB devices, rebuilding RAID arrays, configuring failover, stopping the
TeraStation's beeping, and initializing settings using a USB drive.
11 Drive Lock ( )
Open the front panel with the key to replace drives or access the init button.
12 Init Button
Hold down this button with something pointed to initialize the TeraStation's admin username and password,
IP settings, SSL, and service port restriction settings to their factory default values. The effects of this button
can be modified in Settings.
13 Status LEDs
Normally, these LEDs blink green when drives are accessed. If a drive fails, its LED will turn red.
14 Fan
Spins to avoid overheating inside. Do not block the fan.
15 USB 3.0 Port ( )
Compatible Buffalo USB drives, USB flash drives, digital cameras, and USB UPS connections can be connected.
USB hubs are not supported.
16 LAN Port 1 ( )
Use an Ethernet cable to connect this port to your network for communicating at 1000 Mbps.
17 LAN Port 2 ( )
This second Ethernet port may be used for network redundancy or backup for communicating at 1000 Mbps.
You may connect a second TeraStation directly to this port for backup.
18 LAN Port 3 ( )
Use an Ethernet cable to connect this port to your network for communicating at 10 Gbps.
Note: To communicate at 10 Gbps, all network devices must be compatible with 10 GbE.

11
19 Power Connector
Use the included power cable to connect to an UPS, surge protector, or outlet.
20 Anti-Theft Security Slot ( )
Use this slot to secure your TeraStation with a cable lock (not included).
21 Serial Number
This sticker shows the TeraStation's serial number.
22 UID Button
Press the UID button on the front or the back of the unit to cycle the blue LED on and off.
23 Link LED
Glows green when the unit is connected to a network.
24 100 Mbps Link LED
Glows amber when the unit is connected to a network at 100 Mbps.
25 1000 Mbps Link LED
Glows green when the unit is connected to a network at 1000 Mbps.
26 10 Gbps Link LED
Glows blue when the unit is connected to a network at 10 Gbps.
Turning the TeraStation On and Off
Note: Do not disconnect or reconnect the internal drives while turning on or off the TeraStation.
Press the power button on the TeraStation to turn it on.
To turn off the TeraStation, press and hold the power button for 3 seconds. Don't unplug the TeraStation without
turning it off first. You can also shut it down and restart it remotely from Settings.
1 Double-click the icon to start NAS Navigator2.

12
2 Right-click your TeraStation's icon and select Settings. For macOS, select the TeraStation's icon while holding
down the control key, then select Settings.
3 Enter the username and password, then click OK.
Note: The default username and password are "admin" and "password".

13
4 Settings will open.
5 Click at the top-right of Settings and choose Shut Down.
6 Click Yes.
7 The "Confirm Operation" screen will open. Enter the confirmation number, then click OK.
When all the LEDs on the front of the TeraStation turn off, the shutdown process is complete.
Creating an Initialization Drive
We recommend creating an initialization drive as soon as possible. This USB drive can be used to initialize the
TeraStation's settings to its factory default values, or recover the system if your TeraStation encounters an error that

14
prevents the unit from booting. For detailed procedure, refer to the "Creating an Initialization Drive" subsection in
chapter 7.

Chapter 2 Configuration
Configure and manage your TeraStation using the Settings interface, accessible from a browser window. Open the
interface using the procedure below or type the TeraStation's IP address in the URL field of your browser. Within
Settings, the Easy Admin page gives you quick access to commonly used settings.
Note: Microsoft Edge, Firefox, Google Chrome, Internet Explorer 9 or later, and Safari 9 or later are supported. If
you have difficulty viewing Settings, check the following:
• If there are a large number of registered users, groups, or shared folders, use another browser instead of
Internet Explorer.
• If you have a proxy server enabled in the browser settings, disable the proxy server.
• With Internet Explorer, set security to Local intranet. On Windows Server operating systems, higher-level
security is configured by default. Set the security to a lower level temporarily.
• On a Mac, you can also use Bonjour to log in to Settings. Navigate to Bookmarks - Bonjour - TeraStation name
from the menu bar of Safari. If you don't see "Bonjour" in the Bookmarks menu, click Safari - Preferences and
select "Include Bonjour in the Bookmarks menu" under "Advanced".
Setting Up Through Initial Setup Wizard
When you access Settings for the first time, or after initializing the TeraStation's settings, the initial setup wizard will
be displayed. To set up the TeraStation using the wizard, follow the procedure below.
1 Double-click the icon to start NAS Navigator2.
2 Right-click on your TeraStation's icon in NAS Navigator2 and select Settings. For macOS, click your TeraStation's
icon while holding down the control key, then select Settings.
15

16
3 The password settings page will be displayed. Enter the desired new administrator password and click Next. If
you click Skip, the administrator password will not change from the default value ("password").
4 The time zone settings page will be displayed. If you need to change the time zone from that which is currently
displayed on the page, select it from the drop-down list and click Next.

17
5 The proxy server settings page will be displayed. If you place the TeraStation under a proxy network, set your
proxy settings. Click Next.
6 The RAID settings page will be displayed. To change the RAID mode from the default mode, select the desired
RAID mode and click Next, then click Start in the next page. The "Confirm Operation" screen will open so enter
the confirmation number and click OK. Changing the RAID mode will begin.

18
If you want to keep the RAID mode as is, select "Keep current RAID mode" and click Next.
Note: The RAID settings page will not be displayed if using TS5210DN series.
7 The usage feedback settings page will be displayed. If you allow Buffalo to collect your usage and environment
information, select the "Send usage feedback" box. If you don't permit information collection, leave the box
blank and click Next.

19
8 The folder path to access shared folders will be displayed and the initial setup will finish.
Opening Advanced Settings
1 Double-click the icon to start NAS Navigator2.
2 Right-click on your TeraStation's icon in NAS Navigator2 and select Settings. For macOS, click your TeraStation's
icon while holding down the control key, then select Settings.
3 Enter the username and password and click OK.
Notes:
• If the time-out period is set to "10 minutes", you will be logged out of Settings after 10 minutes of inactivity.
• Click Secure Connection to log in with an encrypted connection.
/