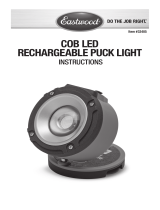
Eastwood Quick Change Worklight System Battery Pack Operating instructions

Type
Operating instructions

This manual is also suitable for

QUICK CHANGE
WORKLIGHT SYSTEM
INSTRUCTIONS
Item #32409
2 Eastwood Technical Assistance: 800.343.9353 >> tech@eastwood.com
The EASTWOOD WORKLIGHT SYSTEM features a Power Unit with 3 interchangeable COB LED Light
attachments and a convenient USB type compact charger. A quick change, turn and lock design allows
switching of attachments in just seconds. The handgrip style base features a thumb control switch
with a strong magnetic base and a retractable 360° swivel hook.
CONTENTS
(1) Eastwood Quick Change
Power Unit with Magnetic Base
and Swivel Hook
(1) Wall Charger – 120V input,
5 Volt, 1.0 amp USB output
(1) 39” [1m] USB to Micro USB cord
(1) Focusable, Multi-Brightness,
Swiveling Spot Light Attachment
(1) Swiveling, Multi-Brightness,
Light Bar/End Light Attachment
(1) 14” Flexible Attachment
SPECIFICATIONS
18650 type, Li-ion, 3.7V, 2600mAh, Li Ion Integral Rechargeable Battery.
4 -hour charge time.
Light Output: Spot Light Attachment: 300 Lumens/160 Lumens
Light Output: Flat LED Bar Attachment: 600 Lumens/300 Lumens
Light Output: Flexible Attachment: 80 Lumens
Runtime: Spot Light Attachment: 3.5 Hrs. / 6.5 Hrs.
Runtime: Flat LED Bar Attachment: 2 Hrs. / 3.5 Hrs.
Runtime: Flexible Attachment: 10 Hrs.
To order parts and supplies: 800.343.9353 >> eastwood.com 3
READ INSTRUCTIONS
Thoroughly read and understand this manual before using.
Save for future reference.
EYE INJURY HAZARD!
DO NOT allow the Eastwood Quick Change lights to project directly into eyes.
Temporary blindness may occur.
Never operate or store Lamp in damp or wet conditions.
FIRE HAZARD!
Do not cover Spotlight while in operation as it does generate heat.
Only mount on stable surfaces hang from secure location.
Keep work light away from excessive heat sources to avoid damage to light.
DANGER indicates a hazardous situation which, if not avoided, will result in death or serious injury.
WARNING indicates a hazardous situation which, if not avoided, could result in death or serious injury.
CAUTION used with the safety alert symbol, indicates a hazardous situation which, if not avoided,
could result in minor or moderate injury.
NOTICE is used to address practices not related to personal injury.
SAFETY INFORMATION
The following explanations are displayed in this manual, on the labeling, and on all other information
provided with this product:
4 Eastwood Technical Assistance: 800.343.9353 >> tech@eastwood.com
SET-UP
Grip the Power Unit firmly, align the two bayonet pins of the selected accessory with the two
notches of the Power Unit then push inward firmly and turn the Lock Collar of the accessory
5° Clockwise until it locks (FIG 1).
To remove accessory, tightly grip the Power Unit and the Lock Collar of the accessory, push
in and turn 5° Counter-Clockwise to release bayonet pins.
✓
FIG. 1
Rotate
Align and push
✓
To order parts and supplies: 800.343.9353 >> eastwood.com 5
OPERATION
SPOT LIGHT
3 Switch Modes: On/Off - Brightness
- Press once and release, ON - High Illumination.
- Press and release, Low Illumination.
- Press and release, OFF.
Beam Focus
- Pull Collar outward to reduce beam size.
- Push Collar in to increase beam size.
Positioning
- Position straight or rotate through 180° angle and 360° Swivel.
LIGHT BAR/FLASHLIGHT
4 Switch Modes: On/Off – Brightness & Flashlight
- Press once and release, Light Bar ON - High Illumination.
- Press and release, Light Bar – Low Illumination.
- Press and release again, Light Bar – OFF/Flashlight – ON.
- Press and release, OFF.
Positioning
- Position straight or rotate through 180° angle and 360° Swivel.
FLEXIBLE ATTACHMENT
2 Switch Modes: On/Off
- Press once and release, ON.
- Press and release, OFF.
Positioning
- Bend as needed to conform to desired configuration.
POWER UNIT MOUNTING
Handheld, Flat Surface, Magnetic Attachment or Hanging
- Hold in hand as a standard flashlight.
- Set flat base on horizontal surface.
- Set against any position, flat ferrous metal surface for Magnetic attachment.
- Pull hook from base for 360° hanging position.
6 Eastwood Technical Assistance: 800.343.9353 >> tech@eastwood.com
CHARGING
Push ON/OFF Button partially
to obtain a battery power level
reading (FIG 2).When fully
charged, three Green and one
Amber indicator lamp will
illuminate. The number of
illuminated LED’s will decrease
from four to one as the charge
depletes.
When the Lamp fails to il-
luminate and/or the 4 (Green
and Amber) LED charge level
indicators at the rear of the
Power Unit do not illuminate, a
charge is required.
- Flip up rubber seal and
plug the Micro USB
terminal of included Wall
Charger into rear of Power
Unit (FIG 3).
- Insert the USB plug into
the USB port of the
Wall Charger.
- Plug wall unit into properly grounded 120 VAC, 60 Hz. Outlet.
- Amber and Green LED’s will illuminate and a Green one will flash to indicate charging
(FIG 3).
- Allow 4 hours for full charge.
- The array of 4 LED’s at the rear of the Housing will all illuminate to indicate full charge.
- Close the rubber Charging Port Cover.
CHARGING WHILE IN USE
The Lamp may be used while charging, however it will greatly extend the
required charging time.
FIG. 3
On/Off
FIG. 2
✓
✓
Battery
level
To order parts and supplies: 800.343.9353 >> eastwood.com 7
NOTES
© Copyright 2019 Easthill Group, Inc. 6/19 Instruction item #32409Q Rev 2
If you have any questions about the use of this product, please contact
The Eastwood Technical Assistance Service Department: 800.343.9353 >> email: tech@eastwood.com
PDF version of this manual is available at eastwood.com
The Eastwood Company 263 Shoemaker Road, Pottstown, PA 19464, USA
800.343.9353 eastwood.com
  • Page 1 1
  • Page 2 2
  • Page 3 3
  • Page 4 4
  • Page 5 5
  • Page 6 6
  • Page 7 7
  • Page 8 8

Eastwood Quick Change Worklight System Battery Pack Operating instructions

Type
Operating instructions
This manual is also suitable for

Ask a question and I''ll find the answer in the document

Finding information in a document is now easier with AI