Page is loading ...

1
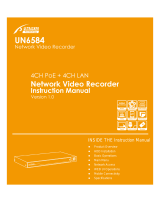
Hi Definition 1080P NVR
Network Video Recorder
SLD310 4 Channel – SLD311 8 Channel – SLD312 16 Channel
User’s Manual
Security Labs, Inc. Customer Support 800-774-0284 www.security-labs.com
V103015NVR

USER MANUAL
Table of Contents
OVERVIEW OF THE NVR ..................................................................................... 1
FRONT PANEL ..................................................................................................................... 1
REAR PANEL ....................................................................................................................... 2
REMOTE CONTROL .............................................................................................................. 2
NVR CONNECTION .............................................................................................. 3
HDD INSTALLATION ............................................................................................................. 3
CAMERA, ROUTER AND MONITOR CONNECTION ....................................................................... 3
POWER SUPPLY CONNECTION ................................................................................................ 3
NVR BOOT UP ...................................................................................................... 3
SYSTEM INITIALIZATION ......................................................................................................... 3
STARTUP WIZARD ................................................................................................................ 3
THE NVR’S MENUS .............................................................................................. 6
MAIN MENU GUIDE ............................................................................................................ 7
MAIN MENU ...................................................................................................................... 8
PARAMETER .................................................................................................................... 8
IP Camera .................................................................................................................... 8
Live .............................................................................................................................. 9
Output ........................................................................................................................ 9
Image Control ........................................................................................................... 10
Privacy Zone.............................................................................................................. 10
Record ....................................................................................................................... 11
Schedule ................................................................................................................... 11
Mainstream / Substream / Mobilestream ................................................................ 12
Alarm ........................................................................................................................ 13
Motion Detection ..................................................................................................... 13
Alarm I / O (Input / Output) ..................................................................................... 14
Record Search ........................................................................................................... 15
Event Search ............................................................................................................. 16
Backup ...................................................................................................................... 16
Device ....................................................................................................................... 19
HDD ........................................................................................................................... 19
Cloud Storage ........................................................................................................... 19
System ...................................................................................................................... 20
General ..................................................................................................................... 20
DST ............................................................................................................................ 20
NTP ........................................................................................................................... 21
Users ......................................................................................................................... 21
Info ............................................................................................................................ 22
Channel Info.............................................................................................................. 22

USER MANUAL
Log ............................................................................................................................ 23
Advanced - Maintain ................................................................................................ 23
Events ....................................................................................................................... 24
Shutdown.................................................................................................................. 24
NETWORK .............................................................................................................. 25
NETWORK SEARCH TOOL .................................................................................................... 25
Modify the NVR Settings .......................................................................................... 25
Network Connection Type ........................................................................................ 26
E-mail ........................................................................................................................ 27
DDNS ......................................................................................................................... 27
Quick Reference (QR) Code or P2P ........................................................................... 29
Connecting with a desktop or laptop web browser ................................................. 30
ActiveX (IE) & Plug-ins - Download and Installation ................................................. 30
Web Application Manager Login .............................................................................. 30
Live Interface ............................................................................................................ 31
Menu Bar .................................................................................................................. 31
Live Display ............................................................................................................... 31
Video Control ............................................................................................................ 32
Playback .................................................................................................................... 33
Record Search ........................................................................................................... 33
Playback Control ....................................................................................................... 34
Remote Settings........................................................................................................ 35
Local Setting ............................................................................................................. 36
Logout ....................................................................................................................... 36

USER MANUAL
SAFETY INSTRUCTIONS
Please carefully read the following safety instructions to avoid personal
injury and prevent the NVR and other connected devices from being damaged.
1. Power source - Only use the included 48 volt (POE rated) power supply for 4 and 8
channel units, or 3 prong AC cable included with the 16 channel unit
Never operate the equipment with an unspecified power supply.
2. Never push objects of any kind through the ventilation openings of the NVR
3. Do not place the equipment in a dusty area
4. Do not place the equipment in a wet or humid environment
5. Keep the surface of the equipment clean and dry
Use soft damp cloth to clean the outer case of NVR (do not use liquid aerosol cleaners)
6. Do not operate if unusual symptoms are found
If any unusual smells or sounds are detected, unplug the power cable and contact
technical service at 1-800-774-0284.
7. Do not remove the case / cover
No user serviceable parts are inside. Please contact technical service for assistance in
upgrading or replacing the hard drive.
9. Although rarely required, when replacing the clock back-up lithium battery, use the
same part number included with the unit.
WARNING: Disconnect the power supply before replacing the standard 3V lithium battery
on the main board. Dispose of old battery via an approved recycle facility.
10. Keep the NVR well ventilated
The NVR includes a hard disk drive and control board that produce heat during
operation. Do not block the ventilation openings (on the top, bottom, both sides and the
back side) to allow cooling during operation. Install the NVR in a well ventilated area.
11.The included power supply can only be used for one NVR. Do not connect
additional equipment to the supply.

1
Overview of the NVR
Front Panel
Note:NVR is the abbreviation for Network Video Recorder.
NVR Front Panel(Your model’s layout may vary)
Item
Key title
or Indicator
Remark Function & Description
1
Power Indicator
PWR
“Green” indicates “ON”
2 IR Receiver
Receives the IR signal from your Remote Control
3 HDD Indicator HDD
“Red” indicator flashing shows the hard drive is being read or written to. If
the indicator is always on, the hard disk is abnormal, unformatted or has no
recorded files.
4
Channel
select:
CH1 CH2
CH3 CH4
Select a channel to view full screen
5 QUAD
On Live or Playback mode, switch to Quad display.
6 REC ●
Press the button to start manual record.
7 MENU/ESC
Enter into Main menu, exit or stop playing
8 Down Key
Move down
9 SEL/EDIT
Enter into shortcut menu and select ENTER and EDIT
10 Up Key
Move up
11 PTZ PTZ
Enter into PTZ control interface
12 REW
Move to left; Rewind function;
decrease PTZ rotation speed and parameter value of graphic setting
13 PAUSE
Pause / play frame by frame manually
14 PLAY
Enter into Record Search menu and play.
15 FWD
Right key; increase PTZ rotation speed and Parameter value.
16 STOP
Stop playing or stop manual record
17 USB
USB port
Table 1-1

USER MANUAL
2
Rear Panel
NVR Rear Panel(Your model’s layout may vary)
Item Port Description
1
Power Port
Attach 48VDC power supply / AC cable for 16CH NVR
2
Power Switch
Power ON/OFF
3
USB Port
Connect USB devices, such as USB mouse and USB flash disk.
4
Sensor/Alarm
Connect input trigger switch or PIR, also alarm output is located here
5
HDMI Port
Connect to HDMI high definition monitor
6
VGA Port
Connect to VGA monitor, such as PC monitor
7
AUDIO OUTPUT
Audio signal output, RCA jack to powered speakers or stereo system
8
WAN Port
Network connection to router with included LAN patch cable
9
Camera Inputs
Power to POE cameras, and input for video from cameras
Table 1-2
Remote Control
Table 2-3 Key functions of the remote control
Item Key title Key function
1 1-8 Channel select 1-8; Numeric buttons
2 9 & 0 Numeric buttons
3 ALL Multiple display mode
4 Menu Enter into Main menu/Exit
5 ▲ Up arrow, Volume adjust
6 ▼ Down arrow, Volume adjust
7
◄/
Left/Right ; Decrease/increase parameter
value of control bar.
8 SEL Select /Edit ; selected operation.
9
Rewind
10
Enter into record search menu; Play
11
Forward
12 ● Record
13
Pause/Sequence
14 ■ Stop manual record; stop playing
15 Audio Go to main menu
16 Mute Mute On/off
Table 1-3

USER MANUAL
3
NVR Connection
HDD Installation
Your NVR comes with a pre-installed hard drive. To replace, upgrade, or add a hard drive to your unit, please
disconnect the power cable to the NVR. The SATA data cables and power wires to the hard drive can be pulled
directly out of the drive. Please note the key / orientation of the plug being removed from the drive, and re-install
in the same manner to the new drive. The hard drive is typically held in place with four screws. After
installation, place the cover back on the NVR, secure with the cover’s screws, and attach the power cable. Go to the
Main Menu, select the <DEVICE> sub menu, and click on <FORMAT HDD>. Please use only a SATA drive
recommended for surveillance applications. Contact technical service for the latest factory recommendations.
Camera, Router and Monitor Connection
Connect the included LAN patch cable from the WAN port on the NVR to the router or switch on your
local network. A local monitor should be connected to the VGA or HDMI outputs to help you see the
menus and setup your new NVR. Cameras can be connected directly to the RJ45 (POE) ports on the
back of the NVR.
Power Supply Connection
Please connect the included 48 VDC power adapter (4 & 8 Channel), or AC cord (16 channel) to the
back of the unit.
NVR Boot up
System Initialization
Upon pressing the power button, you will see the Security Labs logo and Customer Support contact
information. This same screen will be displayed every time your NVR is powered on.
Startup Wizard
After the NVR initialization is completed, the startup wizard will be displayed. If you do not wish to be
reminded of any future setup items the next time you power on the NVR, you may click “Don't show this
window next time” to cancel. You can still access all settings via the menu system at any time. You can
also reactivate the Wizard under: Main Menu / System / General / Show Wizard
TIP: Let the Startup Wizard do its job. If all components are connected correctly, you will see
video from all cameras with no further camera to NVR setup required!
The Wizard setting menu includes:The Homepage, Network setup, IPC (IP Camera) setup, Record
Schedule and Hard Disk Maintenance..
1.The network setup page default mode is DHCP. This automatically assigns an IP address to the NVR

USER MANUAL
4
that is made available by your router. If you intend to use a static IP address (an address that is provided
by your internet service provider and never changes), click on <Static> and enter the address using the
mouse supplied with the NVR. <Save> when finished.
2、IPC Setup allows you to review the cameras that were discovered by the Wizard. This list will contain
the POE cameras that were connected to the back of the NVR, along with any other compatible cameras
that were discovered on your local network via the LAN patch cable connected to your router. You can
edit the address, add, or delete a camera on this list
TIP: Use the <Auto Assign IP to camera(s)> button to refresh any previously deleted cameras, or
to add newly installed cameras to the list.
IPC Setup
Record Schedule gives you a quick way to set up the days, times, and type of recording that you would
like to use. Select Normal (constant recording), Motion (video motion detection), or Alarm (devices
connected to the alarm input terminals) with the mouse control, left-click and drag that selection through
the schedule table.

USER MANUAL
5
TIP: Be sure to further define each type of trigger in the Alarm and Motion menus.
Record Schedule
Hard Disk Maintenance shows the available recording space on the drive. You can also select <Auto>
overwrite for the drive to overwrite the oldest file when full, select the number of days you wish to store at
any time, or stop recording when full. Auto is the default selection and most popular choice. When
installing a new hard drive, click the <Format HDD> button.
TIP: The hard drive included with this NVR has been formatted and is ready to record!

USER MANUAL
6
The NVR’s Menus
This chapter is dedicated to explaining the menu system, and the manual adjustment tools that are
available.
Popup Menu
Using the mouse, right click on the screen, or hover the mouse pointer near the bottom of
the screen to activate the Popup Menu.

USER MANUAL
7
Main Menu Guide
Display
System
Live
Output
Mainstream
Schedule
DDNS
HDD
Cloud
Shutdown
Main Menu
Privacy Zone
IP Camera
Parameter
Network
Record
Alarm
Record Search
Event Search
Device
General
Users
Info
Log
Substream
Record
Email
Network
Alarm
Motion
Maintain
Advanced
Events
Record Search

USER MANUAL
8
Main Menu
Picture 4-2
PARAMETER
Shows sub-menus for Display, Record, Network, and Alarm setup.
IP Camera
“Main Menu”→“Display”→“IP Camera” to enter into the top left menu
Picture 4-4
In LIVE mode, left click the mouse button on the
[ ] icon on the toolbar, or use the [Menu]
button on the remote control to enter the main
menu screen, as shown in Picture 4-2.
If system interface is locked, refer to section 4.3
to unlock it by inputting your password. By
default, there is no password required.
In the Main Menu mode, you can adjust the
settings for Parameter, Record Search, Device,
System, Advanced, and Shutdown.
Channel
:
IPC camera channel
To Edit
:
Click on the blue pencil icon to make changes
to a camera’s network settings (bottom left menu)
State: A green arrow indicates that a camera is live
IP address: The IP address of a camera, including the
gateway
IP Address/Domain
:
Shows the current IP address
being used by a camera
Subnet Mask: Displays the current subnet mask used
by a camera
Port:Displays the current port number used by a
camera
Manufacturer & Device type:Displays on screen if
broadcast by the camera
Protocol: The current protocol being used
MAC Address:The physical address for the camera.
This is a unique identifier that stays with a camera
since its date of production.

USER MANUAL
9
Live
“Main Menu”→“Display”→“Live” to enter into the interface shown below. This menu gives you the
options to assign a title to a camera, and how to display the time for each channel.
Picture 4-6
Output
The Output menu gives you control over sequential camera viewing, the resolution output to your monitor,
and the transparency level of the menus shown on screen.
Go to “Main Menu”→“Display”→“Output” to enter into the interface shown below.
Seq Mode
:
Choose from several
channel display patterns to be shown
in sequential order.
SEQ Dwell Time
:
Choose the time
period you wish for each sequential
view to be shown (5 to 300 seconds)
VGA/HDMI Resolution
:
VGA output
or HDMI output. Including
1024×768,1280×1024,1440×900,
1280×720,1920×1080. Choose the
best option that works with your
monitor.
Transparency
:
Adjusts the visibility
of the menus in a range of 0—128.
Channel
:
Select the channel you wish to edit
Show Time & Channel Name:Check these
boxes if you want these items to be displayed
Date Format:Select your preferred date format
such as MM/DD/YYYY
Time Format:12 hour or 24 hour format will be
displayed
Refresh Rate: Set to 60 for NTSC (USA &
Canada). 50 for PAL operation.
OSD Position:Click and drag the time to place
you prefer on a camera’s on-screen view
Color:Adjust the chroma, brightness, contrast,
and saturation of the camera on the selected
channel(Refer to Picture 4-6)

USER MANUAL
10
TIP: To start or stop Sequential Display, please click the circular icon on the popup menu.
Image Control
Professional line POE cameras will also have access to the Image Control menu. Selections are:
1. IR CUT Mode: To keep the camera in Black and White, Color, or Automatic Switching mode.
Automatic is preferred in most situations.
2. IR Cut Delay: Use this to extend the IR trigger time in the automatic mode. Installations that deal
with extended twilight or dawn conditions can cause the IR to toggle on and off. Increasing the delay will
minimize this condition.
3. Back Light: Use this to balance the illumination of darkened foreground objects with a bright
background (i.e. An interior view of an object sitting near a large window).
4. 3D Noise Reduction: Softens grain in video caused by extreme low lighting.
5. WDR: Wide Dynamic Range increases sensitivity to low light conditions and and enhances the
back lighting function.
6. AGC: Automatic Gain Control governs the cameras reaction to changes in lighting.
Privacy Zone
Privacy Zone is designed to “black out” sections in a camera’s view, as shown in Pictures 4-8 and 4-9.
1. Click (check) the box for each zone to be set (maximum of 4 zones per channel)
2. Click “Setup” to adjust the position of the zone(s). Click and drag a box to an area
to be masked. Click and drag an edge of a box to change its size and coverage
area.
3. Once finished, right click the mouse to return to the prior page
4. Click “Save”
Picture 4-8 Picture 4-9

USER MANUAL
11
Record
“Main Menu”→”Parameter” → “Record”→“Record” to enter into the interface shown in Picture 4-10.
Picture 4-10
TIP: Use the Pre-Record feature when your NVR is set to record events only. This will allow you
to see the activity prior to the event trigger.
Schedule
“Main Menu”→“Record”→“Schedule” to enter the interface shown in Picture 4-11 to set the
record schedule of your NVR.
TIP: Use the “Copy” feature at the bottom of the screen to quickly apply one channel’s settings
to another channel, or to all channels.
Channel
:
Set the desired channel you
wish to adjust in the drop-down menu
Record: Enable or Disable the recording
function for the selected channel
Stream Mode
: Select Mainstream or
Substream. Mainstream displays a higher
quality picture. Substream uses less
processor capacity for more fluent motion
of fast moving objects and consumes
less hard drive space
Pre-Record
:
Use this feature to store
and add video activity before an alarm or
motion trigger. See what causes a
trigger before it happens!
Record Schedule gives you a quick way to
set up the days, times, and type of recording
that you would like to use. Select Normal
(constant recording), Motion (video motion
detection), or Alarm (devices connected to the
alarm input terminals) with the mouse control,
left-click and drag that selection through the
schedule table.
Normal recording times will show as “Green”,
Motion as “Yellow”, and Alarm as “Red”
Picture 4-11

USER MANUAL
12
Mainstream / Substream / Mobilestream
Main, Sub, and Mobile stream selections are available in certain menus or live viewing situations. Using this
menu, you can set the parameters used for each type of streaming selection. Your NVR will automatically sense the
style of camera connected to each channel, and offer the stream settings available for that camera.
Go to “Main Menu”→”Parameter” → “Record”→“Mainstream/Substream/ or Mobilestream” to enter into
the menu interface as shown in Picture 4-12.
TIP: Choose a high Frames Per Second (FPS) setting to view fast moving scenes or objects.
Select a higher bit rate to capture more details when needed. The overall logic is that there is a
maximum amount of information that can be processed per second by any NVR or DVR.
Allocating the resources available to each channel or camera allows you to customize your
installation to achieve the best overall results.
Picture 4-12
Channel
:
Select a channel to modify
Resolution
:
Set the resolution available
for each camera using the drop list.
FPS
:
Frames per second, Min 1 to Max
30
Bitrate Mode : Preview Mode (offers
suggestions from the drop list) and
User-defined Mode (directly enter your
preference
Bitrate
:
Select the rate from the drop list,
or click on the box to type in your
preference.
CBR/VBR: Controlled Bit Rate keeps a
constant data flow rate, Variable changes
with the scenery being viewed. Variable
can offer a better image quality, but can
also demand more resources to do so.

USER MANUAL
13
Alarm
Motion Detection
Video motion detection enables you to record only when there is activity within the view of a camera. This will
conserve space on the hard drive and allow you to quickly find recordings that you want to see.
“Main Menu”→“Parameter ”→ “Alarm” → “Motion” to enter into the menu below.
Alarm Out: Check the box to make the alarm output relay active when there is a motion trigger.
Latch Time: Determines how long the alarm output relay will latch after a motion trigger. Choose from;
10,20,40, and 60 seconds.
Post Recording: Determines how long a motion event will record after a trigger. Choose from; 30
seconds, 1, 2, and 5 minutes.
Show Message: When motion is detected, the unit displays an “R” icon on the screen when in Motion
Record Mode. In Normal Record Mode, the unit changes the “R” on-screen to “M”.
Send Email: Check the box to activate motion detection e-mail alert
Full Screen: Check the box to show the channel “full screen” when motion is detected
Record Channel: Select the channel(s) that will record the motion event. Typically the same channel is
selected as the one being set up (shown in the top box).
TIP: To quickly disable motion detection for a certain camera/channel, use the
“Disable / Enable” function. The other settings for that channel will remain intact.
AREA SETUP: Click on the “Setup” button to display the 20 x 15 grid pattern below.
The grid will overlay your camera’s view for the channel being
edited. Use the mouse to left click a square On (red) – Off (clear).
Left click and drag the mouse pointer to quickly change an area.
Right click to exit back to the setup menu. Use this process to
pinpoint exactly what you want covered by motion detection
(red). Avoid areas (clear) that will cause false triggers such as
known public pathways, nearby tree branches, erratic
sun/shadow movement or pet traffic areas
Channel: Choose channel(s) to enable motion
detection. Only channels with an active
camera will show on the drop list.
Enable:
Activates or deactivates motion
detection for the channel being set up
Sensitivity: Adjusts from 1 (low sensitivity) to
8 (high). A lower number is suggested for
outdoor applications to avoid false triggers
caused by rapid changes in lighting or from
wind moving objects.
Buzzer: Set the buzzer to alert you when
activity is detected. Selections are; Disable, 10,
20, 40 and 60 seconds.

USER MANUAL
14
Alarm I / O (Input / Output)
“Main Menu”→”Parameter”→“Alarm”→“Alarm”
Picture 4-17
Post Recording: You can set how long an alarm recording will last after a trigger (30s, 1 minute, 2
minutes, or 5 minutes).
Alarm out: A quick way to activate or deactivate the alarm output for a channel.
Show Message: Displays an alarm alert message on screen when triggered
Send Email: Set to send an email when an alarm is triggered
Full Screen Alarm: The corresponding channel will be switched to full screen display mode with an alarm
trigger.
Record Channel: Select a channel to record the alarm video to. A different channel, or multiple channels
can be selected for the video recording function.
Copy: Use to copy the current channel parameters (except Recording Channel) to another or all
channels.
Your NVR is equipped with a set of alarm input
terminals. These inputs are designed to be
connected to external triggering devices such as PIR
motion detectors, door switches, panic switches,
alarm panel outputs, and The Tempal™ Temperature
Alert device.
Alarm In / IO Channel: Select a channel to
configure
Alarm Type / IO Status:
Select from;
Normally-Open (a switch that triggers an alarm
when it completes a circuit), Normally-Closed (a
switch that triggers an alarm when it breaks or
opens a closed loop circuit), or “OFF”.
Buzzer: Select how long the buzzer will sound
with an alarm trigger (OFF, 10s, 20s, 40s, & 60s)
Latch time: Select how long the alarm output
relay will close (10s, 20s, 40s, 60s).

USER MANUAL
15
Record Search
“Main Menu”→“Record Search”→“Record Search”
Picture 4-18
Picture 4-19
During single channel playback mode, zoom in to an area on the screen by clicking on the
magnifying glass icon, and drag a rectangle over that area. Right click on the mouse to go back
to normal viewing.
Channel: Select the channel (or ALL) you want
to search.
Type: Select the type of recording; ALL,
Normal, Motion, I.O. (alarm input terminal), or
Alarm (Motion + I.O.).
Time:
Select a Month and Year and click
<Search>. Days on the calendar that highlight
yellow contain recordings. Clicking on the
highlighted dates shows the channels that have
recordings. Entering a Start and End Time can
further
narrow down your results. Click
<Playback> to see the results of your search on
the Playback Interface page.
Playback Interface: Select channel(s) to view
in the left window. Use the blue arrows along the
bottom to start and control playback. Click along
the green control bar to quickly move to another
time in the recording. Drag the volume control
knob to adjust volume when applicable. When
playback ends, the
NVR will remain in the
playback interface mode, as shown in Picture
4-19.
Time Bar Increments: By default, the time bar
covers a 24 hour period. Click on the 2H, 1H,
or 30m at the very bottom of the screen to
shorten the time span covered by the bar.
Clip and Backup: While the NVR is in
single channel playback mode, you can
quickly back up what you see on the
screen by clicking on the scissor icon to
start a backup, and once again to end the
backup. Click the save function on the
following message box.

USER MANUAL
16
Event Search
“Main Menu”→“Record Search”→“Event Search”
Event Search gives you a drop list, text type method to find events by date, time, channel and type.
Click on the appropriate box to select or enter a search date, time period, channel(s), and the type of
recording; Normal, Motion, I.O. (alarm terminal input) or Alarm (Motion + I.O. at the same time) that you
wish to review. Click <Search> to see a list of events that match your criteria.
Use the double arrows to go to the next or previous page of events on the list.
Place a page of events number in the box next to the blue arrow and click to “Jump” to that page.
To narrow or broaden your search results, enter new parameters into Search Date, Search Time, Channel,
and Type, then click <Search> once again.
Backup
Insert a USB flash drive into an available port on the front or back of your NVR. Users generally will
connect the mouse to a USB port on the back panel, leaving the front panel USB easily accessible for
USB backup purposes. If several large files need to be copied to a USB device, it is recommended to
use the USB 3.0 port on the back panel. By design, the USB3.0 port is intentionally located on the back
of the main board, placed near the digital signal processor.
1) Use Event Search to locate the events(s) to copy.
2) Check the box (or boxes) to the left of the event(s) to select them (Picture 4-23).
3) Click <Backup> at the bottom right of the screen
Note: <Quick Backup> will select all events on the page
4) In the next pop-up message box select H264 or AVI for the type of file most compatible with your
favorite media player, click <Save>. The AVI format is the most commonly used, and compatible with
many media players. The player software included with your unit will play either type of file.
/