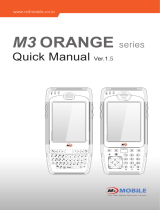
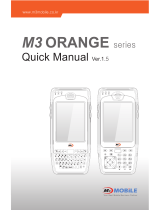
M3 Mobile UL-10 User manual

Category
Handheld mobile computers
Type
User manual

This manual is also suitable for

Using this manual
1
User Manual
Version 1.1 ©2015
Using this manual
2
Using this manual
Thank you for purchasing this M3 UL10. This device will provide you with high quality data
capture and mobile communication at industrial level of ruggedness.
This user manual has been specially designed to guide you through the basic functions and
features of M3 UL10.
Read me first
Please read all safety precautions and this manual carefully before using your
device to ensure safe and proper use.
This user manual is written based on current state of the device and the detail of this
manual are subject to change without prior notice.
The description on this manual is based on the default setting of the device.
Images and screenshots are taken using current version of software.
This user manual assumes the device is fully optioned. For the available options with
your device, please contact your local distributor or visit our homepage at
http://www.m3mobile.net
M3 Mobile is not liable for performance issues caused by third-party applications.
M3 Mobile is not liable for performance issues or incompatibilities caused by user
mistakes.
M3 Mobile is not liable for copyright/patent infringement by the user.
M3 Mobile may request part of or entire application developed by third-party
company to improve the overall product performance.
Newer version of operating system (OS) than your current OS may have been
released after your purchase. For the latest OS version information, please contact
your local distributor.
This user manual may contain technical and/or editing error.
Using this manual
3
Copyright
Copyright © 2015 M3 Mobile Co., Ltd.
This user manual is protected under international copyright laws.
Any part of this document cannot be copied, reproduces, modified or translated to other
languages without prior written consent of M3 Mobile.
Trademarks
M3 Mobile and the M3 logo are registered trademark of M3 Mobile Co., Ltd.
M3 UL10 is a registered trademark of M3 Mobile.
Microsoft logo, Windows logo, MS Office, ActiveSync and Windows Mobile Device
Center are registered trademarks of Microsoft Corporation.
Bluetooth
®
is a registered trademark of the Bluetooth SIG, Inc.
Summit and SCU are trademarks of Summit data communication.
Instructional icons
Before you start, familiarize yourself with the below icons to help with the manual.
Warning situations that could cause injury to yourself or others.
Caution situations that could cause damage to your device or other
equipment.
Note useful tips or additional information.
Using this manual
4
Safety precaution.
Do not use PDA while driving.
It can expose to serious accident.
Using PDA while driving may defend against law.
Do not touch charging plug with wet hand.
It may cause electric shock.
Be aware of handling battery.
Do not apply big impact or drill into it.
Avoid damping the battery or submerge into water.
Avoid metallic contact with the battery.
Do not expose PDA, battery or charger to excessive heat.
It may cause PDAs corruption or explosion.
If PDA has been left in a car, as temperature increases it may cause explosion.
Do not use PDA in event of thunder and lightning.
Using PDA in lightning condition can cause electric shock.
Avoid use of PDA in restricted area.
It can cause radio interference.
Avoid use of PDA within aircraft. It can interfere with the navigational system of
the vessel.
Avoid use of PDA within hospital. It can interfere with the medical equipment.
Turn off PDA where explosion risk area.
Please obey rules of explosion risk area.
It is safe to turn off PDA in patrol station.
Be aware of using head set.
Continuous use of head set with high volume can damage hearing ability.
Using headset while walking or driving, it can decrease attentiveness and cause
accident.
Revision History
Version 1.0 Release date: March, 2015
Initial release
Using this manual
5
Contents
1. Getting Started .................................................................................................. 7
1.1 Product package ............................................................................................... 7
1.1.1 Device and Peripherals ..................................................................................... 7
1.2 Battery .................................................................................................................. 8
1.2.1 How to Use .......................................................................................................... 8
1.2.2 How to charge .................................................................................................... 9
1.3 Power on & off .................................................................................................. 12
1.3.1 Power on ........................................................................................................... 12
1.3.2 Power off ........................................................................................................... 12
1.3.3 Sleep mode ....................................................................................................... 12
1.4 Memory card .................................................................................................... 13
1.4.1 Inserting memory card .................................................................................... 13
1.4.2 Data check ....................................................................................................... 13
1.5 SIM card ............................................................................................................. 14
1.5.1 Inserting SIM card ............................................................................................. 14
2. Basic usage ..................................................................................................... 15
2.1 Features ............................................................................................................. 15
2.2 Keypad .............................................................................................................. 16
2.2.1 Buttons ............................................................................................................... 16
2.3 Screen ................................................................................................................ 18
2.3.1 Task bar .............................................................................................................. 18
2.3.2 Desktop screen ................................................................................................. 19
2.4 Data input ......................................................................................................... 20
2.4.1 Stylus pen ........................................................................................................... 20
2.4.2 Keyboard ........................................................................................................... 20
2.5 Reset ................................................................................................................... 22
2.5.1 Soft reset ............................................................................................................ 22
2.5.2 Clean boot ........................................................................................................ 22
2.6 Sync with PC ..................................................................................................... 23
2.6.1 How to sync ....................................................................................................... 23
Using this manual
6
3. Application usage .......................................................................................... 25
3.1 Bluetooth ........................................................................................................... 25
3.1.1 Bluetooth configuration .................................................................................. 25
3.1.2 Getting connected .......................................................................................... 25
3.2 Scanner .............................................................................................................. 28
3.2.1 Scanner basics .................................................................................................. 28
3.2.2 Scanner use....................................................................................................... 27
3.3 Wireless LAN ...................................................................................................... 28
3.3.1 WLAN configuration ......................................................................................... 28
4. Advanced usage ........................................................................................... 31
4.1 Software development kit (SDK) .................................................................... 31
4.1.1 SDK Package .................................................................................................... 31
4.1.2 OS Update ......................................................................................................... 32
4.1.3 Key customization ............................................................................................ 32
5. Etc ..................................................................................................................... 34
5.1 Specification ..................................................................................................... 34
5.2 Services ......................................................................................................... - 35 -
5.2.1 Contact details ............................................................................................ - 35 -
Using this manual
7
1. Getting Started
1.1 Product package
1.1.1 Device and Peripherals
Check M3 UL10package contains below items:
<M3 UL10>
<Battery>
<Adapter>
<USB cable>
<Stylus pen>
<Quick manual>
<Cradle>
If there is any missing part or damaged item, please contact your supplier immediately.
Use of controls or adjustments or performance of procedures other than
those specified herein may result in hazardous radiation exposure.
Using this manual
8
1.2 Battery
1.2.1 How to Use
Inserting battery
Insert the battery to the battery pack position.
Slide the battery lock to the left to lock the battery pack.
M3 UL10 uses Li-Ion 3.7V, 4,500mAh smart battery.
Using unauthorized battery may cause explosion or serious damage of
the device.
Risk of explosion if battery is replaced by an incorrect type. Dispose of
used batteries according to the instructions.
Check the battery is placed in the correct direction.
Removing battery
Slide the battery lock to the right to unlock the battery pack..
Then lift up the battery to remove from the battery position.
Using this manual
9
Battery contact pin may bend or damaged not pull out properly.
Program error may be occurred when removing battery while any program is
running. Please make sure the running program is closed before
The back-up battery would work when the battery has removed so the device goes to sleep
mode.
M3 UL10 can be used for maximum 11 hours with fully charged battery. It can
be different depending on users
working environment.
1.2.2 How to charge
If the exclamation markshows up next to the battery icon, please charge the battery
otherwise the device will be turned off.
Charging the battery
Plug in authentic AC adaptor plug to wall jack and DC jack to power connector of
cradle.
Using this manual
10
Insert PDA to device slot to start charging the PDA. Make sure that the device is
connected to the cradle correctly.
AC adaptor is rated at 100~240V, 5A. Do not use the adapter outside the rated
voltage.
Please use authentic cradle that M3 Mobile provides only, there might be a
malfunction and/or failure of device.
If PDA is in right position, charging LED will indicate red and it will start charging the battery. It
will change to green when the battery is fully charged.
If the charging LED is not turned on, please re-insert the device to the cradle.
LED Color
Description
Red
The battery is charging.
Green
The battery is fully charged.
Acceptable user temperature range is -20
o
C (-4
o
F)~60
o
C (140
o
F)
It will take approximately 4 hours to fully charge from deplete state using the supplied
charging cradle.
Using this manual
11
Charging spare battery
Position the spare battery to battery pack of the cradle as indicated in the following figure.
Charging LED on the cradle indicates the charging status.
Remove the spare battery from the charging slot when charging is done.
Battery attached to the PDA will be charged first than the spare battery on the cradle, when
two batteries are being charged at the same time.
M3 Mobile recommends replacing the battery if the battery is being used
for 2 years.
Battery capacity decrease when charging and discharging is repeated.
Battery information can be checked in Start
Settings
System
Power.
Using this manual
12
1.3 Power on & off
1.3.1 Power on
To turn on the device, attach fully charged main battery and press the power button briefly.
Empty or low level of the back-up battery may cause starting problem. If this
happens press and hold the reset button for 5 seconds.
1.3.2 Power off
Press and hold the power button for more than 5 seconds to turn off the device.
1.3.3 Sleep mode
Device will automatically enterSleep mode’ to save battery if there is no constant usage.
By default, backlight is turned off after 30 seconds of null state and will enter sleep mode if
the device is not used for 1 minute on battery power.
The time can be set from Start
Settings
System
Backlight for backlight off time and
Start
Settings
Power for sleep mode.
In sleep mode, all modules except phone module are powered off which
causes Wi-Fi to disconnect from the current AP. However, on resume, Wi-Fi is
automatically re-connected to the AP normally within 10 seconds.
Using this manual
13
1.4 Memory card
1.4.1 Inserting memory card
M3 UL10 uses MicroSDexternal memory card. The external memory slot is located inside of the
battery as indicated in the following image:
To insert MicroSD, first open the top cover and slide in the external memory card in the right
direction until you feel a click.
M3 UL10 with Windows CE 6.0 operating system supports up to 32GB of
external memory.
1.4.2 Data check
Stored data can be checked in My Device
Storage Card.
For OS update using MicroSD, please refer to section 4.2.1 OS update via SD card.
Using this manual
14
1.5 SIM card
1.5.1 Inserting SIM card
If the device is optioned with 3G network, SIM card slot is located under the battery socket.
The SIM must be authorized by the local network provider for voice or data communication
over the wireless network.
To insert the SIM card, remove the battery and slide in the SIM card to the proper position.
Please refer to section 3.5 Phone for more information on how to use the phone.
Using this manual
15
2. Basic usage
2.1 Features
Device layout
Using this manual
16
2.2 Keypad
2.2.1 Buttons
M3 UL10 has two different keypad options: 37Keys and 55Keys.
Button
Description
Scan
Used to scan while scanner program is running.
Soft keys
Use specific command or menu.
Blue / Yellow
function
Use special function keys shown on keypad as Blue or yellow.
It will be printed out according to printed color(mode).
Back Space
Delete previous input data.
Enter
Input data or Confirm input data.
Space
Input space between characters.
Power
Short press: Go into Sleep mode.
Long press: Turn On/OFF device.
F Keys(F1~F10)
Use programmed function.
Numbers
Input numbers.
Backlight Toggle
Turns On/Off the LCD Backlight.
Reset
Reset device.
Shift
Used to input uppercase letters.
Using this manual
17
Button
Description
SCAN
Used to scan while scanner program is running.
Soft1 / Soft2
Use specific command or menu.
Characters
Used to input characters or to execute functions.
Back space
Deletes previous input data
Shift
Used to input uppercase letters.
Function
Activate specific function.
Power
Long press: Turns on / off the device.
Short press: Enters Sleep / Wake up Mode.
Backlight toggle
Toggles the LCD backlight.
Short press: Reduces the backlight level to 5% and/or turns on the
backlight
Long press: Turns off the backlight completely
Numbers
Input numbers.
Green / Redkey
Use special function keys shown on keypad as green or yellow.
Using this manual
18
2.3 Screen
When you turn on the device, you will see a screen as the following image. The screen is
divided into 2 sections.
Desktop
Task bar
2.3.1 Task bar
Task bar indicates the status of the device and Startmenu.
Icon
Name
Description
Start
Shows list of programs, Favorites, Documents, Settings,
Help and Run.
/
Bluetooth
Indicates Bluetooth status of
connection/disconnection.
Fast Connection
Directly connects to Turning on/off of WLAN,
Backlight and Task manager.
Volume Adjusts volume while using M3UL10.
/
Network
Indicates connection/disconnection of network
status. Information of network connection will be seen
when double click.
Input Mode
Shows input mode. Users can choose input mode
between Transcriber and Keyboard with long press.
Activated Shows list of programs that are currently running.
Using this manual
19
program Window
/ /
Input Data type
Shows data type which is currently uses to input. It is
changed depending on pressing the mode change
button.
/ /
Blue key mode Status of Blue key mode
/ /
Yellow mode
Status of Yellow mode.
Connectivity Display data connectivity (Sync)
Phone status Displays signal strength
Charge status Charging battery
2.3.2 Desktop screen
There are program icons which can be added and/or deleted in home screen.
Icon
Name
Description
My Device Categorize and list folders and files.
Recycle Bin
Remove and/or restore files or data.
Files or data cannot be restored once they have
removed from recycle bin.
Internet Explorer Browse Web sites or use Intranet .
Media Player
Play digital audio and/or video files.
Sup p ort s A SF, W M A , M P3, W A V file s.
Microsoft WordPad Create WordPad file.
My Documents Store and show programs, files and data.
Remote Desktop
Connection
Process remote connection to desktop.
Transcriber Process transcriber.
Using this manual
20
2.4 Data input
2.4.1 Stylus pen
Select and execute
Click on the target icon with stylus pen.
Performing selecting menu
Double-click on the icon to perform, with Stylus pen.Long
press on touch screen allows user to selection onparticular
functions - cut, copy, delete, etc.
Selecting several contents
Drag several icons to choose and/or set block.
2.4.2 Keyboard
Physical keys Press the keypads on the device.
Soft input panel (SIP) Click on keyboard icon at the menu bar ( ).
Transcriber Hand writing recognition.
To enable transcriber, click on the up arrow when SIP is shown. When an SIP menu pops up
select Transcriber.Transcriber Introwindow will be show up and click Dont show this, if this
information is no longer needed.
  • Page 1 1
  • Page 2 2
  • Page 3 3
  • Page 4 4
  • Page 5 5
  • Page 6 6
  • Page 7 7
  • Page 8 8
  • Page 9 9
  • Page 10 10
  • Page 11 11
  • Page 12 12
  • Page 13 13
  • Page 14 14
  • Page 15 15
  • Page 16 16
  • Page 17 17
  • Page 18 18
  • Page 19 19
  • Page 20 20
  • Page 21 21
  • Page 22 22
  • Page 23 23
  • Page 24 24
  • Page 25 25
  • Page 26 26
  • Page 27 27
  • Page 28 28
  • Page 29 29
  • Page 30 30
  • Page 31 31
  • Page 32 32
  • Page 33 33
  • Page 34 34
  • Page 35 35

M3 Mobile UL-10 User manual

Category
Handheld mobile computers
Type
User manual
This manual is also suitable for

Ask a question and I''ll find the answer in the document

Finding information in a document is now easier with AI