Page is loading ...

1
2
3
4
5
6
7
1
2
3
4
5
6
7
Shake the mill to clear pepper or salt
remainings, then twist the base lid
anti-clockwise until and are aligned.
The mechanism then works to switch off the
stand-by indicator and to keep tabletop free of
spills.
6 7
8 9
10. Hold the mill with a push of the switch
button. Ground pepper or salt will start
dispensing with light illuminating for the
seasoning area.
TURN
HOLD
UPWARDS TO THE UPMOST LEVEL
INDICATOR
LIGHTS UP
ELECTRONIC PEPPER MILL WITH LIGHT ELECTRONIC PEPPER MILL WITH LIGHT ELECTRONIC PEPPER MILL WITH LIGHT ELECTRONIC PEPPER MILL WITH LIGHT
NOTE:
GROUND PEPPER OR SALT COMES OUT
AT THE SAME SIDE WITH THE SWITCH
BUTTON. GUIDE THE MILL FOR GRINDING
EVENLY AND DIRECTLY OVER DISHES.
11. With one hand grasping the power unit,
the other hand pulls the clear container
upwards and turns it clockwise or
anticlockwise to align one of the numeric
settings with the index . 1 stands for
the finest grind, and 7 serves with the
coarsest grind. Release the clear
container, and it’ll be fully seated back
with the power unit.
TO SELECT GRIND SETTING
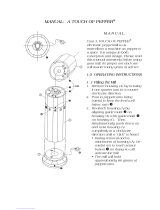
ELECTRONIC PEPPER
MILL WITH LIGHT
SAVE THESE INSTRUCTIONS
TWIST
EASY ACCESS TO
FILL WITH
PEPPERCORNS OR SALT
EXTERNAL GRIND
SELECT FROM FINE
TO COARSE
PRECISE ADJUSTMENT
BY 1~7 NUMERIC
SETTINGS
PUSH-TO-ACTIVATE
SWITCH BUTTON
BUILT WITH
STAND-BY INDICATOR
MESS-FREE BASE
BUILT WITH CLOSING
MECHANISM KEEPS
TABLETOP AND
COUNTERTOP
FREE OF SPILLS
LIGHT SHINES
THE SEASONING AREA
WHILST GRINDING
ILLUMINATED
AREA
PULL
1
9. Twist the base lid clockwise until the
index is aligned with the index .
The stand-by indicator in the switch
button will light up. The mechanism then
allows the switch to function and the
fresh-ground pepper or salt to pass
through the opening in the base lid.
NOW, THE MILL IS READY FOR USE!
NOTE :
IF THE INDICATOR DOES NOT LIGHT UP,
REPEAT THE STEP 3 AND ENSURE
BATTERIES ARE INSERTED CORRECTLY.
When going from coarse to fine grind,
remove any remains to prevent obstructing
the grinder by inverting the mill and shaking.
Any remaining pepper or salt will be removed
from the grinding mechanism so that the
adjustment can go freely.
TO SELECT GRIND SETTING
AFTER USE
1
2
3
4
5
6
7
1
2
3
4
5
6
7
2
SHAKE
FROM COARSE TO FINE
PULL AND TURN
1
2
1
2
3
4
5
6
7
NOTE:
MAKE SURE TO PULL THE CLEAR
CONTAINER UPWARDS TO THE UPMOST
LEVEL, THEN TURN. DO NOT FORCE TO
TURN THE CLEAR CONTAINER BEYONE
THE RETURN SIGNS AND .

1
2
3
4
5
6
7
1
2
3
4
5
6
7
1
2
3
4
5
6
7
1
2
3
4
5
6
7
1
2
3
4
5
6
7
1
2
3
4
5
6
7
TOP LID
CLEAR CONTAINER
POWER UNIT
1 ~ 7 NUMERIC
SETTINGS FROM
FINE TO COARSE
GRIND ADJUSTMENT
MESS-FREE
BASE LID
1
ELECTRONIC PEPPER MILL WITH LIGHT ELECTRONIC PEPPER MILL WITH LIGHT ELECTRONIC PEPPER MILL WITH LIGHT ELECTRONIC PEPPER MILL WITH LIGHT ELECTRONIC PEPPER MILL WITH LIGHT
DIAGRAM
PUSH-TO-ACTIVATE
SWITCH BUTTON
WITH STAND-BY
INDICATOR
2 3 4 5
BATTERY
COMPARTMENT
CAP
MILL UPSIDE DOWN
BRACKET
CLASP
PUSH
SLOT
Load 6 "AA" batteries into
the battery compartment
ensuring the polarity
markings + , are aligned.
3. INSERT BATTERIES
Guide the slot in one end to insert into the
bracket, then push the cap downwards until
the clasp snaps.
4.
REPLACE THE BATTERY COMPARTMENT
CAP
Invert the mill. Push the clasp to pull
the cap from the top of the compartment.
2.
REMOVE THE BATTERY COMPARTMENT
CAP
TWIST
TWIST
PUSH
TWIST
HOLD
With one hand holding the clear container,
the other hand twists the top lid
anti-clockwise until it stops, then pull the
lid upwards.
6. REMOVE THE TOP LID
7. Pour peppercorns or coarse sea salt into
the clear container.
Align the index on both the lid and the
clear container to place back the lid, then
twist the lid clockwise until it stops.
8. REPLACE THE TOP LID
TO FILL
MILL UPSIDE DOWN
PLACE BACK
ALIGN TO
PLACE BACK
AND
ALIGNED
BRACKET
SLOT
Hold the mill upright. Align the index on
the lid with the index on the power unit
to place back the lid.
5. REPLACE THE BASE LID
Then, twist the lid clockwise until the
indexes and are aligned.
Twist the MESS-FREE base lid
anti-clockwise until the printed index on
the lid and on the power unit are aligned,
and the lid will come off from the mill.
TO INSERT BATTERIES
1. REMOVE THE MESS-FREE BASE LID
CERAMIC GRINDER
2
1
TWIST
ALIGN TO
PLACE BACK
/