Page is loading ...

1 - Start with any B corner by placing it in the preferred corner for installation.
2 - Attach adjacent A panel to B corner using the 1 ½” bolts with a washer on both the bolt and nut sides. Do not tighten, yet.
3 - Proceed with remaining panels until finished as shown in diagram. Add or subtract 2’ A panels to create size of building purchased.
If you have A/V (audio/video) panels, they can be substitued in any of the A panel locations.
4 - Install the roof J panels. The roof’s square holes will have cage nuts on the outside. Use 1 ½” bolts and washers from the inside. Do not tighten.
5 - Straighten and square walls. Using ¾” socket and wrench, tighten and torque bolts as you square up. Tighten and torque roof.
6 - Using a 3/8” masonry bit, drill 4” deep holes at the anchor hole locations. Tap in wedge anchors in holes.
7- Put washer and nut on anchor and tighten to manufacturer-recommended 25 lbs. torque.
A
J
J
DOOR
B
B E
B
AA
DR
A
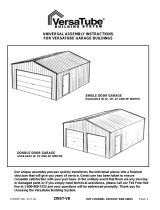
Panelized Installation Instructions
Assembly Hardware Included
QUANTITIES
Tools Needed
Hammer
¾” Socket & Ratchet
Torque Wrench
¾” Wrench
” Masonry Bit
Hammer Drill
We’re always working to make things better for you. If you have feedback about this manual, please tell us at survive-a-storm.com/feedback
1 ½” Bolt ” Anchor
½” Washer ½” Nut ½” Cage Nut
(pre-inserted)
1½” Bolt
4x4 4x6 4x8 6x4 6x6 6x8 8x4 8x6
” Anchor
½” Washer
½” Nut
½” Cage Nut
8x8
84 108 132 106 132 158 132 158 184
68 88 108 86 108 130 108 130 152
16 20 24 20 24 28 24 28 32
16 20 24 20 24 28 24 28 32
156 196 240 192 240 288 240 288 336
/