Page is loading ...

Description: The X10 Lamp Module is the simplest and most effective way to control your household incandescent lights. Lighting control is
simply a plug-in away. The X10 Lamp Module plugs into any standard 120V household outlet and gives you the ability to remotely control any
incandescent light you plug into the Module (up to 300 watts). The Lamp Module is actually a Receiver that Responds to X10 Signals generated by
X10 Controllers elsewhere on the electrical power lines. Simply dial in any House Code and Unit Code you choose for each Module and away you
go! Don't worry about losing manual control of the lamp... it will function normally even with the Module in place. The Lamp Module is the
foundation of your home lighting system.
Note: Due to the changes in circuitry and to accommodate for newer lighting technologies, the older local sense feature is disabled.
PLM04 The AGC Lamp Module incorporates an advanced X10 Powerline circuit design which allows the Module to operate in adverse
environments. The principal advantage is better noise rejection. These Modules are recommended for all installations where reliability of operation
is paramount.
Specific Requirements: 120VAC / 300W
Minimum Load = 40W Lamps rated below 40W may flicker and/or operate erratically.
Lamp Modules must not be used to control appliances or fluorescent lamps
Optional / Supplementary Devices & Modules:
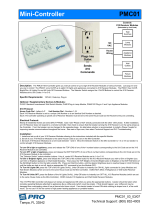
PMC01 Desk-top, Plug-in Mini-Controller, PHK05 RF Wireless Handheld Remote Kit, XPMT4 Desk-top, Plug-in Mini-Timer.
X10 Protocol:
House Code Dial - Letters A-P, Default "A" Unit Number Dial - Numbers 1-16, Default "1"
Each X10 Receiver Module is set to a unique Unit Number or to an identical Unit Number as desired.
Each X10 Controller operating a specific set of Receiver Modules must be set to the same House Code as the Receivers they are controlling.
Responds to ALL LIGHTS ON Command
Electrical Protocol:
Nearly all residential homes are wired SPLIT-PHASE. Each 120V Phase is NOT directly connected with the other 120V phase. If after installation,
an X10 Receiver does not respond to a remote Controller, then check to ensure that the breaker serving the X10 Receiver is on the same phase as
the Controller. If not, the breaker can be changed to the opposite phase. An alternative solution is recommended, to install a Phase Coupler for
improving remote communications throughout the home.
Setting the PLM01 Address Code:
Using a small screwdriver set the House Code Wheel (RED) to the setting that matches an X10 PRO controller (A-P). Then Set the Unit Code
Wheel (BLACK) to the desired number address (1-16).
Installation:
1. Plug the Lamp Module into any wall outlet, adhering to the above stated Electrical Protocol.
2. Plug the Light, to operate, into the Module bottom outlet. Be sure the Light is turned-on, if it has a switch.
3. The Light will turn-on immediately.
4. Send an X10 OFF command to turn it OFF. Installation complete.
TWO YEAR LIMITED WARRANTY X10.com (X10), a division of Authinx Inc., warrants this product to be free from defective material and
workmanship for a period of two years from the original date of purchase at retail. X10 agrees to repair or replace, at its sole discretion, a
defective product if returned to X10 within the warranty period and with proof of purchase. If service is required under this warranty: visit
www.x10.com, or email [email protected]
/