Use
43
EN
At the end of the set time, a buzzer notifies
the user and the cooking zone is turned off
automatically.
To deactivate the buzzer:
• Press any hob key.
To modify or deactivate the Timed cooking
function:
1. Hold down the keys of the timer
at the same time. The display will show
the time indicator . An LED above
the time indicator shows the active
cooking zones which can be selected in
sequence.
2. Release the timer keys when the
LED indicates the required cooking zone.
3. Press the keys or of the timer to
program the new time the selected
cooking zone is to remain on for, or to
reset the time to 0 (zero). After a few
seconds, the LED next to the time
indicator will turn off and Timed
cooking will begin. If you select 0 (zero),
the cooking zone concerned will turn off.
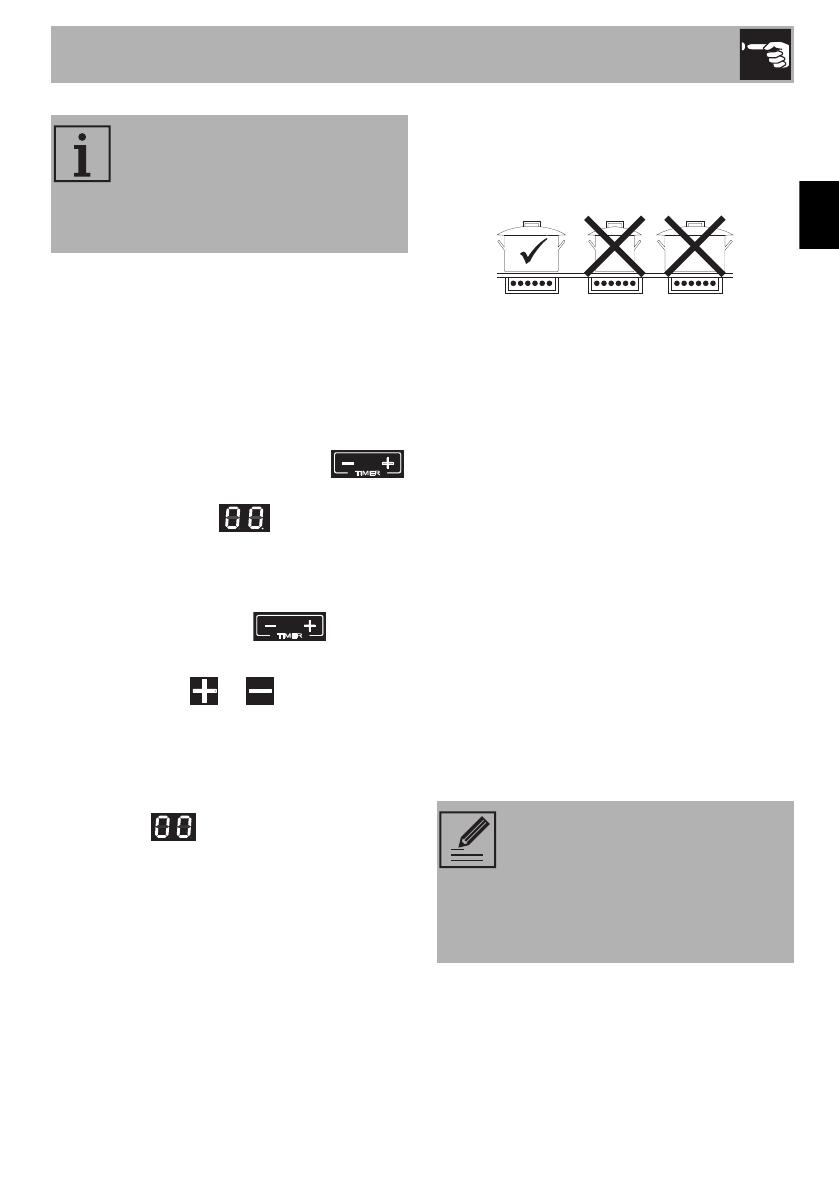
3.6 Advice on energy-saving
• The diameter of the base of the pan must
correspond to the diameter of the
cooking zone.
• When buying a pan, check whether the
diameter indicated is that of the base or
the top of the pan, as the top is almost
always larger than the base.
• When preparing dishes with long
cooking times, you can save time and
energy by using a pressure cooker,
which also makes it possible to preserve
the vitamins in the food.
• Make sure that the pressure cooker
contains enough liquid as, if there is not
enough and it overheats, this may cause
damage to both the pressure cooker and
the cooking zone.
• If possible, always cover pans with a
suitable lid.
• Choose a pan suitable for the quantity of
food to be cooked. A large, half-empty
pan leads to a waste of energy.
This function can be activated on
multiple cooking zones at the same
time. The flashing LED and time
indicator refer to the next cooking
zone to be switched off.
Under certain circumstances, if the
hob and the oven are being used
at the same time, the maximum
power limit that can be used by the
electrical system might be
exceeded.


