Page is loading ...

Basic Manual
Introduction
Table of Contents
Before Using Your
New Cell Phone
Basic Functions
Phone Functions
Mail Functions
Google Functions
Internet Functions
Multimedia Functions
Useful Functions
In Case of
Loss of Your IS06
Appendix/Index

ii
Introduction
Thank you for purchasing the IS06. Before using your
IS06, be sure to read the IS06 Basic Manual (this
PDF manual) to ensure correct usage. After you have
fi nished reading this manual, store this PDF manual
and the printed manuals in safe places so you can
retrieve them whenever you need them.
Manuals for the IS06
The IS06 comes with the Basic Manual and
Instruction Manual.
For learning the basics:
Read the IS06 Basic Manual (this manual).
For learning details on using each function:
Read the supplied IS06 Instruction Manual
(Japanese). Be sure to read the Safety Precautions
to ensure proper usage of the
IS06.
The keyword searchable au Online Manual is also
available on the au homepage:
http://www.au.kddi.com/manual/index.html
Notes on Cell Phone Use
Cell Phone Etiquette
The cell phone always emits weak radio waves when
power is on.
Use the cell phone in an enjoyable and safe manner
without forgetting to be considerate of others around
you.
Use of cell phones is not allowed in some
places.
• Do not use the cell phone while you are driving.
Doing so is both dangerous and prohibited by law.
• Using a cell phone in an aircraft is prohibited by
law. Be sure to turn the cell phone off.
Radio waves from cell phones may interfere with
medical electrical equipment.
• Some people close to you in crowded places
such as packed trains may be using a cardiac
pacemaker. Turn the cell phone off in such places.
• Abide by the rules of hospitals and other medical
institutions where it is forbidden to use or carry cell
phones.
Be considerate of where you use the cell phone
and how loudly you talk.
• Do not make calls in theaters, museums, libraries,
and other similar places. Turn power off or turn on

1
Introduction
manner mode not to disturb others around you by
ringtones.
• Do not use the cell phone on a street where you
might interrupt the fl ow of pedestrians.
• Move to areas where you will not inconvenience
others on trains or in hotel lobbies.
• Refrain from talking in a loud voice.
• Obtain the permission of other people before you
take their photos with the cell phone’s camera.
• Do not record information with the cell phone’s
camera in bookstores and other locations where
taking photos is not permitted.
Do not use the cell phone while driving!
Turn off your cell phone or put it in Drive mode while
driving.
Do not use the cell phone while driving a car/
motorcycle or riding a bicycle. It may result in a
traffi c accident. Using a cell phone while driving is
prohibited by law. Using a cell phone while riding a
bicycle may also be punishable by law.
Prohibited!
• Looking at a cell phone display
• Talking on a cell phone while holding it
Illustrations and Screenshots in This Manual
The illustrations in this manual may look different from
the actual cell phone in shape, color and typeface.
The screenshots in this manual are simplifi ed and
may look different from the actual cell phone screens.
Notation of Tapping Instructions in This
Manual
This instruction manual omits the phrase “tap” when
listing instructions that involve tapping menu items,
icons, keys, or other user interface elements.
Ex.: Registering a new contact in your Contacts from
the Dialer
[Phone] Enter phone number
[Create new contact]
This means, Tap
[Phone] Enter phone
number Tap
Tap [Create new contact].

2
Introduction .................... ii
Notes on Cell Phone
Use ................................. ii
Illustrations and
Screenshots in This
Manual ...........................1
Notation of Tapping
Instructions in This
Manual ...........................1
Table of Contents ···········2
Before Using Your
New Cell Phone
List of Icons ····················5
List of Included Items ·····6
Names and Functions
of Parts ···························7
Included Items ················9
Battery Pack ...................9
au IC-Card ...................11
microSD Memory
Card .............................12
Turning On/Off the
Power ···························13
Turning On the Power ..13
Turning Off the Power...13
Switching the Display
Language to English ····13
Using the System
Settings ........................13
Using the Initial
Settings Screen ............13
Setting Manner Mode/
Airplane Mode ··············14
Setting Manner Mode ...14
Setting Airplane
Mode ............................ 14
Touch Panel··················14
Operating the Touch
Panel ............................14
Displaying the Home
Preview Screen ............ 17
Executing Widgets .......18
Locking the Screen ......20
Unlocking the Screen ...20
How to Input
Character ·····················21
Showing the
Keyboard .....................21
Using the Android
Keyboard .....................21
Using the iWnn IME
Keyboard .....................22
Basic Functions
Using Android ···············25
Home Screen ···············26
Using the Home
Screen .......................... 26
Viewing the Status
Bar ................................27
Showing the
Notifi cation Panel/
Using Easy Setting .......27
Using Applications/
Widgets/Folders ........... 28
Menu Screen ················31
Using Applications
and Other Functions ....31
Quick
Search ···················32
Using Quick Search .....32
Phone Functions
Making a Phone Call ····34
Entering a Phone
Number to Call .............34
Making International
Calls .............................34
Searching and Calling
From Your Contacts ......35
Making a Call Using
the Call Log ..................35
Receiving a Call ···········36
In Call Functions ··········37
Adjusting the Receiver
Volume ......................... 37
Call Log ························37
Viewing Your Call Log ..37
Making a Call From
Your Call Log ................ 37
Contacts ······················· 38
Adding a New
Contact .........................38
Viewing Your
Contacts .......................39
Quick Contact .............. 39
Deleting a Contact ....... 39
Editing a Contact .........39
Mail Functions
PC-mail ························41
Setting Up PC-mail .......41
Table of Contents

3
Table of Contents
Managing Received
PC-mail .........................42
Creating and Sending
PC-mail .........................43
C-mail ··························· 44
Receiving C-mail ..........44
Setting Up a C-mail
Receiving Filter ............44
Google Functions
Using Google
Services ·······················46
Registering an Existing
Google Account ...........46
Creating a New
Google Account ..........47
Gmail ····························48
Viewing Your Inbox .......48
Creating and Sending
E-mail ...........................49
Showing Labels ............49
Android Market ·············50
Using the Android
Market ..........................50
Google Voice Search ····52
Using Voice Search ...... 52
Using Other Google
Services ·······················53
Using Google Talk ........ 53
Using Google Maps .....53
Using Google Maps
Navigation .................... 53
Using Google Places ... 54
Using Google
Latitude ........................54
Using Google News
and Weather .................54
Using Google
Calendar ......................54
Internet Functions
Connecting to the
Internet ························· 56
Using Wi-Fi ...................56
Using Data
Communication
Services .......................57
Browser ························58
Displaying a Web
Page .............................58
Possible Actions While
Displaying a Web
Page .............................58
Multimedia Functions
Camera ························61
Before Taking a Photo ..61
Taking a Photo ..............61
After Taking a Photo .....62
Before Recording a
Movie ............................63
Record a Movie ............63
After Recording a
Movie ............................64
Gallery ··························65
Viewing Photos .............65
Viewing Movies ............ 65
Useful Functions
Alarm/Wakeup Call·······67
Setting an Alarm...........67
Setting a Wakeup Call ..67
PocketBook ··················68
Voice Recorder ............68
Playing Back Your
Recordings ...................68
Using the Calculator ....69
Setting Up the World
Clock ............................ 69
Using the Stopwatch ....70
Smar tNote ···················· 71
Creating a New Note ....71
Editing an Existing
Note ..............................72
Deleting a Note ............ 72
In Case of
Loss of Your IS06
Remote Control Lock ···74
Activating the Device
Administrator ................ 74
Setting Up the Remote
Control Lock .................74
Activating the Remote
Control Lock From a
Registered Phone ........75
Unlocking the Remote
Control Lock .................75
Security Lock Service ··76
Activating the Remote
Control Lock Using the
Security Lock Service ..76
Appendix/Index
Troubleshooting ············ 78
Index ····························80

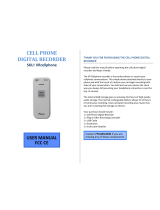
List of Icons
List of Included Items
Names and Functions of Parts
Included Items
Turning On/Off the Power
Switching the Display Language to English
Setting Manner Mode/Airplane Mode
Touch Panel
How to Input Character
Before Using Your
New Cell Phone

5
Before Using Your New Cell Phone
You can check the current settings and status of your
IS06 by looking at the icons on the status bar at the
top of the display.
: Calling or currently in a call
: Missed call
: In a call using a Bluetooth
®
headset
: Information available
: An error occurred/Warning display
Character input mode display
Hiragana-
Kanji
Full-width
Katakana
Half-width
Katakana
Full-width
Alphabet
Half-width
Alphabet
Full-width
Numeric
Half-width
Numeric
: New e-mail
: New C-mail
: Syncing data
: Data sync failed
: Alarm/Wakeup call set
: Setting call volume
: Call volume muted
: Silent manner mode
: Manner mode
List of Icons
: Bluetooth
®
standby
: Bluetooth
®
connecting
: Connected to Wi-Fi (display signal srength)
: Using GPS
: Insufficient disk space
: Preparing microSD memory card
: Connected by USB
: 3G transmission
: Receiving packets
: Sending packets
– : Battery power level
– : Battery power level (when charging)
: Signal strength
: Out of area
: Airplane mode
: Playing music
: Displays the current time
: Software update available

6
USB-microUSB
conversion cable
(Sample)
Instruction Manual
(Japenese)
Basic Manual
Introduction
Table of Contents
Before Using Your
New Cell Phone
Basic Functions
Phone Functions
Mail Functions
Google Functions
Internet Functions
Multimedia Functions
Useful Functions
In Case of
Loss of Your IS06
Appendix/Index
IS06
PANTECH earphone
jack conversion
adapter 03
Warranty (Japanese)
Safety Precautions
(Japanese)
Software Update
Guide (Japanese)
au International Call
Guide (Japanese)
PANTECH
microUSB-18 pin
(charger) conversion
cable
microSD memory card
(2 GB) (Sample)
Battery pack
Setting Guide
(Japanese)
List of
Included
Items

7
Before Using Your New Cell Phone
Built-in antenna
NOTE
Be careful not to place any stickers over the
built-in antenna or cover the built-in antenna with
your hand when transmitting data or talking. Call
and network connection quality will be adversely
af
fected.
Names and Functions of Parts

8
Proximity sensor
Receiver
Allows you to hear ringtones, incoming call voice,
and multimedia playback audio, etc.
microUSB connection jack
Display (touch panel)
Back key
Return to the previous screen.
Home key
Displays the Home screen.
Hold down to display a list of recently used
applications and functions.
Menu key
Displays a menu for the application or function
currently used.
Microphone
Transmits your voice during a call.
Also used to record sounds.
LED lamp
Lights up red while charging.
Flashes when receiving a call or when an alarm
rings depending on your settings.
Power key
Turns on the IS06 by holding down this key while
the power is turned off.
Used to turn the power on and off, turn the screen
on or off, or end a call. Hold down to display a
menu of phone options (manner/airplane mode).
Strap eyelet
Camera light
Camera (lens)
Volume key
Search key
Press for application-specifi c search features or to
search your IS06 information or the web via Quick
Search.
Battery pack cover
This manual represents each key as shown below.
Menu key
(Menu)
Home key
(Home)
Back key
(Back)
Search key
(Search)
Power key
(Power)
Volume key
(Volume)

9
Before Using Your New Cell Phone
Included Items
Battery Pack
Removing the Battery Pack
Inser t the tip of your
fi nger (fi ngernail) into
the slot at the bottom
of the battery pack
cover and lift up.
Use the gr oove to lift
the battery pack out.
Inserting the Battery Pack
Confi rm the location
of the connectors
in the IS06 and
insert the battery
pack in the proper
orientation.
-2
-3
-1
Place the batter y
pack cover back on
the IS06.
Push down on the
two locations at -1,
the two locations at
-2, and the two
locations at -3, in
that or
der.
Battery Life
Standby time Approximately 200 hours
Talk time Approximately 300 minutes
Battery life may be shorter than the list depending
on the applications and functions used.

10
Charging the Battery Pack
Common AC adapter
01/02 (sold separately)
PANTECH microUSB-18 pin (charger)
conversion cable
Charging time takes approximately 190 minutes.
Connect the PANTECH microUSB-18 pin (charger)
conversion cable to the common AC adapter
01/02 (sold separately).
Open the microUSB connection jack cover on the
IS06 and connect the PANTECH microUSB-18 pin
(charger) conversion cable.
Plug the common AC adapter 01/02 (sold
separately) into an 100 V AC power outlet.
The LED lamp lights up red, and
– will be
displayed.
The LED lamp will go out when charging is
complete.
Unplug the PANTECH microUSB-18 pin (charger)
conversion cable from the IS06 in a straight line
once charging is complete.
Close the microUSB connection jack cover.
Unplug the common AC adapter 01/02 (sold
separately) from the power outlet.
To remove the PANTECH microUSB-18 pin
(charger) conversion cable from the common AC
adapter 01/02 (sold separately), pull the cable out
in a straight line while holding down the release
buttons on both sides of the connector.
If you charge the IS06 when the battery pack has
no power left, it may take a few moments for the
charging notice to display on the screen.

11
Before Using Your New Cell Phone
au IC-Card
The au IC-Card contains
your phone number and
other personal details.
IC (metal) portion
au IC-Card
Inserting/Removing the au IC-Card
Cutout
Turn off the IS06 and remove the battery pack
cover.
Slightly raise the au IC-Card and pull it out in the
direction of the arrow.
To insert the au IC-Card, insert it in the direction
of the arrow. Make sure the IC (metal) portion is
facing down and the cutout on the au IC-Card
matches that shown in the fi gure.
NOTE
Pay attention to the followings not to damage the
au IC-Card.
• Do not touch the IC (metal) portion of the au
IC-Card or the IC card terminal on the IS06.
• Check to ensure that the au IC-Card is inserted in
the correct direction.
• Do not apply excessive force when inserting or
removing the au IC-Card.
Be careful not to lose your au IC-Card after
removing it.

12
microSD Memory Card
Notes on Handling of microSD Memory Card
Do not remove the microSD memory card, the
battery pack, or turn off the power when loading,
writing, saving, playing, moving, or copying data
to and from the microSD memory card. Doing so
could result in the loss of some or all data stored on
the microSD memory card or the IS06.
Do not drop or apply excessive force to the IS06
when there is a microSD memory card inside.
Doing so could result in the loss of some or all data
stored on the microSD memory card.
Do not insert any liquid, metallic, fl ammable, or
other foreign objects in the microSD memory card
slot on the IS06. Doing so could result in a fi re,
electrical shock, or damage to the IS06.
microSD memory card may become warm after
long periods of use. This is not a malfunction.
Inserting/Removing a microSD Memory Card
Turn off the IS06. Remove the battery pack cover
and the battery pack.
Insert the microSD memory card in the direction of
the arrow. Make sure that the metallic terminal is
facing down and the side with the microSD logo is
facing up.
Remove the microSD memory card by pulling it out
in the direction of the arrow.
You can save photos, movies, documents, music,
and other fi les to a microSD memory card.
Some applications may not function without a
microSD memory card.
To safely remove a microSD memory
card, unmount it by tapping
[menu]
[Settings] [System] [microSD & phone
storage][Unmount microSD], or turn off your IS06
before removing.

13
Before Using Your New Cell Phone
Turning On/Off the Power
Turning On the Power
Hold down (Power)
The logo will be displayed
and after a few moments the
lock screen will appear. See
“Unlocking the Screen” (
P.20)
to unlock the screen.
After unlocking the screen,
the display will turn off
and the screen will lock
automatically after a period
of inactivity.
Turning Off the Power
Hold down (Power)
until the Phone
options screen
appears
[Power off]
[OK]
Switching the Display Language to English
You can switch the display language for function
names and other items to English.
Using the System Settings
[ ] (menu) [] (Settings)
[ ] (System) [
] (Language & keyboard)[
] (Select language)[English]
Using the Initial Settings Screen
When you fi rst turn on the IS06
[] (change language)
on the screen with the Android
robot[English]

14
Setting Manner Mode/Airplane Mode
Setting Manner Mode
Hold down (Power) until the Phone
options screen appears
[Manner mode]
When manner mode is on, appears in the status
bar and all sounds, including ringtones and other
sound effects, are turned off. (Excludes multimedia
playback audio and alarms.)
To turn off manner mode, hold down (Power)
again until the Phone options screen appears
[Manner mode].
Setting Airplane Mode
Hold down (Power) until the Phone
options screen appears
[Airplane
mode]
When airplane mode is on, appears in the status
bar and all communications/networking functions
such as Wi-Fi and Bluetooth
®
are turned off.
To turn off airplane mode, hold down (Power)
again until the Phone options screen appears
[Airplane mode].
Touch Panel
Operating the Touch Panel
The IS06 is equipped with a touch panel screen.
You can perform actions by tapping items and keys
on the screen with your fi nger.

15
Before Using Your New Cell Phone
Long Touch Keep touching a menu or item.
Tap Touch a menu or item and quickly remove
your fi nger from the screen.
Flick Up/Down
Touch and quickly slide your finger
up or down across the screen.
Flick Left/Right
Touch and quickly slide your finger
left or right across the screen.

16
Drag Keep touching the item and slide your finger
to the desired location with the item.
Slide Keep touching and slide your finger across
the screen in the target direction.
Pinch In (Zoom out)
Place two fingers on the
screen and slide them closer.
Pinch Out (Zoom in)
Place two fingers on the
screen and slide them apart.

17
Before Using Your New Cell Phone
Displaying the Home Preview Screen
Tap at the top of the Home screen
to display the Home Preview screen in 3D.
You can fl ick the Home Preview screen to rotate it
left and right, or to tilt it up and down. Tap a Home
screen in the 3D display to move to that Home
screen.
<Home screen>
<Home Preview screen>

18
Tap (Menu) on the
Home screenTap
[Widget]
Long-touch the widget
to select it and drag it
to the desired location
Tap the widget on the
Home screen
The 3D widget will be
executed
Tap
[3D Widgets]
Slide to the left and
right
Executing Widgets
Executing 3D
Widgets
/