Stairmaster 8UB-15 User guide

Type
User guide
Assembly Instructions
Page 1
620-8623 Rev. B
Latest Rev.
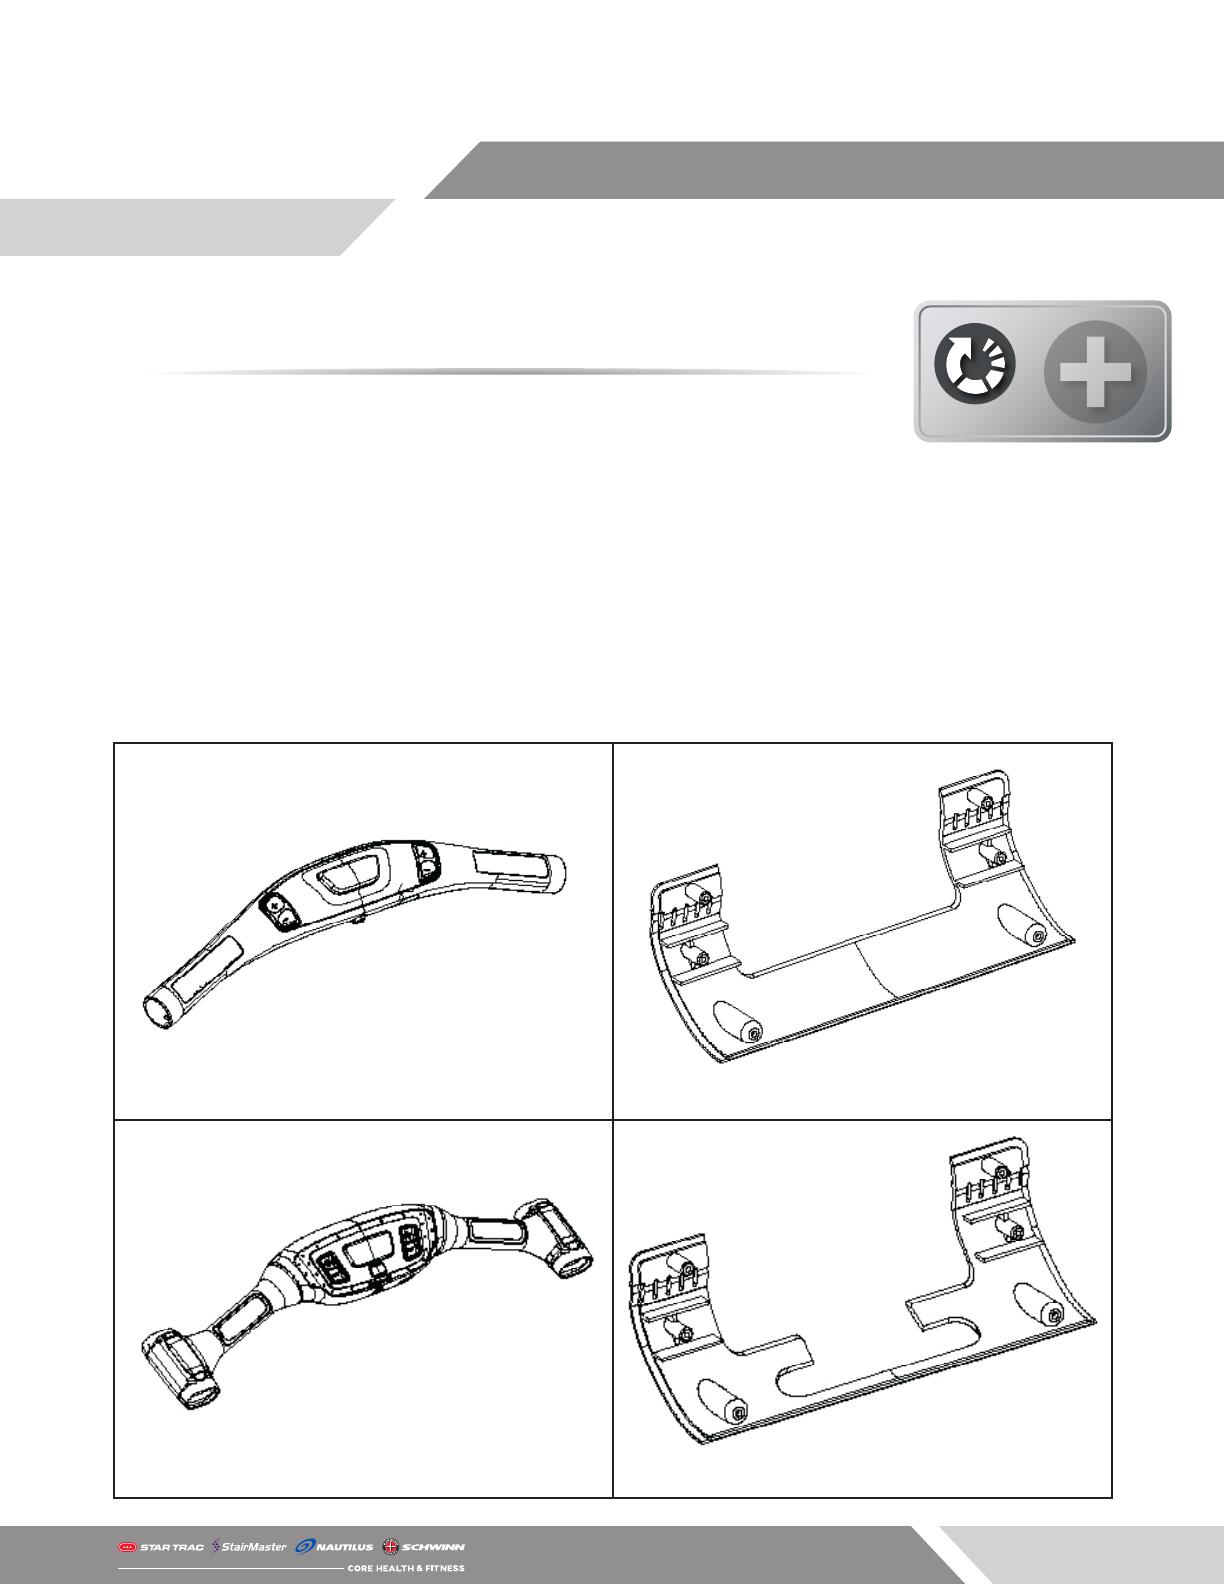
With the release of a newly designed hotbar, the bottom console plastic collar
also needed to be changed. The consoles will come with two dierent collars,
depending on if the unit has the new hotbar design or the old design.
Along with the bottom plastics, the headphone jack insert was also changed. Like the collar, the unit
will need one of two audio inserts installed into the hotbar when using a 15” embedded console.
Please see the below matrix to determine which collar and which audio insert is needed when in-
stalling the console:
Console Plastics:
OLD HOTBAR USE: 020-7461-XX
NEW HOTBAR USE: 701-0294-XX
8-Series Console Plastics and Hotbar Audio Insert Guide
Applies to: 8-Series Consoles
Assembly Instructions
Page 2
620-8623 Rev. B
Hotbar Audio Insert:
OLD HOTBAR
USE: 715-3722
1. Remove the phillips screw on the underside of
the hot bar that holds the cover in place and pull
out the cover..
2. Insert the headphone jack and use the Phillips
screw to fasten in place.
Assembly Instructions
Page 3
620-8623 Rev. B
3. Remove the 2 Phillips screws on the USB
panel and remove the panel from the console.
Disconnect the USB cable from the USB board.
4. Connect the USB cable and HDMI cable to the
new panel. Apply the overlay to the panel. Install
panel into the console.
5. Carefully close the console and refer to the
owner’s manual for programming and operation
instructions.
Assembly Instructions
Page 4
620-8623 Rev. B
NEW HOTBAR
USE: 020-7798
1. Use a #2 phillips screwdriver to remove the PCB
from 715-3722 then install it into 020-7798.
1. Remove the phillips screw on the underside of
the hot bar that holds the cover in place and pull
out the cover..
Assembly Instructions
Page 5
620-8623 Rev. B
2. Insert the headphone jack and use the Phillips
screw to fasten in place.
3. Remove the 2 Phillips screws on the USB
panel and remove the panel from the console.
Disconnect the USB cable from the USB board.
4. Connect the USB cable and HDMI cable to the
new panel. Apply the overlay to the panel. Install
panel into the console.
5. Carefully close the console and refer to the
owner’s manual for programming and operation
instructions.
  • Page 1 1
  • Page 2 2
  • Page 3 3
  • Page 4 4
  • Page 5 5

Stairmaster 8UB-15 User guide

Type
User guide

Ask a question and I''ll find the answer in the document

Finding information in a document is now easier with AI