Page is loading ...

Six easy steps to use
the Multi Mark Target/Locator
Step 3/Paso 3
With the Multi Mark™ target installed in the electrical
box, cover the box up with the drywall. Position your
drywall in the exact location and fasten with enough
screws to safely secure the drywall.
Al terminar de instalar la Multi Mark™ target en la caja
eléctrica, cubra la caja con la mampostería (drywall).
Después ponga la mampostería en el sitio exacto y
sujete con suficientes tornillos para que esté bien
asegurado a la pared.
Remove the locator from the drywall. Cut out the drywall
using your mark as a guide. If you are using a hand saw,
keep in mind, the cut on the side where the stud is must
be a shallow cut. Multiple tools can then be used (hand
or electric) to cut the drywall.
Quitar el localizador de la mampostería. Cortar la
mampostería usando la marca que usted se hizo como guía.
Tenga presente que si utilice una sierra de mano que en el
lado de la viga (stud) debe de ser un corte pequeño.
Después se pueden utilizar herramientas múltiples (ya
sean de mano o eléctricas) para cortar la mampostería.
Cinco pasos sencillos para usar el
localizador de objetivo Multi Mark
Remove the drywall cut out and Multi Mark™ target.
Note: When removing the Multi Mark™ target use two
hands, holding each end of the spring pull straight out.
Finish screwing down the drywall.
And you’re Done!!!
Quitar la mampostería y cortar la Multi Mark™ target.
Nota: Cuando quite la Multi Mark™ target use las dos
manos. Agarrando cada extreme del resorte tire derecho
hacia afuera. Termine atornillando la mampostería.
¡¡¡Y ya terminó!!!
Step 5/Paso 5
Step 6/Paso 6
Step 1/Paso 1
Compare the Multi Mark™ locator to the outside
perimeter of the electrical box you are using.
Electrical boxes vary so this will show you where to
make your cut.(on the line inside or outside the line)
Comprobar que el Multi Mark™ localizador esté en
el perímetro exteriorde la caja eléctrica que usted
esté usando.
Las cajas eléctricas varían en tamaño entonces éstas
instrucciones le demostrarán a usted donde hacer el
corte (en la línea de adentro o la línea de afuera).
Step 2/Paso 2
Place Multi Mark™ target in electrical box inserting
the ends of the springs into the electrical box device
locating holes.
Take a mental note as to the direction of the arrow.
If you have a multi-gang box you install the targets
at each end of the box.
Poner la Multi Mark™ target en la caja eléctrica
metiendo los extremos de los resortes dentro de
los agujeros localizados en la caja eléctrica.
Memorice en qué dirección va la flecha.
Si usted tiene una caja de multi-cuadrilla se instalen
los targets a los extremos de la caja.
Step 4/Paso 4
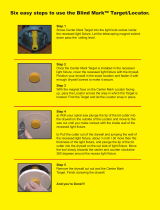
With the arrow on the Multi Mark™ locator facing in the
same direction as Multi Mark™ target, pass the locator
across the area in which the target is located.
The locator will find the target and snap in place. Do not
force the locator into position. Then using the appropriate
template, use your pencil to mark around the locator,
outlining the electrical box perimeter.
Con la flecha del Multi Mark™ localizador en la misma
dirección que el Multi Mark™ target, pase el localizador a
través del área en el cual se encuentra la blanco (target).
El localizador encontrará la blanco y se encajará. No haga
fuerza para que entre. Después utilice la plantilla apropiada
y marque alrededor del localizador dejando marcado el
contorno de la caja eléctrica.
/


