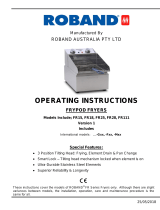
FD10 3

ROBAND FD10 3, FD10 4, FD10 Series, FD10-G, FD10-UK Operating Instructions Manual

  • Hello! I am an AI chatbot trained to assist you with the ROBAND FD10 3 Operating Instructions Manual. I’ve already reviewed the document and can help you find the information you need or explain it in simple terms. Just ask your questions, and providing more details will help me assist you more effectively!
  • What should be done if the control box is damaged?
    What is the recommended cooking temperature for donuts?
    What should be done if the machine is not heating up?
    What is the recommended oil level for the fryer?
    What is the correct way to clean the fryer?
21/01/2019
Manufactured By
ROBAND AUSTRALIA PTY LTD
OPERATING INSTRUCTIONS
DONUT FRYERS
Models: FD10 Version 4
Includes
International models:
-G
Special Features:
Thermal Safety Cut Out
Stainless Steel Donut Lifter
Ultra-Durable Stainless Steel Elements
Advanced Control Safety System
Easy Clean Drain Tray
series
These instructions cover the models of ROBAND
®
Donut Fryers only. Although there are slight
variances between models, the installation, operation, care and maintenance procedure is the
same for all.
®
®
®
CONTENTS
INTRODUCTION ..................................................................................................... 1
GENERAL PRECAUTIONS ..................................................................................... 1
PACKAGING ........................................................................................................... 2
COMPLIANCE ......................................................................................................... 2
INSTALLATION ....................................................................................................... 3
OPERATION............................................................................................................ 4
GENERAL SAFETY ................................................................................................. 5
GENERAL FIRE SAFETY ........................................................................................ 5
SAFETY FEATURES ............................................................................................... 6
CLEANING, CARE & MAINTENANCE .................................................................... 7
TROUBLESHOOTING ............................................................................................. 8
SPECIFICATIONS ................................................................................................... 9
CIRCUIT DIAGRAM............................................................................................... 10
PARTS LIST .......................................................................................................... 11
APPENDIX A ......................................................................................................... 12
WARRANTY .......................................................................................................... 16
Page: 1
INTRODUCTION
Congratulations on your purchase of this quality ROBAND
®
product. With proper
care and management your new purchase will give you years of trouble free
service.
By reading these instructions carefully you can ensure that this machine is used
and maintained properly, helping your new investment to perform well for you now,
and to continue performing in the many years to come.
GENERAL PRECAUTIONS
This machine must only be operated by qualified person(s) who are fully versed in the
operating and safety instructions described in this manual. Operators should be
instructed to familiarise themselves with any and all safety instructions described in
this manual prior to commencement of any maintenance or service.
In the case of new personnel, training is to be provided in advance. These machines
should not be operated by persons (including children) with reduced physical, sensory
or mental capabilities, or lack of experience or knowledge, unless they are being
supervised or being instructed concerning the safe use of the appliance by a person
responsible for their safety.
These machines are heating units, and as with any commercial heating unit the
surfaces on these Donut Fryers will get hot. Always be careful when near an
operating Grill Station, and ensure that any risk to unwary customers or staff is
minimised with additional signage if necessary. Due to the obvious heat hazard
Roband recommends that these units be kept out of reach of children.
These Donut Fryers are for use with oil. The machines are not designed for use
with water for such task as cooking pasta, and any such misuse will void the
warranty.
The machine should be disconnected from all power and allowed to cool before
cleaning. Any damaged plug or cord should be replaced before further use.
ROBAND WILL ACCEPT NO LIABILITY IF;
Non-authorised personnel have tampered with the machine.
The instructions in this manual have not been followed correctly.
Non-original spare parts are used.
The machine is not cleaned correctly, with the right product.
There is any damage to the unit.
Page: 2
PACKAGING
All care is taken when packing and Roband ensures that every unit is functional and
undamaged at the time of packaging.
The Package of these Donut Fryers should include:
1) One Fryer
2) Two Donut Lifters
3) Two Cooking Racks
4) This manual
5) One control box
6) Packaging materials
Any damage to the machine as a result of freight must be reported to the Freight
Company and to the agent responsible for the dispatch of said unit within 24 hours of
receipt. No claims will be accepted or entertained after this period.
RCM:
Roband
®
products have been designed and manufactured to comply with any and
all specifications set out by the Australian Communications and Media Authority
(ACMA) in regards to Electromagnetic Compatibility. As testament to such
compliance these units bear the RCM symbol.
For further information contact the Australian Communications Authority, PO Box
13112, Law Courts, Melbourne VIC 8010.
CE:
Roband
®
products bearing the CE compliance mark have been designed and
manufactured to comply with European Standards and Directives.
COMPLIANCE
Page: 3
INSTALLATION
Remove all the packaging materials and tape, as well as any protective plastic
from the machine. Clean off any glue residue left over from the protective
plastic using methylated spirit.
Place the fryer on a firm, level surface in the required position. The feet can
be adjusted for an uneven surface. Take a moment to familiarise yourself
with the general arrangement of the fryer before going any further.
National Standards exist outlining the positioning, spacing and ventilation
requirements when installing new appliances. These Standards should be
consulted and new equipment should be installed accordingly. In any
situation where specifications allow a distance of less than 100mm we would
still recommend that a well-ventilated air gap of not less than 100mm be
maintained. If the machine is near particularly heat-sensitive materials
common sense should be employed in determining sufficient distancing.
The element and controls are designed as separate components to the body
and pan. These are collectively referred to as the control box. The main
switches, thermostats and pilot lights are located on the face of the control box.
The control boxes can be tilted back and rested in the upright position or
removed altogether from the fryer body. Once removed, the pan may then be
removed by sliding your fingers beneath the handles and lifting them out.
Caution: Ensure pan has cooled before attempting to remove it.
Before connecting the fryer to the power supply ensure that all the controls are
in theOFF position.
Plug the control box of the fryer into a standard, single phase, 10Amp power
point.
RCD Protection
We recommend the use of an RCD (Residual Current Device) rated at not less than
30mA for circuit protection when using these units. Note that if one RCD is used to
protect multiple socket outlets, the RCD shall be appropriately rated so as to allow up
to 30mA from these machines alone.
Page: 4
OPERATION
Place the tank in the fryer. Place the control box in position and the element
guard over the element in the bottom of the tank.
Fill the tank with the required volume of oil. The specifications at the end of
these instructions indicate the correct volume of oil.
Rotate the on/off knob to the on position. The green pilot light will indicate that
the machine is on. Rotate the thermostat knob to select the desired cooking
temperature. As a guide, between 170° and 180°C should suffice but
experience will dictate the best cooking temperature.
Caution: If using “solid” type cooking oil, this must be melted very slowly by turning
the thermostat on to the lowest setting for about 10 to 15 seconds, then off for a
similar period. Repeat this process until the level of liquid oil reaches the minimum
oil level mark. This is to prevent the possibility of the oil igniting.
When the temperature has been set the pilot light will illuminate indicating that
heating is taking place. When the oil has reached the set temperature the pilot light
will go out. The thermostat will then continue to cycle on and off, maintaining the
set temperature.
Page: 5
SAFETY
GENERAL SAFETY
This machine contains no user-serviceable parts. Roband Australia, one of our
agents, or a similarly qualified person(s) should carry out any and all repairs. Any
repair person(s) should be instructed to read the Safety warnings within this manual
before commencing work on these units.
Steel cutting processes such as those used in the construction of this
machine result in sharp edges. Whilst any such edges are removed to the
best of our ability it is always wise to take care when contacting any edge.
Particular care should be taken when panels are removed (eg during
servicing) as this may expose sharp edges.
Do not remove any cover panels that may be on the machine.
This unit can get very hot, ensure everyone is aware that the machine is
operating and take care to avoid contact with hot surfaces. Hot surfaces
should be left well ventilated with an air gap of at least 100mm, though
common sense should be used if the machine is near heat-sensitive
materials.
Always ensure the power cable is not in contact with hot parts of the machine
when in use. Ensure that any damaged power cord is replaced before further
use.
Do not clean this unit with the aid of a Spray Applicator or Water Jet.
These units are not suitable for cleaning in a dishwasher and no parts of
these machines (except the grease box) should ever be submerged in water.
Keep out of reach of children or the inept.
GENERAL FIRE SAFETY
Before using any fryer adequate safety measures should be in place. Such
measures should include, but not be limited to, having an appropriate fire
extinguisher or fire blanket located nearby in case cooking oil ignites.
Page: 6
SAFETY FEATURES
The FD10 has a thermal overload fitted.
The thermal overload’s function is to cut power to the fryer when the oil
temperature reaches 238°C, thus preventing the oil reaching flash point
temperature.
If the thermal overload trips, it is easily reset by pushing the small red reset
button on the rear of the control box after the oil has cooled down by at least
12°C. If the overload continues to trip there may be a fault with the
thermostat and you should contact your nearest authorised service agent for
further help.
WARNING: Always turn both the thermostat and main switch “off” and allow
element to cool before lifting the element out of the oil.
WARNING: Always turn both the thermostat and main switch “OFF”, and allow
element to cool before lifting the element out of the oil.
WARNING: IMMERSING A HOT ELEMENT IN OIL COULD CAUSE A FIRE.
WARNING: Ensure that oil is changed or filtered regularly. Old or dirty oil has a
lower flash point and is more prone to surge boiling.
WARNING: Always be careful when cooking frozen or over-wet food products as
these items are more prone to surge-boiling and are more likely to result in the
“spitting” of hot oil.
Cooking Tip: For frozen foods, direct from freezer to fryer, allow higher
temperature or slightly longer cooking time. Always shake the cold water and ice
from frozen foods before frying. As a general rule for larger food items, cook at a
lower temperature and for a longer period of time. For smaller items of food, cook
at a higher temperature for a shorter time.
To obtain the optimum results from your fryer we recommend the following
guidelines:
If solid type cooking oil is used, melt it slowly at the minimum temperature
setting.
Keep salt away from the cooking oil.
Check your oil to food ratio, 6:1 oil to food is recommended.
Filter the cooking oil regularly.
Top up the cooking oil regularly.
Never use copper or brass utensils in the cooking oil.
Keep the fryer covered when not in use.
Page: 7
CLEANING, CARE & MAINTENANCE
Attention to regular care and maintenance will ensure long and trouble free
operation of your fryer.
The Fryer should be cleaned out daily, or more often if necessary.
Ensure the power is off and the fryer is cool before attempting to drain the
cooking oil or clean any part of the machine.
Wipe the fryer down with warm soapy water using a damp sponge or cloth. Do
not immerse the control box in water.
Filter the cooking oil daily if the fryer is constantly in use.
Empty and wash the drip tray at the bottom the fryer regularly. The tray is
removed by simply sliding it out.
Always ensure the power cable is not in contact with hot parts of the fryer when
in use.
Although every care is taken during manufacture to remove all sharp edges, care
should be taken when cleaning to avoid injury.
Caution: Some cleaning agents can damage stainless steel or the
polycarbonates and plastics used in switches and pilot lights, usually through
prolonged use. For this reason we recommend cleaning with soapy water only.
Any damage to the unit through the use of harsh or improper cleaning agents is
entirely the fault of the user.
Warning: No parts of this these units, with the exceptions of the oil pan and
drain tray (when detached from the unit), should ever be immersed in water for
cleaning or any other purposes.
Page: 8
TROUBLESHOOTING
If the fryer does not function check the following points before calling for service.
The control box is plugged in correctly and the power switched on.
The power points are not faulty.
The temperature has been set correctly and the overloads have not tripped. To
reset a tripped temperature overload switch, press the red button behind the
control box as indicated in the picture below. Frequent tripping of the overload
may indicate a problem.
The thermostat knobs are not loose or broken, rendering the thermostats
inoperable.
Page: 9
SPECIFICATIONS
Model
FD10 & FD10-UK
Power Source
220-240 Volts AC
Power Frequency
50-60Hz
Power Consumption
2100-2500 Watts
Amps
10
Width mm
740
Height mm
340
Depth mm
489
Weight kg
15
Constant research and development may necessitate specification changes at any
time.
Page: 10
CIRCUIT DIAGRAM
MODELS: FD10 VERSION 3
NOTE: Tilt switch for UK models ONLY.
TC Thermal cut-out
TS Thermostat
NOTE: This circuit diagram has been provided for reference and to assist
qualified service and repair agents only. Under no circumstances should a
person not suitably qualified attempt repairs to any electrical equipment
Page: 11
PARTS LIST
F15 PARTS LIST
PART NO
DESCRIPTION
QTY
PART NO
DESCRIPTION
QTY
ES0264
Pilot Light & O-ring 10mm
Amber
1
PC0060
Cord Clamp - 10A
1
EC0031
Terminal Block -
Porcelain/Steatite "1602",
L & N marked, 10mm sq.
1
PC0011
Food Set & Nuts
1
ES0265
Pilot Light & O-ring 10mm
Green
1
PS0021
Knob & S/S Screw
1
ES0239
Plug & Cord - 10 Amp
Black Thermoset
Elastomer - 2BL 1E
1
SS0226
Drip Tray
1
ES0007
Rotary Switch & Plain
Knob - 2 position
1
SS0459
Element Guard
1
HC0053
Element - 2300W 240V
1
TC0026
Thermostat Limit
240ºC -13K
1
MC0073
Rack
1
TS0005
Thermostat 205ºC &
Plain Knob
1
MC0074
Donut Lifter
2
VS0189
Control Box Complete
1
MS0038
Handle Set for Tank
1
VS0238
Lid (with basket handle
cutout) with Knob and
Screw
1
Page: 12
APPENDIX A
RESIDUAL CURRENT DEVICES (RCD’S)
Also known as Earth Leakage Protection systems an RCD is a protective device
that automatically disconnects the live conductors of a circuit when an earth
leakage current reaches a predetermined value.
Australian and International Standards detail when and where RCD’s are to be
used in electrical installations, but common practice in many countries is to use a
30mA RCD in general commercial applications. This is typically done because
30mA RCD’s are readily available and are used in domestic installations.
For Commercial installations, and for socket-outlets providing power to commercial
heating equipment (Toasters, Bains Marie, Grillers), 30mA RCD’s are typically
unsuitable unless they are protecting only one device. Higher rated RCD’s should
be considered if protecting multiple socket-outlets, giving appropriate consideration
to the type of equipment being protected.
AS/NZS3000 2.5.2 gives the following warnings that should have been taken into
consideration when an RCD circuit was installed.
To avoid unwanted tripping due to leakage currents and transient
disturbances, care should be taken to ensure that the sum of the leakage
currents of electrical equipment on the load side of an RCD is less than
1/3 of its rated residual current.
To avoid excessive leakage current causing unwanted tripping where
socket-outlets are protected by one RCD having a rated residual current
not greater than 30mA, consideration should be given to the number of
socket-outlets protected and the nature of electrical equipment likely to
be connected to the socket-outlets.
Tubular elements (such as those used in this unit) reaching temperatures greater
than 110°C are subject to moisture absorption and therefore earth leakage current
generation. Should the installation and use of this unit trip an RCD the unit will
need to be run on a circuit without an RCD for approximately 30-60 minutes, after
which time the elements should have dried out and the machine should function
normally. If you are unable to locate a circuit without an RCD please contact your
supplier or contact Roband or our Agent for alternative suggestions.
Page: 13
NOTES
Page: 14
NOTES
Page: 15
NOTES
Page: 16
WARRANTY
Every care is taken to ensure that no defective equipment leaves our factory and all goods manufactured by
us are guaranteed against defective workmanship and materials for a period of 12 months from the date of
purchase. Roband Australia’s obligations pursuant to this express warranty being limited to the repair or
replacement of the defective goods or materials, at is option and subject to the terms contained within this
Warranty statement. Where relevant, glass, Teflon® and lamps are not included in this warranty and RCD
tripping due to moisture absorption by Tubular Heating Elements is not considered a warranty fault.
Generally, all goods claimed under this warranty must be returned to the factory or an authorized service
agent, freight prepaid, for inspection. All parts deemed to be defective will be replaced, however, no claims
will be entertained for second hand products, or parts damaged in transport, misused or modified in any way
without our approval. For machines that are not considered to be portable (e.g. food bars, rotisseries, large
hotplates and some bain maries), on site warranty service will be provided in capital city metropolitan areas
only. In all other locations, the customer is responsible for all travelling time/service call costs and payment
for this will be required prior to the commencement of the repair. The labour costs to actually repair the fault
will be met by the company.
Any repairs or replacement of defective goods or materials pursuant to this warranty, must be authorized by
Roband Australia prior to any action being taken. The company reserves the right to reject a claim for
warranty if it is not completely satisfied with the circumstances under which it occurred and any other costs
incurred for false claims or faults due to incorrect usage etc. are the responsibility of the claimant. Roband
Australia Pty Ltd nor any subsidiary company or Agent shall be liable for loss of profit or damage to other
equipment and property except where it is in breach of the guarantees provided in accordance with
Schedule 2 of the Competition and Consumer Act 2010 (Cth) or the applicable legislation from time to time.
The goods come with guarantees that cannot be excluded under the Australian Consumer Law (ACL). You
are entitled to a replacement or refund for a major failure and for compensation for any other reasonably
forseeable loss or damage. You are also entitled to have the goods repaired or replaced if they fail to be of
acceptable quality and the failure does not constitute a major failure.
Generally, authorized service agents are located in all areas which have authorized distribution dealers. For
the name of your nearest Australian authorised service agent, please contact:
Roband Australia Pty Ltd
1 Inman Road, Cromer, NSW 2099
Warranty Number: 1800 268 848
Phone: (02) 9971 1788 Fax: (02) 9971 1336
All other countries please contact your selling Agent.
Please complete the following details and keep this card in a safe place.
NAME
ADDRESS
MODEL No: SERIAL No: DATE PURCHASE
NAME OF DEALER:
PLEASE RETAIN THIS SECTION FOR YOUR RECORDS
DO NOT POST
ROBAND
®
AUSTRALIA PTY LTD
OTHER LEADING PRODUCTS AVAILABLE:
Sycloid Toaster
DRINK MIXERS
HIGH PERFORMANCE DEEP FRYERS
VITAMIX BLENDERS
GRILLMAX TOASTERS
NOAW Slicers
Manufactured/Imported in Australia by:
Authorised Distributor/Agent
/