Page is loading ...

Installation & Operation for Limit
Switches for Pneumatic Actuators
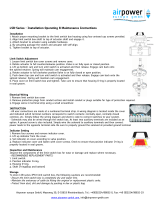
Installation:
1. Attach proper mounting bracket to the switch box housing using the fasteners provided.
2. Align switch box shaft to top of actuator shaft and engage it.
3. Attachbrackettoactuatorusingthefastenersprovided(ngertightonly).
4. Rotate the actuator twice and the switch and actuator will self-align.
5. Tighten the bracket to the top of actuator.
Switch Adjustment:
1. Loosen transparent dome cover screws and remove.
2. Remove the open close indicator. WARNING: Do not rotate indicator when engaged.
3. Loosen the switchbox cover screws and remove the cover.
4. Rotate the actuator clockwise.
5. Push down the top cam and turn until the switch is activated and then release. Engage the cam back onto the
splined retainer. The spring will maintain cam engagement.
6. Rotate the actuator counter-clockwise.
7. Lift up bottom cam and turn until the switch is activated and then release. Engage the cam back onto the splined
retainer. The spring will maintain cam engagement.
8. Place the cover on the switch box and tighten the screws. Take care to ensure that the cover gasket seal is
properlylocatedinsealgroove.
9. Place the indicator on the shaft.
10.Placetransparentdomeonswitchboxsothattheindicatordisplaymatchesvalveposition.Adjustthedomeand
tightenthedomecoverscrews.Takecaretoensurethatthedomegasketsealisproperlylocated.
Electrical Wiring:
1. Removetheswitchboxcoverandindicator.(Seeswitchadjustmentsections1-3).
2. Removeprotectionplugsfromconduitentriesandinstallconduitorplugssuitablefortypeofprotectionrequired.
WARNING: To maintain the NEMA rating, the use of proper wiring methods per NEC and local
codesisrequired.
3. Engagewiresinterminalstripusingasmallscrewdriver(⅛"blade).
Note:Conduitplugssuppliedwiththeswitchboxarefortransitpurposesonly.ToensureNEMAprotection,any
unused con- duitentrymustbeclosedwithappropriateconduitplug.
© 2016 DVCC Printed in the USA PRV216_inhouse
Dixon Sanitary
N25 W23040 Paul Road • Pewaukee, WI 53072
ph: 800.789.1718 • 262.513.6900 • fx: 800.789.4046 • 262.513.4904
dixonvalve.com
connect with us on
scan to visit our website
/


