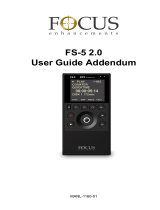
DataVideo DN-60A User manual

Type
User manual
1
2
Contents
WARNINGS AND PRECAUTIONS ..................................................................5
WARRANTY ................................................................................................7
S
TANDARD WARRANTY .................................................................................... 7
T
WO YEAR WARRANTY .................................................................................... 7
D
ISPOSAL....................................................................................................... 8
1. PRODUCT OVERVIEW ........................................................................9
1.1 F
EATURES ....................................................................................... 9
2. CONNECTIONS & CONTROLS ........................................................... 11
2.1 F
RONT PANEL ................................................................................ 11
2.2 R
EAR PANEL .................................................................................. 12
3. CF CARD SLOT ................................................................................. 13
3.1 P
OWERING ON .............................................................................. 14
3.2 DN-60A
POWER SOURCES .............................................................. 14
3.3 DN-60A
STATUS LED AND ERROR MESSAGES ..................................... 15
4. DN-60A MENUS .............................................................................. 16
4.1 M
AIN MENU ................................................................................. 17
5. SETUP MODE .................................................................................. 18
5.1 P
LAY SETUP OPTIONS ...................................................................... 18
5.2 R
ECORD SETUP OPTIONS ................................................................. 19
5.3 S
YSTEM SET UP .............................................................................. 20
5.4 S
AVE SET UP ................................................................................. 20
5.5 R
ECALL SET UP .............................................................................. 21
6. DN-60A GENERAL SETUP NOTES ...................................................... 22
6.1 C
HOOSE A FILE OPERATING SYSTEM, FAT32 OR NTFS ........................... 22
6.2 S
ET THE CF CARD VOLUME ID ........................................................... 22
6.3 S
ET THE SIGNAL TYPE ...................................................................... 23
3
6.4 SET FILE TYPE ................................................................................ 23
6.5 F
ORMAT THE CF CARD ..................................................................... 23
6.6 S
ELECT WHICH TIME CODE TO DISPLAY ................................................ 23
6.7 S
ET UP SYNCH TO TAPE .................................................................... 24
6.8 S
ET THE AUDIO SAMPLING RATE IN THE SOURCE EQUIPMENT .................. 24
6.9 S
ET THE RECORD DATE (OPTIONAL) .................................................... 24
6.10 B
EFORE STARTING TO RECORD .......................................................... 24
6.11 S
TARTING THE RECORD PROCESS ....................................................... 24
6.12 P
AUSING THE RECORD PROCESS ........................................................ 25
6.13 M
ARKING THE RECORDING ............................................................... 25
6.14 S
TOP A RECORDING BEFORE POWERING OFF ......................................... 26
6.15 P
OWER ON AUTO RECORD ................................................................ 26
6.16 T
IME LAPSE RECORDING .................................................................. 26
6.17 U
SING PRE-TRIGGER SET UP ............................................................. 27
7. PLAYBACK ....................................................................................... 28
7.1 S
ET UP LOOP PLAY........................................................................... 28
7.2 P
LAY OUT ...................................................................................... 28
7.3 DN-60A
PLAYOUT TO A CAMERA LCD PANEL ..................................... 28
8. BEFORE TRANSFERRING THE CF CARD TO A COMPUTER................... 28
8.1 CF
CARD CONNECTION TO A COMPUTER ............................................. 29
8.2 DN-60A
FILE NAMING SCHEME ........................................................ 29
9. QUALIFIED DN-60A CF CARDS AND MAX RECORDING TIMES ............ 29
10. UPDATING DN-60A FIRMWARE................................................... 31
11. DN-60A RS-232 CONTROLLER COMMAND SET ............................. 33
11.1 C
ONNECTOR PIN ASSIGNMENT .......................................................... 35
11.2 S
YSTEM CONTROL........................................................................... 35
11.3 S
ENSE REQUEST ............................................................................. 36
11.4 T
RANSPORT CONTROL ..................................................................... 38
12. SPECIFICATIONS ......................................................................... 41
SERVICE AND SUPPORT ............................................................................ 42
4
Disclaimer of Product and Services
The information offered in this instruction manual is intended as a guide
only. At all times, Datavideo Technologies will try to give correct, complete
and suitable information. However, Datavideo Technologies cannot exclude
that some information in this manual, from time to time, may not be correct
or may be incomplete. This manual may contain typing errors, omissions or
incorrect information. Datavideo Technologies always recommend that you
double check the information in this document for accuracy before making
any purchase decision or using the product. Datavideo Technologies is not
responsible for any omissions or errors, or for any subsequent loss or
damage caused by using the information contained within this manual.
Further advice on the content of this manual or on the product can be
obtained by contacting your local Datavideo Office or dealer.
5
Warnings and Precautions
1. Read all of these warnings and save them for later reference.
2. Follow all warnings and instructions marked on this unit.
3. Unplug this unit from the wall outlet before cleaning. Do not use liquid
or aerosol cleaners. Use a slightly damp cloth for cleaning.
4. Do not use this unit in or near water.
5. Do not place this unit on an unstable surface, cart, stand, or table. The
unit may fall, causing serious damage.
6. Any slots and openings on the case top, back, and bottom are provided
for ventilation. To ensure safe and reliable operation of this unit, and to
protect it from overheating, do not block or cover these openings. Do
not place this unit on a bed, sofa, rug, or similar surface, as the
ventilation openings may become blocked. This unit should never be
placed near or over a heat source or radiator. This unit should not be
placed in a built-in installation unless proper ventilation is provided.
7. This product should only be operated from the type of power source
indicated on the marking label of the AC adapter. If you are not sure of
the type of power available, consult your Datavideo dealer or your local
power company.
8. Do not allow anything to rest on the power cord. Do not locate this unit
where the power cord will be walked on, rolled over, damaged or
otherwise stressed.
9. If an extension cord must be used with this unit, make sure that the
total of the ampere ratings on the products plugged into the extension
cord do not exceed the extension cord’s rating.
10. Make sure that the total amperes of all the units that are plugged into a
single wall outlet do not exceed 15 amperes.
11. Never push objects of any kind into this unit through the case
ventilation slots, as they may touch dangerous voltage points or short
out parts that could result in risk of fire or electric shock. Never spill
liquid of any kind onto or into this unit.
12. Except as specifically explained elsewhere in this manual, do not
attempt to service this product yourself. Opening or removing covers
that are marked “Do Not Remove” may expose you to dangerous
6
voltage points or other risks, and will void your warranty. Refer all
service issues to qualified service personnel.
13. Unplug this product from the wall outlet and refer to qualified service
personnel under the following conditions:
a. When the power cord is damaged or frayed;
b. When liquid has spilled into the unit;
c. When the product has been exposed to rain or water;
d. When the product does not operate normally under normal
operating conditions. Adjust only those controls that are covered
by the operating instructions in this manual; improper adjustment
of other controls may result in damage to the unit and may often
require extensive work by a qualified technician to restore the
unit to normal operation;
e. When the product has been dropped or the case has been
damaged;
f. When the product exhibits a distinct change in performance,
indicating a need for service.
Care must be taken when connecting a 6pin DV/IEEE-1394 cable into the DN-
60A when the other end is already connected to a computer. Do not attempt
to insert the connector backwards as DC power from the computer is present
on the cable and can damage the receiver circuits in the DN-60A.
Use the supplied power adaptor to power the unit reliably. Alternatively use
a charger specifically designed to charge the rechargeable AA batteries in
use. The DN-60A unit can accept voltages of 6 to 24 volts (Max) via its center
positive DC input.
Please choose to switch power sources or insert 4 fresh AA batteries before
extended use. Switching between internal battery and external power (or
vice versa) may cause the unit to restart and thus interrupt the normal
Record or Playback operation already in progress.
7
Warranty
Standard Warranty
Datavideo equipment is guaranteed against any manufacturing defects
for one year from the date of purchase.
The original purchase invoice or other documentary evidence should be
supplied at the time of any request for repair under warranty.
Damage caused by accident, misuse, unauthorized repairs, sand, grit or
water is not covered by this warranty.
All mail or transportation costs including insurance are at the expense
of the owner.
All other claims of any nature are not covered.
Cables & batteries are not covered under warranty.
Warranty only valid within the country or region of purchase.
Your statutory rights are not affected.
Two Year Warranty
All Datavideo products purchased after 01-Oct.-2008 qualify for a free
one year extension to the standard Warranty, providing the product is
registered with Datavideo within 30 days of purchase. For information
on how to register please visit www.datavideo.com
or contact your
local Datavideo office or authorized Distributors
Certain parts with limited lifetime expectancy such as LCD Panels, DVD
Drives, Hard Drives are only covered for the first 10,000 hours, or 1 year
(whichever comes first).
Any second year warranty claims must be made to your local Datavideo
office or one of its authorized Distributors before the extended warranty
expires.
8
Disposal
For EU Customers only - WEEE Marking
This symbol on the product indicates that it should
not be treated as household waste. It must be handed
over to the applicable take-back scheme for the
recycling of Waste Electrical and Electronic Equipment.
For more detailed information about the recycling of
this product, please contact your local Datavideo
office.
9
1. Product Overview
The DN-60A is a small and portable video recorder/player capable of
recording to certified removable Compact Flash (CF) cards. It can record up
to 4.5 hours* of video depending on the recording format, settings and CF
card size. The unit can easily be set up for FAT32 or NTFS file systems; as well
as DV PAL, DV NTSC, DVC Pro 25, DVC Pro 50 and HDV (1280x720p or
1440x1080i) also.
This unit is capable of recording from digital IEEE-1394B sources. It can also
be set up to record SD PAL or SD NTSC Time Lapse sequences at a variety of
intervals. Set it up to buffer live video and when you press record within 8
seconds of an event you can be confident that you have recorded that must
have shot.
Once recorded Drag and Drop your chosen video files directly to the time-
line of your Non-Linear Editing program using popular DV file types such as
Microsoft AVI type 2, Canopus AVI, QuickTime MOV and MXF (OP 1A) as well
as M2T in HDV mode. With this many useful features the DN-60A is ideal for
a variety applications within broadcast, education, animation, science,
medical, construction and security.
1.1 Features
Small, easy to carry and camera mountable Compact Flash recorder
Input Video Connections
IEEE-1394 supports DV25, DVC Pro 25, DVC Pro 50 and HDV only
Embedded External or Internal Time Code
Output Connections
IEEE-1394 in playback can supply DV, DVC Pro and HDV signals to the
camera
10
IEEE-1394 connection supports AVC command set via PC and Mac
FW400 connections
Allows recording to Microsoft AVI, Canopus AVI, QuickTime DV MOV,
MXF OP1A and M2T file formats directly (M2T converts to QuickTime
via supplied utility on CD)
Auto power on of unit when connected camera is switched on
Default 48KHz (16bit) audio sampling rate for best quality audio
recording
Time-lapse with single or multi frame recording at user defined
intervals
4 or 8 second pre-trigger buffer, useful in recording unexpected events
especially in science research, wildlife recording, Health & Safety or
security applications
Loop playback of video from a selected video bin
Can be set to Auto record to the current empty video bin when the unit
is powered on
Backlit LCD panel allowing quick confirmation of the recorders status
RS-232 interface for computer trigger and control
11
2. Connections & Controls
2.1 Front Panel
1. LCD PanelShows the status and menu options of the DN-60A
2. Menu Navigation ButtonRotate to change options and press in to
select
3. DC Power input Connect the DN-60A power adaptor here
4. Status LED
5. Power On / Auto / Off switch
6. CF Card Protection CoverSlide down then lift up carefully to gain
access
12
2.2 Rear Panel
1. Battery Compartment CoverPress in gently and slide up to access
2. Camera Mount screw threadAttach DN-60A camera mount here
3. DV/DVC Pro/HDV i/o Port Attach 6pin IEEE-1394 cable connector
here
4. RS-232 PortConnect 3.5mm Jack for RS-422 control by computer
13
3. CF Card Slot
1. CF Card Protection Cover Slide down then lift up carefully to open this
cover and get access to the CF card slot and the card eject button.
2. CF Card Eject Button Press in to eject the fitted CF card. When the slot is
empty (no CF card inserted), this button is normally in the depressed
position. Upon inserting a CF card, the button moves out again.
NOTE: CF cards need to be inserted the correct way up so that the pins
inside the unit marry correctly with the card otherwise damage to the pins
may happen.
NOTE: the CF card does not support UMDA7.
Do not force a card into the slot or force the card protection cover.
14
3.1 Powering On
Connect the DN-60A’s own power adaptor to
the right hand side DC In socket. Ensure the
power adaptor unit is connected to a suitable
mains socket. Switch the power ON/OFF switch
on the Left hand side of the unit to one of 3
positions.
1. Manual power ON position
A. Auto power ON/OFF position (when camera is switched on/off)
0. Manual power OFF position
The LCD display panel will show
Datavideo DN-60A Loading… after a
few seconds the Home Display will be
shown. The DN-60A is now ready for set
up or use as a recorder or playback device.
3.2 DN-60A Power Sources
Use the supplied DN-60A power adaptor to reliably power the unit.
Alternatively, you can use AA or rechargeable AA batteries. Use a compatible
charger with the rechargeable AA batteries being used. However, please pay
close attention to the battery indicator on the DN-60A LCD panel during
battery powered operation and change over batteries before they become
exhausted.
Please choose to switch to the power adaptor or insert 4 fresh AA batteries
before any extended use. Switching between internal battery power and the
external power adaptor (or vice versa) will cause the unit to restart and thus
interrupt the normal Record or Playback operation already in progress.
The DN-60A unit can safely accept voltages of 5 to 15 Volts DC (Max) via its
centre positive DC input socket.
15
Note: Not all AA labelled batteries are manufactured to the same dimensions
so care must be taken when selecting batteries for use with the DN-60A.
Some batteries because of their non-standard dimensions prove difficult
when fitting or removing them from the DN-60A standard AA battery
compartment. Care must be shown in order to avoid user related damage to
the DN-60A.
3.3 DN-60A Status LED and Error Messages
The DN-60A has a red status LED just below the Menu Navigation Button.
This can be used as a quick way of confirming that the unit is working
correctly or is requiring user attention.
LED constantly OFF
DN-60A is idle or the unit is waiting to be
powered on.
LED constantly ON
Indicates the DN-60A unit is recording a
camera/source input.
LED Slowly Dimmed
OFF and ON
Indicates record pause, formatting card, or
making media file.
LED Flashing ON and
OFF
The LCD panel will also indicate that there is:
No Media
CF card is not detected by
DN-60A. Check CF card.
No Input
Video signal is lost from DN-
60A. Check cabling and
source equipment.
Bad Input
Video signal received does
not match the DN-60A
settings.
Unsafe Battery
level
Usually indicates low battery
level. Change batteries or
power source.
Wrong Format
Media!!
CF card does not match the
format settings of the DN-
60A.
16
User can choose:
"RESTORE SETTING": Reset DN-60A configuration to accept the CF card
inserted.
Or
"FORMAT MEDIA": Format the CF card according to current DN-60A
configuration.
Caution: All content on the CF card will be erased by selecting "FORMAT
MEDIA"
4. DN-60A Menus
Pressing the Navigation Button in will select the menu option or confirm a
value. Rotating the Navigation Button in either direction will change the
menu option or set a value. If all options have been displayed then the menu
display will only scroll options in one direction. Choose EXIT to return to a
previous menu level or to return to the initial Home screen.
The DN-60A is a menu driven unit; there are several menus which are used to
set up the unit. The menu settings are non-volatile (settings are stored even
when the unit is switched off). So general settings, such as Signal and File
types, may only need to be set once. We will look at specific set ups in more
detail later on in this manual, but here is an overview of the available menu
options.
17
4.1 Main Menu
There are 5 initial main menu level options at the Home screen and they are:
Menu Option Action taken
This will take the DN-60A into record mode when
the menu navigation button is pressed in. At this
point the DN-60A checks for the chosen input
signal (DV, DVC Pro or HDV) at the IEEE-1394
connector. Use Status mode to check that the unit
has the correct settings first. If not, use Setup
mode to modify the DN-60A
settings before
recording.
This will take the DN-60A into playback mode
when the menu navigation button is pressed in. At
this point the DN-60A checks for existing media
files in the currently selected bin or CF card. Note
loop playback can be selected from within setup
mode.
Tools mode allows the user to perform selected
tasks to prepare files for transfer to an edit system
or to erase existing video files on the card. This
menu also allows a user to update the DN-60A
firmware.
Setup mode enables various record and playback
related parameters and modes to be setup, saved
or recalled including Sync to Tape, Signal Type, File
Type and Battery Type.
Status mode allows the user to confirm the
current settings in use. These
parameters are
displayed across several screen changes using the
menu navigation button.
18
5. Setup Mode
Entered from the Main Menu, this set of options enables various record and
playback related parameters and modes to be setup.
Menu Option Action taken
PLAY SET UP
Here Loop Playback Mode can be switched ON or
OFF.
RECORD SET UP
Here settings for File Type, Sync to Tape, Pre-
Trigger, Time Lapse,
Record at Power ON and
Record Date can be changed.
SYSTEM SET UP
Here settings for input Signal Type, File System,
Volume ID, Timec
ode and Battery Type can be
chosen.
SAVE SET UP
The DN-60A allows current settings to be saved as
USER1 or USER2 to allow time efficient set up of the
unit when in the field.
RECALL SET UP
Used to quickly adopt user stored settings in USER1
and USER2 or adopt a factory default for PAL DV,
NTSC DV or HDV.
5.1 Play Setup Options
Entered from the SETUP Menu, this set of options enable various record
related parameters and modes to be setup.
Menu Option Action taken
Will return you to the SET UP menu.
Allows user to choose playback of whole bin or just
one clip within a bin.
When enabled the DN-60A will loop play the current
clip selected, the playback will continuously loop until
stopped. Note that the chosen mode is indicated by
an asterisk.
19
5.2 Record Setup Options
Entered from the SETUP Menu, this set of options enable various record
related parameters and modes to be setup.
Menu Option Action taken
Exit
Will return you to the SET UP menu.
SET FILE TYPE
The file options change depending on the Signal Type
chosen in System Set Up.DV and DVC signals can be
recorded to Microsoft avi, Canopus avi, QuickTime
mov or MXF OP1A files. HDV signals can only be
recorded to m2t files at present.
These file options may be expanded in later firmware
revisions.
SET SYNC TO TAPE
Allows the feature to be turned ON or OFF. ON allows
the unit to record in step with the camera. OFF
allows the unit to record independently of the
camera.
PRE-TRIGGER
SETUP
Allows the feature to be turned ON or OFF. ON allows
the unit to constantly hold the latest 4 to 8 seconds
of video in its memory until the record action is
started. The initial 4-8 seconds of video from memory
is stored to the bin first and then the rest of the
video after the record trigger is then added to the
bin. See page 14
TIME-LAPSE
SETUP
Set the Time Lapse interval and then the number of
frames to be captured at the interval. Now turn the
feature ON or OFF. This feature is NOT available in
HDV mode. See Time lapse section on page 14.
RECORD ON
POWER UP
Allows the feature to be turned ON or OFF. ON allows
the unit to start recording using the current settings
at power on provided the incoming signal is correct
and the currently selected video bin is empty.
SET RECORD DATE
Allows date of recording to be set if not already
provided by source equipment.
20
5.3 System Set Up
Entered from the SET UP Menu, this set of options enable file system, signal
and power related parameters and modes to be setup.
Menu Option Action taken
Exit
Will return you to the SET UP menu.
SET SIGNAL TYPE
Where the recorder is set to operate in one of three
modes, DV+DVC 60Hz,
DV+DVC 50Hz or HDV
50/60Hz. The current selection will be marked with
an asterisk.
SET FILE SYSTEM
This option will set up the CF card file system type
seen by the computer as either NTFS or FAT32. The
current selection will be marked with an asterisk.
SET VOLUME ID
When reading a DN-60A CF card the volume name is
shown on the computer as Datavideoxx. This option
sets the xx value between 0 and 99. A useful feature
when ingesting multiple CF cards at the same time
from a multi-camera shoot.
TIMECODE
DISPLAY
During recording and playback, this option allows
display of either the Internal or the External time
code. Note that the current selection will be marked
with an asterisk.
SET BATTERY
TYPE
This option allows the proper display of remaining
power from Alkaline, NiMH-1, NiMH-2 or Lithium
type battery cells.
SET DV HIDDEN
MODE
Allows user to enable or disable this DV mode. When
enabled conflicts with other DV devices are avoided.
5.4 Save Set Up
Entered from the SET UP Menu, this set of options enable file system, signal
and power related parameters and modes to be setup.
Menu Option Action taken
Exit
Will return you to the SET UP menu.
  • Page 1 1
  • Page 2 2
  • Page 3 3
  • Page 4 4
  • Page 5 5
  • Page 6 6
  • Page 7 7
  • Page 8 8
  • Page 9 9
  • Page 10 10
  • Page 11 11
  • Page 12 12
  • Page 13 13
  • Page 14 14
  • Page 15 15
  • Page 16 16
  • Page 17 17
  • Page 18 18
  • Page 19 19
  • Page 20 20
  • Page 21 21
  • Page 22 22
  • Page 23 23
  • Page 24 24
  • Page 25 25
  • Page 26 26
  • Page 27 27
  • Page 28 28
  • Page 29 29
  • Page 30 30
  • Page 31 31
  • Page 32 32
  • Page 33 33
  • Page 34 34
  • Page 35 35
  • Page 36 36
  • Page 37 37
  • Page 38 38
  • Page 39 39
  • Page 40 40
  • Page 41 41
  • Page 42 42

DataVideo DN-60A User manual

Type
User manual

Ask a question and I''ll find the answer in the document

Finding information in a document is now easier with AI