Page is loading ...

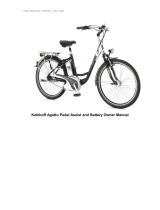
Dahon Boost
OWNER’S MANUAL

Contents
Welcome/Intro .................................................................. 3
What’s it called ................................................................ 4
Battery and Charger Operation ...................................... 6
Before the rst use ....................................................................6
Battery Hibernation Mode ..........................................................6
Normal Charging .......................................................................6
Charging with Installed battery ................................................ 11
Battery Key Lock .....................................................................12
Safety Precautions ..................................................................12
Battery .................................................................................12
Battery Charger ...................................................................12
Location for Charging ..........................................................12
Range for Battery ....................................................................13
Things you can do to increase performance .......................13
Battery Tips and Approximate Life .......................................13
Battery Recycling ................................................................14
How it all works ............................................................. 14
Boost Technology ....................................................................14
Controller Unit .........................................................................14
1. On-Off Buttons ................................................................15
2. Battery Level Indicator .....................................................15
3. Boost Mode Indicator ......................................................15
4. Boost Mode Button ..........................................................16
5 & 6 Front Light Function ...................................................16
General Operation ...................................................................17
Using the Hub Gears ...............................................................17
Riding without Assistance ........................................................17
Checks before Riding ..............................................................17
Service & Storage .......................................................... 18
Service ....................................................................................18
Checklist ..............................................................................18
Initial inspection after 2 months ...........................................19
From the second inspection on ...........................................19
Cleaning ..................................................................................19
Storage ....................................................................................19
Long-Term Storage ..................................................................19
Operation After Long-Term Storage ........................................19
Troubleshooting ............................................................ 20
Specications ................................................................ 23
Motor Unit ................................................................................23
Battery .....................................................................................23
Battery Charger .......................................................................23
Warranty ......................................................................... 23
Dahon Five-Year Limited Warranty ..........................................23
Lifetime Warranty Upgrade ......................................................23
Required Assembly at Time of Purchase ................................24
Making a Warranty Claim ........................................................24
Warrantee Exclusions ..............................................................24
2

Completely read through all of the •
information in this manual before you start
using you Dahon Boost.
Make sure to read the standard Dahon •
Bicycle manual safety and general
information for cycling.
The Dahon Boost is designed for on-road •
use only. Using it off-road, jumping or racing
will risk serious injury and death to the user.
Always wear a correct-tting helmet when •
riding any bicycle.
If you are unsure about anything or have •
question, please talk to your local Dahon
dealer. Dahon dealers are specialists in
Dahon product information and advice. They
are also a valuable source for all cycling
product, riding and service information.
This product complies with European EPAC •
requirements according to EN 15194
Welcome/Intro
3

What’s it called
A. GENERAL
1. Assist Unit
2. Chainwheel and integrated
Torque sensor
3. Battery
4. Frame Latch
5. Handlepost
6. Handlebar Assembly
7. Front light
8. Rear light
9. Battery Hanger Unit
B. HANDLEBAR ASSEMBLY
1. Controller Unit
2. 3-Speed Hub Gear shifter
3. Left-hand Brake Lever
4. Right-Hand Brake Lever
4

C. BATTERY AND CHARGER
1. Battery
2. Boost Batter Charger
3. Power Source Plug
4. Battery Charging Socket
5. Charger Plug
5

Charging can be done when the battery is on
the bike or removed from it. For details, refer to
“Normal Charging” and “Charging with installed
battery”. When not charging, always pull out
the charging plug from the battery and the
power plug from the outlet before storing the
battery charger.
Before the First use
CAUTION: The Battery must be fully
charged before the rst ride.
Please make sure you allow the battery to
complete a full charge cycle before installing it
on the bike. Please read though and follow all
of the safety precautions.
Battery Hibernation Mode
After 20 days of inactivity, the battery will place
itself in Hibernation Mode. This is to help save
loss of power and extend the life of the battery.
To resume normal battery function, you will
need to remove the battery from the bike and
perform one standard charge cycle. Once
standard charge cycle is complete, the battery
will be ready to use again.
Normal Charging
Press the off button on the controller unit.
CAUTION: Do not remove the battery
with the controller switch set to ON.
Ignoring this could cause electrical shock.
Battery and Charger Operation
Insert the battery lock key into the key hole of
the battery-hanger unit.
With the battery-lock key turned clockwise, pull
out the battery.
6

If the battery is wet or dirty, wipe it clean with a
dry cloth.
Insert the power plug into a power outlet.
Insert the charging plug into the battery
7

Indicating lamps of the battery charger
Lamp(s) Illuminated Status
Green (solid)
Green (solid)
Green (solid)
Orange (solid)
Green (solid)
Green (blinking)
Green (solid)
Not Lit
Not Lit
Not Lit
Green (solid)
Orange (solid)
Green (solid)
Orange (blinking)
Charging
Green (solid)
Green (solid)
Green (solid)
Orange (solid)
Green (solid)
Green (blinking)
Green (solid)
Not Lit
Not Lit
Not Lit
Green (solid)
Orange (solid)
Green (solid)
Orange (blinking)
Charging Completed.
Green (solid)
Green (solid)
Green (solid)
Orange (solid)
Green (solid)
Green (blinking)
Green (solid)
Not Lit
Not Lit
Not Lit
Green (solid)
Orange (solid)
Green (solid)
Orange (blinking)
Power of AC 100 to 240 V is not being supplied
(the power plug is not plugged into an outlet).
Green (solid)
Green (solid)
Green (solid)
Orange (solid)
Green (solid)
Green (blinking)
Green (solid)
Not Lit
Not Lit
Not Lit
Green (solid)
Orange (solid)
Green (solid)
Orange (blinking)
The battery charger is being supplied with
power, but the battery is not connected to
the battery charger. Follow the procedure and
insert the charging plug into the battery.
Green (solid)
Green (solid)
Green (solid)
Orange (solid)
Green (solid)
Green (blinking)
Green (solid)
Not Lit
Not Lit
Not Lit
Green (solid)
Orange (solid)
Green (solid)
Orange (blinking)
It is possible that the temperature of the battery
is too high or too low or that the voltage is too
low. Charging does not start and the unit enters
the standby status. As soon as the conditions
are fullled, charging starts automatically (it is
recommended to start charging after the bat-
tery temperature has become normal).
Green (solid)
Green (solid)
Green (solid)
Orange (solid)
Green (solid)
Green (blinking)
Green (solid)
Not Lit
Not Lit
Not Lit
Green (solid)
Orange (solid)
Green (solid)
Orange (blinking)
The battery charger or the battery is abnormal.
Stop use immediately and contact your dealer.
Li-ion BATTERY CHARGER SUNSTAR ENGINEERING INC.
Green (solid)
POWER ON
Green (blinking)
CHARGING
Green (solid)
CHARGING COMPLETE
Orange (blinking)
ERROR
Orange (solid)
STANDBY
8

Remove the charging plug from the battery when both indicating lamps change to green •
indicating charging is completed.
Remove the power plug from the power outlet.•
9

Insert the battery into the battery-hanger unit
until it clicks.
Remove the battery lock key.
10

Charging with Installed Battery
It is possible to charge the battery installed on
the bicycle as shown below.
The charging method is the same as for
charging the removed battery.
CAUTION: Do not charge the battery
with the controller switch set to ON.
Ignoring this could cause re.
When not charging, always pull out the charging plug from the battery and the power plug from
the outlet before storing the battery charger.
11

Your Dahon Boost comes standard with 2
battery lock keys; we suggest you keep
one in a safe place for emergencies. Dahon
Boost bike keys may be duplicated by a
qualied locksmith. Blank keys for the Dahon
Boost are available through your Authorized
Dahon Dealer. Please record the key number
for future reference and key replacement. If
your keys are ever lost or stolen, contact your
authorized Dahon dealer for replacement.
Safety Precautions
These safety precautions are provided for your
benet to protect you and those around you.
Please read and follow them carefully to avoid
unnecessary injury, damage to the product, or
damage to other property.
Battery
• Do not throw the battery into a re.
• Do not apply the battery to other
appliances.
• Use only the specied charger to charge
the battery.
• Do not disassemble or modify the battery.
• Do not connect positive and negative
terminals by using metallic objects.
• Keep the battery away from water. Pouring
water on the battery may result in a short
circuit and overheating of the battery.
• Do not submerge the battery. Soaking the
battery in water may cause irreparable
damage.
Battery Charger
• Do not disassemble or modify the battery
charger.
• Please use the battery charger with the
battery in the kit.
• Do not drop the battery charger.
• Do not bring the terminals of the charging
plug in contact with metal.
• If you notice a strange smell or smoke,
stop the charging procedure immediately!
Take your battery and charger to your
authorized Dahon dealer for service or
replacement.
• DO NOT CHARGE THE BATTERY FOR
LONGER THAN 24 HOURS!! This could
seriously reduce the life of the battery.
Location for Charging
Please perform charging at a location satisfying
the following conditions.
• A level and stable location
• A location not exposed to rain or water
• A location not exposed to direct sunlight
• A location with good ventilation and no
moisture
• A location out of the reach of children and
pets.
• A location with a temperature from 0°C to
45°C at the time of charging
Do not use (discharge) the battery while
charging.
Always perform charging in an environment
with a normal temperature (0ºC to 45ºC).
NOTE: As the battery temperature is higher
directly after riding, charging may not start, but
this is not a defect. Charging will also not start
when the temperature is too low (0ºC or lower).
When the temperature inside the battery is
not suitable, the orange charging standby
lamp continues to ash, and charging starts
when the temperature inside the battery is in
the range from 0ºC to 45ºC. For this reason,
charging may take time.
12

Range for Battery
Running distance on one charge varies
depending on rider’s weight, wind resistance,
outdoor temperature, terrain, etc. Riders can
expect to get up to 2 hours of battery life in
normal at conditions.
Things you can do to increase
performance:
Proper gear usage• : Pedaling in the correct
gear for the terrain will help save energy for
both you and the battery.
Tires• : Always make sure the tires are at the
correct pressure as indicated on the side-
wall. This will give lower rolling resistance
and better performance. If your tires start to
show excessive wear, replace them. New
tires always perform better!
General Maintenance• : Keeping the bicycle
correctly adjusted and lubricated is impor-
tant. Worn or misaligned parts can add drag
and resistance which will reduce the range
of the battery
• Always start in Eco or Normal mode:
Getting going always requires more energy
than anything else. Avoid using Turbo mode
to start or restart because this uses a lot of
battery and will shorten the range.
Correctly charge and discharge your •
battery: Please follow all of the direction for
charging and discharging. Once a battery
has been mistreated, you can’t x it.
Correctly store your Battery• : Once again,
please follow all of the directions for storage.
Always turn off the unit at the controller• :
Never just remove the battery to turn it off
Temperature• : Both extreme high and low
temperatures can drain the battery more
quickly. So when it is really cold or hot, don’t
expect to go as far or as long.
Wind• : As with any cycling wind has a huge
effect on performance. Any headwind will
reduce the battery range. Strong headwinds
can be worse than even the steepest hill for
performance. Conversely, a good tailwind
will allow you to travel much further than
normal.
Hills• : Like wind, hills play in important part
in battery range. Going uphill for any length
of time will reduce the range. Down hill the
battery range will increase because the mo-
tor doesn’t have to work as hard. Also, try
coasting (stop pedaling) or for longer down
hills you can even turn the unit off to help
increase range.
Road• Conditions: Flat smooth roads will
allow the bike to roll faster and the battery
to last longer. Ridging on dirt, gravel, gravel,
sand, and grassy surface will greatly effect
battery life. So will bumpy or and rough
surface.
Stop and Start• : Since more energy is used
during initial acceleration, riding in condi-
tions that force you to start and stop often
(i.e. city trafc) will cause the motor to use
more energy.
Number of Battery Charges• : Each time the
batter is charged, it will loose its capacity to
hold as much charge next time. These loss-
es are very small during the life expectancy
of the battery, but they will affect range to a
degree.
Luggage• : Luggage is weight that needs to
be moved and this means the motor works
harder so range will decrease when you
carry luggage.
Rider Weight• : A heaver rider will cause the
motor to use more energy than with a lighter
rider.
Battery Tips and Approximate Life
The Dahon Boost is equipped with a lithium-
ion battery. If used and maintained properly
it should last approximately 500 charging
cycles. The battery should be replaced when
the riding distance with a full charge becomes
notably short (in cold areas, the possible riding
distance may be short even after charging).
Please contact your dealer to purchase a
replacement battery or to obtain warranty
service if covered under the limited warranty.
Some other ways to keep your battery
in good condition include:
When the unit is not used for a long time, •
charge the battery once a year. After
13

charging, use the battery until one red
indicating lamp for the remaining battery
charge is lit, and then store the battery
again.
It is recommended to store the battery •
in a cool location (- 20°C to 20°C
recommended).
When the charging has been completed, •
immediately disconnect the charging plug.
Do not recharge a battery immediately after •
it has completed a charge. The battery
will not “charge twice”, and will likely be
damaged if you do so.
Use and drain the battery as much as •
possible before charging.
Battery Recycling
At the end of a useful life, lithium-ion batteries
are recyclable. Laws governing proper disposal
and recycling of batteries vary according to
locality. Please consult your dealer for advice
about disposal or recycling according to your
local law. The battery or recycled must be
disposed of properly.
Your Dahon Boost incorporates a state of
the art electric assist unit and some pretty
clever electronics. For performance, safety,
and enjoyment is important to completely
understand how these features operate. Even
experienced cyclists should make sure they
are familiar with the specic operations of the
Boost. Make sure you read, and understand
this part of the manual. If you do have any
questions or are at all unclear, please contact
your Authorized Dahon Dealer.
Boost Technology
Boost technology provides a smooth and
powerful power-assisted ride based on your
pedaling force, speed, and gearing. The
system automatically knows how much power.
Once you turn the unit on, all you have to do
is start pedaling the system does the rest.
Through the controller unit, you can then
choose the level of assist you require based on
the conditions.
Controller Unit
Located on the left-hand side of the handlebar,
the controller looks like this:
1. On-Off Buttons
2. Battery Level Indicator
3. Boost Level Indicator
4. Boost Level Button
5. Front Light On-Off Button
6. Front Light Indicator Lamp
How it all works
14

1. On-Off Buttons
Gently press the ON button to activate the •
unit. The Battery level lights will ash for
several seconds before becoming xed at
the current battery charge level.
The unit will start in the Normal mode, so •
both the left and middle Boost level indicator
lamps should also come on.
NOTE: Always keep your feet off the pedals •
when setting the control-switch to “ON”.
The Chainwheel has a built-in sensor to •
detect the force with which the pedal is
pressed. It is important that the no load is on
the pedals when you rst turn the unit on for
correct operation.
To switch off the unit gently press the OFF •
button. This will turn the unit off and all
lamps on the controller should go out.
2. Battery Level Indicator
Battery level is indicated by three lamps. It
functions when the unit is turned on. They
represent the level of charge currently in the
battery.
Status of the
Lights
What it Means
Three Red lamps lit
The Battery is full
or above two-
thirds
Two Red lamps lit The remaining bat-
tery charge has
decreased
One Red lamp lit The batter charge
is becoming low
and should be re-
charged soon
One Red lamp
ashing fast
The battery is
nearly completely
discharged. Please
charge the bat-
tery as soon as
possible.
One Red lamp
ashing slowly
The battery is com-
pletely discharged.
Please charge the
battery as soon as
possible.
3. Boost Mode Indicator
The Boost mode or ‘power level’ is shown by
three blue lamps. You can choose the boost
level by using the Boost Level Button. You can
choose between three Boost settings:
ECO Mode• : (Indicated by single left hand
lamp being lit)
The most economical of the three Boost
Modes. The Eco mode will provide assis-
tance up to 15kmh, but at lower power level
than the Normal or Boost modes. The level
of assistance gradual decreases as you ap-
proach 15 kmh. Good for using on the at or
when you want to conserve battery charge.
15

Normal Mode• : (Indicated by both the left-
hand and middle lamps being lit)
The Normal mode will also provide assis-
tance up to 15kmh, but at a slightly higher
assist ration than the ECO mode. As with
the Eco Mode, the level of assistance
gradual decreases as you approach 15 kmh
Good for at or rolling hills, or when you nd
you need a bit more power.
Boost Mode• : (Indicated by all three lamps
being lit)
The Boost mode gives you maximum power
and speed. Assistance starts as soon as
you put pressure on the pedals and contin-
ues through to 25kmh. Assistance gradually
decreases as you approach 25kmh. The
Boost Mode is great for getting up hills, or if
you have to go a short distance in a hurry.
4. Boost Mode Button
The Boost level button is used to switch be-
tween the three available Boost settings. Each
time you press the button it will change in the
following order:
Normal > Boost > Eco > Normal
5 & 6. Front Light Function
The Boost uses an integrated LED front
headlamp that is operated at the controller.
The headlamp is turned on or off by press-
ing the light button (5). When the Front light is
switched on, the headlamp indicator lamp (6)
will glow yellow.
NOTE: The Boost is also tted with an inde-
pendent rear light. This light is operated via a
separate on/off switch and is not connected to
the battery. For your safety please remember to
turn on and off the rear light.
16

General Operation
When you rst turn on the unit, make sure •
there is no pressure on the pedals. Pres-
sure or movement of the pedals affects the
torque setting and can cause the unit to
function incorrectly.
The Boost operates according to the force •
applied to the pedals. If there is no force on
the pedals for ve minutes after the ON but-
ton has been pressed, the unit will turn off
to save battery charge.
Do not ride through deep puddles or heavy •
rain. If the assist unit is exposed to lots of
water or submerged, electric shock may
occur.
Always park the bicycle on a level surface.•
Never lift the bicycle by the battery.•
Using the Hub Gears
Your Boost is tted with a 3-speed internal
geared rear hub. For general use and use
of the bicycle without the Assist unit active,
operation of these gears can be found in the
standard Dahon Owners Manual.
NOTE: Your Boost determines your overall
speed based on how fast you are pedaling.
All cut-off and assist level speeds are based
on using the bicycle in the third (high) gear at
the hub. Assistance cut-off speeds are greatly
reduced when in the rst and second gears.
This is normal and allows usability for a variety
of riding styles and levels.
Riding without Assistance
The Boost has been designed as a lightweight
folding bike. With the assist unit turned off it
can be ridden as a normal bicycle.
Checks before Riding
Here are some things to check before you •
start riding:
Make sure the battery is installed correctly.•
Make sure to remove the battery lock key.•
Make sure the battery has sufcient charge.•
Perform all checks in the bicycle owners’ •
manual.
17

Service
Your Dahon Boost will require the standard service requirements that are found in the bicycle manual. Please refer to instruction manual.
Checklist
The following checklist should be used for checking components specic to your Boost Bicycle:
Inspect for
Inspection term
1st
inspection
2nd
inspection
3rd
inspection
4th
inspection
5th
inspection
6th
inspection
7th
inspection
2 months 6 months 12 months 18 months 24 months 30 months 36 months
Check if the assist unit is loosened or damaged.
Check if the assist function operates normally or produces
abnormal noise.
Check if grease leaks from the assist unit.
Check if the electric wiring is connected without slack or
damage.
Check if any cord is disconnected and each cord is mounted to
the frame properly.
Check if the battery lock key functions normally.
Check if the battery is mounted securely.
Check if each indication lamp lights up or if any lamp indicates
abnormality.
Check if the battery is running short quickly.
Service & Storage
18

Initial inspection after 2 months
Approximately two months after your rst •
use, you should check to make sure every-
thing is tight and secure.
Inspect the bike and contact your dealer if •
you nd a problem.
From the second inspection on
To ensure your Boost continues to function •
correctly, you should have it inspected and
serviced every six months The responsibility
and expense for proper routine maintenance
of this bicycle is your own responsibility.
Cleaning
It is important to keep all of the wiring, plugs
and contact points clean and free form dirt,
water, oil. Some things to remember:
After every ride it is good to give the bike a •
wipe over. This makes removing any dirt,
grit much easier.
After riding in the rain or on wet roads, •
always clean and dry all components
immediately.
Never spray water directly onto any part of •
the bicycle as this may cause damage on
electric shock.
Avoid using any chemicals or strong clean-•
ing agents on the electrical components.
Try using a dry, or slightly damp cloth to •
clean dirt and grit away..
Always be careful when cleaning around •
wires and connectors. Damage can occur if
you pull or push wiring too vigorously.
Storage
It is important to store you bike correctly.
Please ensure:
It is stored in a level and stable location.•
A location with good ventilation and no •
moisture.
A location not exposed to rain or direct •
sunlight.
It is also a good idea to cover the bicycle for •
storage.
Long-term Storage
When your bike is to be stored for one month
or longer. Please make sure to:
Make sure that only one red indicating lamp •
lit remains. If there are more lamps lit use
the battery until only one light remains.
Store the battery at a suitable temperature •
(-20ºC to 20ºC recommended).
Charge once a year. After charging, store •
the battery again after using it until one red
indicating lamp for the remaining battery
charge is lit.
Operation After long-term Storage
After 20 days of inactivity, the battery will place
itself in Hibernation Mode. This is to help save
loss of power and extend the life of the battery.
To resume normal battery function, you will
need to remove the battery from the bike and
perform a standard charge cycle. Once com-
plete, the battery will be ready to use again.
19

Troubleshooting
Symptom Please Check Solution
When riding the bike
The pedals feel stiff.
Are the indicator lamps on the controller lit? Set the control-switch to ON
Is the battery installed? Install the battery.
Is the battery locked securely? Lock the battery securely.
Has the battery been charged? Charge the battery
Has the unit been inactive for ve or more
minutes?
Automatic off function is operating. Set the
control-switch to ON again.
Have you set the control-switch to ON applying
force to the pedals?
Set the control-switch once to OFF, and then set
it again to ON without applying any force to the
pedals.
Vibrations are felt
from the pedals
Have you stopped the bike with your feet on
the pedals or does this occur at the time of
start?
This is a characteristic of the motor and not an
abnormality.
Does this occur while riding the bike normally?
A wire break of the pedal-force sensor (etc.) can
be considered. Please return to your dealer for
advice.
Flashing indicating
lamps of the control-
switch
Are the left side two lamps ashing?
The temperature of the assist unit is high. Set the
control-switch to OFF and wait for the tempera-
ture to drop.
Is the red lamp on the left ashing?
The battery charge is nearly exhausted. Re-
charge as soon as possible.
Are the lamps ashing in a different pattern?
This indicates a problem with the Turbo unit.
Please ask your dealer for a repair.
20
/