Instant Pot IP-LUX60 V3 User manual

Category
Kitchen & houseware accessories
Type
User manual

Instant Pot IP-LUX60 V3 is a versatile kitchen appliance that combines the functions of a pressure cooker, sauté pan, slow cooker, rice cooker, steamer, and food warmer. Its user-friendly control panel features 10 built-in cooking programs for easy one-touch cooking. With its ability to cook food up to 70% faster than traditional methods while preserving nutrients, the Instant Pot IP-LUX60 V3 is a perfect time-saving solution for busy individuals and families.

Instant Pot IP-LUX60 V3 is a versatile kitchen appliance that combines the functions of a pressure cooker, sauté pan, slow cooker, rice cooker, steamer, and food warmer. Its user-friendly control panel features 10 built-in cooking programs for easy one-touch cooking. With its ability to cook food up to 70% faster than traditional methods while preserving nutrients, the Instant Pot IP-LUX60 V3 is a perfect time-saving solution for busy individuals and families.

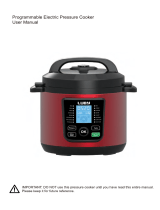
Programmable Electric Pressure Cooker
User Manual
Model: IP-LUX60 V3
July 2016
(Pictures in the manual are for reference only. Please refer to the actual product.)
Thank you for purchasing the mul-funconal Instant Pot®. Please read the User Manual
carefully before use and keep it in a convenient place for future reference.
2

IMPORTANT SAFEGUARDS ........................................................................................... 3
Special Cord Set Instrucons ................................................................................... 4
Product Introducon .................................................................................................... 4
Product Features ..................................................................................................... 5
Specicaons ........................................................................................................... 5
Product Accessories Included.................................................................................. 6
Product Accessories for Purchase ........................................................................... 7
Before the First Use ..................................................................................................... 8
Removing and Installing the An-Block Shield ........................................................ 8
Removing and Installing the Sealing Ring ............................................................... 8
Safe Lid Opening...................................................................................................... 9
Cooking Preparaon ................................................................................................ 9
Controls and States of the Cooker ............................................................................... 11
Control Panel ........................................................................................................... 11
States of the Cooker ................................................................................................ 12
Operaon Keys ........................................................................................................ 12
Funcon Keys .......................................................................................................... 12
Cooking with Your Instant Pot® .................................................................................... 14
Inial Test Run ........................................................................................................ 14
Pressure Cooking ..................................................................................................... 14
Slow Cooking ........................................................................................................... 16
Delay Start ............................................................................................................... 16
Sautéing .................................................................................................................. 17
Warming .................................................................................................................. 17
Advanced Operaons .............................................................................................. 17
Care and Maintenance ................................................................................................. 18
Cleaning .................................................................................................................. 18
Troubleshoong ........................................................................................................... 18
Limited Warranty ......................................................................................................... 21
3

Your Instant Pot® cooks with pressure. When using pressure cookers, basic safety
precauons should always be followed.
PLEASE READ ALL INSTRUCTIONS.
1. Do not touch hot surfaces of pressure cooker. Use handles only.
2. This appliance should not be used near children or by individuals with disabilies or
limited knowledge in using pressure cookers.
3. Do not place the pressure cooker in a heated oven or any hot surfaces.
4. Extreme cauon must be used when moving a pressure cooker containing hot liquids.
5. Do not use pressure cooker for other than intended use.
6. For Household use only. Not for outdoor use if unaended.
7. This appliance cooks under pressure. Improper use may result in scalding injuries. Make
certain the unit is properly closed before operang. Please see Cooking Preparaon”.
8. Do not ll the unit over 2/3 full. When cooking foods that expand during cooking such as
grains, beans, and dried vegetables, do not ll the unit over 1/2 full. Overlling may cause a
risk of clogging the pressure release valve and developing excess pressure. Please see
Cooking Preparaon”.
9. Be aware that certain foods, such as applesauce, cranberries, pearl barley, oatmeal and
other cereals, split peas, noodles, macaroni, rhubarb, and spaghe can foam, froth, spuer,
and clog the pressure release. These food items should not be cooked in a pressure cooker.
10. Always check the pressure release valve, oat valve and an-block shield for clogging
before use.
11.Make sure the pressure release handle is in the sealing posion for all the pressure
cooking programs.
12. Do not open the pressure cooker unl the unit has cooled and all internal pressure has
been released. If the handles are dicult to push apart, this indicates that the cooker is sll
pressurized – do not force it open. Any pressure in the cooker can be hazardous. Please see
Cooking Preparaon”.
13. Never deep fry or pressure fry in the unit with oil.
14. To protect against electrical shock, do not immerse the cord, power plug, or appliance in
any liquid.
15. Unplug from power outlet when not in use and before cleaning. Allow the unit to cool
before pung on or taking o parts, and before cleaning. To disconnect, turn any control to
"o", then remove plug from the wall outlet.
16. Do not operate any appliance with damaged cord or plug, or aer the appliance
malfuncons or has been damaged in any manner.
17. Use of accessories and parts that are not recommended by Instant Pot® may cause
damages. Cook only in the stainless steel inner cooking pot provided.
18.Do not let cord hang over edge of table or counter, or touch hot surfaces.
19.Do not use this product in any electrical systems other than the North American electrical
systems with voltage: 110-120V~/60Hz.
4

For safety reasons, the power supply cord is designed to be short to minimize the possibility of
entanglement or tripping. If an extension cord is used, the electrical rang of the cord must be at
least 12 amps and 120 volts. The extension cord must be arranged so that it will not drape over
the edge of a table or counter where it can be pulled by children or tripped over accidentally.
This appliance has a polarized plug (one prong is wider than the other). To reduce the risk of
electric shock, this plug is intended to t into a polarized outlet in only one way. If the plug does
not t fully into the outlet, ip the plug. If it sll does not t, contact a qualied electrician. Do not
aempt to modify the plug in any way.

Instant Pot® is a convenient, kitchen-friendly me and space saver. It is a 6-in-1 mul-funcon
cooker combining the benets of a Pressure Cooker, Sauté Pan, Slow Cooker, Rice Cooker, Steamer,
and Food Warmer. Its 10 micro-processor controlled intelligent programs make your everyday
cooking as easy as pressing a buon. It helps you conserve energy by saving up to 70% of energy
comparing with convenonal cooking. In most cases, your Instant Pot® reduces the cooking me
by 70%, and preserves more vitamins and minerals in the food ingredients.
Instant Pot® has earned the entrusted UL cercaon by going through the rigorous UL lab
tesng. The product has been designed to avoid the common user errors and safety hazards of
convenonal stove-top pressure cookers through the use of 10 proven safety mechanisms and
patented technologies. These include: 1) safety lid lock, 2) pressure regulator, 3) leaky lid smart
detecon, 4) an-blockage vent, 5) magnec sensor for lid posion detecon, 6) auto pressure
control, 7) excess pressure protecon, 8) auto temperature control, 9) high temperature
monitoring, and 10) power fuse cut o.
5

High safety standards: 10 safety mechanisms and UL safety cercaon. Please visit
www.InstantPot.com for detailed informaon.
Mul-funconal: Braising, pressure cooking, stewing, steaming, simmering, slow
cooking, sautéing/browning, cake baking, and keeping warm.
10 built-in, convenient cooking programs: Simply press one of the funcon keys to start
cooking. The microprocessor inside the cooker does your job to control the me, cooking
pressure and temperature.
Clean and pleasant to use: Instant Pot® produces very lile heat, noise and leaks almost
no steam. This preserves all the aromas, moisture and avors in the food, and not in your
kitchen.
Up to 24-hour delay start cooking: Long 24-hour mer. Perfect for meal planning.
Up to 240 minutes of manual selecon of cooking me.
Auto keep warm: Aer cooking, the keep-warm funcon starts automacally for 10
hours.
Dishwasher safe stainless steel inner pot, lid and steam rack.

Working pressure: High 10.2 - 11.6psi (70 ~ 80kPa)
Pressure release pressure limit: 15.22psi (105kPa)
Working temperature: 115°C - 118°C (239°F ~ 244°F)
Keep warmfuncon: up to 10 hours, 63 - 78°C (145 ~ 172°F);
Slow Cookfuncon: 0.5-20 hours, temperatures adjusted as: Normal mode: 87.8-93°C /
190-200°F; More mode: 93-99°C / 200-210°F; Less mode: 82-87.8°C / 180-190°F
Sautéfuncon: Normal mode: 160 -176°C (320 -349°F); More mode: 175 - 210°C (347 -
410°F); Less mode: 135 -150°C (275 -302°F).
Please note that beeping is always ON in all error condions.
Model
Power
Supply
Rated
Power
Volume Inner Pot Size Weight Dimension
IP-LUX60
V3
120V~
60Hz
1000W 6 quart
16x22x24 cm
6.3x8.66x9.45
inch
6.61kg
(14.57lb)
33x31x32 cm
13x12.2x12.6
inch
Accessories
Rice paddle, soup spoon, measuring cup, steam rack, manual and recipe book
6

Accessories Included Images Descripons
Stainless Steel Inner Pot
3-ply boom for even heang
Food grade 304 (18/8) stainless
steel
Mirror-polished surface for
easy cleaning
Dishwasher safe
Sealing Ring
Durable food safe silicone
passing FDA standards
Dishwasher safe
Replace every 18-24 months or
when deformaon is noced
Stainless Steel Trivet
Stainless steel trivet to elevate
food from water for steaming
program
Rice Paddle
Rice paddle for scooping out
rice or food content
Stands up straight and lays at
Soup Spoon
Soup spoon for transferring
soup/broth
Handle hooks onto inner pot
rim
Measuring Cup
Measuring cup for measuring
quanty of food ingredients
such as rice, mul-grains, etc.
Please note that these accessories may disconnue and new accessories may become
available. For addional purchases, replacements or the latest accessories collecon, please
visit the Instant Pot website at: www.instantpot.com/store
7

Accessories for
Purchase
Images Descripons
Tempered Glass
Lid
9-inch diameter ts most electric pressure
cooker inserts
Professional grade tempered glass with
steam release vent and stainless steel rim
Colorless glass for clear viewing
Dishwasher safe
Silicone Mini Mi
Food grade silicone passing FDA standards
Dishwasher safe
Ridged gripping surface, non-sck
Comfortable and easy to put on
Silicone Cover
Creates air-ght and water-ght seal on the
Instant Pot® stainless steel inner pot
Dishwasher safe
Food safe silicone passing FDA standards
Stainless Steel
Steam Rack with
Handle
Stainless steel steam rack to elevate food
content from water for steaming program
Handle designed for easy transferring of
steam rack into and out of inner pot
Please note that these accessories may disconnue and new accessories may become
available. For addional purchases, replacements or the latest accessories collecon, please
visit the Instant Pot website at: www.instantpot.com/store
8

Before the rst use, please take out all accessories from the package and read this manual
carefully. Please pay parcular aenon to operaonal instrucons and cauons to avoid any
injury or property damage. Please wash the inside of the lid and the inner pot with warm soapy
water, rinse, and dry thoroughly. Clean the outside of the cooker base with a clean damp cloth.
Never immerse the cooker base in water or any other liquid. Never clean the cooker base in the
dishwasher. The lid and sealing ring can be washed in dishwasher from me to me. Make sure
water is fully drained aer washing. Inspect the lid to ensure that there is no food debris blocking
the valves.
Removing and Installing the An-Block Shield
The an-block shield can
be removed by pushing it
on the side and outward.
To install the an-block
shield, posion it in place
and press it down.
Removing and Installing the Sealing Ring
The sealing ring can be removed by
pulling it outward, secon by secon,
from the sealing ring rack. To reinstall
the sealing ring, press it down into
the rack secon by secon. The
sealing ring can be installed with
either side facing up.
Please note the following:
Prior to each use, inspect to make sure the sealing ring is well seated in the sealing ring
rack and the an-block shield is mounted properly on the pressure release valve. A
properly seated sealing ring can be shied, with a bit of eort, clockwise or an-clockwise
inside the sealing ring rack.
Aer use, remove any food debris from the sealing ring and an-block shield.
Keep the sealing ring clean to avoid odor. Washing the sealing ring in warm soapy water or
dishwasher can remove odor. However, it is normal for the sealing ring to absorb the smell
of certain acidic foods. It is recommended to have more than one sealing ring at home.
You can purchase addional sealing rings from www.InstantPot.com.
Never pull the sealing ring by force, as the force may cause deformaon of the sealing ring
and sealing ring rack to aect its funcon in sealing the pressure.
A sealing ring with cracks, cuts, or other damages should be replaced immediately.
9

1. Make sure the pressure cooking program is complete or press Keep-Warm/Cancelto
terminate the program.
2. Release pressure by one of the following approaches:
Quick Release:
Turn the pressure release handle to the "Venng" posion to let out steam unl the oat
valve drops down.
Cauon:
Please keep hands and face away from the opening on the top of the pressure release
handle when using Quick Release. The escaping steam is hot and can cause scalding.
Never pull out the pressure release handle when it is leng out steam.
Please be aware that Quick Release is not suitable for food with large liquid volume or
high starch content (e.g. porridge, congee, scky liquids, soup, etc.). Food content may
splaer out from the pressure release. Use Natural Release instead.
Natural Release:
Allow the cooker to cool down naturally unl the oat valve drops down. This may take 10
to 15 minutes or even longer, depending on the amount of food inside. Aer cooking is
nished, the cooker will be in Keep Warm mode.
Place a wet towel on the lid to speed up cooling.
3. Open the lid: Hold the lid handle, turn the lid counterclockwise to the open posion, and li
the lid up to open. To avoid vacuum sucon on the lid, turn the pressure release to Venng
posion to let in air when liing the lid.
Cauon: Do not open the lid unl pressure inside the pot is completely released. As a
safety feature, the lid is locked and wont open unl the oat valve drops down.
If the oat valve is stuck due to food debris or scky liquid, you can push it down with a
pen or chopsck aer you are certain that the pressure has been released completely by
moving the pressure release handle to the venng posion.
To avoid personal injuries, never aempt to force down the oat valve to open the lid. DO
NOT open the lid unl aer the pressure is completely released naturally or manually by
opening the pressure release valve.

1. Open the lid
Pick up the lid handle, rotate approximately 30 degrees counterclockwise unl the
mark on the lid is aligned with the mark on the cooker base rim.
10
2. Check whether all parts on the lid are assembled properly
Check the oat valve and pressure release valve for obstrucons. Make sure that the sealing
ring is well seated inside its holding rack. The an-block shield is installed properly and the
oat valve can move up and down easily.
3. Remove the inner pot, and put in food and liquid
The total amount of food and water should NEVER exceed the
maximum level marking of the inner pot. It is recommended
that you do not ll the unit to over 2/3 full. When cooking food
that expands during cooking such as rice, beans or dried
vegetables, do not ll the unit to over 1/2 full. Over lling may
risk clogging the pressure release and developing excess
pressure. This may also cause leakage or damage to the unit.
4. Place the inner pot inside the cooker base
Be sure to remove any foreign objects. Wipe dry the outside of the inner pot and the heang
plate inside the cooker base.
Aer pung the inner pot inside the cooker base, rotate the inner pot slightly to ensure
good contact between the inner pot and the heang element.
5. Close the lid completely
Hold the lid handle and put the lid on the cooker, with the mark on the lid and the
OPEN mark on the cooker base rim aligned. Rotate the lid clockwise approximately 30
degrees unl the mark on the lid is aligned with the CLOSE mark on the cooker
base rim.
Instant Pot® has a safety feature to disable the cooker and the display will ash "Lid" if the lid
is not posioned correctly. When using "Soup/Broth", "Meat/Stew", "Steam", "Egg", "Rice",
11
"Mulgrain", Cakeand "Porridge" programs, the lid should be fully closed. When using
"Sauté", the lid should be open. "Keep Warm" and Slow Cookprograms work with the lid
either open or closed.
6. Posion the pressure release handle properly
Please note that it is perfectly normal and
necessary for the pressure release handle
to be loose. It works by weight and simply
rests on top of the pressure release outlet.
It can also be removed for washing if
necessary by pulling it straight out.
When running any of the programs except
"Keep-Warm", "Sauté" or "Slow Cook",
align the pointed end of the pressure
release handle to "Sealing" posion, indicang that the pressure cooker is in the sealed
posion.
The "Sauté" funcon must be used without the lid. The "Slow Cook" and Keep-Warm
funcons can operate with or without the lid, or use an oponal glass lid available at
www.InstantPot.com.
Cauon: When the lid is closed while iniang the Keep Warmor Slow Cookprograms,
the pressure release valve must be in the Venngposion.


The control panel of your Instant Pot® consists of a LED display, 3 mode indicators, 3 operaon
keys and 12 funcon keys. Each funcon key has a funcon indicator light. Operaon keys do not
have indicator lights.
12

Your Instant Pot® has 3 states
which are shown on the LED display
and funcon indicators.
Standby state: the LED
display shows OFF”.
Pre-heang state: the LED
display shows Onand the
acvated funcon indicator
lights up.
Program operang state:
the acvated funcon indicator lights up and the LED display shows me. For pressure
cooking, slow cooking and delay start funcons, the me counts down. For Keep Warm,
the me counts up.

The 3 operaon keys include “+”, “-, and Adjustkeys. The “+” and - are used to change the
me value.
The "Adjust" key can make 3 types of adjustments:
1. Changing the pressure keeping me for pressure cooking funcons, except "Manual"
and "Rice" funcons. "Rice" is fully automac.
2. Changing the temperature of "Slow Cook" and "Sauté".

The most important key is Keep Warm/Cancel. When
Instant Pot® is being programmed or in operaon,
pressing this key will cancel the program and return
the cooker to standby state. When the cooker is in
standby state, pressing this key acvates the keep-
warm program.
The Soup/Broth key is for making various soups and
broth. You can use the Adjustkey to select a
shorter or longer cooking me, depending on the
desired cooking result. Instant Pot® controls the
pressure and temperature to a level that the liquid
never goes into a heavy boiling state. For example,
when making chicken broth with the "Soup/Broth"
funcon, the broth is clear and the chicken remains
intact aer cooking. If you need the food content to
be fully broken down, please sr and mix the soup
before serving.
The Meat/Stew key is for cooking meat and stew. The
Adjustkey can be used to change the cooking me to achieve the desired meat texture. In
general, the "More" seng is for fall-of-the-bone cooking results.
The Cakekey is a general seng for baking various types of cakes such as New York style
cheesecakes, banana breads, sponge cakes, etc. The Moreseng is for baking dense cakes
like New York style cheesecakes, the Normalseng is for baking medium density cakes like
banana bread, whereas the Lessseng is for baking light, airy cakes like sponge cakes. Users
can also press the ‘+’ or -key to set customized baking mes for dierent recipes.
13
Warning: the stainless steel inner pot is not ideal for baking. For best results, use a ceramic
inner pot that is available as an Instant Pot® accessory, or line the interior boom of the
stainless steel inner pot with parchment paper.
The Eggkey is programmed to cook eggs with the results of boiled eggs. You can use the “+” or
-key to adjust for less or more cooking me to account for dierent egg sizes, and also
select your desired texture such as using the Lessmode for so boiled, Normalmode for
medium boiled, and Moremode for hard boiled.
The "Sauté" key is used for open lid sautéing, browning or simmering inside the inner pot.
"Adjust" can be used to change the operang temperature in 3 modes. Please see the
Sautéingsecon for details.
The Rice key is a fully automated smart program for cooking regular rice or parboiled rice. The
cooking me is adjusted automacally depending on the amount of rice. To cook 2 cups of
rice, it takes about 10 minute pressure keeping me; for 3~5 cups of rice, it takes about 12
minute pressure keeping me; more cups will take longer me accordingly. Total cooking me
is not displayed, whereas the pressure keeping me will be shown when working pressure is
reached. The Adjustkey has no eect on this program. Please note: You can cook as lile as
one cup of rice with the correct rao of water.
The "Mulgrain" key is a program to cook mixed grains of wild rice, hard brown rice, mung beans,
etc. There are three Adjustopons for mulgrain rice cooking. The "Normal" seng has 40
minutes of pressure cooking me. The "Less" seng has 20 minutes of pressure cooking me.
The "More" seng has 45 minutes of warm water soaking me and 60 minutes of pressure
cooking me. The "More" seng is suitable for harder grains such as dry split corn.
The Porridge key is to make porridge of various grains. You can use the Adjustkey to select a
cooking me. The Normalseng is for rice porridge. For a mixture of various grains and
beans, please choose the "More" seng. Sr the Porridge before serving. Please note, aer
the Porridgeprogram is nished, do NOT put pressure release handle in the venng
posion, otherwise the porridge will splaer out the pressure release. Please use Natural
Release.
The Steam key is designed for steaming purposes. You can steam vegetables, seafood or reheat
food with the steam rack provided. When steaming vegetables and seafood, please note that
using the Natural Releasemethod for releasing steam will likely overcook the food. You will
need to use the Quick Releasemethod to release the pressure as soon as the cooking me
has reached.
Using 1~2 cups (160ml) of water is sucient for steaming fresh and frozen vegetables, with
1~2 minute pressure keeping me. Please use the “+” or -key to change the steaming me.
Please note that unlike other pressure cooking funcons, the Steamfuncon heats at full
power connuously. This may burn food that is in direct contact with the boom of the inner
pot. Please use the trivet provided to elevate food above the water. Use a metal basket or
(oven safe) glass/ceramic container that ts into the inner pot to contain the food.
The Manual key allows manual seng of cooking me. The me set in this mode is pressure
cooking me which will begin to count down when working pressure is reached. The
maximum pressure cooking me is 240 minutes.
The Slow Cook" key allows you to use your Instant Pot® as a convenonal slow cooker. The user
can change the cooking me by pressing the "+" or "-" key to set the cooking me from 0.5 to
20 hours. The "Adjust" key allows the user to adjust the level of heang as in tradional slow
cookers. Please see the Slow Cookingsecon for its usage.
The Delay Start key is for delayed cooking. To start delayed cooking, rst select the desired
cooking funcon (all program funcons except Sauté”), and then press the Delay Startkey.
Use “+” and -to set the delayed hours. Press "Delay Start" key again to change the minutes.
14
The me you are seng is the delayed me before the program starts. Please allow
sucient cooking me and cooling down me before serving. The me delay can be adjusted
with the “+” or -key for up to 24 hours. Please see the Delayed Cooking with Delay Start
secon for details.


In order to familiarize yourself with the Instant Pot® and start
cooking with your favourite recipe, it is highly recommended
for rst me users to do a test run. This test run will help you
become familiar with Instant Pot®, make sure the unit is free
of residues from the manufacturing process, and indicate
whether your unit is working properly. This oponal, but
recommended, test run will complete in about 15 minutes.
1. Make sure the pressure release handle and oat valve are unobstructed and clean, and that
the sealing ring is properly inserted.
2. Place the inner pot in the cooker base and add water to the “3” mark in the inner pot.
3. Close the lid. Make sure that the pressure release handle is poinng to the "Sealing" mark on
the lid.
4. Press the "Steam" buon, and press the -buon to change the me to 2 minutes.
5. In 10 seconds, your Instant Pot® will go into the preheang cycle (display showing On”).
Within a few minutes, steam will release for a minute or two unl the Float Valve pops up to
seal the cooker. Once working pressure is reached, which may take a few minutes or up to 10
-13 minutes, the countdown mer will begin. When the countdown is nished, the Instant
Pot® will beep and automacally switch into the Keep Warmmode.
The test is now complete. Press the Keep-Warm/Cancelbuon and/or unplug the unit. Once the
pot cools down, you can open it and are ready to try your
favorite recipes.

The following procedure is for "Soup/Broth", "Meat/Stew",
"Steam", "Cake", "Egg", Rice, "Mulgrain", "Porridge",
and Manualfuncons.
1. Follow steps in the "Cooking Preparaon" secon of
this manual.
2. Connect the cooker to the power outlet. The LED display
shows OFFindicang that its in standby state.
3. Select a cooking funcon, e.g. Soup/Broth. Once a
funcon key is pressed, its indicator lights up.
Within 10 seconds aer pressing a funcon key,
you can sll select any other funcon keys and
adjust cooking me.
15
4. Select cooking me.
You may use the "Adjust" key (except the Manual
and Ricefuncons) to adjust cooking me. Press
the "Adjust" key repeatedly to change between
Normal, “More" and Less" modes which will light
up on the display.
If necessary, change the cooking me with “+” and -
. Press and hold the “+” or -key for faster changes.
The built-in cooking me is suitable for most type of
food. Please use the cooking me table in the recipe
book to determine the appropriate cooking me
based on the food type, the quanty of food and your texture preference.
5. Cooking starts automacally in 10 seconds aer the last key press.
Three audible beeps will sound to indicate the cooking process has begun. The LED
display shows "On" indicang that the pre-heang state is in progress. Please note:
depending on the food content, the quanty and its temperature (frozen or not), the
preheat cycle may vary from 10 to 40 minutes.
As the pressure increases inside the cooker, it is perfectly normal for traces of steam to
escape from the oat valve unl the oat valve pops up.
Once the cooker reaches working pressure, the LED display changes from On" to the
programmed cooking me. The cooking me counts down to indicate the remaining
me in minutes. During this pressurized state, you should not see any steam leaking out
anywhere from the lid. However, from me to me, you may see a small amount of
steam coming out from the pressure release handle. This is perfectly normal.
During the cooking operaon, the cooker may make so clicking sounds. This comes
from the normal operaon of the heang element switching on and o.
At any me, you can cancel the cooking program in progress and return to standby
mode by pressing the Keep-Warm/Cancelkey.
6. When the pressure cooking cycle nishes, the cooker
beeps and automacally goes into the "Keep Warm" cycle,
called Auto Keep WarmCycle. The LED display shows an
Lon the rst digit, such as "L0:02", to indicate the Keep
Warmcycle and me duraon. The clock counts up for 10
hours. If the 10 hour Auto Keep Warmcycle nishes, the
cooker goes into standby state.
It is not recommended to leave cooked rice in Keep-
Warmstate for too long as it may aect the texture
of the rice.
7. To serve food, press Keep-Warm/Cancelto stop the
keep-warm cycle and open the lid according to the Safe Lid Openingsecon of this manual.
When opening the lid, the inner pot may be suconed to the lid due to vacuum eect
caused by contracon of cooling air. Please turn the pressure release handle to
Venngto let in air to release the vacuum.
16

1. Follow steps in the "Cooking Preparaon" secon of this
manual. The pressure release handle should be at the
"Venng" posions. An oponal glass lid can also be used.
2. Connect the cooker to the power outlet. The LED display
shows OFFindicang that its in standby state.
3. Press Slow Cookkey.
4. Change cooking me between 0.5 and 20 hours by
pressing the "+" or "-" key.
5. Select the desired cooking mode with the Adjustkey. By
pushing the "Adjust" key repeatedly, you can adjust the cooking mode to Normal, “More
and Lesssengs, which correspond to medium, high and low in a convenonal slow
cooker.
6. Cooking starts automacally in 10 seconds aer the last key is pressed.
7. When the cooking nishes, the cooker beeps and goes into the Auto "Keep Warm" cycle for
10 hours.

Your Instant Pot® has a delay start funcon to delay the start of
cooking for up to 24 hours. The Delay Startfuncon does not
apply to the Keep Warm, and "Sauté" funcons. The following
shows how to program for delayed cooking with Delay Start”.
1. Follow steps in the previous Pressure Cookingand Slow
Cookingsecons to set a cooking program.
2. Within 10 seconds aer program selecon, press the
Delay Startkey to set the hours and minutes to be
delayed. Use “+” and -to set the delayed hours. Press
"Delay Start" key again to change the minutes. The me is
the delayed me before the program starts. Please allow
sucient cooking me and cooling down me before
serving.
3. 10 seconds aer last key press, the Delay Startfuncon starts, the me on LED display
counts down, and the ashing green indicator on the Delay Startkey changes to solid
green.
4. To cancel the Delay Start program, press the Keep-Warm/Cancelkey at any me.
5. Your Instant Pot® starts cooking when the delay mer counts down to 0. Aer cooking, the
cooker will enter the Auto Keep Warmcycle for 10 hours. Please Note:
We highly discourage using the Delay Startfuncon for cooking easily perishable foods,
such as meat and sh, which may spoil when le at room temperature for hours. Cooked
rice may yield overly so texture due to long soaking me. It may also cause a layer of
burned rice at the boom of the pot if it is le in Keep-Warm mode for too long.
The Delay Startfuncon is not recommended for porridge, oatmeal or other frothy,
scky foods due to the possibility of the oat valves geng blocked and causing
overow of food content. The Instant Pot® should not be le unaended during the
preheat cycle. Since the Delay Startfuncon implies leaving the unit unaended, it is
strongly recommended to not use the Delay Startprogram for the types of food
menoned above.
17

1. Follow steps in the "Cooking Preparaon" secon of this
manual. Keep the lid open to avoid pressure from building
up inside the cooker. An oponal glass lid can be used.
2. Connect the cooker to the power outlet. The LED display
shows OFFindicang that its in standby state.
3. Press Sautékey. For safety reasons, the maximum
operaon me of one Sautécycle is 30 minutes.
4. Change the cooking temperature to Normal, “Moreand
Lessmodes with the Adjustkey. The "Normal" mode is
suited for regular sauté or pan searing. The "More" mode is
for sr-frying or browning meat at higher temperature. The
"Less" mode is suitable for simmering, reducing juices or
thickening sauces. To avoid pressure build-up, the lid
should not be closed. If you accidentally close the lid,
ashing "Lid" will be displayed to warn about the wrong lid
posion.
Cauon: parally closing the lid during sautéing could
cause pressure to build up in the cooker. This can be
hazardous.
5. Heang starts automacally in 10 seconds aer the last key
is pressed. The Sautéprogram can be cancelled at any
me by pressing Keep Warm/Cancelkey.
6. When the desired temperature is reached, the LED display shows Hot”.
7. When cooking nishes, the cooker beeps and goes to the standby state. If you need more
me, simply press the Sautékey again.

Pressing the Keep-Warm/Cancelkey in the standby state acvates the Keep Warmfuncon.
When Keep Warmfuncon starts, the me counts up by minutes for up to 10 hours. The "Keep
Warm" funcon can be used with or without the lid closed. You can also use an oponal glass lid
for this funcon. When the 10-hour limit is up, the cooker beeps and goes to the standby state.

1. Auto keep warm ON/OFF: In factory seng, Auto Keep Warmis ON when a cooking
program buon is pressed. Auto Keep Warmcan be turned ON and OFF by a second press
on the same cooking program buon before the cooking program starts. During this period,
the Keep Warm buon indicator displays ON or OFF accordingly.
2. Audible beeping ON/OFF: In factory seng, beeping is ON. To turn beeping OFF, press and
hold the -buon for 3 seconds. The display will show S ONto indicate Sound ON.
3. Memorizing the last used program sengs per cooking program buon: The previously used
cooking sengs, including me, pressure and temperature are stored once the custom
sengs are dened, even aer the Instant Pot® cooker is unplugged from power source. To
reset to factory default sengs, press and hold the Adjustbuon for 3 seconds when the
Instant Pot® cooker is in the OFF mode.
18

Regular care and maintenance are essenal to ensuring that this product is safe for use. If any of
the following circumstances happen, please stop using the appliance immediately and contact the
Instant Pot customer care team.
Power cord and plug appear worn out, deformed, discoloured or damaged.
A poron of power cord or the plug gets hoer than usual.
The cooker heats abnormally or emits a burnt smell.
When powered on, there are unusual sounds or vibraons.
If there is dust or dirt on the plug or socket, please remove the dust or dirt with a dry cloth.

Cauon: please make sure the appliance is cooled down and unplugged before cleaning.
1. Clean the product aer each use. Wipe the cookers inner black rim and water collecng duct
with a dry cloth.
2. Remove the lid and take out the inner pot, wash with detergent, rinse with water and then
wipe dry with a so cloth. The stainless steel inner pot and lid are dishwasher safe, but
ensure that water is fully drained from the lid cavity aer each wash.
3. Use water to clean the lid, including the sealing ring (which can be removed), pressure release
valve, an-block shield, and wipe them clean with a so dry cloth. Do not take apart the
pressure release handle assembly.
4. Clean the cooker base with clean damp cloth. Do not immerse the cooker base in water. Do
not use a wet cloth to clean the pot while the power cord is plugged into the power outlet.

If you experience any problem with the appliance, please DO NOT return the product to the
retail store or online merchant. For technical assistance and product return informaon, please:
Create a support cket at www.InstantPot.com/support/
Email to support@instantpot.com
Or call 1800 828-7280 for the Instant Pot® customer support team
The cases in the following tables do not always indicate a faulty cooker. Please examine the cooker
carefully before contacng the Instant Pot® customer support team for repair. You can also nd
ps, videos and FAQs on www.InstantPot.com/faq/
19
Problem Possible Reason Soluon
1
Dicult to close the lid
Sealing ring not installed
properly
Posion the sealing ring well
Float valve in the popped-up
posion
Slightly press the oat valve
downward
2
Dicult to open the lid
Pressure exists inside the
cooker
Posion the pressure release
valve to the venng posion
to reduce the internal pres-
sure. Open the lid aer the
pressure is completely
released.
Float valve stuck at the
popped-up posion
Press the oat valve lightly
with a pen or chopsck.
3
Steam leaks from the
side of the lid
No sealing ring Install the sealing ring
Sealing ring damaged Replace the sealing ring
Food debris aached to the
sealing ring
Clean the sealing ring
Lid not closed properly Open then close the lid again
4
Steam leaks from oat
valve for over 2
minutes
Food debris on the oat valve
silicone seal
Clean the oat valve silicone
seal
Float valve silicone ring worn-
out
Replace the oat valve silicone
ring
5
Float valve unable to
rise
Too lile food or water in
inner pot
Add water according to the
recipe
Float valve obstructed by the
lid locking pin
Close the lid completely, see
Cooking Preparaonsecon
Steam comes out from
the pressure release
valve non-stop
Pressure release handle not
in sealing posion
Turn the pressure release
handle to the sealing posion
6
6
Pressure control fails Contact support online
7
7
Display ashes Lid
Lid is not in the correct posi-
on for the selected program
Close the lid for pressure
cooking or open the lid for
sautéing
Troubleshoong Table
20
Troubleshoong Table (Connued)
Possible Reason Soluon
Problem
9
8
Display remains
blank aer con-
necng the power
cord
Bad power connecon or no
power.
Inspect the power cord to
ensure a good connecon,
check the power outlet is
acve.
Cookers electrical fuse has
blown
Contact support online
9
All LEDs
ash with
a code
appearing
on screen
C1
code
Faulty temperature sensor
(cannot be detected)
Contact support online
C2
code
Faulty temperature sensor
(short circuited)
Contact support online
C5
code
Temperature is too high
because inner pot is not
placed into the cooker base
Insert the inner pot properly
Temperature is too high
because there is no water in
inner pot
Put food and water in the
inner pot
C6
code
Faulty pressure sensor Contact support online
10
Rice half cooked or
too hard
Too lile water
Adjust dry rice and water
rao according to recipe
Cover opened prematurely
Aer cooking cycle
completes, leave the cover
on for 5 more minutes
11 Rice too so Too much water
Adjust dry rice and water
rao according to recipe
12
Intermient beeping
aer the cooker
starts for a while
Indicaon of overheang. The
cooker has reduced the
heang temperature, and may
not reach cooking pressure
Starch deposits at the boom
of the inner pot might have
clogged heat dissipaon. Stop
the cooker and inspect the
boom of the inner pot
13
Occasional cking or
light cracking sound
The normal sound of power
switching and expanding
pressure board when changing
temperature
Nothing to be worried about
Boom of the inner pot is wet.
Wipe boom of the inner pot
dry before cooking
  • Page 1 1
  • Page 2 2
  • Page 3 3
  • Page 4 4
  • Page 5 5
  • Page 6 6
  • Page 7 7
  • Page 8 8
  • Page 9 9
  • Page 10 10
  • Page 11 11
  • Page 12 12
  • Page 13 13
  • Page 14 14
  • Page 15 15
  • Page 16 16
  • Page 17 17
  • Page 18 18
  • Page 19 19
  • Page 20 20
  • Page 21 21
  • Page 22 22

Instant Pot IP-LUX60 V3 User manual

Category
Kitchen & houseware accessories
Type
User manual

Instant Pot IP-LUX60 V3 is a versatile kitchen appliance that combines the functions of a pressure cooker, sauté pan, slow cooker, rice cooker, steamer, and food warmer. Its user-friendly control panel features 10 built-in cooking programs for easy one-touch cooking. With its ability to cook food up to 70% faster than traditional methods while preserving nutrients, the Instant Pot IP-LUX60 V3 is a perfect time-saving solution for busy individuals and families.

Ask a question and I''ll find the answer in the document

Finding information in a document is now easier with AI