Page is loading ...

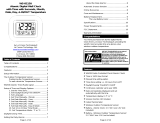
14-Inch Rowan
Indoor/Outdoor Wall Clock
Model: 433-3836
DC: 082420
This product is warranted to be free from defects in material
and workmanship under normal use and service for a period
of two years from the date of sale to the customer. Warranty
will not apply to defects resulting from abuse, accidents, or
misuse. If a defect that is covered by this warranty arises
during the warranty period, promptly return the clock
(postage prepaid) with proof of purchase showing the date
the clock was purchased to the following address and such
defects will be repaired, or the products will be replaced at
La Crosse Clock Company option without charge.
La Crosse Clock Company
Warranty Department
2830 South 26th Street.
La Crosse, WI 54601
For Online support visit:
www.lacrossetechnology.com/support
WARRANTY & SUPPORT
Made in China - Printed in China
WARNING: This product can expose you to chemicals including
styrene, which is known in the State of California to cause cancer.
For more information go to: https://www.p65warnings.ca.gov/

• Always purchase the correct size and grade of battery most suitable
for intended use.
• Clean the battery contacts and also those of your clock prior to battery
installation.
• Ensure the battery is installed with correct polarity (+ and -).
• Remove battery from equipment when it is not used for an extended
period of time.
• Promptly remove an expired battery.
• The specifications for this wall clock may change without prior notice.
• Improper use or unauthorized opening of movement or clock housing
will void any warranty.
CARE & MAINTENANCE
Battery Requirements: 1 AA (IEC, LR6, 1.5V) required in the
Battery Compartment (Alkaline recommended)
Battery Life: 12 months
Temperature Range: -40°F to 140°F
Humidity Range: 0% to 100%
SPECIFICATIONS
POWER UP
1. Insert 1 fresh AA alkaline battery, according to polarity, into the
snug Battery Compartment.
2. Rotate the Time Set Wheel to set the time.
3. Mount on a wall and enjoy!
Note: The quartz movement
will keep the clock running
accurately. If the clock does not
operate, or steadily loses time,
replace the battery.
Time Set
Wheel
Battery
Compartment
AA
Learn more from our video: bit.ly/wallclock_setup
• The Thermometer and Hygrometer are self-adjusting and do not need
a battery to operate.
• Allow 24 hours for proper automatic adjustment.
THERMOMETER & HYGROMETERREMOVE COVER FROM MOVEMENT
1. Open: Remove the two screws securing the battery cover to the
clock. Lift o to access the movement.
2. Close: Replace the cover over the movement. Use the scews to
secure the battery cover to the clock.
MOUNTING
1. Be sure the Cover is in the closed position.
2. Use the top Hanger Hole to mount the clock.
Screw Hole
Screw Hole
/