Elite Screens OMS180H1 User manual

Category
Projection screens
Type
User manual
Rev041115-JA 1 www.elitescreens.com/yardmaster
Yard Master Series
Outdoor Movie Screen
User’s Guide
What’s in the Box?
A. Screen material x 1
C. Curved Stake x 4
D. Ring-Stake x 4
E. Guy-rope x 4
F. M6*40 hex nut x 2
G. M6*40 hexagonal screw x 2
H. Carrying bag x 1
I. Screen material bag x 1
Frame Assembly
1. Assemble the frame by connecting the letters on the ends of the tubes together as shown in the
diagram below. For example, A to A, B to B etc.
2. A and J are attached and secured with the provided Hexagonal Screws (G)
B. Steel
T
ube x 12
14
-
Rev041115
-JA 2 www.elitescreens.com/yardmaster
Screen Material Assembly
1. Lay the assembled frame on the floor and take caution not to scratch the frame and/or floor
surface. Note: The silver securing pegs on each end of the tube should be facing the floor.
2. Find the opening of the screen material and start by sliding it from the top of the frame,
with the back of the screen material facing the floor. With the help of someone
preferably, continue to pull downward until the screen material is completely on the
frame. Make sure the screen material is properly centered before moving to next step.
3. Once the screen material is completely on the frame, fasten the Velcro straps to secure
the material (as shown in image below). The straps are adjustable to pull the screen tight
and stretch the material to achieve a flat projection surface.
Securing the Screen with the Guy-Ropes and Stakes to the ground
1. Tie the Guy-Ropes to the ear on each of the top corners of the frame.
Note: Guy-Ropes should be installed to the front and back of the frame.
Take an example for 120" with 14pcs steel tube:
Rev041115-JA 3 www.elitescreens.com/yardmaster
2. Raise the frame vertically on the ground and rotate the short tube on both sides of the
foot stool 9 in the direction of the white screen so that that the holes on the frames
are lined up. Finish attaching and securing the side frame to the feet with the hexagonal
screws and hex nuts as shown below.
Ear
Guy Rope
Hexagonal Screw
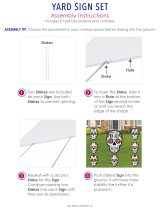
3. Drive the Curved Stakes through
each hole on the ends of the legs.
4. Tie two of the Guy-Ropes to the
front Curved stakes.
5. Drive the two Ring-Stakes to the
ground and attach a Guy-Rope on
each side to secure the back of
the frame.
Warning Instructions
1. The Ring-Stake and Curved Stake should be properly driven into the ground to avoid the
frame from falling which could result in injury or permanent damage to the screen.
2. Always be cautious of strong windy conditions. We don’t recommend using over 20mph.
3. A soft terry cloth with mild soap and water may be used to clean the screen surface.
For a local Elite Screens contact or Technical Support, please visit
www.elitescreens.com
Ring Stake
Curved Stake
  • Page 1 1
  • Page 2 2
  • Page 3 3

Elite Screens OMS180H1 User manual

Category
Projection screens
Type
User manual

Ask a question and I''ll find the answer in the document

Finding information in a document is now easier with AI