LG 60PK950 Owner's manual

Category
LCD TVs
Type
Owner's manual

The LG 60PK950 plasma TV offers a range of features to enhance your viewing experience. Connect to the internet via LAN or wirelessly with the wireless media box to enjoy a variety of online content, including movies, TV shows, music, and games. With built-in Wi-Fi, you can also connect to your home network to access media files stored on your PC or other DLNA-compatible devices.

The LG 60PK950 plasma TV offers a range of features to enhance your viewing experience. Connect to the internet via LAN or wirelessly with the wireless media box to enjoy a variety of online content, including movies, TV shows, music, and games. With built-in Wi-Fi, you can also connect to your home network to access media files stored on your PC or other DLNA-compatible devices.

www.lg.com
OWNER’S MANUAL
PLASMA TV
Please read this manual carefully before operating
your set and retain it for future reference.
P/NO: MFL63725505(1005-REV00)
Printed in Thailand
2
ENGLISH
SAFETY INSTRUCTIONS
Please read these safety precautions carefully before using the product.
In this manual, the illustration may be somewhat different from your product because it is just example to help the instruc-
tion.
PRECAUTION IN INSTALLING THE PRODUCT
WARNING
WARNING
CAUTION
Keep away from heat sources like electrical
heaters.
- Electrical shock, fire, malfunction or deforma-
tion may occur.
If you can smell smoke or other odors or hear
a strange sound unplug the power cord and
contact the service center.
- If you continue to use without taking proper
measures, electrical shock or fire can occur.
Do not use the product in damp place such as
a bathroom or any place where it is likely to get
wet.
- This may cause a fire or could give an electric
shock.
Install the product on a flat and stable place
that has no risk of dropping the product.
- If the product is dropped, you may be
injured or the product may be broken.
Keep the product away from direct sunlight.
- The product can be damaged.
Do not place the product in a built-in instal-
lation such as bookcase or rack.
- Ventilation required.
ELECTRICAL POWER RELATED PRECAUTIONS
Make sure to connect the power cable to the
grounded current.
- You may be electrocuted or injured.
Do not touch the power plug with wet hands.
Additionally, it the cord pin is wet or covered
with dust, dry the power plug completely or
wipe dust off.
- You may be electrocuted due to excess
moisture.
During a thunder or lightning storm, unplug
the power cable or signal cable.
- You may be electrocuted or a fire can break
out.
Protect the power cord from physical or
mechanical abuse, such as being twisted,
kinked, pinched, closed in a door, or walked
upon. Pay particular attention to plugs, wall
outlets, and the point where the cord exits
the appliance.
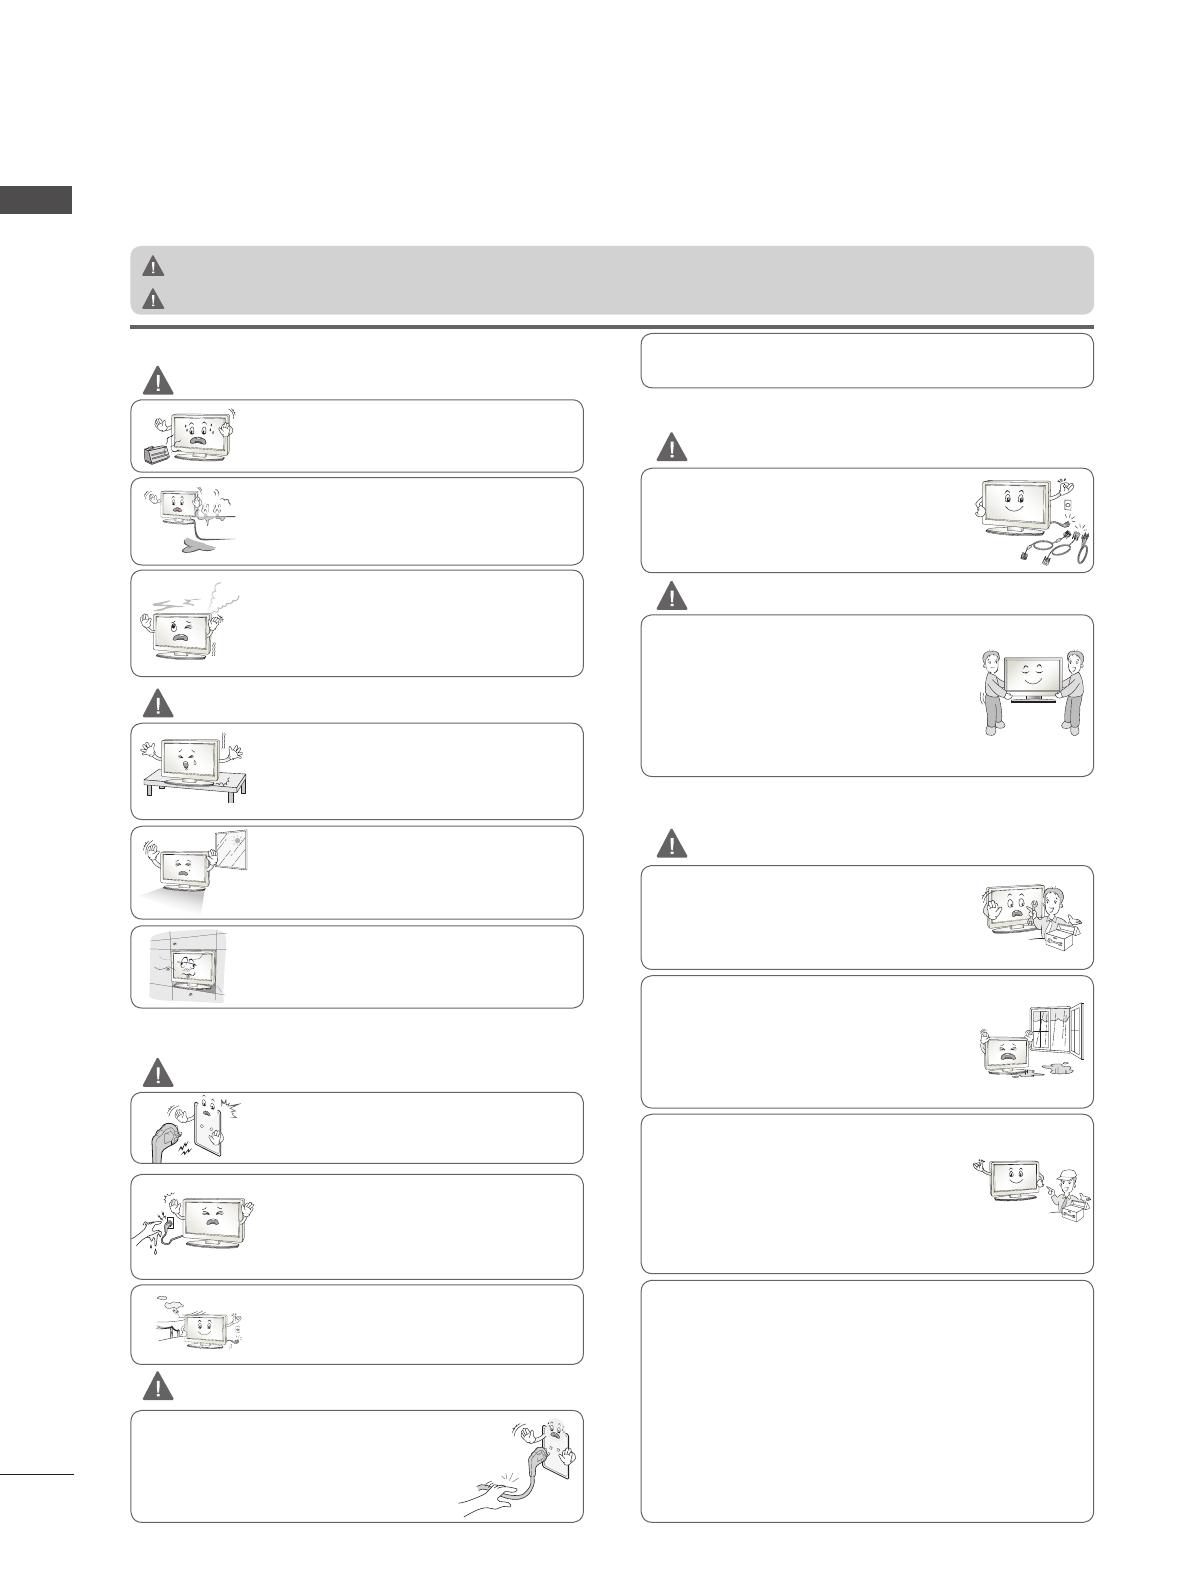
PRECAUTIONS IN MOVING THE PRODUCT
Do not shock the product when moving it.
- You may be electrocuted or the product
can be damaged.
Make the panel face forward and hold it
with both hands to move.
- If you drop the product, the damaged
product can cause electric shock or fire.
Contact with the service center for repair.
Make sure to turn off the product.
Make sure to remove all cables before mov-
ing the product.
- You may be electrocuted or the product
can be damaged.
PRECAUTIONS IN USING THE PRODUCT
Do not disassemble, repair or modify the
product at your own discretion.
- Fire or electric shock accident can occur.
- Contact the service center for check, cali-
bration or repair.
To reduce the risk of fire or electric shock,
do not expose this apparatus to rain or
moisture.
Apparatus shall not be exposed to dripping
or splashing and no objects filled with liq-
uids, such as vases, shall be placed on the
apparatus.
Refer all servicing to qualified service per-
sonnel. Servicing is required when the
apparatus has been damaged in any way,
such as power supply cord or plug is dam-
aged, liquid has been spilled or objects
have fallen into the apparatus, the appara-
tus has been exposed to rain or moisture,
does not operate normally, or has been
dropped.
WARNING
WARNING
CAUTION
CAUTION
!
?
!
?
!
?
!
?
!
?
!
?
!
?
!
?
!
?
IMPORTANT INFORMATION TO PREVENT “IMAGE BURN /
BURN-IN” ON YOUR TELEVISION SCREEN
-
When a fixed image (e.g. logos, screen menus, video game,
computer display and teletext pages) is displayed on the televi-
sion for an extended period it can become permanently imprint-
ed on the screen. This phenomenon is known as “image burn” or
“burn-in”. Image burn is not covered under the manufacturer’s
warranty.
-
In order to prevent image burn, avoid displaying a fixed image on
your television’s screen for a prolonged period (2 or more hours
for LCD, 1 or more hours for Plasma).
-
Image burn can also occur on the letterboxed areas of your
television if you use the 4:3 aspect ratio setting for an extended
period.
As long as this unit is connected to the AC wall outlet, it is not
disconnected from the AC power source even if you turn off
this unit by SWITCH.
If you ignore the warning message, you may be seriously injured or there is a possibility of accident or death.
If you ignore the caution message, you may be slightly injured or the product may be damaged.
CAUTION
WARNING
3
ENGLISH
CONNECTING YOUR UNIT
Here shown may be somewhat different from your set.
AUDIO IN
(RGB/DVI)
/DVI IN
COMPONENT IN
ANTENNA
IN
RGB IN
(PC)
RS-232C IN
(CONTROL & SERVICE)
2
LAN
WIRELESS
CONTROL
R
L(MONO)
AUDIO
VIDEO
AV IN 1
1
AUDIO
VIDEO
/DVI IN
1
2
3
OPTICAL
DIGITAL
AUDIO OUT
R
L(MONO)
AUDIO
VIDEO
AV IN 1
COMPONENT IN
2
1
AUDIO
VIDEO
* To connect an additional equipment, see the External Equipment Setup
section in CD Manual.
ANTENNA CONNECTION
1
POWER CORD
3
VCR CONNECTION
2
DVD/STB
2
PREPARATION
ACCESSORIES
Ensure that the following accessories are included with your TV. If an accessory is missing, please
contact the dealer where you purchased the TV.
Image shown may differ from your TV.
Power Cord
Nero MediaHome
4 Essentials CD
Cable Holder
(Refer to p.8)
x 2
Protection
Cover
(Refer to p.9)
Cable
Management Clip
(Refer to p.8)
Batteries (AAA)
AV MODE INPUTENERGY
SAVING
1 2
ABC
3
DEF
4
GHI
5
JKL
6
MNO
7
PQRS
8
TUV
0
9
WXYZ
BACK
EXIT
OK
LIST
Q.VIEW
MENU
Q.MENU
FREEZE
P
A
G
E
FAV
RATIO
MUTE
MARK
DELETE
CHAR/NUM
P
TV
LIGHT
Remote Control
AV MODE INPUTENERGY
SAVING
1 2
ABC
3
DEF
4
GHI
5
JKL
6
MNO
7
PQRS
8
TUV
0
9
WXYZ
BACK
EXIT
OK
LIST
Q.VIEW
MENU
Q.MENU
FREEZE
P
A
G
E
FAV
RATIO
MUTE
MARK
DELETE
CHAR/NUM
P
TV
or
Owner’s Manual
4
ENGLISH
PREPARATION
Wireless Media Box
Separate purchase
Wireless LAN for
Broadband/
DLNA Adaptor
Optional extras can be changed or modified for quality improvement without any notification.
Contact your dealer for buying these items.
This device only works with compatible LG Plasma TV.
(50PK7
***
, 50PK9
***
)
AW-50PG60MS
(60PK9
***
)
AW-60PG60MS
AW-50PG60M
or
AW-60PG60M
or
OUT
WIRELESS
CONTROL
AV1 AV2
COM1 COM2 RGB WIRELESS
HDMI1 HDMI2
HDMI3
HDMI4
Wall Mounting Bracket
Polishing Cloth
Polishing cloth for
use on the screen.
This item is not included for all models.
* Lightly wipe any stains or
fingerprints on the surface
of the TV with the polish-
ing cloth.
Do not use excessive
force. This may cause
scratching or discoloura-
tion.
x 4
x 4
M4x28
M4x14
(Only 50PK7
***
, 50PK9
***
)
Bolts for stand assembly
(Refer to p.7)
Ferrite Core
(
This item is not
included for all
models.
)
Ferrite Core
(
This item is not
included for all
models.
)
Ferrite core can be used to
reduce the electromagnetic
wave when connecting the
power plug.
The closer the location of the
ferrite core to the power plug,
the better it is.
Install the power
plug closely.
Ferrite core can be used to
reduce the electromagnetic wave
when connecting the LAN cable.
Place the ferrite core far from
TV and wind the LAN cable in
the ferrite core once.
5
ENGLISH
FRONT PANEL CONTROLS
Image shown may differ from your TV.
NOTE
TV can be placed in standby mode in order to reduce the power consumption. And TV should be
switched off using the power switch on the TV if it will not be watched for some time, as this will
reduce energy consumption.
The energy consumed during use can be significantly reduced if the level of brightness of the pic-
ture is reduced, and this will reduce the overall running cost.
CAUTION
Do not step on the glass stand or subject it to any impact. It may break, causing possible injury from frag-
ments of glass, or the TV may fall.
Do not drag the TV. The floor or the product may be damaged.
Power/Standby Indicator
Illuminates red in standby mode.
• The lighting is off while the TV remains on.
Remote Control
Sensor
INPUT MENU
OK VOLUME
PROGRAMME
POWER
Touch Button
You can use the desired button function by touching.
SPEAKER
Intelligent Sensor
Adjusts picture according
to the
surrounding conditions
6
ENGLISH
PREPARATION
BACK PANEL INFORMATION
Image shown may differ from your TV.
Power Cord Socket
This TV operates on an AC power.
Caution: Never attempt to operate the TV on
DC power.
WIRELESS Control
Connect the Wireless Ready Dongle to the
TV to control the external input devices con-
nected to Wireless Media Box wirelessly.
RGB/DVI Audio Input
Connect the audio from a PC or DTV.
RGB IN Input
Connect the output from a PC.
OPTICAL DIGITAL AUDIO OUT
Connect digital audio to various types of
equipment.
Connect to a Digital Audio Component.
Use an Optical audio cable.
RS-232C IN (CONTROL & SERVICE) PORT
Connect to the RS-232C port on a PC.
This port is used for Service or Hotel mode.
Audio/Video Input (AV IN1/2)
Connect audio/video output from an external
device to these jacks.
LAN
Network connection for AccuWeather,
Picasa, YouTube, etc.
Also used for video, photo and music files on
a local network.
HDMI/DVI IN Input
Connect an HDMI signal to HDMI IN. Or DVI
(VIDEO) signal to HDMI/DVI port with DVI to
HDMI cable.
Component Input
Connect a component video/audio device to
these jacks.
Antenna Input
Connect antenna to this jack.
USB Input
Connect USB storage device to this jack.
1
2
3
4
5
6
7
8
9
10
11
12
1
h}GpuY
USB IN 1
USB IN 2
AUDIO IN
(RGB/DVI)
/DVI IN
COMPONENT IN
ANTENNA
IN
RGB IN
(PC)
RS-232C IN
(CONTROL & SERVICE)
2
LAN
WIRELESS
CONTROL
R
L/MONO
AUDIO
VIDEO
AV IN 1
1
AUDIO
VIDEO
/DVI IN
1
2
3
OPTICAL
DIGITAL
AUDIO OUT
G[
/DVI IN
h}GpuY
USB IN 1
USB IN 2
AUDIO IN
(RGB/DVI)
/DVI IN
COMPONENT IN
ANTENNA
IN
RGB IN
(PC)
RS-232C IN
(CONTROL & SERVICE)
2
LAN
WIRELESS
CONTROL
R
L/MONO
AUDIO
VIDEO
AV IN 1
1
AUDIO
VIDEO
/DVI IN
1
2
3
OPTICAL
DIGITAL
AUDIO OUT
G[
/DVI IN
2 43 5 6
8
9
7
7
12
11
9
10
7
ENGLISH
Image shown may differ from your TV.
When assembling the desk type stand, check whether the bolt is fully tightened. (If not tightened fully,
the product can tilt forward after the product installation.) If you tighten the bolt with excessive force,
the bolt can deviate from abrasion of the tightening part of the bolt.
1
Carefully place the TV screen side down on
a cushioned surface to protect the screen
from damage.
2
Set the Stand Base on even floor.
Assemble the parts of the Stand Body
with the Stand Base of the TV.
Stand Body
Stand Base
STAND INSTALLATION
4
5
Assemble the TV as shown.
Fix the 4 bolts securely using the holes in
the back of the TV.
M4x28
Assemble the parts of the Cable
Management Clip with the Stand Body.
3
Cable
Management
Clip
Stand Body
(Only 50PK7
***
, 50PK9
***
)
M4x14
8
ENGLISH
PREPARATION
BACK COVER FOR
WIRE ARRANGEMENT
Image shown may differ from your TV.
After connecting the cables as necessary,
install Cable Holder as shown and bun-
dle the cables.
In case of the LAN cable, install as shown
to reduce the electromagnetic wave.
Cable Holder
HOW TO REMOVE THE
CABLE MANAGEMENT
CLIP
2
Connect the cables as necessary. To con-
nect additional equipment, see the
External Equipment Setup section.
3
Install the Cable Management Clip into
the TV until clicking sound.
NOTE
Do not use the Cable Management Clip to
lift the TV.
- If the TV is dropped, you may be injured or
the TV may be damaged.
Image shown may differ from your TV.
Hold the Cable Management Clip with both
hands and pull it backward as shown.
1
9
ENGLISH
SWIVEL STAND
Image shown may differ from your TV.
After installing the TV, you can adjust the TV set
manually to the left or right direction by 20
degrees to suit your viewing position.
Image shown may differ from your TV.
When installing the wall-mounted unit, use the
protection cover.
NOT USING THE DESK-
TYPE STAND
Insert the Protection
Cover into the TV until
clicking sound.
Protection Cover
(Fix a Guide to the Outsides.)
CAREFUL INSTALLATION
ADVICE
You should purchase necessary components
to fix the TV safety and secure to the wall on
the market.
Position the TV close to the wall to avoid the
possibility of it falling when pushed.
The instructions shown below are a safer way
to set up the TV, by fixing it to the wall, avoid-
ing the possibility of it falling forwards if pulled.
This will prevent the TV from falling forward
and causing injury. This will also prevent the
TV from damage. Ensure that children do not
climb or hang from the TV.
3
Use the eye-bolts or TV brackets/bolts to fix the
product to the wall as shown in the picture.
(If your TV has bolts in the eyebolts, loosen then
bolts.)
* Insert the eye-bolts or TV brackets/bolts and
tighten them securely in the upper holes.
Secure the wall brackets with the bolts on the
wall. Match the height of the bracket that is
mounted on the wall.
Use a sturdy rope to tie the product for align-
ment. It is safer to tie the rope so it becomes
horizontal between the wall and the product.
2
2
1
1
1
2
3
NOTE
When moving the TV undo the cords first.
Use a platform or cabinet strong and large
enough to support the size and weight of the TV.
To use the TV safely make sure that the height of
the bracket on the wall and on the TV is the
same.
10
ENGLISH
PREPARATION
The TV can be installed in various ways such as
on a wall, or on a desktop etc.
The TV is designed to be mounted horizontally.
EARTHING
Ensure that you connect the earth wire to prevent
possible electric shock. If grounding methods are
not possible, have a qualified electrician install a
separate circuit breaker.
Do not try to earth the TV by connecting it to tele-
phone wires, lightening rods or gas pipes.
WALL MOUNT:
HORIZONTAL INSTALLA-
TION
We recommend the use of a LG Brand wall
mounting bracket when mounting the TV to a wall.
We recommend that you purchase a wall mount-
ing bracket which supports VESA standard.
LG recommends that wall mounting be per-
formed by a qualified professional installer.
DESKTOP PEDESTAL
INSTALLATION
NOTE
Should Install wall mount on a solid wall per-
pendicular to the floor.
Should use a special wall mount, if you want
to install it to ceiling or slanted wall.
The surface that wall mount is to be mount-
ed on should be of sufficient strength to sup-
port the weight of TV set; e.g. concrete, nat-
ural rock, brick and hollow block.
Installing screw type and length depends on
the wall mount used. Further information,
refer to the instructions included with the
mount.
LG is not liable for any accidents or damage
to property or TV due to incorrect installa-
tion:
- Where a non-compliant VESA wall mount
is used.
- Incorrect fastening of screws to surface
which may cause TV to fall and cause per-
sonal injury.
- Not following the recommended Installation
method.
For adequate ventilation allow a clearance of 10
cm all around the TV.
Image shown may differ from your TV.
Power Supply
Circuit breaker
10 cm
10 cm
10 cm
10 cm
10 cm
10 cm
10 cm
10 cm
10 cm
Model
VESA
(A
*
B)
Standard
Screw
Quantity
50PK7
***
50PK9
***
60PK9
***
400
*
400
400
*
400
600
*
400
M6
M6
M8
4
4
4
11
ENGLISH
NETWORK
This TV can be connected to a local area network (LAN) via the LAN port. After making the physical
connection, the TV needs to be set up for network communication.
CAUTION
Do not connect a modular phone cable to the LAN port.
Since there are various connection methods, please follow the specifications of your
telecommunication carrier or internet service provider.
Wired Network Connection
1
Connect the LAN port of the Modem or Router to the LAN
port on the TV.
2
Select Network Settingin the NETWORK menu.
3
After connecting the LAN port, use the NetCast menu.
For more information about NETCAST setup and trouble-
shooting, visit http://lgknowledgebase.com. Search for
NetCast.
LAN
WIRELESS
CONTROL
/DVI IN
RGB IN
(PC)
RS-232C IN
(CONTROL & SERVICE)
AUDIO IN
(RGB/DVI)
R
AUDIO
VIDEO
AV IN 1
L(MONO)
ANTENNA
IN
1
2
COMPONENT IN
AUDIO
VIDEO
OPTICAL
DIGITAL
AUDIO OUT
Broadband Modem
Router
Broadband Modem
Broadband Service
Broadband Service
1
This feature is not available in all countries.
12
ENGLISH
NETWORK
Wired Network Setup
1
Select NETWORK.
2
Select Network Setting.
3
Select Wired.
4
If you already set Network Setting: Select Resetting. The new connection settings
resets the current network settings.
5
Select IP Auto Setting or IP Manual Setting.
When Selecting IP Manual Setting:
IP addresses will need to be input manually.
6
Select OK.
IP Auto Setting
IP Manual Setting
If wired and wireless networks are both available, wired is the preferred method.
After making a physical connection, a small number of home networks may require the TV network
settings to be adjusted.
For detail information, contact your internet provider or router manual.
Network Setting
Insert the IP address.
IP Mode
◄ IP Manual Setting
IP Address 0 . 0 . 0 . 0
Subnet Mask
255 . 255 . 0 . 0
Gateway 0 . 0 . 0 . 0
DNS Server 0 . 0 . 0 . 0
OK
Network Status
Network connecting...
Setting Test Close
NETWORK
OK
Move
Network Setting : Wired
• Network Status : Internet is connected
Legal Notice
Network Setting : Wired
Network Type
Wired network is recommended
wired
wireless
If you already set
the Network Setting
Previous setting value exists. Do
you want to connect with the
previous setting?
OK
Resetting
Next
Exit
Exit
Network Setting
Select the IP setting mode.
IP Mode
◄ IP Auto Setting ►
IP Address 0 . 0 . 0 . 0
Subnet Mask
255 . 255 . 0 . 0
Gateway 0 . 0 . 0 . 0
DNS Server 0 . 0 . 0 . 0
OK
Exit
Previous
Previous
Appeared when
wired and wireless
are simultaneously
connected.
13
ENGLISH
This feature requires an always-on broadband internet connection.
You do not need to connect to a PC to use this function.
If Network Setting is not working, check your network conditions. Check the LAN cable and
make sure your router has DHCP turned on if you wish to use the Auto Setting.
If the Network Setting is not completed, network may not operate normally.
IP Auto Setting: Select it if there is a DHCP server on the local area network (LAN) via wired
connection, the TV will automatically be allocated an IP address. If you’re using a broadband
router or broadband modem that has a DHCP (Dynamic Host Configuration Protocol) server
function. The IP address will automatically be determined.
IP Manual Setting: Select it if there is no DHCP server on the network and you want to set the IP
address manually.
NOTE
For more information about NetCast setup and trou-
bleshooting, visit http://lgknowledgebase.com.
Search for NetCast.
Use a standard LAN cable with this TV. Cat5
or better with a RJ45 connector.
Many network connection problems during set
up can often be fixed by re-setting the router
or modem. After connecting the player to the
home network, quickly power off and/or dis-
connect the power cable of the home network
router or cable modem. Then power on and/or
connect the power cable again.
Depending on the internet service provider
(ISP), the number of devices that can receive
internet service may be limited by the applica-
ble terms of service. For details, contact your
ISP.
LG is not responsible for any malfunction of
the TV and/or the internet connection feature
due to communication errors/malfunctions
associated with your broadband internet con-
nection, or other connected equipment.
LG is not responsible for problems within your
internet connection.
Some content available through the network
connection may not be compatible with the TV.
If you have questions about such content,
please contact the producer of the content.
You may experience undesired results if the
network connection speed does not meet the
requirements of the content being accessed.
Some internet connection operations may not
be possible due to certain restrictions set by
the Internet service provider (ISP) supplying
your broadband Internet connection.
Any fees charged by an ISP including, without
limitation, connection charges are your respon-
sibility.
A 10 Base-T or 100 Base-TX LAN port is
required for connection to this TV. If your internet
service does not allow for such a connection,
you will not be able to connect the TV.
A DSL modem is required to use DSL service
and a cable modem is required to use cable
modem service. Depending on the access
method of and subscriber agreement with your
ISP, you may not be able to use the internet
connection feature contained in this TV or you
may be limited to the number of devices you
can connect at the same time. (If your ISP lim-
its sub-scription to one device, this TV may not
be allowed to connect when a PC is already
connected.)
The use of a “Router” may not be allowed or its
usage may be limited depending on the poli-
cies and restrictions of your ISP. For details,
contact your ISP directly.
The wireless network operates at 2.4 GHz
radio frequencies that are also used by other
household devices such as cordless tele-
phone, Bluetooth® devices, microwave oven,
and can be affected by interference from them.
It can be interrupted by the device using 5 GHz
radio frequencies. It is same device with LG
wireless media box, cordless telephone, other
Wi-Fi device.
It may decrease the service speed using
Wireless network by surrounding wireless con-
dition.
Turn off all unused network equipment in your
local home network. Some devices may gener-
ate network traffic.
In some instances, placing the access point or
wireless router higher up away from the floor
may improve the reception.
The reception quality over wireless depends
on many factors such as type of the access
point, distance between the TV and access
point, and the location of the TV.
14
ENGLISH
NOTE
When connecting internet through the wired/
wireless sharing machine, it may interrupt the
connection because of the use limitation and
confirmation of service company.
To connect wireless AP, an AP that supports
the wireless connection is necessary, and the
wireless connection function of the AP needs
to be activated. Please enquire to the AP sup-
plier for the possibility of AP wireless connec-
tions.
Please verify the security settings of AP SSID
for wireless AP connection, and enquire to the
AP supplier for the AP SSID security settings.
The TV can become slower or malfunction with
wrong settings of network equipments (wired/
wireless router, hub, etc). Please install cor-
rectly by referring to the manual of the equip-
ment, and set the network.
►When AP is set to include 802.11n, and if
Encryption is designated as WEP(64/128bit) or
WPA(TKIP/AES), the connection may not be
possible.
►There may be different connection methods
according to the AP manufacturers.
NETWORK
h}GpuY
puG[
USB IN 1
USB IN 2
The LG Wireless LAN for Broadband/DLNA Adaptor, allows the TV to connect to a wireless lan
network.
The network configuration and connection method may vary depending on the equipment in use and
the network environment. Refer to the setup instructions supplied with your access point or wireless
router for detailed connection steps and network settings.
Wireless Network Connection
1
Connect the “LG Wireless LAN for Broadband/DLNA
Adaptorto the USB IN 1 or USB IN 2 jack on the TV.
2
Select Network Settingin the NETWORK menu.
After connecting, you can use the NetCast menu.
NOTE
For enjoying pictures, music, or video stored in the PC using the router, the use of wired port in the router is
recommended.
When the wireless port of the router is used, there may be restrictions for some functions.
15
ENGLISH
Wireless Network Setup
6
Scan the all available AP (Access
Point) or wireless routers within range
and display them as a list.
7
Select an AP (Access Point) or
wireless router on the list.
(If your AP is locked, insert the
security key of AP).
8
Input the security key of AP.
1
Select NETWORK.
2
Select Network Setting.
3
Select Wireless.
4
If you already set Network Setting:
Select Resetting.
The new connection settings resets
the current network settings.
5
Select Setting from the AP list.
Select the wireless network setting type.
Select the wireless network setting type
Setting from the AP list
Simple setting (WPS-button mode)
Setting Ad-hoc network
Next
9
Repeat step 4-5 on P.12.
Inserting SSID
Insert the SSID of AP.
If your AP is locked
If you already set the
Network Setting
Previous setting value exists. Do
you want to connect with the
previous setting?
OK
Resetting
Next
NETWORK
OK
Move
Network Setting : Wired
• Network Status : Internet is connected
Legal Notice
Network Setting : Wired
Network Type
Wired network is recommended
Wired
Wireless
Exit
Exit
Previous
Selecting AP
Next
Select AP you want to connect.
Page 1/1
IPTIME
iptime
ASW
Network1
Connecting with PIN mode
Access Point
Search
Network Setting
Select the IP setting mode.
IP Mode
◄ IP Auto Setting ►
IP Address 255 . 255 . 0 . 0
Subnet Mask
255 . 255 . 0 . 0
Gateway 255 . 255 . 0 . 0
DNS Server 255 . 255 . 0 . 0
OK
Exit
Previous
Previous Exit
OK
Cancel
Exit
Prev.
Insert 1~32 ASCII characters.
@./
ghi
pqrs
abc
jkl
tuv
def
mno
wxyz
#+-
aA1
1
4
7
2
5
8
0
9
3
6
^
^
Appeared when wired and wireless
are simultaneously connected.
16
ENGLISH
NETWORK
If you want to connect the AP (Access Point) or router with PIN, use this feature.
When a security code is already set
PIN (Personal Identification Number)
PIN number is the unique 8 digit number
of the dongle.
Connecting with PIN mode
Insert PIN number at the AP webpage and
press ‘Connect’ button.
PIN NUMBER : 12345670
Connect
For more information, check the AP manual.
Next
2
RED
Connect the acccess point with PIN
mode.
4
Select Connect.
1
Repeat step 1-7 on P.15.
5
Repeat step 4-5 on P.12.
3
You can see the Network ID and Security Key
on your TV screen.
Enter the PIN number to your device.
Selecting AP
Next
Select AP you want to connect.
Page 1/1
IPTIME
iptime
ASW
Network1
Connecting with PIN mode
Access Point
Search
Exit
Previous
Exit
Previous
If your access point or wireless router that supports PIN or WPS (Wi-Fi Protected Setup), it’s available
to use your access point or wireless router within 120 counts. You do not need to know the access
point name (SSID: Service Set Identifier) and security code of your access point or wireless router.
Simple setting (WPS-button mode)
Press WPS mode button of AP and press ‘Connect’ button.
Connect
Caution: Check if WPS mode button is available for your AP.
Next
1
Repeat step 1-4 on P.15.
2
Select Simple setting (WPS-button mode).
3
Select Connect.
Select the wireless network setting type.
Setting from the AP list
Simple setting(WPS-button mode)
Setting Ad-hoc network
Next
Exit
Previous
Exit
Previous
4
Repeat step 4-5 on P.12.
17
ENGLISH
This is the method of communicating directly with the machine to communicate without AP.
This is the same as connecting two PCs with a cross cable.
Ad-hoc Mode
Select the wireless network setting type.
Setting from the AP list
Simple setting (WPS-button mode)
Setting Ad-hoc network
Next
1
Repeat step 1-3 on P.15 .
Setting Ad-hoc network
Features using exiting network can be unavailable. Do you
want to change network connection?
Next
OK Cancel
Setting Ad-hoc network
Insert the setting information into the device.
Next
Network ID(SSID) : LGTV10
Security Key : 1111111111
Changing the setting information.
Connect
Exit
Previous
Exit
Previous
Exit
Previous
2
Select Setting Ad-hoc network.
3
Select OK.
4
Select Connect to connect Ad-hoc network.
You can see the Network ID and Security Key on your
TV screen.
Enter this Network ID and Security Key to your device.
If a network may not operate, change the setting
information using the RED button.
Network Setting
Insert the IP address.
IP Mode IP Manual Setting
IP Address 192 . 168 . 0 . 10
Subnet Mask
255 . 255 . 255 . 0
Gateway 192 . 168 . 0 . 1
DNS Server 255 . 255 . 0 . 0
Previous
OK
Exit
Network Status
Ad-hoc network is connected.
(LGTV10)
Mac Address : 00:00:13:64:23:01
IP Address : 10.19.152.115
Subnet Mask : 255.255.254.0
Gateway : 10.19.152.1
Setting Test Close
TV
Signal Strength
TV
TV
TV
Gateway
Setting Ad-hoc network
Insert the setting information into the device.
Network ID(SSID) : LGTV10
Security Key : 1111111111
Cancel
Connecting the Ad-hoc network
PC Setting
Internet Protocol(TCP/IP) of PC needs to be set
manually.
IP address, Subnet Mask, and default Gateway
can be set with your own discretion.
i.e) IP address: 192.168.0.1 / Subnet Mask:
255.255.255.0 / default Gateway: 192.168.0.10
TV Setting
Verify IP address and gateway of PC.
Input Gateway address of PC to IP Address, and
IP Address of PC to Gateway, and select OK.
i.e) IP address: 192.168.0.10 / Subnet Mask:
255.255.255.0 / default Gateway: 192.168.0.1
Example of the PC setting that
supports a wireless network
1. Find a wireless network device
in your PC.
2. Select LGTV10 that appears in
the list. (Select the same name
as the network ID that appears
on your TV screen.)
3. Type 1111111111 in the Inserting
the security key dialog.
(Type the security key that
appears on your TV screen.)
5
Insert the IP address.
6
Network setting is
completed.
Select Close.
18
ENGLISH
NETCAST
NETCAST MENU
1
Select NETCAST menu option.
2
Enjoy the Weather info, Movie Online or Photo Album.
These services are provided by separate Content Provider.
Please visit the content providers web site for specific information on their services. (But, some content
manual maybe not provide depending on Content Provider).
NetCast menu source can differ by country.
• Press the RED button to select Weather of area.
• Press the EXIT button to return to normal TV viewing.
Photo
Album
Movie
Online
Weather
info
NOTE
The videos list searched from the TV may different with the list searched from a web browser on
PC.
The settings of this TV do not affect the Movie Online’s playback quality.
The playback videos may be paused, stopped or buffering occurring often depending on your
broadband speed.
We recommend a minimum connection speed of 1.5 Mbps. For the best playback condition, a con-
nection speed of 4.0 Mbps is required. Sometimes your broadband speed varies based on your
ISP’s network conditions. Contact your ISP if you have problems maintaining a fast connection that
is reliable, or if you want to increase your connection speed. Many ISPs offer a variety of broadband
speed options.
To view the owner’s manual that provided by the Content Provider, visit our website at http://www.lg.com.
For service that requires log in, join the applicable service on the website using the PC and log in through
the TV to enjoy various additional functionalities.
When you set the city you want with Setup by pressing the red button, the background of NetCast will be
set to the weather of the selected city.
If there is no user action 2 minutes following freezing image or video on screen, the screensaver will acti-
vate itself preventing fixed image remaining on screen.
19
ENGLISH
WATCHING TV / PROGRAMME CONTROL
ANTENNA
IN
ANTENNA
IN
ANTENNA CONNECTION
For optimum picture quality, adjust antenna direction.
An antenna cable and converter are not supplied.
To prevent damage do not connect to the mains outlet until all connections are made between the
devices.
Multi-family Dwellings/Apartments
(Connect to wall antenna socket)
Single-family Dwellings /Houses
(Connect to wall jack for outdoor antenna)
Outdoor
Antenna
(VHF, UHF)
Wall
Antenna
Socket
RF Coaxial Wire (75
)
Antenna
UHF
Signal
Amplifier
VHF
In poor signal areas, to achieve better picture quality it may be necessary to install a signal amplifier
to the antenna as shown above.
If signal needs to be split for two TVs, use an antenna signal splitter for connection.
20
ENGLISH
WATCHING TV / PROGRAMME CONTROL
REMOTE CONTROL KEY FUNCTION
When using the remote control, aim it at the remote control sensor on the TV.
In some countries, some remote control keys may not work.
1
2
3
4
5
6
7
8
POWER
Switches the TV on from standby or off to standby
VOLUME UP / DOWN
Adjusts the volume.
MENU
Select a menu.
Clears all on-screen displays and returns to TV
viewing from any menu.
THUMBSTICK(Up / Down / Left / Right)
Allows you to navigate the on-screen menus and
adjust the system settings to your preference.
OK
Accepts your selection or displays the current mode
INPUT
External input mode rotate in regular sequence.
Switches the TV on from standby.
Q. VIEW
Returns to the previously viewed programme.
PROGRAMME UP/DOWN
Selects a programme.
Q. MENU
Select the desired quick menu source.
Installing Batteries
Open the battery compartment cover on the back and
install the batteries matching correct polarity (+with
+,-with -).
Install two 1.5 V AAA batteries. Do not mix old or used
batteries with new ones.
Close cover.
To remove the batteries, perform the installation a
actions in reverse
AV MODE INPUTENERGY
SAVING
1 2 ABC 3 DEF
4
GHI
5
JKL
6
MNO
7
PQRS
8 TUV
0
9
WXYZ
BACK
EXIT
OK
LIST
Q.VIEW
MENU
Q.MENU
FREEZE
P
A
G
E
FAV
RATIO
MUTE
MARK
DELETE
CHAR/NUM
P
TV
LIGHT
AV MODE INPUTENERGY
1
1
2
4
5
6
7
8
3
  • Page 1 1
  • Page 2 2
  • Page 3 3
  • Page 4 4
  • Page 5 5
  • Page 6 6
  • Page 7 7
  • Page 8 8
  • Page 9 9
  • Page 10 10
  • Page 11 11
  • Page 12 12
  • Page 13 13
  • Page 14 14
  • Page 15 15
  • Page 16 16
  • Page 17 17
  • Page 18 18
  • Page 19 19
  • Page 20 20
  • Page 21 21
  • Page 22 22
  • Page 23 23
  • Page 24 24
  • Page 25 25
  • Page 26 26
  • Page 27 27
  • Page 28 28

LG 60PK950 Owner's manual

Category
LCD TVs
Type
Owner's manual

The LG 60PK950 plasma TV offers a range of features to enhance your viewing experience. Connect to the internet via LAN or wirelessly with the wireless media box to enjoy a variety of online content, including movies, TV shows, music, and games. With built-in Wi-Fi, you can also connect to your home network to access media files stored on your PC or other DLNA-compatible devices.

Ask a question and I''ll find the answer in the document

Finding information in a document is now easier with AI