Page is loading ...

Showdown Troller
DIGITAL FISH FINDER
User Manual
www.MarCumtech.com
Troller 2.0 Combo Troller 2.0
Items sold separately

www.MarCumtech.com
- 2 -
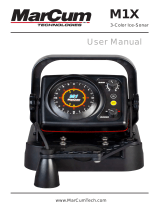
About Your New Showdown Troller 2.0 Handheld Fish Finder
Your new Showdown Troller 2.0 Digital Fish Finder is a palm-sized sonar device with full size
performance. While most often used in ice fishing applications to quickly “troll” from hole to hole,
it is equally at home in open water where you can use it to shoot through your canoe or kayak in
order to find fish and the correct depth. The ultimate in portability is matched to Showdown’s
proven Crystal-Quick® vertical display. Simply turn on your Showdown Troller, and immediately
begin observing the action below. The Showdown’s Auto Depth Range feature immediately locks
on to the proper depth range, while also displaying digital depth at all times.
Standard features included in the Showdown Ice Troller 2.0 are:
25-level noise sensitivity
10-level noise/interference rejection
Ice mode
Depth measurement in Standard or Metric
5 or 10 foot bottom lock zoom
Battery status display
Getting Started
Your Showdown Troller 2.0 was purchased in one of two configurations -- either as a stand-
alone system, or as a Combo, with a soft pack, shuttle and 12- volt battery.
If you purchased the Showdown Troller 2.0 as a stand-alone, it comes with the following:
Showdown Troller 2.0 Handheld sonar Unit
6-foot transducer / power cable and 200 kHz - 20 Degree transducer
Neck Lanyard
User’s Manual
If you purchased the Showdown Troller 2.0 as a Combo, it comes with the above items as well
as the following:
Soft Pack, Battery Box/Base, Gimbal mount/slide-on bracket, 12-volt battery, Wiring harness,
Battery charger, Transducer arm, Transducer stop
Your new Showdown Troller Digital Fish Finder runs on either 6 AA batteries
(not included) or the optional 12-volt rechargeable battery. To use it with AA batteries, open
the battery compartment located in the back of the unit and insert 6AA batteries into the
battery compartment and replace the cover.
To further set your Troller up, take one looped end of the neck lanyard and feed it through the
neck lanyard slot located on the “bottom” on the Troller unit. Take the other looped end and pass
it through the loop that has been fed through the slot to secure the lanyard to the Troller unit.
Finally, simply secure the plug on the 6’ transducer cord in to the power receptacle on the back
of the unit and your Showdown Troller is now ready to be used. The 6AA batteries will power
your Showdown Troller for up to 12 hours of continuous use.
12-Volt Rechargeable Battery Option
You may have purchased your Troller as part of the Combo Package, or you may have
purchased it alone and have also bought the Performance Pack. Either of these options will
allow you to power your Troller from a recharge- able 12-volt battery. If you have purchased the
Troller 2.0 as a stand-alone, you should consider getting a Performance Pack and 12-volt
battery to add to the unit’s versatility.
With either the Combo Pack or the Performance Pack, to power your Troller off the 12-volt
battery you simply plug the 12V “pig-tail” lead that is part of the transducer cable into the wiring
harness that is attached to the battery. Make sure that the both leads of the wiring harness are
slid on to the terminals of your battery, red to red, black to black.

www.MarCumtech.com
- 3 -
The Troller system can be placed in and removed from the pack/shuttle with ease by using the
Quick-Slide bracket that comes with the Performance Pack and Combo Pack. Feel free to keep
AA batteries in place while using the 12-volt battery—when you are connected to the big
battery, you will be using current from the big battery. Should you choose to go on a “scouting
mission”, you can quickly disconnect the pigtail connection to return to running on AA battery
power.
Battery Charging
Your Combo Pack or Performance Pack comes with a 3-stage battery charger. This style of
charger has proven to be the most effective and easiest to use of all charging systems available.
Because this is a 3-stage charger, there is no danger of overcharging your battery. When
properly cared for, a sealed lead acid battery will last for at least a couple of years. Batteries are
made to be used, and they need to be used to make the most of them. The most important thing
you can do is to promptly recharge your battery after each use. Not charging your battery
immediately after use is the number one thing that leads to battery failure.
For safety reasons, it is recommended that you place your system on a flat hard surface like
cement or tile when charging it, away from any flammable materials. Be sure to disconnect the
charger from the wall when not in use and avoiding leaving your battery hooked up to the
charger for extended periods of time.
When you get home from a trip, put your battery on charge right away, and leave it there
overnight, or for around 8-12 hours. Likewise, on the night before you go ice fishing put it on the
charger again to ensure a charge. Again, there is no danger of overcharging your battery. We
often talk to people who hesitate to charge their battery after each use for fear that the battery
will develop a “memory” and this will lead to a shortened run time—THIS IS FALSE!!! ALWAYS
CHARGE YOUR BATTERY AFTER EVERY USE!!! Be sure to use the charger that came with
your system, or a similar one that is between .5 amp and 1 amp. Using a larger charger, like you
would use on a car, truck, RV, or boat is likely to cause damage to the battery. To charge, simply
couple the end of the charger with the end of the wiriness harness. It is normal for a green light
to appear on the charger at this time. It is also normal for the light on the charger to be green if it
is just plugged into the wall. When it is plugged into the wall and battery, you will see a red LED
light appear on the charger. If the light is red, the battery is being charged. When your battery is
fully charged, this red light should change to green. If it is time to go fish and the light has not
turned green, go fish and try to allow a longer charging period next time.
Showdown Troller Features
The Showdown’s straight forward control panel is designed to let you concentrate on
fishing. Most settings work by first activating the function itself (ex: press SENS to trigger
sensitivity adjustment), then simply press the UP or DOWN keys to adjust levels.
POWER ON— To turn the Showdown Troller POWER to ON, press and hold POWER key for
two seconds. The unit will beep, and a message will appear briefly at the bottom of the
screen—this message indicates which software edition that your system is equipped with, and
whether ICE MODE is on or off. (See below to activate ICE MODE). It is normal to hear a
“ticking” sound coming from the transducer whenever the Troller is operating.
POWER OFF— To turn the Showdown Troller POWER to OFF, press and hold POWER for two
seconds. Showdown Troller automatically preserves your sonar settings the next time you
activate unit.
BACKLIGHT— To turn backlight on, turn Showdown Troller POWER ON, then press POWER
key again (do not hold key down). To turn backlight off, press POWER momentarily again (do
not hold button down).

www.MarCumtech.com
- 4 -
SIMULATOR mode— With Showdown Troller POWER OFF, enter SIMULATOR mode by
pressing and holding POWER key for 5 seconds. “SI” will appear on the bottom of the screen,
indicating you are in SIMULATOR mode. SIMULATOR mode shows how the bottom, a lure and
fish would appear on the screen if you were fishing in 32’ of water. To exit SIMULATOR mode,
turn the Showdown Troller POWER to OFF, then turn unit back ON. While in SIMULATOR mode,
it is easy to experiment with the various settings to see how they work and what effect they have
on your display. While in SIMULATOR mode, you will not hear the “ticking” sound coming from
the transducer.
ICE MODE— Your Showdown Troller sonar offers exclusive ICE MODE, a feature unique to
Showdown sonar units, which allows for seamless operation in the coldest conditions. With ICE
MODE active, Showdown Troller triggers an internal LCD heater that keeps the liquid crystals
moving at their normal super high speeds, regardless of sub-freezing temperature. This means
that anglers no longer have to worry about their sonar “slowing down” due to freezing liquid
crystals. While this feature is called “Ice Mode”, you may find that your Showdown performs
better under a wide variety of conditions when in “ICE” mode. The extra amount of power used
to operate the LCD heater is insignificant.
NOTE: If your Showdown Troller is left in extreme cold for an extended time period with the
POWER turned OFF, allow one to two minutes for the Ice Mode LCD heater to warm the crystals
sufficiently, after POWER has been turned ON, and ICE Mode has been activated. After the ICE
Mode LCD heater has been running for an extended period, it is perfectly normal for the
Showdown Troller power-head to feel warm.
TO INITIATE ICE MODE, simply press the UP and DOWN buttons simultaneously. You will now
see the message “ICE ON” flash briefly at the bottom of the screen. The internal LCD heater is
now activated. To exit ICE mode and return Showdown Troller to normal operating mode, press
the UP and DOWN keys simultaneously. The message “ICE OFF” will now flash briefly at the
bottom of the screen.
SENSITIVITY— The Showdown Troller is a highly sensitive sonar unit capable of reading the
tiniest of solid objects below. It features a 25-level adjustable Sensitivity function with surface
clutter elimination. Ideally, Sensitivity should be set at the lowest level possible to still view your
lure and surrounding fi while at the same time “tuning out” excessive clutter in the water column.
Clutter can make reading the sonar screen more difficult. Clutter can be caused by any number
of suspended items, including algae, zooplankton, tiny bubbles, and other particles.
If you’re seeing too much clutter, simply decrease the Sensitivity level until the clutter
disappears. Conversely, if you’re not reading your lure directly below the transducer, consider
increasing the Sensitivity level. In most cases, you will have the best performance with the
Sensitivity set between 5 and 10. To adjust Showdown Troller SENSITIVITY, press the SENS/
ZOOM button. The “SENS” indicator will appear at the lower left of view-screen, along with a
number that indicates the Sensitivity setting (0 to 25) at the bottom of the screen. With the SENS
indicator activated, press the UP or DOWN key to increase or decrease sonar SENSITIVITY to
the desired level.
ZOOM—The Troller has a bottom lock zoom feature that allows the user to have a close-up look
at the bottom 5 or 10 feet of the water column. To activate the bottom- lock zoom, press and hold
the SENS/ZOOM button for approximately 4 seconds, and the display will change to show the
bottom 10 feet of the water column. Press and hold the button again, and the display will now
show the bottom 5 feet of the water column. To exit ZOOM, press and hold the button again, and
you will be back to full water column view.

www.MarCumtech.com
- 5 -
RANGE— The Showdown Troller is equipped with 5-separate depth ranges—20, 40, 60, 80,
and 120’. Regardless of the manual depth range setting, Showdown Troller will always display
digital depth down to 120’, even if bottom is deeper than the bottom limit of your current RANGE
setting.
AUTO RANGE— In Auto Range mode, Showdown Troller will automatically lock into the depth
range appropriate to the depth of the water. For instance, in 32-feet of water, Showdown Troller
will automatically lock in at the 40-foot depth range. Auto Range allows you to simply turn on
the power and begin fishing. Your Ice Troller is in Auto Range Mode when you turn it on.
MANUAL RANGE— To manually adjust the Troller’s depth range, press the RANGE/METRIC
key. This will cause the digital depth markers to flash on-and-off, indicating that the sonar has
switched from AUTO RANGE mode to MANUAL RANGE mode. While the display is flashing
press either the UP or DOWN key to toggle between depth ranges—20-FT, 40-FT, 60-FT, 80-FT,
120FT, Pressing UP moves RANGE to the next shallower depth zone; DOWN moves to the next
deeper zone. To go back to Auto Range, press the RANGE/ METRIC key, then press the UP key
(moving Range to the next shallower setting) until the Range passes the 20-foot range by one
step. At this point, you see a flashing “A” icon instead of the FEET indicator. To return to manual
range, simply press RANGE/ METRIC again, and scroll DOWN to the desired range.
METRIC— To change your display to read in meters rather than feet, press and hold the
RANGE/METRIC for approximately 4 seconds. When in metric mode, all depth measurements,
including zoom functions, will be displayed in meters. Repeat this process to return to
measurements in feet.
NOISE (Interference Rejection) — The unit’s Noise Rejection feature allows you to use your
Showdown Troller in close proximity to other sonar units, trolling motors, and other electronic
devices without experiencing excessive signal interference. A ten (10) level Noise Rejection
function allows you to adjust to a wide range of rejection levels. If “noise interference” occurs,
increase the Noise Rejection level until you effectively eliminate the signal interference. To adjust
the Troller’s NOISE Rejection control, simply press the NOISE/BATT button once. The message
“noi” will start to blink at the bottom of the screen, followed by a number. This number indicates
the level of NOISE rejection you are at. Pressing the UP or DOWN button at this time will
change this number and your level of noise rejection. Continue to adjust until interference is
eliminated. After approximately 5-seconds, all noise rejection data will disappear from the
screen, but still be active.
BATTERY STATUS— Press and hold the NOISE/BATT button for approximately 4 seconds and
your battery status will appear, reflected in a percentage of 0-100 at the bottom of the display.
This status indicator will disappear after a few seconds.
Other Showdown Troller Features
Backlight— Your Showdown Troller offers a warm “nightglow” backlight that accentuates the
pixels in the display. The backlight can be turned on or off by briefly pressing the POWER button
after unit is ON.
Digital Depth— The digital depth display on the Showdown Troller sonar provides a quick and
easy way to determine depth. Digital Depth is always displayed in the bottom of the display. In
addition, the digital depth scale indices are shown to the left of the display area for quickly
determining the depth of fish or your lure.
Low Battery Warning— When battery power reaches very low levels, a low battery indicator
will appear and flash at the top right of the display. An audible beep will also sound every 30

www.MarCumtech.com
- 6 -
seconds. This signifies that it is time to replace the 6 AA batteries, or recharge the 12-volt
battery.
“Last Settings” Memory— Your Showdown Troller automatically remembers the settings you
used last. So, when it is turned OFF and then ON again, your previous settings will be preserved
and active.
Tips for Using Your Showdown Troller
Setting up the transducer— When placing the Showdown Troller Transducer in an ice- hole or
over the side of a watercraft, the transducer will automatically level itself—accurately displaying
the water depth and other underwater features like fish and weeds.
When using the transducer to “shoot through” the bottom of a canoe, kayak or other watercraft,
be sure that the bottom of the transducer is level before attempting to shoot through, so a
positive bottom reading can be seen. Many anglers successfully shoot through the hull of their
canoe or kayak by placing a wet towel on the floor of their boat, then placing the transducer on
top of that. When Ice-Fishing, we recommend having transducer down the least amount
possible. The Showdown Ice Troller puts out enough power that in most cases it is not
necessary to have your transducer down more than a few inches below the water line to get a
good reading. When the ice thickness is over two feet, it may be necessary to have your
transducerset farther down. Remember--the less transducer cable you have out, the easier it is
to pull it out of the water when bringing in a fish or to move to a new location.
How to read the Showdown Troller sonar signals— The Showdown Troller displays the water
column in its natural state (vertically), rather than in a circular configuration. On the Showdown,
top is the surface, and bottom is bottom. Bottom appears as a dark solid bar above decreasingly
solid bars below. A thicker “bottom band” indicates a harder bottom composition, such as rock,
gravel or sand. A thinner band indicates a softer bottom.
Generally, a solid band that appears on the screen between the surface and bottom indicates
some form of aquatic life (game fish, baitfish, insects, plank- ton, etc.), or your lure. Thicker, or
more solid bands, imply larger objects, such as game fish. Stronger or denser objects return a
stronger signal back to the transducer than smaller objects.
At the same time, even a large fish may not return a strong signal until it swims directly beneath
your transducer. This is because the transducer emits a cone-shaped signal that increases in
diameter as the signal travels deeper. Therefore, not only will a fish appear to grow in size as it
travels beneath the transducer (the signal has become stronger), but it will also appear to be
swimming from deeper water to shallower water, even though this may not be the case at all. A
fish that’s swimming at 25 feet may not display at 25-feet until it passes directly beneath the
sonar transducer. That’s simply because the sonar signal travels further to return an echo from a
fish that’s off to the side than it does from a fish that's directly below.
How do I “see” my lure?
The best way to find your lure on the Showdown Troller screen is to simply drop it down to
bottom, then reel it up about a foot. You should see a single solid band appear above bottom to
signify your lure. If you do not see this, adjust the sonar Sensitivity by pressing the SENS/
ZOOM button and then the UP/DOWN keys (see SENSITVITY). Adjust sensitivity until you can
make out your lure even as you reel it up toward the surface or jig it up and down. Do not
increase sensitivity too much, however, as doing this may cause your Showdown Troller to
display excess “clutter” that makes following your lure and nearby fish more difficult.
Battery life and sonar run-time — Using 6AA battery power, up to 12 hours of continuous use
can be achieved.

www.MarCumtech.com
- 7 -
If using the optional 12-volt battery, you should get up to 30 hours of use between charges. To
avoid an unexpected shortage of power, always have a spare set of AA batteries with you. To
assure long battery life, and peak sonar performance, we recommend checking your 6AA
batteries often and charging your 12V battery after every use.
Will the Showdown Troller read through the ice?
Yes. This is a great way to save time while looking for a particular spot or depth. To receive a
sonar signal directly through the ice (without drilling a hole), first clear off any snow that may be
covering ice. Make sure that ice in the area is relatively “clear” ice without excessive bubbles or
frost pockets, which can deflect sonar signals. Pour about a cup of water on the spot, and
immediately rest the transducer on the standing water on the ice. If the surface of the ice is
rough or filled with air bubbles, drilling a 1” deep hole in the ice before checking the depth may
be necessary.
Caring For Your Showdown Troller
To keep your Showdown Troller running at optimal performance, we recommend the following:
Stow your Showdown Troller properly when not in use. Turn sonar power off and disconnect
Power plug from back of unit. Remove the AA batteries if storing for over 3 months. If using the
Performance Pack, slide the adjustable transducer arm back into the housing, and stow
transducer into the interior pocket. Close and secure soft case door with Velcro enclosure. Store
in cool (above 30°F, below 85°F), dry location whenever possible. If you use the Performance
pack with a 12-volt battery, recharge the battery after every use, and during prolonged storage
periods, recharge the battery every few months, and disconnect the charger from the wall and
the battery when not in use. These steps will maximize the life of your battery. To clean your
Showdown Troller periodically, use a mild dishwashing soap and a soft cloth, and gently clean
the Showdown Troller power head and view screen. DO NOT use window cleaner or
alcohol-based cleaning products—they may damage LCD screen and void your warranty.
Product Performance Specifications
Output: 200 kHz Transducer Angle: 20° Transmit Power: Up to 4000 watts peak-to-peak power
2-inch Target Separation Sensitivity Control: 25-level
Noise Rejection Control: 10-level anti-interference
Range Control: 5 depth ranges—20’, 40’, 60’, 80’, 120’ (Auto and Manual Settings) Ice Fishing
Mode: Activates LCD heater, and boosts gain Digital Depth Display Grayscale: 4-level Grayscale
WARRANTY
MarCum warranties this product to be free from defects in materials and workmanship for one
year from the date of purchase. This warranty applies to customers who properly complete the
online product registration form found on the MarCum Technologies Website: www.marcum-
tech.com/support .
MarCum Technologies will repair or replace any components that fail in normal use. Failures due
to abuse, misuse, unauthorized alteration, modification, or repair are not covered. The warranty
is valid only for the original owner who purchases the unit from an authorized dealer. An original
sales receipt dated within the warranty period is required for all warranty claims.
To best serve our customers, MarCum Technologies has set a standardized battery warranty
policy. Battery warranty coverage requires a proof of purchase. Please see our website,
www.marcumtech.com/support for full details on warranty coverage.

www.MarCumtech.com
How to Obtain Service
If your system is malfunctioning, check the support section of our website. You may find that the
solution to your problem is something you can resolve yourself. If you need to send it in, there is
no need to contact our office. Getting repairs made is as simple as going to our website,
Marcumtech.com clicking the support tab and then filling out the MarCum Warranty Claim.
If your system is under warranty, be sure to attach a picture/scan of your proof of purchase with
date included. If your system is out of warranty, we have a flat rate fee that will cover the cost of
repairs, including parts and labor. You will find the non-warranty claim on our support site.
Once you have completed and submitted a claim, package the system as described on the
website and ship it to us.
Some people are more comfortable calling for shipping instructions. During peak ice season, we
sometimes receive a high volume of calls, making it impossible to get to all customers who
phone in. For this reason, strongly consider using the on-line forms at www.marcumtech.com/
support or the "Live Chat" option.
MarCum Technologies
ATTN: Service Dept.
3943 Quebec Ave N
Minneapolis, MN 55427
Please send your email inquiries to [email protected]
If you are unable to use email or internet, you may call us at 763-512-3987.
Our office hours are Monday – Friday, 8 – 4 Central Time.
International callers may use 888-778-1208.
The customer is responsible for shipping costs associated with returning the system to MarCum
Technologies. MarCum will pay for shipping the repaired system back to the customer while it is
still under warranty. All out of warranty services will be charged a fee for service and shipping
which must be paid in advance. The system should be securely packed and shipped “pre-paid
freight” and insured to MarCum Technologies. It is the customer’s full responsibility to track their
products sent out in the mail or other forms of delivery service. MarCum Technologies will not
be liable for packages lost in route to us. Unless specified otherwise, do not include batteries or
other accessories when returning the product for repair. MarCum Technologies will not be
responsible for lost or damaged accessories. Turnaround time can vary, on average it is about
1 week.
MarCum User Manuals are available for downloads from
www.MarCumtech.com
2021-0405
/