NewAge Products 63274 Operating instructions
- Category
- Wall & ceiling mounts accessories
- Type
- Operating instructions

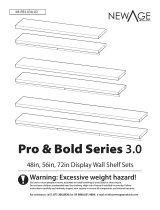
Warning: Excessive weight hazard!
Use two or more people to move, assemble or install shelving to avoid back or other injury.
Do not leave children unattended near the shelving. High risk of injury if installed incorrectly: Follow
instructions carefully and routinely inspect your system to ensure all components are fastened securely.
48in & 72in Display Wall Shelf Set
Bold Series 3.0

2
Parts Supplied
Unpacking
• Begin by placing the package on a covered at surface.
• Remove all cardboard, packaging material and clear plastic bags.
• Dispose / recycle all packaging materials.
• Verify all the contents in the box and gather the required tools.
Lock Nut
(1/4”)
Wall Shelf Light Valance
Hex Bolt
(1/4” dia x 5/8”)
www.newageproducts.com
Thank you for purchasing a
NewAge Product!
Please give us a call or visit online if
you have any questions.
Call 1.877.306.8930;
for UK 0800.031.4069;
email at info@newageproducts.com
Fender Washer
(1/2” OD)
Washer
(1/4” ID)
Lag Bolt (1/4”dia x 3”)
Lag Screw
(1/4” dia x 2-1/2”)
Phillips Bolt
(M5 x 12mm)
Part Description 48in QTY 72in QTY
Wall Shelf
2 2
Light Valence
2 3
Hardware
1/4" x 5/8" Hex Bolt
4 4
1/4" Lock Nut
4 4
M5 x 12mm (Phillips Bolt)
4 6
1/4" x 2-1/2" Lag Screw
6 6
1/4" ID x 0.9" OD Fender Washer
6 6
1/4" ID x 1/2" OD Washer
8 8

3
Manufacturer Warranty Limited Lifetime
1. Service calls to correct the installation of any NewAge products or to instruct you how to use or install them.
2. Damage resulting from improper handling, or products damaged by accident, misuse, abuse, re, ood, improper installation,
acts of God, neglect, corrosion, modication or mishandling.
3. Products damaged by improperly loading beyond the specied maximum weight capacity outlined in the instructions provided
with the product.
4. Repairs or replacement when your product is used in other than normal, single-family household use, such as a commercial
environment, or handled in anyway inconsistent with the installation instructions included with the product.
5. Cosmetic damage, including scratches, dings, dents or cracks in paint that do not aect the structural or functional capability
of the product.
6. Surfaces damaged due to chemical interaction resulting in corrosion of paint or metal.
7. Replacement parts for NewAge products outside Canada and the United States.
8. Loss of product contents due to theft, re, ood, accident or acts of God.
9. Shipping or freight fees to deliver replacement products or to return defective products.
10. Any labor costs during the limited warranty period.
When this product is installed, operated and maintained according to the instructions attached to or furnished with the product,
NewAge Products Inc. will replace the defective product or parts if the part fails as a result of defective materials or workmanship
for the Lifetime of the product.
NEWAGE PRODUCTS INC. WILL NOT PAY FOR:
IMPLIED WARRANTIES, INCLUDING TO THE EXTENT APPLICABLE WARRANTIES OF MERCHANTABILITY OR FITNESS FOR A PARTICULAR
PURPOSE, ARE EXCLUDED TO THE EXTENT LEGALLY PERMISSIBLE. ANY IMPLIED WARRANTIES THAT MAY BE IMPOSED BY LAW ARE LIMITED
TO ONE YEAR, OR THE SHORTEST PERIOD ALLOWED BY LAW. SOME STATES AND PROVINCES DO NOT ALLOW LIMITATIONS OR EXCLUSIONS
ON HOW LONG AN IMPLIED WARRANTY OF MERCHANTABILITY OR FITNESS LASTS, SO THE ABOVE LIMITATIONS OR EXCLUSIONS MAY NOT
APPLY TO YOU. THIS WARRANTY GIVES YOU SPECIFIC LEGAL RIGHTS, AND YOU MAY ALSO HAVE OTHER RIGHTS WHICH VARY FROM STATE
TO STATE OR PROVINCE TO PROVINCE
DISCLAIMER OF IMPLIED WARRANTIES; LIMITATION OF REMEDIES
www.newageproducts.com
Tools Needed
Magnetic Leveler
Tape Measure
7/16” socket
Cordless Power Drill
Stud Finder
Pencil
7/16” & 1/2”
Socket Wrench
Ladder
Safety Glasses
3/16” Drill Bit

4
Align the bottom shelf with the bottom of the cabinet and insert the 1/4” Hex bolt and washer
through the mounting holes and tighten with a lock nut inside the cabinet. Repeat to the
opposite side.
Ensure there is 48in/72in between the Wall Cabinets / Lockers depending on your shelf size.
Weight Capacity
Display Shelf Installation:
48in / 72in
Parts Needed:
www.newageproducts.com
Lock Nut
(1/4”)
Washer
(1/4” ID)
2
1
250lbs
250lbs
WARNING:
Do not exceed the weight capacity of the wall shelves. Each Shelf has an evenly distributed weight capacity of
250lbs. Each Shelf must be secured between two Locker or Wall Cabinets and attached to the wall.
Hex Bolt
(1/4” dia x 5/8”)
Note: Cabinets must be installed before installing display shelves
Wall Shelf

5
Align the top of the shelf with the top of the Wall Cabinet / Locker and insert the 1/4” Hex bolt
and washer through the mounting holes and tighten with a lock nut. Repeat to the opposite
side.
Using a stud nder locate the wall studs and mark the location to drill in the Wall Shelf
slot holes.
Check and level before securing to Wall.
www.newageproducts.com
5
4
3
Note:
Refer to Installation Tips for
installing the top shelf upside down

6
7
Using two M5 Phillips bolts, screw the Light Valance into the Wall Shelf hex rivet. Repeat
for all remaning Light Valances.
Parts Needed:
6
1
Drill a pilot hole using a 3/16” drill bit. Using a 1/4” x 2-1/2” lag bolt, one 1/4” ID Fender
Washer and a 7/16” socket, bolt the Wall Shelf into the Stud. Repeat for remaning studs and
second shelf.
To install the Top Shelf upside down, ip the shelf to where the top of the shelf is now facing
down. Insert the 1/4” Hex bolt and washer through the bottom mounting holes and tighten
with a lock nut inside the cabinet. Continue steps 3-5 to complete installation.
Fender Washer
(1/2” OD)
7/16” Socket
Lag Bolt (1/4”dia x 3”)
Lag Screw
(1/4” dia x 2-1/2”)
7/16” socket
M5 Bolt
(M5 x 12mm)
Parts Needed:
Installation Tips
Note:
The Top Shelf is capable of being installed upside down if desired.
Lock Nut
(1/4”)
Washer
(1/4” ID)
Hex Bolt
(1/4” dia x 5/8”)
Parts Needed:
Light Valance

ATTENTION: Risque de poids excessif!
Utilisez deux personnes ou plus pour déplacer, assembler ou installer les étagères an d'éviter tout risque de
blessure au dos ou autre.
Ne laissez pas les enfants sans surveillance près des étagères. Risque élevé de blessure en cas d'installation
incorrecte: suivez les instructions avec soin et inspectez régulièrement votre système pour vous assurer que
tous les composants sont bien xés.
Votre produit est-il endommager?
Avez vous besoin d’aide ou de pièces de rechange? Contactez NewAge Products a 1-877-306-8930; ou
Ne pas retourner au détaillant.
System de Tablettes Murale - 48po & 72po
SERIE BOLD 3.0
ARRÊT

2
Pièces fournies
Déballage
• Commencez par placer l’emballage sur une surface plane et
couverte.
• Enlevez tout le carton, le matériel d’emballage et les sacs en
plastique transparents.
• Éliminer / recycler tous les matériaux d’emballage.
• Vériez tout le contenu de la boîte et rassemblez les outils néces-
saires.
Contre-écrou
(1/4”)
Tablette Murale Cantonnière
Boulon Hexagonal
(1/4” dia x 5/8”)
www.newageproducts.com
Merci d’avoir acheté un pro-
duit NewAge!
S’il vous plaît appelez-nous ou visitez
en ligne si vous avez des questions.
Composez le 1.877.306.8930;
pour UK 0800.031.4069;
email à info@newageproducts.com
Rondelle pare-choc
(1/2” OD)
Rondelle
(1/4” ID)
Lag Bolt (1/4”dia x 3”)
Tire-fond
(1/4” dia x 2-1/2”)
Boulon à tête
Philips
(M5 x 12mm)
Description de la pièce
Quantité pour 48 po Quantité pour 72 po
Tablette Murale
2 2
Cantonnière
2 3
Quincaillerie
1/4” x 5/8” Boulons Hexagonale
4 4
1/4” Contre-écrou
4 4
M5 x 15mm(Boulon à tête Philips)
4 6
1/4” x 2-1/2” Tire-Fond
6 6
1/4”ID x 0.9” OD Rondelle pare-choc
6 6
1/4”ID x1/2” OD Rondelle
8 8

3
www.newageproducts.com
Niveau magnétique
7/16” Douille
7/16” & 1/2”
Clé à douille
Échelle
Lunettes de protection
Les outils nécessaires
Perceuse-visseuse
électrique
Localisateur
de montants
Crayon
Foret de 3/16”
Ruban à
measurer
Garantie à vie limitée du fabricant
1. Les appels de service pour corriger l’installation de tout produit NewAge ou pour vous montrer comment les utiliser ou les installer.
2. Les dommages causés par une manutention ou une expédition inadéquate du produit, ou des produits endommagés par un accident,
une mauvaise utilisation, un abus, un incendie, une inondation, une installation inadéquate, un cas fortuit, une négligence, la
corrosion, une modication ou une mauvaise manipulation.
3. Les produits endommagés en raison d’une charge supérieure au poids maximum précisé dans les instructions fournies avec le produit.
4. Les réparations ou le remplacement lorsque votre produit est utilisé pour un autre usage que celui d’un ménage unifamilial normal,
comme un milieu commercial ou d’une façon non conforme aux directives d’installation incluses avec le produit.
5. Les dommages cosmétiques, y compris les éraures, les marques, les entailles ou les ssures dans la peinture qui n’aectent pas la
capacité fonctionnelle ou structurelle du produit.
6. Les surfaces endommagées en raison d’une interaction chimique entraînant la corrosion de la peinture ou du métal.
7. Les pièces de rechange pour des produits NewAge à l’extérieur du Canada et des États-Unis.
8. La perte des produits y étant contenus en raison d’un vol, d’un incendie, d’une inondation, d’un accident ou de cas fortuits.
9. Les frais d’expédition ou de transport pour livrer les produits de rechange ou pour retourner des produits défectueux.
10. Tout coût de main-d’œuvre pendant la période de garantie limitée.
Lorsque ce produit est installé, utilisé et entretenu conformément aux instructions ci-jointes ou fournies avec le produit, NewAge
Products Inc. remplacera les pièces ou le produit défectueux advenant que ceux-ci découlent d’un défaut de matériel ou de
fabrication pendant la durée de vie du produit.
NEWAGE PRODUCTS INC. N’ASSUMERA PAS LES COÛTS SUIVANTS :
LES GARANTIES IMPLICITES, Y COMPRIS LES GARANTIES APPLICABLES DE QUALITÉ MARCHANDE OU DE CONVENANCE PRÉCISE, SONT EXCLUES DANS
LA LIMITE OÙ LA LOI LE PERMET. TOUTE GARANTIE IMPLICITE QUI POURRAIT ÊTRE IMPOSÉE PAR LA LOI DOIT SE LIMITER À UN AN, OU À LA PÉRIODE LA
PLUS COURTE PERMISE PAR LA LOI. CERTAINS ÉTATS AINSI QUE CERTAINES PROVINCES NE PERMETTENT PAS LES LIMITATIONS OU LES EXCLUSIONS SUR LA
DURÉE D’UNE GARANTIE IMPLICITE DE QUALITÉ MARCHANDE OU DE CONVENANCE PRÉCISE. PAR CONSÉQUENT, IL EST POSSIBLE QUE LES LIMITATIONS OU
EXCLUSIONS PRÉCITÉES NE S’APPLIQUENT PAS À VOUS. CETTE GARANTIE VOUS DONNE DES DROITS LÉGAUX PARTICULIERS ET VOUS POURRIEZ ÉGALEMENT
DISPOSER D’AUTRES DROITS VARIANT SELON L’ÉTAT OU LA PROVINCE.
EXONÉRATION DE GARANTIES IMPLICITES; LIMITATION DE RECOURS

4
Alignez la tablette inférieure avec le bas de l’armoire et insérez le boulon hexagonal 1/4 ”et
la rondelle dans les trous de montage et serrez à l’aide d’un écrou de blocage à l’intérieur de
l’armoire. Répétez pour le côté opposé.
Assurez-vous qu’il y a 48 pouces / 72 pouces entre les armoires / casiers muraux en fonction de
la taille de votre étagère.
Capacité de poids
Installation d’Étagère d’exposition:
48po / 72po
Pièces nécessaires:
www.newageproducts.com
Contre-ecrou
(1/4”)
Rondelle
(1/4” ID)
2
1
250lbs
250lbs
Attention:
Ne dépassez pas la capacité de poids des étagères murales. Chaque étagère a une capacité de poids
uniformément répartie de 250 lb. Chaque étagère doit être xée entre deux armoires vestiaires ou murales et
xée au mur.
Boulon Hexagonal
(1/4” dia x 5/8”)
Remarque: Les armoires doivent être installées avant l’installation des présentoirs
Tablette

5
Alignez le haut de l’étagère avec le haut de l’armoire murale / casier et insérez le boulon
hexagonal 1/4 ”et la rondelle dans les trous de montage et serrez à l’aide d’un écrou de
blocage. Répétez pour le côté opposé.
À l’aide d’un détecteur de montants, localisez les montants du mur et marquez
l’emplacement de perçage dans les trous des fentes de la tablette murale.
Vériez et nivelez-le avant de le xer au mur.
www.newageproducts.com
5
4
3
Attention:
Reportez-vous aux conseils d’installation pour
installer la tablette supérieure à l’envers

6
7
À l’aide de deux boulons Phillips M5, vissez la cantonnière dans le rivet hexagonal de
l’étagère murale. Répétez cette procédure pour toutes les cantonnières légères restantes.
6
1
Percez un avant-trou avec un foret de 3/16 ”. En utilisant un tire-fond de 1/4 ”x 2-1 / 2”, une
rondelle pare-choc de 1/4 ”et une douille de 7/16”, boulonnez la tablette murale dans le
montant. Répétez cette procédure pour les montants restants et la deuxième étagère.
À l’aide de deux boulons Phillips M5, vissez la cantonnière dans le rivet hexagonal de
l’étagère murale. Répétez cette procédure pour toutes les cantonnières légères restantes.
Rondelle pare-choc
(1/2” OD)
Douille 7/16”
Lag Bolt (1/4”dia x 3”)
Vis Tire-fond
(1/4” dia x 2-1/2”)
7/16” socket
Boulons M5
(M5 x 12mm)
Conseils d’installation
Remarque:
La tablette supérieure peut être installée à l’envers si vous le souhaitez.
Contre-ecrou
(1/4”)
Rondelle
(1/4” ID)
Boulons Hexagonal
(1/4” dia x 5/8”)
Pièces nécessaires:
Cantonnière
Pièces nécessaires:
Pièces nécessaires:
-
 1
1
-
 2
2
-
 3
3
-
 4
4
-
 5
5
-
 6
6
-
 7
7
-
 8
8
-
 9
9
-
 10
10
-
 11
11
-
 12
12
NewAge Products 63274 Operating instructions
- Category
- Wall & ceiling mounts accessories
- Type
- Operating instructions
Ask a question and I''ll find the answer in the document
Finding information in a document is now easier with AI
in other languages
- français: NewAge Products 63274 Mode d'emploi
Related papers
-
 NewAge Products 65884 Installation guide
-
 NewAge Products 50660 Owner's manual
-
 NewAge Products 65213 Installation guide
-
 NewAge Products 50512 Owner's manual
-
 NewAge Products 65013 Installation guide
-
 NewAge Products 65400 Installation guide
-
 NewAge Products 60000 User manual
-
 NewAge Products 60002 User guide
-
 NewAge Products 55989 Installation guide
-
NewAge Products 56397 User manual
Other documents
-
 SATELLITE MX3 Shelf Operating instructions
-
 Elrene 026865854282 Installation guide
-
Newage IM-OKC1.05A-06 User manual
-
 Newage 10-Outlet Power Strip User manual
-
Newage 66913 User manual
-
 Newage 56 User manual
-
ALTA Tilt User manual
-
Eclipse BI-FOLD Installation guide
-
ALTA BandLift User manual
-
 ALTA WINDOW FASHIONS Roller Skyline Valance Cornice User manual


