Page is loading ...

CPX
TM
3800
Power Amplifier
Owner’s Manual
CPX
®

Este símbolo tiene el propósito, de alertar al usuario de la presencia de “(voltaje) peligroso” sin aislamiento dentro de
la caja del producto y que puede tener una magnitud suficiente como para constituir riesgo de descarga eléctrica.
Este símbolo tiene el propósito de alertar al usario de la presencia de instruccones importantes sobre la operación y
mantenimiento en la información que viene con el producto.
PRECAUCION: Riesgo de descarga eléctrica ¡NO ABRIR!
PRECAUCION: Para disminuír el riesgo de descarga eléctrica, no abra la cubierta. No hay piezas útiles dentro. Deje todo
mantenimiento en manos del personal técnico cualificado.
ADVERTENCIA: Para evitar descargas eléctricas o peligro de incendio, no deje expuesto a la lluvia o humedad este apara-
to Antes de usar este aparato, Iea más advertencias en la guía de operación.
Intended to alert the user to the presence of uninsulated “dangerous voltage” within the product’s enclosure that
may be of sufficient magnitude to constitute a risk of electric shock to persons.
Intended to alert the user of the presence of important operating and maintenance (servicing) instructions in the lit-
erature accompanying the product.
CAUTION: Risk of electrical shock — DO NOT OPEN!
CAUTION:To reduce the risk of electric shock, do not remove cover. No user serviceable parts inside. Refer servicing to
qualified service personnel.
W
ARNING
:T
o prevent electrical shock or fir
e hazard, do not expose this appliance to rain or moisture. Before using this
appliance, read the operating guide for further warnings.
Ce symbole est utilisé dans ce manuel pour indiquer à l’utilisateur la présence d’une tension dangereuse pouvant être
d’amplitude suffisante pour constituer un risque de choc électrique.
Ce symbole est utilisé dans ce manuel pour indiquer à l’utilisateur qu’il ou qu’elle trouv
era d’importantes instructions
concernant l’utilisation et l’entretien de l’appareil dans le paragraphe signalé.
ATTENTION: Risques de choc électrique — NE PAS OUVRIR!
ATTENTION: Afin de réduire le risque de choc électrique, ne pas enlever le couvercle. Il ne se trouve à l’intérieur aucune
pièce pouvant être reparée par l’utilisateur. Confiez I’entretien et la réparation de l’appareil à un réparateur agréé.
AVERTISSEMENT:Afin de prévenir les risques de décharge électrique ou de feu, n’exposez pas cet appareil à la pluie ou
à l’humidité.Avant d’utiliser cet appareil, lisez attentivement les avertissements supplémentaires de ce manuel.
Dieses Symbol soll den Anwender vor unisolierten gefährlichen Spannungen innerhalb des Gehäuses warnen, die von
Ausr
eichender Stärke sind, um einen elektrischen Schlag verursachen zu können.
Dieses Symbol soll den Benutzer auf wichtige Instruktionen in der Bedienungsanleitung aufmerksam
machen,
die Handhabung und Wartung des Produkts betreffen.
V
ORSICHT
:
Risiko — Elektrischer Schlag! Nicht öffnen!
V
ORSICHT
:
Um das Risiko eines elektrischen Schlages zu vermeiden, nicht die Abdeckung enfernen. Es befinden sich keine
Teile darin, die vom Anwender repariert werden könnten. Reparaturen nur von qualifiziertem Fachpersonal durchführen
lassen.
ACHTUNG: Um einen elektrischen Schlag oder Feuergefahr zu vermeiden, sollte dieses Gerät nicht dem Regen oder
F
euchtigkeit ausgesetzt werden.Vor Inbetriebnahme unbedingt die Bedienungsanleitung lesen.

IMPORTANT SAFETY INSTRUCTIONS
WARNING: When using electrical products, basic cautions should always be followed, including the following:
1. Read these instructions.
2. Keep these instructions.
3. Heed all warnings.
4. Follow all instructions.
5. Do not use this apparatus near water.
6. Clean only with a dry cloth.
7. Do not block any of the ventilation openings. Install in accordance with manufacturer’s instructions.
8. Do not install near any heat sources such as radiators, heat registers, stoves or other apparatus (including amplifiers)
that produce heat.
9. Do not defeat the safety purpose of the polarized or grounding-type plug. A polarized plug has two blades with one
wider than the other. A grounding type plug has two blades and a third grounding plug. The wide blade or third prong is
provided for your safety. If the provided plug does not fit into your outlet, consult an electrician for replacement of the
obsolete outlet.
10. Protect the power cord from being walked on or pinched, particularly at plugs, convenience receptacles, and the point
they exit from the apparatus.
11. Only use attachments/accessories provided by the manufacturer.
12. Use only with a cart, stand, tripod, bracket, or table specified by the manufacturer, or sold with the apparatus. When a
cart is used, use caution when moving the cart/apparatus combination to avoid injury from tip-over.
13. Unplug this apparatus during lightning storms or when unused for long periods of time.
14. Refer all servicing to qualified service personnel. Servicing is required when the apparatus has been damaged in any
way, such as power-supply cord or plug is damaged, liquid has been spilled or objects have fallen into the apparatus,
the apparatus has been exposed to rain or moisture, does not operate normally, or has been dropped.
15. Never break off the ground pin. Write for our free booklet “Shock Hazard and Grounding.” Connect only to a power
supply of the type marked on the unit adjacent to the power supply cord.
16. If this product is to be mounted in an equipment rack, rear support should be provided.
17. Note for UK only: If the colors of the wires in the mains lead of this unit do not correspond with the terminals in your
plug‚ proceed as follows:
a) The wire that is colored green and yellow must be connected to the terminal that is marked by the letter E‚ the earth
symbol‚ colored green or colored green and yellow.
b) The wire that is colored blue must be connected to the terminal that is marked with the letter N or the color black.
c) The wire that is colored brown must be connected to the terminal that is marked with the letter L or the color red.
18. Exposure to extremely high noise levels may cause a permanent hearing loss. Individuals vary considerably in suscep-
tibility to noise-induced hearing loss, but nearly everyone will lose some hearing if exposed to sufficiently intense noise
for a sufficient time. The U.S. Government’s Occupational Safety and Health Administration (OSHA) has specified the
following permissible noise level exposures:
Duration Per Day In Hours Sound Level dBA, Slow Response
8 90
6 92
4 95
3 97
2 100
1 1⁄2 102
1 105
1⁄2 110
1⁄4 or less 115
According to OSHA, any exposure in excess of the above permissible limits could result in some hearing loss. Ear plugs or protectors to
the ear canals or over the ears must be worn when operating this amplification system in order to prevent a permanent hearing loss, if
exposure is in excess of the limits as set forth above. To ensure against potentially dangerous exposure to high sound pressure levels, it is
recommended that all persons exposed to equipment capable of producing high sound pressure levels such as this amplification system be
protected by hearing protectors while this unit is in operation.
SAVE THESE INSTRUCTIONS!

1
Save the carton and packing materi-
als! Should you ever need to ship the
unit, use only the original factory pack-
ing.
For replacement packaging, call Crest
Performance’s Customer Service
Department directly.
2
Read all documentation before
operating your equipment. Retain all
documentation for future reference.
3
Follow all instructions printed on
unit chassis for proper operation.
4
Never hold a power switch or cir-
cuit breaker in the "ON" position
if it won’t stay there by itself!
5
Do not use the unit if the electrical
power cord is frayed or broken.
The power supply cords should be
routed so that they are not likely to be
walked on or pinched by items placed
upon or against them.
6
Always operate the unit with the
AC ground wire connected to the
electrical system ground. Precautions
should be taken so that the means of
grounding of a piece of equipment is not
defeated.
7
Damage caused by connection to
improper AC voltage is not cov-
ered by any warranty. Mains voltage
must be correct and the same as that
printed on the rear of the unit.
8
Do not ground any hot (red) terminal.
Never connect a hot (red) output to
ground or to another hot (red) output!
9
Power down and disconnect units
from mains voltage before making
connections.
0
Do not drive the inputs with a
signal level greater than that
required to enable equipment to
reach full output.
¡
Do not run the output of any ampli-
fier channel back into another
channel’s input.
Do not parallel- or series-con-
nect an amplifier output with any
other amplifier output.
Crest Performance is not responsible for
damage to loudspeakers for any reason.
Ô
Do not connect the inputs or
outputs of amplifiers to any
other voltage source, such as a
battery, mains source or power supply,
regardless of whether the amplifier is
turned on or off.
£
Connecting amplifier outputs to
oscilloscopes or other test equip-
ment while the amplifier is in bridged
mono mode may damage both the
amplifier and test equipment!
¢
Do not spill water or other liquids
into or on the unit, or operate the
unit while standing in liquid.
ˆ
Do not block fan intake or exhaust
ports.
Do not operate equipment on
a surface or in an environment
which may impede the nor-
mal flow of air around the unit,
such as a bed, rug, weathersheet, carpet
or completely enclosed rack.
§
If the unit is used in an extremely
dusty or smoky environment the
unit should be periodically blown free
of foreign matter.
¶
Do not use the unit near stoves,
heat registers, radiators or other
heat-producing devices.
ƒ
The equipment power cord should
be unplugged from the outlet when
left unused for a long period of
time.
Service Information
Do not remove the cover!
Removing the cover will expose you to
potentially dangerous voltages. There are
no user-serviceable parts inside.
Equipment should be serviced by
qualified service personnel when:
A. The power supply cord or the plug has
been damaged.
B. The equipment has been exposed to rain.
C. The equipment does not appear to oper-
ate normally or exhibits a marked change
in performance.
D. The equipment has been dropped or the
enclosure damaged.
To obtain service:
contact your nearest Crest
Performance Service Center,
Distributor, Dealer or Crest
Performance at 601.486.2000 USA
or visit www.crest-performance.com
for additional information, email
techserve@crestaudio.com
This symbol is used to alert
the operator to follow important
procedures and precautions
detailed in documentation.
This symbol is used to warn opera-
tors that uninsulated “dangerous
voltages” are present within the
equipment enclosure that may
pose a risk of electric shock.
important precautions

p. 8
table of contents
1
2
3
4
5
6
7
how to use this manual
p.9
introduction
p.10
installation
p.11
unpacking
mounting
connecting power
cooling requirements
operating precautions
connecting inputs
connecting outputs
features overview
p.15
front panel
rear panel
operation modes
p.22
stereo
parallel
bridged mono
protection features
p.24
GCL™ Gain Comparator Limiting
IGM
™
impedance sensing
thermal protection
short circuit
DC voltage protection
turn on/off protection
AUTORAMP
™
signal control
safety
p.27
speaker protection
user responsibility
service and support
p.29
support
contact us
specifications
p.31
wire gauge charts
p.32
b
a
contents
appendices
CPX
TM
owner’s manual

p. 9
how to use this manual
1
conventions
terms
official Crest Performance features and
each indicator or control on the amplifier will appear as: terms
actions
specific actions or selections the user can execute will appear as: actions
tasks
are broken down into steps 1
2
3
warnings
indicators
tips
see
see—refers to other sections of the manual containing
supplementary information on the current topic or a related issue
note
note—supplementary feature information
Preferred methods.
Helpful hints.
Feature insights.
+
Procedures not to attempt.
Issues or hazards to keep in
mind when operating
the equipment.
a
What to look for on
the equipment display.
Alerts, indicators or
prompts that may appear.
®

p. 10
welcome
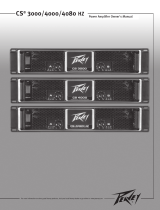
Congratulations on your purchase of the CPX 3800 Series, a power ampli-
fier designed for years of reliable, flawless operation under rigorous use.
This amplifier offers the sonic superiority and unsurpassed reliability for
which Crest Performance is famous while remaining surprisingly compact.
Advanced technology and extensive protection circuitry allow operation
with greater efficiency into difficult loads and power conditions. The GCL
(Gain Comparator Limiting)™ circuit ensures trouble-free operation into
loads as low as 2 ohms. The Gain Comparator Limiting circuit protects
drivers and ensures that sonic integrity is maintained even in extreme
overload conditions. The CPX 3800’s high-efficiency design uses tunnel-
cooled heat sinks and variable-speed DC fans. This cooling topology
maintains a lower overall operating temperature, resulting in longer
output transistor life. For your safety, read the important precautions
section, as well as input, output,and power connection sections.
Although the CPX Series amplifiers are quite simple to operate and are
housed in ultra-strong steel chassis, improper use can be dangerous.
This amplifier is very high powered and can put out high voltages and
sizable currents at frequencies up to 30 kHz. Always use safe operating
techniques when operating this amplifier.
For your safety,
read the important
precautions section,
as well as input,
output and power
connection sections.
a
CPX
TM
owner’s manual
introduction
2

p. 11
installation
2
unpacking
mounting
connecting
power
cooling
requirements
operating
precautions
connecting
inputs
connecting
outputs
/
what to do with the shipping carton
/
proper rack-mounting technique
/
required AC line voltages
/
keeping the amplifier cooled
/
preventing amplifier damage

CPX
TM
owner’s manual
p. 12
installation
2
unpacking
Upon unpacking, inspect the amplifier. If you find any damage, notify your supplier
immediately. Only the consignee may institute a claim with the carrier for damage
incurred during shipping. Be sure to save the carton and all packing materials. Should
you ever need to ship the unit back to Crest Performance, one of its offices, service
centers or the supplier, use only the original factory packing. If the shipping carton is
unavailable, contact Crest to obtain a replacement.
mounting
CPX Series amplifiers will mount in standard 19" racks. Rear mounting ears are also
provided for additional support, which is recommended in non-permanent installations
like mobile or touring sound systems.
connecting power
CPX Series amplifier power requirements are rated at 1/8
t
power (typical music
conditions) and 1/3
r
power (extreme music conditions). The maximum power cur-
rent draw rating is limited only by the front panel circuit breaker. Consult the speci-
fications in the Appendices section for figures on the current that each amplifier will
demand. Make sure the mains voltage is correct and is the same as that printed on
the rear of the amplifier. Damage caused by connecting the amplifier to improper AC
voltage is not covered by any warranty. Unless otherwise specified when ordered,
Crest amplifiers shipped to customers are configured as follows:
Option 1 North America 120VAC / 60 Hz
Option 2 Europe, Asia 230/240VAC / 50 Hz
Option 3 Australia 240VAC / 50 Hz
Option 4 South America 120VAC / 60 Hz or 240VAC / 50 Hz
For replacement
packaging, call Crest
Performance’s
Customer Service
Department directly.
see—service and support
+
Always turn off and
disconnect the amplifier
from mains voltage before
making audio connections.
Also, as an extra precaution,
turn down the attenuators
during power-up.
a

2
p. 13
installation
Make certain that there
is enough space around
the front and rear of the
amplifier to allow the
heated air to escape.
suggestion: In racks
with closed backs,
allow at least one
standard-rack-space
opening for every
four mounted power
amplifiers.
a
cooling requirements
The CPX™ Series amplifiers use a forced-air cooling system to maintain a low, con-
sistent operating temperature. Air is drawn into the amplifier by fan(s) on the rear
panel, courses through the cooling fins of the tunnel-configured channel heat sink(s),
and then exhausts through the front panel grille. If either heat sink gets too hot, its
sensing circuit will open the output relay, disconnecting the load from that particular
channel. The CPX 3800 utilizes one common heat sink and a single fan, but retains
the separate circuitry. NOTE: Maintain an adequate air supply at the back of
the amplifier and enough space around the front of the amplifier to allow
the cooling air to escape. If the amp is rack mounted, do not use doors or covers
on the front of the rack; the exhaust air must flow without resistance. If you are using
racks with closed backs, use fans on the rear rack panel to pressurize the rack and
ensure an ample air supply.
operating precautions
Make sure the mains voltage is correct and the same as that printed on the rear of the
amplifier. Damage caused by connecting the amplifier to improper AC voltage is not
covered by any warranty. See the Connecting Power section for more information on
voltage requirements.
Although the CPX Series amplifiers have AUTORAMP
™
circuitry, which raises the
signal level gradually after the output relay closes, remember to have the gain controls
turned down during power-up to prevent speaker damage if there is a high signal level
at the inputs. Whether you buy or make them, use good-quality connections, input
cables and speaker cables, along with good soldering technique, to ensure trouble-free
operation. Most intermittent problems are caused by faulty cables.
Consult the Wire Gauge Chart to determine proper gauges for different load
impedances and cable lengths. Remember that cable resistance robs amplifier power
in two ways: power lost directly to resistance (I
2
R loss), and by increasing the total load
impedance, thereby decreasing the power demanded of the amplifier. Also, make sure
the mode switch is correctly set for the desired application. See Sections on Stereo,
Parallel and Bridged Mono modes for more information.
Always turn off and
disconnect the amplifier
from mains voltage
before making audio
connections. Also, as an
extra precaution, turn
the attenuators down
during power-up
a
+

connecting inputs
Input connections are made via the three-pin XLR (pin 2+) or 6.3 mm plug “Combi”
connectors on the rear panel of the amplifier. The inputs are actively balanced. The
input overload point is high enough to accept the maximum output level of virtually
any signal source.
connecting outputs
All models have two output (speaker) connections per channel. Cables can be
connected with banana plugs, spade lugs or bare wire to the five-way binding posts. The
preferred method is connection via the Speakon
®
connectors.
CPX
TM
owner’s manual
p. 14
installation
2
inputs
outputs

front panel
rear panel
/
location of connectors and controls
/
legend of panel symbols
3
p. 15
features overview

p. 16
CPX
TM
owner’s manual
features overview
1
front panel
switches and controls
1
AC Power Switch/Circuit Breaker
The CPX Series amplifiers have a combination AC switch/circuit breaker
on the front panel. If the switch shuts off during normal use, push it
back to the ON position once. If it will not stay on, the amplifier needs
servicing.
2
Input Attenuators
Whenever possible, set the attenuators fully clockwise to maintain
optimum system headroom. The input attenuator controls located at the
front panel, (one for channel A, one for channel B), adjust gain for
their respective amplifier channels in all modes. See the specifications
at the end of this manual for standard voltage gain and input sensitivity
information.
The power only breaks
one side of the AC mains.
Hazardous energy may be
present in the enclosure
when the power switch is in
the OFF position.
a
When operating in the bridged
mode, both attenuators must
be in the same position so the
speaker load will be equally
shared between the channels.
See the section on Bridged
Mono operation for more
information and precautions.
a
5
4
3
2

p. 17
features overview
3
indicators
CPX™ Series amplifiers feature three front panel LED indicators per channel:
GCL™, SIGNAL and POWER. These LED indicators inform the user of
each channel’s operating status and warn of possible abnormal conditions.
3
GCL (Gain Comparator Limting) LED
A channel’s GCL LED will light at the onset of clipping. If the LEDs are
flashing quickly and intermittently, the channel is just at the clip threshold.
A steady, bright glow means the amp is clip limiting, or reducing gain to
prevent severely clipped waveforms from reaching the loudspeakers. See
the Gain Comparator Limiting section for more information. During ini-
tial power-up the GCL LED will light to indicate that the AUTORAMP™
gain reduction circuitry is activated. This prevents sudden signal bursts
when the speaker relays are closed.
4
Signal LED
This LED lights when its channel produces an output signal of about 4 volts
RMS or more (0.1 volt or more at the input, with 0 dB attenuation and
standard x40 voltage gain). This signal indicates whether a signal is reaching
and being amplified by the amplifier.
5
Power LED
The Power LED indicates that its channel’s output relay is closed and the
channel is operational. It lights under normal operation and remains on, even
when the channel is in Gain Comparator Limiting or GCL gain reduction.
These protection features leave the output relay closed. If the Power LED goes
off, there is no signal at the output connectors.

p. 18
features overview
3
rear panel
6
IEC Mains Connector
This is a standard IEC power connector. An AC mains cord having
the appropriate AC plug and ratings for the intended operating
voltage is included in the carton.
U.S. DOMESTIC AC MAINS CORD
The mains cord supplied with the unit is a heavy-duty, three-
conductor type with a conventional 120 VAC plug with ground
pin. It should be connected to an independent circuit capable
of continuously supporting at least 15 amps. This is particularly
critical for sustained high-power applications. If the outlet used
does not have a ground pin, a suitable grounding adapter should
be used and the third wire grounded properly.
Never break off the ground pin on any equipment. It is provided for
your safety.
The use of extension cords should be avoided but, if necessary,
always use a three-wire type with at least a #14 AWG wire size. The
use of lighter wire will severely limit the power capability of this
amplifier. Always have a qualified electrician install any new
electrical equipment. To prevent the risk of shock or fire hazard,
always be sure that the amplifier and all associated equipment is
properly grounded.
NOTE: FOR U.K. ONLY
If the colors of the wires in the mains lead of this unit do not correspond
with the colored markings identifying the terminals in your plug, proceed
as follows: (1) The wire that is colored green and yellow must
rear panel legend
input connection
XLR connector polarity
TRS connector polarity
bridged mono mode
parallel mode
stereo mode
output connection
Speakon
®
output
channel A stereo/parallel
channel B stereo/parallel
bridged mono
five-way binding post
channel A stereo/parallel
bridged mono
channel B stereo/parallel
CPX
TM
owner’s manual
76
8
9 ¡
0

p. 19
features overview
3
be connected to the terminal that is marked by the letter E, the Earth
symbol, colored green or colored green and yellow. (2) The wire that is
colored blue must be connected to the terminal that is marked with the
letter N or the color black. (3) The wire that is colored brown must be
connected to the terminal that is marked with the letter L or the color
red.
7
Low Cut Switch
This switch is used to activate the LOW CUT filter for the corresponding
channel. It is a push-type switch that requires a small tool to activate. The IN
position routes the input signals through the 40 Hz LOW CUT
filter, while the OUT position bypasses the filter. This filter will cut extremely
low frequencies, protecting speakers from the possibility of over-excursion.
The filter low-frequency rolloff is 12 dB per octave. The LOW CUT filter for
each channel will function independently of the crossover function.
8
Crossover Switch (100 Hz crossover)
This switch is used to activate the 100 Hz crossover for the cor-
responding channel. It is also a pushpush type switch and requires a
small tool to activate. The CPX offers two 100 Hz crossovers. These
are specially designed features that enhance the response of most
loudspeakers in a typical bi-amped application. Rather than having a flat
output curve, these crossovers use special filters to tailor the response
and provide a flat acoustical output. This type of crossover sounds more
natural than conventional state-variable crossovers. With the switch IN,
the input signals are routed through the crossover and the low frequen-
cies are automatically sent to the corresponding channel. At the same
time, the high frequencies are sent to the HIGH OUT (9) jack and must
then be patched to the INPUT of the other channel of this amplifier or
to another amplifier input to complete the bi-amped system. With the
switch OUT, the crossover is defeated and the input signal is routed
directly to the respective power amp channel. The crossover frequency
is fixed at 100 Hz and cannot be changed. The crossover configuration
is a four-pole Linkwitz-Riley approximation.
9
High Out Jacks
This 1/4” jack supplies high-frequency output signals from the activated
crossover for patching to this amplifier and/or additional power amplifier
inputs. Unlike the low-frequency crossover output that is automatically
routed to the associated channel, the high-frequency output signal must
be patched to some suitable input in order to complete the bi-amped
system. This 1/4” jack also provides an unbalanced (tip/sleeve) output to
be patched with single-conductor shielded cables.

p. 20
features overview
3
CPX
TM
owner’s manual
0
Conn. Mode Select Switch
Depressing the rear panel CONN. MODE select switch connects both
input connectors together in parallel. This directs the same input signal
to both channels and allows one connector to be used with a patch cable
to drive another amplifier. In the OUT position, both input connectors
operate independently. Do not operate the CONN. MODE select switch
with the amplifier powered on. See the sections on Stereo, Parallel and
Bridged Mono Mode for more information.
¡
Amp Mode Select Switch
The rear panel AMP MODE select switch determines if the amplifier is in
stereo (two channels) or in Bridged Mono Mode. Do not operate the AMP
MODE select switch with the amplifier powered on. See the Operations
Mode section for more information on Stereo, Parallel and Bridged Mono
Mode applications.

p. 22
operation modes
4
stereo
parallel
bridged mono
/
choosing the appropriate mode
/
switching between operation modes
/
special considerations when using bridged mode
CPX
TM
owner’s manual

p. 23
stereo
For stereo (dual channel) operation, turn the amplifier off and set the mode
select switches on the back panel to the OUT (extended) position. In this
mode, both channels operate independently of each other with their input
attenuators controlling their respective levels. For example, a signal at chan-
nel A’s input produces an amplified signal at channel A’s output, while a signal
at channel B’s input produces an amplified signal at channel B’s output.
parallel
For parallel (dual channel/single input) operation, turn the amplifier off and
set the connector mode (Conn. Mode) switch to the parallel position by
depressing the switch. Both input connectors are then strapped together and
drive both channels with the same input signal. Because both connectors are
strapped together, either connector can be used with a patch cable to drive
the input of another amplifier. Output connections are the same as in the
Stereo Mode. In Parallel Mode, both input attenuators remain active, allow-
ing users to set different levels for each channel. Power and other general
performance specifications are the same as in the Stereo Mode.
bridged mono
Both amplifier channels can be bridged together to make a very powerful
single-channel monaural amplifier. Use extreme caution when operat-
ing in bridged mode; potentially lethal voltage may be present
at the output terminals. To bridge the amplifier, depress the rear panel
Amp Mode switch (11) to the IN position. Direct the signal to channel A’s
input and connect the speakers across pin +1 and pin +2 of the channel
A Speakon® output connector. Only channel A’s input attenuator is active
while in Bridged Mono mode. Both connectors are strapped together,
so either connector can be used with a patch cable to drive the input of
another amplifier.
Unlike the Stereo
and Parallel Modes, in
which one side of each
output is at ground, in
the Bridged Mode both
sides are hot. Pin +1 is
Channel A’s side, which
is the same polarity as
the input. The minimum
nominal load impedance
in the Bridged Mode is 4
ohms, which is equivalent
to driving both chan-
nels at 2 ohms. Driving
bridged loads of less
than 4 ohms will activate
GCL™ circuitry, result-
ing in a loss of power
and potential thermal
overload.
a
operation modes
4
When operating in the
Bridged Mode, both
attenuators must be in
the same position so
the speaker load will be
equally shared between
the channels.
a

p. 24
protection features
5
GCL™
gain
comparator
limiting
IGM
™
impedance
sensing
AUTORAMP
™
signal control
thermal
protection
short circuit
DC voltage
protection
turn on/off
/
description of protection features
CPX
TM
owner’s manual
/