Page is loading ...

1
Table of Contents
1. Introduction .............................................................................................. 2
2. Features ................................................................................................... 3
3. Safety Notes ............................................................................................. 4
4. Your Receiver and its Functions ........................................................... 5
4.1 Remote Control Functions ............................................................................. 5
4.2 Front Panel Controls ....................................................................................... 7
4.3 Rear Panel Connections ................................................................................. 7
5 Getting Started ........................................................................................ 9
5.1 Connecting the Satellite Receiver .................................................................. 9
5.2 First Steps ........................................................................................................ 9
6 Installation of Unicable LNB ...............................................................10
7 Selecting TV and Radio Channels ......................................................... 12
7.1 Info Box ......................................................................................................... 12
7.2 Channel List and Sort Manager ................................................................... 12
7.3 Program Information (EPG) ...........................................................................13
7.4 Subtitles ......................................................................................................... 13
7.5 Teletext ........................................................................................................... 13
7.6 Listening to the Radio .................................................................................. 14
8 Additional Operating Functions ............................................................. 14
8.1 Volume Control / Mute ............................................................................... 14
8.2 Last Channel ............................................................................................... 14
8.3 Audio Mode ................................................................................................. 14
8.4 Create / Edit Favorite Channel Lists ........................................................ 14
8.5 Timer Programming .....................................................................................15
8.6 Parental Lock .............................................................................................. 15
8.7 Change Password ....................................................................................... 16
9 Menu Structure (Main Menu) .................................................................. 16
10 Advanced Operation ............................................................................ 17
10.1 RF Modulator ........................................................................................... 17
10.2 LNB Settings ......................................................................................... 17
10.3 DiSEqC Setting (General Setting) .............................................................. 17
10.4 DiSEqC 1.0 .................................................................................................. 17
10.5 Antenna Positioner / DiSEqC 1.2 ............................................................ 18
10.6 USALS ........................................................................................................ 19
10.7 Auto Search Function .............................................................................. 19
10.8 Manual Search Function ......................................................................... 20
10.9 Transponder Editor ................................................................................. 20
10.10 Data Transfer ............................................................................................ 21
10.11 Delete All Channels ................................................................................... 22
10.12 Factory Preset .......................................................................................... 22
10.13 Software Update ........................................................................................ 22
11 Trouble Shooting ................................................................................. 22
12 Technical Specifications ...................................................................... 23
GB

2
Disposal of Old Electrical & Electronic Equipment (Applicable in the European
Union and other European countries with separate collection systems)
This symbol on the product or on its packaging indicates that this product shall not
be treated as household waste. Instead it shall be handed over to the applicable
collection point for the recycling of electrical and electronic equipment. By ensuring
this product is disposed of correctly, you will help prevent potential negative
consequences for the environment and human health, which could otherwise be
caused by inappropriate waste handling of this product. The recycling of materials
will help to conserve natural resources. For more detailed information about
recycling of this product, please contact your local city office, your household waste
disposal service or the shop where you purchased the product.
1. Introduction
Thank you for purchasing this digital receiver. It has been designed for easy setup and
getting quickly started right after connecting your antenna system and your TV set. The
most popular TV channels on ASTRA and HotBird satellite have been pre-programmed in
the channel list. If you do not wish to stay with this list or if you like to modify this list
according to your personal preferences you may create your favorite selection of your own
at any time. All necessary information for you will find in this manual.
To ensure that you get familiar with your receiver and that you will be able to make use of
all advanced features, please read this manual and have it ready for later reference.
We hope you enjoy using this SCHWAIGER product.
GB

3
Digital Satellite Receiver for all Free-to-Air TV programs.
Unicable compatible.
Full-size metal cabinet with integrated AC power supply.
Comfortable graphic user interface (OSD).
Major operating buttons also at the front panel.
8 language menu (German, English, French, Italian, Spanish, Turkish, Arabic, Persian).
DVB subtitle display (on/off).
Timer function (10 events).
EPG: Extended electronic program guide, (7 days).
Integrated teletext function (OSD) and additional VBI display.
Automatic channel search and advanced manual search functions.
Network search.
Main channel list and 5 "favourite channel lists" for individual use.
3.000 TV channel memories (TV and Radio).
Signal strength and quality indicator bars for easy antenna configuration.
2 SCART connectors (TV and VCR).
Additional audio / video output jacks (RCA).
Video output signal format (SCART) selectable: RGB and CVBS.
Digital audio output connectors: Dolby Digital (coaxial) for HiFi systems.
UHF modulator output (CH 21 ~ 69).
4:3 / 16:9 screen format selector .
Pre-programmed TV and radio channel list (ASTRA and HotBird).
Software update "over the air" (OTA).
Data interface for software update: RS-232.
SCPC and MCPC reception.
C / Ku Band reception.
DiSEqC 1.0 and 1.2.
USALS (Universal Satellite Automatic Location System) for easy satellite tracing.
Infrared remote control with 35 functions.
8-character VFD (Alpha numeric) front panel display.
LNB short circuit protection.
Mechanical power switch on the front panel for fully disconnecting of the mains.
(All rights reserved)
GB
2. Features

4
MAINS SUPPLY: 95 to 250V AC (no voltage selection)
OVERLOADING : Do not overload a wall outlet, extension cord or adapter as this may
result in fire or electric shock.
LIQUIDS : The STB shall not be exposed to dripping or splashing and that no
objects filled with liquids, such as vases, shall be placed on the apparatus.
CLEANING : Disconnect the STB from the wall outlet before cleaning. Use a light
damp cloth (no solvents) to dust the STB.
VENTILATION : The slots on top of the STB must be left uncovered to allow proper
airflow to the unit. Do not expose the STB to direct sunlight or do not place it near a
heater. Do not stack electronic equipments on top of the STB.
ATTACHMENTS : Do not use any accessories that are not recommended by the
manufacturer of this unit as these may cause hazard or damage the STB.
CONNECTION TO THE ANTENNA : Disconnect the STB from the mains before
connecting or disconnecting the cable from the antenna. Failure to do so can damage
the antenna.
CONNECTION TO THE TV : Disconnect the TV from the mains before connecting or
disconnecting the cable from the STB. Failure to do so can damage the TV.
GROUNDING : The antenna cable MUST BE EARTHED to the system earth of the
antenna. The grounding system must comply with national standards for
electrical safety.
LOCATION: The STB is designed for indoor use only. Do not expose it to lightening,
rain, or direct sunlight.
GB
Do not remove the cover.
Do not allow the unit to be exposed to hot, cold or humid conditions.
Do not connect or modify cable when the STB is plugged in.
Use a soft cloth and a mild solution of dish washing liquid to clean the casing.
Never allow liquids, spray or other materials to come into contact with the inside of the
STB.
Service should be carried out only at a authorized service centre, contact your local
dealer for more information.
Please note that the unit will be isolated completely from the 230V mains supply only
after switching off the POWER switch on the front panel.
The socket-outlet shall be installed near the equipment and shall be easily accessible.
3. Safety Notes
This set top box (STB) has been manufactured to satisfy the international safety standards.
Please read the following safety precautions carefully.
General

5
* Batteries
Before using the remote control unit for the first time please insert the supplied batteries according
to the instructions below:
- Open the battery compartment on the back of the Remote Control Unit.
- Install two AAA size batteries. Make sure that the (+) and (-) terminals are aligned correctly.
- Close the cover.
* Replacement
- Always replace all batteries at the same time.
- Mixing old and new batteries or mixing different types will reduce overall performance and could
cause leakage or rupture.
Keys and its Functions
1. ON / STANDBY button
To switch the Receiver ON and OFF(standby mode).In the OFF position the unit is in the "standby"
mode and is not disconnected from the power supply. For full isolation from the mains please use
POWER button on the front panel (see more in paragraph 4.2).
2. MENU button
To enter the main menu.
3. Cursor UP / DOWN buttons
To move up/down in the menus and change channels.
1 ON / STANDBY button
2 MENU button
3 Cursor UP / DOWN buttons
4 Cursor LEFT/ RIGHT buttons
5 OK (Enter) button
6 Numeric buttons (0 ~ 9)
7 RADIO button
8 AUDIO button
9 TIMER button
10 VOL (-) / VOL (+) buttons
11 FREEZE button
12 BACK button
13 free (F1) button
14 free (F2) button
15 TELETEXT button
16 EXIT button
17 EPG (Electronic Program Guide)
18 PAGE UP / DOWN button
19 LAST button
20 PROGRAM INFORMATION button
21 SUBTITLE button
22 MUTE button
GB
4. Your Receiver and its Functions
4.1 Remote Control Functions

6
4. Cursor LEFT/ RIGHT buttons
To move left / right in the menus and change channels.
5. OK (Enter) button
To confirm selection of an item or to confirm a menu option.
(In viewing mode: to display the TV / Radio channel list.)
6. Numeric buttons (0 ~ 9)
To enter channel numbers and to select individual menu options.
7. RADIO button
To toggle between TV or Radio mode.
8. AUDIO button
To select the available audio mode.
9. TIMER button
To enter the program timer menu.
10. VOL (-) / VOL (+) buttons
To change the basic audio volume level.
11. FREEZE button
To freeze the current picture (still picture) or return to normal TV mode.
12. BACK button
To return to previous status or menu.
13. F1
This button is not available for this model.
14. F2
This button is not available for this model.
15. TELETEXT button
To enter teletext function.
16. EXIT button
To return to previous status or menu and cancel or abort an active process.
17. EPG (Electronic Program Guide)
To display the TV / Radio program guide. This Information is only shown if transmitted.
18. PAGE UP / DOWN button
To change pages in a list faster than with up/down keys.
19. LAST button
To toggle between present and previous TV / Radio channels.
20. PROGRAM INFORMATION button
To display the "Info Bar" at the bottom of the screen and review extended information about
current and next programs in EPG mode (if transmitted).
21. SUBTITLE button
To display DVB subtitles (on / off), if transmitted in specific programs
22. MUTE button
To temporarily mute the sound.
GB

7
The basic control functions of this unit (Menu, Exit,TV/RADIO, OK, cursor functions) can be carried
out by remote control and by front panel operations as well.
The mechanical POWER switch (1) is fully disconnecting the unit from the 230 Volts power supply.
When this button is set to the ON position there will be minimum power consumption also when the
unit is in "standby" mode. This is required for maintaining remote control and clock time functions.
When the unit will not be in use for a longer period of time we recommend to set the front panel
POWER button to the OFF position.
Note: When switching on again the POWER button (1) the clock time will not be available from the
beginning. After setting the unit to operating mode using the red ON / STANDBY button on the
remote control and receiving a TV or radio program the actual clock time will be taken over
automatically from the transmitter signal. Normally, time synchronization will take only a few
seconds.
Infrared (IR) signals are being received through the front panel IR sensor. The 8 -Charater VFD
(Alpha numeric) display is indicating the actual TV / Radio channel name and number of the
according channel list.
4.2 Front Panel Controls
4.3 Rear Panel Connections
1. Mains Connection (95 ~ 250V)
This unit can be operated at all common AC power systems without voltage pre-selection.
2. RS-232 Data Interface
Computer interface for service stations and advanced users only. To be used for software update
and channel list data transfer from another receiver (master / slave).
GB
1. 8 Charater VFD Display (Alpha numeric)
2. MENU Button
3. TV/RADIO Button
4. POWER Button (mains)
5. IR Sensor
6. EXIT Button
7. Cursor (CH Up / Down, Left / Right) Buttons
8. OK Button Buttons
1. Mains Connection (95 ~ 250V)
2. RS-232 Data Interface
3. Analog Video Output
4. Digital Audio Output (Coaxial)
5. Analog Audio Output (Stereo)
6. SCART Connector (TV)
7. SCART Connector (VCR)
8. VHF / UHF Antenna Input
9. UHF Modulator Output
10. LNB Input
11. LNB Loop-Through Output

8
3. Analog Video Output
Analog video output for connecting Home Theatre systems or monitors. The available video
output signal format is "CVBS"
4. Digital Audio Output (Coaxial)
Dolby Digital and Linear PCM Stereo output for digital input of a HiFi or A/V system with
integrated digital decoder.
5. Analog Audio Output (Stereo)
Audio Stereo L/ R signal for connecting your TV, HiFi or Home Theatre system.
6. SCART Connector (TV)
For connection of all audio and video signals of this digital receiver to the TV set.
7. SCART Connector (VCR)
For connection of all audio and video signals of this digital receiver to a video cassette recorder
(VCR).
8. VHF / UHF Antenna Input
The signal supplied to this connector from a TV antenna (or a local cable TV network) will be
sent to the TV OUT connector.
9. UHF Modulator Output
It provides audio and video signals from this receiver, modulated on a UHF channel of your
choice. If needed, connect the TV / VCR antenna input with a RF cable.
10. LNB Input (IF INPUT)
Connect your satellite antenna system (LNB, multi-switch) to this jack.
11. LNB Loop-Through Output (IF OUTPUT)
If you have another analogue or digital satellite receiver and you wish to use the same LNB, then
you can connect it to this "LNB loop-through" output jack.
CAUTION:
Do not mix up IF INPUT and IF OUTPUT jacks when connecting your satellite antenna!
GB

9
5. Getting Started
This chapter explains some settings you will need to make before using the receiver for the first time.
For easier operation the most popular TV and radio channels of ASTRA and Eutelsat (HotBird)
satellite have been factory-preset. The sorting in the channel list has been made according to the
viewing habits of many German-speaking TV viewers.
You may change the pre-programmed channel list or its sorting at any time.
5.1 Connecting the Satellite Receiver
Mains Supply
This unit is designed for any common mains voltage (95 ~ 250 volts, no adjustment needed).
TV Set
Connect the TV SCART connector on this satellite receiver to the SCART connector of your TV set,
using a commonly available 21-pole SCART cable.
Antenna
Connect the coaxial cable from your satellite antenna system (LNB) to the IF INPUT connector of
the satellite receiver.
For details, please refer to section "Rear Panel Connections".
Press the POWER button (1) on the front panel to switch on
the unit. With the button on the remote control you can
toggle between "Operation" and "Standby" mode. In the
operating mode the 8-charater (VFD) front panel display
shows the Ch. name and number of the actual TV or radio
program. In the "Standby" mode the actual clock time will
appear in the display, provided it has been set correctly or has
been synchronized by a transmitter signal before. When the
POWER button (1) is OFF the front panel display does not
show.
During initial setup the language selection menu appears on
your TV. Use the and buttons on the remote control
or on the receiver to select the language of your choice and
then press the OK button. When selecting ENGLISH, a
WELCOME screen appears on your TV screen:
Your Digital Satellite Receiver is factory pre-programmed.
After you have adjusted several settings in the GENERAL
SETTINGS menu you have to press [EXIT] for loading the
pre-programmed channel data.
If you don't want to use this data press [MENU] and select
INSTALLATION to start your own searching.
Press OK to enter the "General Settings" menu.
In the "General Settings" menu you can perform individual settings that are related to the local time
zone (summertime included), your TV set, and desired language selections. For adjustments,
please use the and buttons and see the explanations at the bottom of the menu screens.
- Press EXIT for loading the pre-programmed channel data. That may take some 30 seconds.
(Please wait.)
or
- Press MENU for selecting the "General Settings" menu. Then select " 3. Installation" and
perform item "1. Auto Search" or item "2. Manual Search", according to your needs.
GB
5.2 First Steps

10
GB
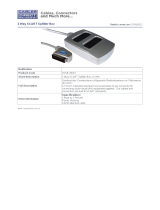
Step 1: Adjust direction of Dish Antenna to the favorite Satellite.
Step 2: Connect Unicable LNB to the Dish Antenna.
Step 3: Connect Unicable LNB with a Splitter and then, splitter with LNB inputs of two separated
receivers.
Step4: After all connections are well done, please turn on one of receivers for software setting.
1). Select "Auto Search" menu in "Installation" menu and select
Satellite by using OK button on RCU.
2). Select "Unicable" in "LNB Local Freq" menu by using Left/
Right button. Then, press OK button.
3). Execute Auto Detecting by pressing Green button on RCU.
Then, Unicable menu appears.
6. Installation of Unicable LNB

11
GB
4). Select IF Frequency by using Left/Right button.
5). After selection of IF Frequency, IF Channel will be saved by pressing "Back" or "EXIT" button
on RCU.
6). Each receiver connected to Unicable LNB MUST use different IF Channels.
7). After the setting, please switch it off for the connection to the other receiver. Setting process is
same as the above way.
8). The above setting values will be initialized by Reinstallation.
1420Mhz 2
1210MHz 1
IF Frequency IF Channel

12
Press OK to display the "Total List" or any Favorite Channel List.
Select the channel using the and buttons on the remote
control or on the receiver.
Press the INFO button.
Select the channel using the numeric buttons.
Select the channel using the and buttons on the remote control or on the receiver.
Press the OK button and select a channel from the channel list that appears. Then press the OK button.
7. Selecting TV and Radio Channels
The following steps are for viewing a preset channel. To select the channel you want to watch, use one
of the following methods.
7.1 Info Box
Your selected channel appears on the TV screen, along with the
"Info Box" at the bottom of the screen that will be visible for a few
seconds. Display time of the "Info Box" can be set to 2, 4, 6 or 8
seconds (menu "Banner Timeout" in "General Settings" menu).
To recall this "Info Box" please press the blue INFO button on the
remote control, and press EXIT to cancel it.
The Info Box displays information such as the titles of the current
and next programs as well as the reception quality and signal
strength. For more detailed information about the current program
press the INFO button again.
You can display all transponder info on any desired TV or radio
channel
7.2 Channel List and Sort Manager
To view the "Total List", press the OK button while watching TV or
listening to the radio.
Three colored buttons are used to manage the Channel List.
GB
RED Button:
Sorting the lists can be made in different ways:
- Alphabet (A-Z)
- Alphabet (Z-A)
- Free / Scrambled Program
- Satellite (Astra - HotBird or others)
- Service Provider
- Themes (News, Sports, etc.)
Please note that an individual sorting (others than mentioned
above) cannot be restored.
GREEN Button:
Press the GREEN button on the remote control to change over to the user list(s) you created.
(Such individual channel lists can be created through "Main Menu", sub menu "Channel Manager".
YELLOW Button
Press the YELLOW button on the remote control to view each satellite's channel list. The first
channel on the list appears on the TV screen
Digital TV offers numerous channels. Therefore, all available
channels are managed in lists.

13
7.3 Program Information
Please note that not all broadcasters provide program
information. So, depending on the broadcaster, program
information may not always be available.
You can use the EPG and INFO buttons to view the extended
program information.
Use the EPG button to view the information on program titles,
broadcast schedule, program synopsis, etc., which are
provided by the broadcaster of the current channel.
Select the program you want to learn more about.
Use the buttons on the remote control to navigate through different programs and use
the buttons to navigate through the days of the week.
Press the OK button. A synopsis of the selected program appears.
Use the INFO button to obtain information about the current program.
While watching TV or listening to the radio, press the INFO
button.
When the button is pressed once, the channel information will
be displayed in the Info Box.
Press the INFO button again to display additional information,
such as a synopsis of the current program,theme, etc.
To display information about the next scheduled program,
press the button.
To return to viewing mode, press the INFO button again or
press the EXIT button.
GB
7.4 Subtitles
This receiver is capable of displaying DVB subtitles that come with selected TV channels.
Please note that subtitles may not be available depending on the TV provider.
To display subtitle text, press the SUBT button on the remote control.
Press the SUBT button again to switch off subtitles.
7.5 Teletext
With this receiver, teletext can be viewed in two different ways.
The so-called "OSD Text" is utilizing the built-in teletext decoder of this receiver. It can be operated
with the remote control unit of this receiver. Usually, it is much faster than the conventional teletext.
It can be used also with TV monitors or projectors that don't have an integrated teletext decoder.
An other option is called "VBI Text" that leaves decoding up to a teletext decoder that is built into
the TV set. In this case, all teletext functions must be operated through the remote control unit of
the TV set.
To enter "OSD Text" press the TTX button on the remote control unit of this receiver.
To select the teletext pages use the numeric or buttons. The purpose of the color buttons on
the remote control unit is explained in the bottom line of the teletext window.
To switch off teletext, press the EXIT button or TTX button again.

14
7.6 Listening to the Radio
This receiver also enables you to listen to many radio stations that provide excellent digital HiFi
quality, close to CD performance standards.
To listen to the radio, press the RADIO button on the remote control.
To return to TV viewing, press the RADIO button again.
Radio channels as well can be managed in channel list as described above for TV channels.
Many radio stations come with extended program information, same as described above for TV
channels.
To view this information please press EPG and / or INFO button.
8. Additional Operating Functions
Besides the fundamental and most frequently used functions, this receiver is offering an additional
variety of convenient features that will be briefly introduced in this section.
8.1 Volume Control / MUTE Button
Use the VOL (+) and VOL ( - ) buttons on the remote control to adjust the basic volume level of your
TV. When either button is pressed, the volume indicator appears on the TV screen.
When you have finished adjusting the volume, the volume indicator disappears automatically.
Press the MUTE button on the remote control to disable the sound temporarily.
This icon will appear on the screen:
Press the MUTE button again to restore the sound.
8.2 Last Channel
To return to the last channel you were watching, press the LAST button on the remote control.
GB
8.3 Audio Mode
Audio Language and the Audio Mode can be selected if the Service Provider supports this feature.
Press the AUDIO button on the remote control.
To change the audio language, use buttons to select one of the languages provided by the
broadcaster.
Use the buttons to select the Audio Mode you want. You may select analogue STEREO,
MONO (L), or MONO (R) as well as Digital Audio "AC3" (for DOLBY Digital / Linear PCM Stereo)
When selecting "AC3" and connecting a Dolby Digital or Linear PCM Stereo equipment to the
DIGITAL AUDIO Output jack on the rear panel, the analogue audio output channels are disabled.
To return to viewing mode, press the AUDIO button again or press the EXIT button.
8.4 Create / Edit Favorite Channel Lists
The Favorite List is a collection of your favorite channels.
You can group special channels into one or more favorite
channel list(s).

15
GB
Enter "Channel Manager" menu.
Select "Add / Remove Channels"
Add channels from the Total List to your Favorite List.
You can also remove channels from your Favorite List.
Follow the on-screen instructions.
You can re-name your favorite lists. Enter "Edit List
Name".
8.5 Timer Reservation
Use this function to make a timer recording on a connected
VCR or switch ON /OFF this receiver at preset times.
You can book up to 10 timer events.
Press the TIMER button on the remote control.
The message "Please set user time first" appears,
followed by the "User Time Setting" screen. Set user time
according to the current time. If the user time is already
set, this step will be skipped.
When the "Recording List" screen appears select a blank
position and then press OK.
The screen "Recording Setting" appears. To record an
event, enter information such as, channel, start time, end
time, event type (Once, Daily, Weekly), etc. When the
settings are completed, select "Recording" and then
press the OK button.
You can check the timer recording settings from the
Recording List.
Note: If there is a pending timer event active, it makes no difference whether or not the unit is
switched off ("Standby") or used normally. The unit will be switched on or change over to the
desired program in any case in time to execute the scheduled event. - If the device is switched to
OFF by using the front panel POWER button the system clock time will be lost along with the
scheduled timer recording.
One minute before the recording start time a message appears, asking whether or not to proceed
with the recording. To proceed with OK or exit with CANCEL.
8.6 Parental Lock
This allows you to lock particular channels or the receiver
itself. For example, you can prevent your children from
accessing adult programs using this function.
Select "Parental Lock Manager" from the Main Menu.
When the "Enter Password" message appears, enter the
password.
The factory default user password is '0000'
Select "Channel Lock" when you wish to lock specific
channels only. (if someone switches to a locked channel,
the password screen will appear.)
Select "Access Lock" when you wish to lock the receiver
when it is powered on. The password will be required
before starting up.
Select " Menu Lock" When you wish to lock the Menu when you don`t want to change in
initial menu

16
GB
8.7 Change Password
The factory default user password is '0000'. For improved security we recommend to create an
individual password, if needed.
Select "Parental Lock Manager" from the Main Menu.
Select "Change Password"
Follow the instructions on the screen.
If you have lost your individual password you will need a master password which will unlock
your system again. Please contact your dealer or your nearest service station.
9. Menu Structure (Main Menu)
1. General Settings
1. Time Zone
2. Summer Time
3. TV Aspect Ratio
4. TV Signal
5. Menu Language
6. Main Audio Language
7. Main Subtitle Language
8. DiSEqC
9. RF Modulator
10. Banner Timeout
1. Edit List Name
2. Add / Remove Channels
3. Edit Channel Name
4. Rearrange Channels
5. Remove Channels of Total List
2. Channel Manager
3. Installation
1. Auto Search
2. Manual Search
3. Transponder Editor
4. Data Transfer
5. Delete all Channels
5. Antenna Positioner
1. Set-up Limit
2. Select Satellite
3. Select Transponder
4. Move East / West
5. Nudge East / West
6. Store Satellite
7. Recalculate Position
6. System Information
Software Update
7. Factory Preset
4. Parental Lock Manager
1. Channel Lock
2. Access Lock
3. Change Password
4. HDD Lock

17
GB
10. Advanced Operation
In this section some settings and operations are described that require certain expertise and basic
knowledge about satellite reception and digital TV for being carried out without fail. For most TV
viewers there should be no need to use, modify or adjust the items as described below.
In case of doubt please ask your dealer for support.
10.1 RF Modulator
In some rare cases there may be a necessity to connect this digital receiver without having
available SCART connectors or RCA audio / video input jacks on the TV set to be connected. In
such a case you can make use of the built-in RF modulator. It is designed to convert the video
output signal of this receiver into a normal analogue TV channel, using a free channel in the UHF
band that can be received with the connected TV set. Please note that, if proceeding like this, the
picture quality and audio quality does not meet digital standards.
Connect the TV out jack of this receiver with the ANTENNA input of your TV, using a standard
IEC coaxial antenna cable.
Go to sub menu "RF Modulator" in the "General settings" menu.
Select the desired UHF output channel (CH 21 ~ 69) according to local necessities, using the
buttons.
Press OK several times to select the desired TV standard (PAL B/G, PAL I, PAL D/K, or NTSC
M). The mostly used standard in Central Europe is PAL B/G.
Set up or tune your TV set to the selected UHF output channel.
Operate this receiver as usual.
10.2 LNB Settings
This receiver has been factory-preset to the requirements of the most commonly used LNB types.
You can check or modify the actual settings in the menu "Installation", sub menu "Auto Search" or
"Manual Search". In case you wish to edit the parameters using the "Auto Search" sub menu, you
need to press the GREEN button first. These are the preset items:
LNB Local Freq. Universal
DiSEqC OFF
22 kHz AUTO
0 / 12 V Control 0 V
These settings may need modifications if you use a specific LNB or a satellite antenna system that has
been installed with DiSEqC equipment (such as selector switches and / or motor antenna systems).
Please follow the instructions that come with this equipment or ask your dealer.
10.3 DiSEqC Setting (General Settings)
There is a DiSEqC option in the Main Menu. Please be sure to have selected the "DiSEqC 1.0" option as
long as you don't employ equipment according to "DiSEqC 1.2" or "USALS" standards. Changes can be
made using the buttons.
10.4 DiSEqC 1.0
In principle, there are two kinds of external DiSEqC switches on the market. One is for connection of two
LNBs, the other one is for connection of up to four LNBs. In the "Auto Search" sub menu you can select
the DiSEqC LNB input 1 / 2 / 3 or 4 for each LNB connected to the corresponding switch port of the
DiSEqC switch.
For details please follow the instructions that come with you DiSEqC equipment.

When doing this, if the position of the antenna is well away from the target satellite, use "Move East /
West" in "Set-up Limit" to move the antenna first.
Alternatively, select "Nudge East/West" and then use the buttons to move the antenna.
Each time you press either button, the antenna will automatically find the satellite.
18
To disable the movement limits, select "Disable Limits" and then press the OK button.
To position the antenna at the center, select "Go to Reference" and then press the OK button.
Once the limits are set, locate the reference satellite.
From the "Antenna Positioner" screen, select "Select Satellite" and then use the buttons to select
the satellite.
Go to "Select Transponder" and select the TP with the strongest signal.
Select "Nudge East/West" and then use the buttons to move the antenna. Find the position
where the Signal is strongest.
Notes:
GB
Select DiSEqC 1.2
or
select USALS
according to your needs. Then please proceed to the
"Antenna Positioner" sub menu in the "Main Menu".
To position the antenna using the DiSEqC 1.2 method,
you will need to set the movement limits first. The reason
for this is to reduce the danger of the antenna coming into
contact with any obstructing object during the antenna positioning operation.
When the movement limits are set, the antenna only moves within the limits specified.
Select "Set-up Limit" and then press the OK button.
Select "Move East/West". Use the button to move the
antenna to the East Limit position.
Select "Set East Limit" and then press the OK button to
save the East Limit you have set previously.
Select "Move East/West" again. Use the button to move
the antenna to the West Limit position.
Select "Set West Limit" and then press the OK button to
save the West Limit you have set previously.
10.5 Antenna Positioner / DiSEqC 1.2
The "Antenna Positioner" function of this receiver enables you to use a motorized antenna to view
multiple satellites. Most motor antennas can be controlled by DiSEqC 1.2 technology, some of them also
can be used for USALS. This convenient function locates the desired satellite if the latitude / longitude of
the receiving place and satellite longitude are known.
For setting up such a system it is needed to set the DiSEqC menu item in the "General Settings" menu
accordingly:
Once the satellite is located, select "Store Satellite" and then press the OK button.
The position of the satellite is stored.
Notes:
If you select the stored satellite, the antenna moves in the direction of the satellite's position.
After locating a satellite, perform "Recalculation". This enables you to locate another satellite
automatically by using the currently selected satellite as a reference point. However, this only
provides an approximate position, so you will need to fine-tune the search.
Select "Recalculate Position" and then press the OK button.
When the message asking you to confirm your selection appears, press the OK button.
Notes:
Satellite Positions are stored in the "Antenna Positioner". Therefore, you will need to manually set
the position of satellites that the "Antenna Positioner" does not currently support.

19
Note on Network Search:
In this search mode, the receiver first collects the network information first from the TP you
selected. Then an Auto Search takes place to research all the channels in that network. The
number of searched channels may vary, depending on the TPs present in that network. Select
whether to use the network information of the TP stream specified in "Select Transponder". I.e,
download the TP information of the satellite you want to find from a particular TP and then use this
to Auto Search the channels in the TP group. The number of channels searched may vary
depending on the TP information transmitted. Select Network Search and then use the buttons
to set it.
GB
10.6 USALS
This convenient function locates the desired satellite by USALS if latitude/longitude of the
receiving place and satellite longitude are known.
Move to USALS mode by using the buttons at the DiSEqC item in the "General Settings"
menu.
Move to "Auto Search" or "Manual Search" to search the desired channel in USALS mode.
Click the DiSEqC item in the Auto Search Menu to open the USALS Setting Popup Menu.
Enter the user location latitude and longitude. Use numeric keys to enter values. Use buttons
to convert East and West.
Enter the latitude and longitude of the desired satellite. Use numeric keys to enter values. Use
buttons to convert East and West.
Click Store to save the input information. The antenna will direct itself towards the computed
USALS result.
If it is physically impossible to direct the satellite, an error will be displayed. Press the "Back" key
and enter new information if this happens.
Use the Signal Strength Bar to check if a satellite signal is received from the new antenna direction.
Use Nudge East/West or Go to Reference to help the antenna work.
10.7 Auto Search Function
Auto Search is the one used most frequently used methods of channel search. It is intended to
have the receiver automatically search all the channels from the satellite you selected.
Select "Auto Search" and then press the OK button.
Select the satellite using the OK button. If you want to
change the Satellite Information, press the GREEN button on
the remote control.
Set the LNB information and DiSEqC information for the
satellite. You can use the existing setting. To change the
setting, use the buttons.
You can select the transponder (TP) you want to use and
check the difference in signal strength and reception quality
from one transponder to another.
Set DiSEqC port to OFF (or to a port you want to use, if any)
Select the type of channels to search: FTA, Scrambled, ALL
or Network.
Start searching for TV and radio channels using the above
settings. Press the RED button.
TV and radio broadcast channels will be searched.
The names of the channels will be listed.
Press the EXIT button to return to viewing mode and check
whether the reception of the selected channel is good.

20
To cancel the entries you have made, press the BACK button or the EXIT button.
GB
10.8 Manual Search Function
Use this channel search by entering the TP information manually to the receiver. This channel
search is often used to search for a particular channel or those channels that "Auto Search" has
missed, but it requires comparatively more expertise.
Select "Manual Search" and then press the OK button.
Select the satellite you want to track.
Set the LNB information and DiSEqC information for the
satellite. You can use the existing setting. To change the
setting, use the buttons.
Set the LNB polarization of the TP to "Horizontal" or "Vertical".
After the settings are completed, select "Next" and then press
the OK button.
Set the Down Frequency of the TP.
Set the Symbol Rate of the TP.
Select the type of channels to search: FTA, Scrambled, ALL or Network.
Press the OK button to start searching using the above settings.
Another search method is "Advanced Search". Use this channel search to search for a particular
channel or channels ones that you couldn't find using "Manual Search". Enter the PID of the
channel you want to search.
Set the channel's Video PID.
Set the channel's Audio PID.
Set the channel's PCR PID.
Press the OK button at "Start Search"
The names of the channels will be listed.
Press the EXIT button to return to viewing mode and check that the reception of the selected
channel is good.
10.9 Transponder Editor
The "Transponder Editor" allows you to change, add, and
delete satellite information.
Go to the "Main Menu", select "Installation", select
"Transponder Editor", and then press the OK button.
Add a Satellite
Use the buttons to move to the last field on the list.
Press the OK button. The screen will change to allow you to
enter the name of the satellite you are adding.
Use the buttons to enter letters. Use the buttons to
change the cursor position.
When you have finished entering the satellite name, press
OK.
Press the OK button to enter the added satellite's TP
information of the added satellite.
When the TP information input field appears in the right panel,
press the OK button.
Enter the TP information, such as Frequency, Polarization (H /
V), Symbol Rate, etc., and then press the OK button. (Use the
Numeric buttons to enter Frequency and Symbol Rate
information, and use the buttons to enter H / V
information).
/