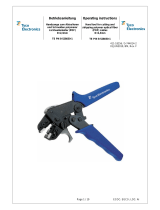
Tyco Electronics 0-0654174-2 Operating Instructions Manual
- Category
- Cable assembly tools
- Type
- Operating Instructions Manual

Page 1 / 18 ECOC: EGC0 ; LOC: AI
Bedienungsanleitung
Handzange
Positive Lock
Model A
PN 0-0654174-2
411-18341 / 2-744014-3
09.01.2009, MD, Rev.B
Operating instructions
Hand Tool
Positive Lock
Model A
PN 0-0654174-2

Page 2 / 18 ECOC: EGC0 ; LOC: AI
P/N 2-744014-3 411-18341 Rev.B
1 Deutsch............................................................................................................................. 3
2 English............................................................................................................................ 11
Page is loading ...
Page is loading ...
Page is loading ...
Page is loading ...
Page is loading ...
Page is loading ...
Page is loading ...
Page is loading ...

Page 11 / 18 ECOC: EGC0 ; LOC: AI
P/N 2-744014-3 411-18341 Rev.B
Table of contents
1 Using the operating manual........................................................................................... 12
2 Basic safety instructions...............................................................................................12
2.1 Responsibilities..............................................................................................................12
2.2 Notes on setting up and operating the tool.................................................................. 12
2.3 Notes on service and maintenance............................................................................... 13
3 Intended use................................................................................................................... 13
4 Technical data ................................................................................................................14
5 Description...................................................................................................................... 14
6 Set-up (including equipping)......................................................................................... 15
7 Operation........................................................................................................................ 16
8 Changing the expendable parts .................................................................................... 17
9 Spear and wear parts .....................................................................................................18
10 Maintenance and preventive maintenance................................................................... 18

Page 12 / 18 ECOC: EGC0 ; LOC: AI
P/N 2-744014-3 411-18341 Rev.B
1 Using the operating manual
The operating manual must be constantly within reach of the tool.
Each person entrusted with the job of operating the tool must be familiar with the operating manual and
strictly observe the instructions therein.
Tyco Electronics decline to accept any liability for damages that are incurred due to the fact that the
instructions on the tool or in the operating manual have been disregarded.
The user is responsible for supplementing the operating manual with any instructions resulting from
current national regulations for accident prevention and protection of the environment.
2 Basic safety instructions
The tool has been constructed according to state-of-the-art technology and the acknowledged technical
safety regulations.
When carrying out jobs such as installation, commissioning, set-up, operation, changing the conditions of
use and the mode of operation or carrying out maintenance and service jobs, it is important to observe
the procedures for switching off the tool described in the operating manual.
RoHS information
Information on the presence and location of any substances subject to RoHS (Restriction on Hazardous
Substances) can be found at the following website:
http://www.tycoelectronics.com/customersupport/rohssupportcenter/
Click on “Find Compliance Status…” and enter equipment part number.
2.1 Responsibilities
The tool may only be operated by suitably trained and authorized personnel.
The user must clearly define and observe the responsibilities of the personnel for operation, set-up,
maintenance and service.
It is particularly important to define who is responsible for work on the electrical and pneumatic
equipment. Such work should only be carried out by specially trained staff.
Should the user make any changes to the tool without consulting the manufacturers or the suppliers, the
latter will not be liable for any damage that may result.
2.2 Notes on setting up and operating the tool
The tool may only be set up and operated in perfect technical condition, observing all the safety
regulations and considering any possible dangers. Before commissioning the tool, it is always important
to check whether all safety devices, especially the safety covers, are installed and are functioning
correctly.
Safety covers may only be removed when the tool is not in operation and has been disconnected from the
electricity supply. The housing and the covers in particular may only be removed by specially trained
personnel.

Page 13 / 18 ECOC: EGC0 ; LOC: AI
P/N 2-744014-3 411-18341 Rev.B
Attention:
Touching live parts can cause danger of electrocution with fatal consequences!
If you suspect that the tool cannot be operated safely, it must be switched off and secured against anyone
accidentally switching it on.
The tool may only be used for the purpose specified in the operating manual.
The manufacturers and suppliers will not be liable for any damages which may result due to the tool being
used for a purpose other than that for which it was intended. This is done entirely at the user’s own risk.
2.3 Notes on service and maintenance
It is absolutely essential that tool and equipment parts on which maintenance or service jobs have to be
carried out are disconnected from the electricity supply, unless anything to the contrary is stated in the
operating manual.
The disconnected parts must first be checked to ensure that they no longer carry any current; then they
must be earthed and short-circuited. Adjacent parts carrying current must be insulated.
The electrical equipment of the tool must be checked regularly, faults such as loose connections or
scorched cables must be removed immediately.
If it should be necessary to carry out work on parts which carry current, it is important to engage the
assistance of a second person who, in cases of emergency, can operate the emergency stop or the main
switch or can cut off the electricity supply to the tool. Only insulated tools should be used!
3 Intended use
The crimp tool P/N 0-0654174-2 is used to produce crimp connections between single crimp contacts and
single wires. Contrary to Tyco Electronics application specification 114-2153 the crimp data is to be taken
from the Tyco Electronics customer drawing P/N 654174-2.
This Hand tool is a special model for the customer AIRBUS!
The following contacts may be processed:
P/N 160773 Positive Lock Receptacle
Hand Tool 0-0654174-2
Contact 160773
Size [AWG]
22 - 16
Wire-Ø [mm]
2,3 – 3,3
Strip length [mm] 5,4

Page 14 / 18 ECOC: EGC0 ; LOC: AI
P/N 2-744014-3 411-18341 Rev.B
!!! NOTE !!!
Dimensions on this sheet are in millimetres [mm]. Figures and illustrations are not drawn to scale.
!!! NOTE ON APPLICATION !!!
Cumulative Traumatic Disorders can result from a prolonged use of manually powered hand tools. Tyco
Electronics hand tools are intended for occasional use and low volume applications. For extended use or
production operations, Tyco Electronics offers a wide selection of powered application equipment.
!!! NOTE !!!
The tool may only be used for the described purpose!
4 Technical data
Dimensions: 270x90x35
Weight: 0,75kg
Electrical connection: /
Pneumatic connection: /
Sound pressure level: /
Transportation: in a cardboard box
5 Description
Figure 1
Movable
Handle
Fixated
Handle
Ratchet
Release
Die Set
Crimper
Anvil

Page 15 / 18 ECOC: EGC0 ; LOC: AI
P/N 2-744014-3 411-18341 Rev.B
Figure 2
6 Set-up (including equipping)
Inserting a contact
1. Before inserting a contact the tool needs to be opened fully. Now the locking is opened by turning it,
the contact positioner is swievelled out to the front and the contact is pushed to the stop into the
positioner. Pay attention that the u-profile of the crimping- and insulation flanks shows upwards in
direction of the crimper (see figure 3 and 4).
Figure 3 Figure 4
2. Now the contact positioner is swivelled back whereby the contact is exactly positioned over the anvil.
The locking is closed again by turning it.
Adjusting the insertion depth of the contact
In order to adjust the insertion depth the contact positioner was equipped with a setscrew. Turning it
clockwise reduces the insertion depth, turning it anti-clockwise increases the insertion depth (see figure
5).
Contact
Positioner
Locking

Page 16 / 18 ECOC: EGC0 ; LOC: AI
P/N 2-744014-3 411-18341 Rev.B
Figure 5
7 Operation
1. At first the handle needs to be closed slightly until the inserted contact is held in the inlet bevel of the
crimping profile.
2. Now the wire is inserted so that the insulation ends between the insulation barrel and the wire barrel
(see figure 6).
Figure 6
3. Now the cable must be held in this position and at the same time the handle must be closed
consistently. The integrated ratchet prevents premature opening and guarantees that the contacts are
crimped with the correct force. In Case of an operating fault the crimp tool can be opened prematurely by
unlocking the integrated ratchet. Therefore the handles are squeezed slightly and the ratchet release
turned anticlockwise with the help of a slotted screwdriver.
4. In the end the handle is opened again and the cable with the crimped contact can be removed (see
figure 7).
Figure 7

Page 17 / 18 ECOC: EGC0 ; LOC: AI
P/N 2-744014-3 411-18341 Rev.B
8 Changing the expendable parts
!!! NOTE !!!
For changing the expendable parts a hex socket head wrench with size 2,5 is supplied.
Contact positioner
In order to change the contact positioner the fillister-head screw needs to be removed. After that the
positioner can be removed and exchanged (see figure 8 and 9).
Figure 8 Figure 9
Crimper
The crimper is also fixed with a fillister-head screw. In order to take it out the pliers need to be opened
fully. After the screw has been removed the crimper can be drawn out to the front (see figure 10 and 11).
Figure 10 Figure 11
Anvil
The anvil too is fixed with a fillister-head screw which can only be reached with the pliers slightly
compressed. The screw is removed and the anvil drawn out (see figure 12 and 13).

Page 18 / 18 ECOC: EGC0 ; LOC: AI
P/N 2-744014-3 411-18341 Rev.B
Figure 12 Figure 13
9 Spear and wear parts
Figure 14 Figure 15
1) 4-1579021-1 Die set (crimper, anvil)
2) 7-1579015-9 Contact positioner
10 Maintenance and preventive maintenance
Prior to operation the tool must be in a proper and clean condition. Any residues should be removed.
The joints should be oiled regularly with light precision mechanics oil and protected against soiling.
Once the hand tool is no longer required it should be stored dry and clean.
1
1
2
-
 1
1
-
 2
2
-
 3
3
-
 4
4
-
 5
5
-
 6
6
-
 7
7
-
 8
8
-
 9
9
-
 10
10
-
 11
11
-
 12
12
-
 13
13
-
 14
14
-
 15
15
-
 16
16
-
 17
17
-
 18
18
Tyco Electronics 0-0654174-2 Operating Instructions Manual
- Category
- Cable assembly tools
- Type
- Operating Instructions Manual
Ask a question and I''ll find the answer in the document
Finding information in a document is now easier with AI
in other languages
- Deutsch: Tyco Electronics 0-0654174-2
Related papers
Other documents
-
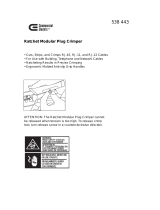 Commercial Electric CE180608A Operating instructions
-
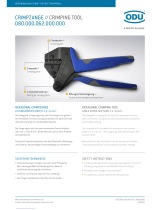 ODU 080.000.062.000.000 User manual
-
Wentronic WZ CRIMP 11 User manual
-
 Multi-Contact M-0GG-SW Installation guide
-
 Airbus Tactilon Dabat User manual
-
Harting 09 99 000 0881 Owner's manual
-
 HRS HT801/MDF97-22S User manual
-
Molex 207129 Series User manual
-
e+p TZ 7 Datasheet
-
 Wurth Elektronik 600 003 Operating instructions


