Page is loading ...

46241A
Printed in Canada 11-06-2021
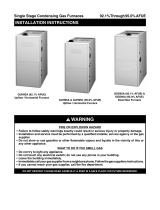
INSTALLATION INSTRUCTIONS FOR THE CADDY
ADVANCED FURNACE BLOWER BOX
PA08585/PA08586
This manual is available for free download on the manufacturer’s web site.
It is a copyrighted document. Re-sale is strictly prohibited. The
manufacturer may update this manual from time to time and cannot be
responsible for problems, injuries, or damages arising out of the use of
information contained in any manual obtained from unauthorized sources.
Eco-energy at the hearth
of your home
CADDY
250, de Copenhague,
St-Augustin-de-Desmaures
(Quebec)
CANADA G3A 2H3

2
Table of contents
1 BLOWER BOX ASSEMBLY INSTALLATION ......................................................... 4
2 DUCT SUPPORT INSTALLATION......................................................................... 10
1.1 Installation on TOP ........................................................................................... 14
1.2 Installation on the RIGHT side .......................................................................... 16
1.3 Installation on the LEFT side ............................................................................ 17
3 GENERAL ELECTRICAL WIRING DIAGRAM ...................................................... 18
4 BLOWER BOX DIMENSIONS ................................................................................ 20
If you are installing the duct support on top of the fan housing, you will need to
install the top air return plenum kit PA08506 (not included).
For installation instructions of the other components of the furnace (temperature
sensor, servomotor, electronic boards) as well as electrical diagrams for the wood-
electric or wood-oil combination furnace refer to the Caddy Advanced furnace
user’s manual.
CONTENT OF THE BOX (PA08585 & PA08586)
1
CARDBOARD AIR FILTER 25" X 14" X1" FILTER SUPPORT
ASSEMBLY
1x
2 CARDBOARD AIR FILTER 25" X 14" X1" 1x
3 BLOWER BOX SIDE PANEL 2x
4 BLOWER BOX ASSEMBLY 1x
5 G10 BLOWER ASSEMBLY WITH REGULAR 1/3HP MOTOR 1x
6 G10 BLOWER ASSEMBLY WITH ECM 1/2HP 1x
7 MOTOR BLOWER ACCESS DOOR 1x
8 BLACK SCREW #10 X 5/8" QUADREX #2 TYPE A 36x
9 BLOWER BOX MANUAL KIT 1x
10 DUCT SUPPORT ASSEMBLY 1x

3

4
1 BLOWER BOX ASSEMBLY INSTRUCTIONS
Step 1
Unscrew the screws (C) and keep them.
Dispose of the part (A).

5
Step 2
Take 3 screws (B), kept in the previous step, and reinstall them as the picture
below.

6
Step 3
Unscrew the screws (C) used to secure the electronic board cover plate (E) and
the protective housing (D) and of the furnace as shown. Keep all parts from this
step.

7
Step 4
Unscrew the screws (H) of parts G and F.
Remove them and keep them.

8
Step 5
Install the leveling bolts (J).
Put the blower box in place.
Using the screws (H) contained in the instruction manual kit, secure the box in
place.

9
Step 6
Using the screws (B), kept in step 1, finish fixing the blower box.
Take the blower wire and pass it through the grommet (J) contained in the manual
kit.

10
Step 7
Install the blower wire in the grommet (K).
Pull the excess wire to secure with the Ty-Rap (L) provided in the manual kit.

11
Caution! The following steps apply only to the
connection of the ECM motor.
Step 8
Remove part (N) to install the grommet (K).

12
Step 9
Take the black wire coming from the blower and connect the wire (O) contained in
the manual kit and pass it through the 2 grommets; one from the blower box and
one from the electronic card box.
The wire (O) is Y-shaped and contains the fuse holder.
The fuse used is 1/4" x 1 1/4" | 10A | 250V.

13
Step 10
Disconnect the black wire from the electronic board and connect the wire from
the blower.
Take the unplugged wire from the power cord and connect it to the wire coming
from the blower.

14
2 DUCT SUPPORT INSTALLATION
You can install the duct support on the TOP, RIGHT or LEFT side of the blower box.
IMPORTANT! If you decide to install the assembled duct support on top of the blower
box, you will need to purchase and install the top air return plenum option PA08506, sold
separately.
2.1 Installation on TOP
Make sure the side panels (G) are secured to the blower housing with the screws (H)
provided. Next, secure the duct support assembly (F) to the top of the blower housing
using the screws (H) previously retained.

15
Next, install the top air return plenum option PA08506 (M). Assembly instructions for the
plenum are included with the kit, sold separately.

16
2.2 RIGHT side installation
Secure the right blower housing side panel (G) to the top of the blower housing with the
screws (H) provided. Secure the left blower housing side panel (G) to the left side of the
blower housing with the screws (H) provided. Then secure the duct support assembly (F)
to the right side of the blower housing with the screws (F).

17
2.3 LEFT side installation
Secure the left blower housing side panel (G) to the top of the blower housing with the
screws (H) provided. Secure the right blower housing side panel (G) to the right side of
the blower housing with the screws (H) provided. Then secure the duct support assembly
(F) to the left side of the blower housing with the screws (F).

18
3
REGULAR MOTOR ELECTRICAL WIRING DIAGRAM

19
4 ECM MOTOR ELECTRICAL WIRING DIAGRAM

20
BLOWER BOX DIMENSIONS
/