Page is loading ...

Before you start staking out the area to be excavated,
it’s a good idea to contact your local utility companies,
or Dig Safe, and ask them to mark all underground cables &
pipes. Allow about 72 hours advance notice for this service.
Site Layout & Excavation
Call
DIG SAFE
first - it’s free!
1.800.344.7233
www.digsafe.com
TM
Start with a corner stake and measure out your project area, leaving about a 6” - 12” leeway
from actual pavement edges for installation of edge restraints. Make sure your corner is 90 degrees!
Set a series of stakes along the perimeter of the excavation area and connect with taught string or nylon mason’s line.
Any pavement should always be sloped away from buildings for drainage, so you will need to grade the soil during
excavation. The minimum slope should be a 1” drop for every 5’, or about 1-1/2 % slope. (So, if you have a stake every
5 feet, drop the string 1” increments on each consecutive stake. You will measure all elevations and base
thickness from the initial string lines. Be sure to clearly mark the string position on each stake in case they are
accidently moved. Use the base material project chart to figure out how far down you have to dig. For “poor”
clasy soils, always use the maximum base thickness. Now you’re ready to start digging!
After excavation of the area, be sure to compact the subgrade with a vibrating plate compactor. The compaction
must be uniform, thorough and complete before moving on to tethe next step.
Step
2
...1
Notes:
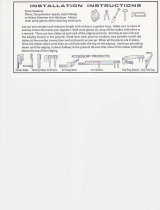
Do you have everything you need?
Gloves
Grub Hoe
Shovel
Wheelbarrow
Line Level
Mason Line
Tamper
Stiff-bristle Push Broom
Plate Compactor (Rental)
Paver Splitter (Rental)
Power Saw (Rental)
Diamond Blades
Marking Crayons
Knee Pads
Measuring Tape
Diamond Blades
Stakes
Duct Tape
3 lb Hammer
Mason’s Chisel
Square Trowel
Small Knife Trowel
Screwdrivers
Utility Knife
Rubber Mallet
Metal Snips
Level
Pry Bar
Rake
Steel or Bevel Square
Screed (1” to 1 1/2” steel pipe)
Screed Board (2 x 4 x 6 to 8”)
It is Important to gather all the tools you need to do the job before you begin.
Having everything on site and handy will avoid unnecessary delays and hassles.
Using the right tool for each task makes your work easier an densures a proper installation
Tools Checklist
Nantucket Paver
INSTALLATION GUIDE
Step
1
Nantucket Pavers, Inc.

Edge Restraints
Unless the pavers are butting against existing curbs or a foundation, it is important to install edge
restraints around the entire perimeter. This keeps the pavers in position and prevents them from
spreading or loosening. Various types of edging materials can be used. Flexible plastic edging,
which is easy to install & will not rot or rust, is perfect for circles or curves. When you need to restrain
a straight line of pavers, it is best to use rigid lengths of edging.
Place it directly on the compacted base & secure it by driving 10” stakes into the pre-drilled holes
every 2 feet. (You may have to purchase extra stakes for the suggested placement.) Be sure that
all square corners are exactly 90 degrees. It’s that simple!
Step
4
Compaction
Compaction describes the process of mechanically increasing the density of the soil & base material.
There are three keys to compacting an adequate base:
1. The Method of Compaction. A rented plate compactor that runs between 75 to 90 hertz will help you achieve
excellent compaction. Hand Tampers will suffice for very small areas and are go
which need special attention to receive the same compaction rate as the rest of the area.
2. The moisture content of the base material or soil. Soils compact better when they contain the right amount
of moisture. If you squeeze a handful of soil & it retains it’s shape when you open
moisture content. If not, you must keep the material slightly damp while compacting. If the surface starts to puddle or
sweat while you are compacting, the material is too wet & must be allowed to dry ou
Never work with frozen base material or soil!
3. Compacting the material in “lifts” or layers. You must spread & compact the base material in a maximum of
3” to 4” layers. (If using a hand tamper only, layer no more than 2” at a time.)
thoroughly compacted before spreading the next one. Check elevations and surface fa
base material to correct low spots, making sure to thoroughly compact any additions before moving on.
When proper compaction has been achieved, the surface should be smooth. If it is still coarse, you
must compact a “choke course” of fine material into the surface to prevent the bedding sand from migrating down.
Step
3
Base Installation
This step is is critical to a successful paver project! It is essential to follow the correct procedure
for base installation, without rushing, in order to avoid serious problems with your finished
pavement
Nantucket Pavers, Inc.
...2

Have your pattern handy
Please refer to the manufacturer’s pattern guide for
pattern layouts specific to the pavers you have chosen.
Keep the pattern picture handy and lay the pavers in
the order suggested for optimum rhythm & efficiency.
Cutting Pavers
The easiest & quickest way to cut pavers is either with a
hand-held power saw equipped with a diamond blade, or
a guillotine cutter. Mark the cut line on the paver with
something that easily washes off- pencil, marking crayon,
soapstone, etc. If your saw has a wet-cut blade, be sure
to rinse the pasty residue off of the pavers immediately;
Don’t forget to wear the proper
Safety glasses, gloves, a dust mask & hearing
protection.
A few notes before laying the pavers
1.
2.
Are you laying a Border Course?
Cutting odd-sized pavers to fit around the very edge of
your area can lead to instability. Instead, try over-laying
your field course first. Then, as you lay the border course
of whole pavers next to the edge restraint, cut the field
pavers to fit within the border.
Border Courses can be made from a completely different
shape & color than the main field pavers. See your
manufacturer’s guide for sample border styles.
Distributing inherent color shades
Pavers from different cubes may have been manufac-
tured at different times & under different conditions,
resulting in subtle shade variations. When installing,
try to randomly choose a few from each pallet as you go.
This will create an even distribution and a fantastic effect.
3.
4.
safety gear!
otherwise, it will stain.
Screeding
The bed of sand must be leveled so that it is an even 1” or 1-1/2” depth. This leveling process is called screeding.
Start by laying 1” to 1-1/2” diameter steel pipes (”Screed Rails”) on the compacted base about 6’ to 8’ apart and
parallel. At this point, check that the top of the pipes are:
2” below the finished elevation for 2-3/8” (6cm) pavers and 2-3/4” below for 3-1/8” (8cm) pavers.
Pack a small amount of sand around the pipes
to hold them in place. (You can also use spikes to
keep them from rolling apart.)
Cover the pipes & the area in between with sand.
Level the sand by drawing the screed board along
the top of the pipes with a backward motion.
(Pulling toward you.)
If room permits, simply slide the pipes backward
or move one to the other side in an adjacent area.
Repeat procedure.
The voids left by the pipes need to be filled with sand
and carefully hand floated with a trowel.
Never screed more bedding sand than you will cover in a day.
Do not disturb, walk on or compact sand in any way before laying the pavers!
Setting the Sand Bed
Pavers are generally “dry set” in a bed of concrete sand. This method is not only easier & neater
than others, it also allows for simple paver repairs or replacements - just pop up the damaged piece
& replace with a new one! The biggest technical advantage of a sand bed installation method is
the finished pavement flexibility and load expansion capabilities.
The finished sand bed must be between 1” to 1-1/2” deep.
Step
5
Nantucket Pavers, Inc.
...3

Sweep the pavement clean & wash it off with water. Be careful not to wash sand out of the
joints! Back-fill the perimeter with topsoil & seed or your choice of landscaping material.
Although it is not necessary to seal pavers, sealer intensifies the color and protects your pavers from stains,
ensuring a beautiful surface for many years. Cleaning & sealing can also restore the original appearance of raw
pavers that have been exposed to dirt & wear over time. Please talk to your sales representative
about these products. Nantucket Pavers recommends a Water Based Sealer and be sure to test one block or a
or a corner of one block first, let dry and see if you like the look of the sealer prior to sealing the entire patio.
Sealer can not be removed once applied.
FINISHING
Step
8
When all pavers are laid and you are satisfied with placement, pattern and fit, it is time to compact the
pavers into the bedding sand. Compaction evens the top surface of your pavement and starts the
interlock process by forcing sand up through the joints. DO NOT use your plate compactor to set these
patio blocks! You must use a rubber mallet to tamp the blocks down into the bedding sand. Be sure
all patio blocks have been properly tamped down and compacted into place.
Start on one edge of the pavement and compact the perimeter first. Then, go back and forth through the main field.
Do not compact any pavers that are within 3 feet of an unrestrained edge.
After initial compaction, you are ready to begin filling the joints with sand. We recommend concrete sand.
Spread some DRY concrete sand over the top of your pavers. With a stiff bristle push-broom, begin
sweeping the sand around the pavers and into the joints using a push-pull-pound motion. When joints are
full, sweep off excess sand and repeat compaction. This will vibrate the sand down & allow you to sweep the
next lot into the joints. Repeat sand sweep. Continue until all joints are filled and tight.
Retain some sand in a dry place and re-sweep after joints have settled over a period of 30 - 60 days.
COMPACT & JOINT SAND
Step
7
Click
When you lay the pavers, the best way to maintain consistent
joint spacing and a neat pattern is to use the “Click and Drop”
Method. After the first few pavers have been laid to establish
the pattern and 90 degree angle, grasp the next paver by the
top 1/2” (as shown.) Slide through the air horizontally, toward
it’s proper resting spot, about a 1/2” below the top of the laid
paver. Let the long edge just tap side of the the laid paver.
When you hear the click of the pavers tapping, drop it in place.
Click and Drop
If you are using a border course, lay the main field pavers first, marking out and leaving adequate space
for the border. You can over-lay the main field a bit if the spacing is questionable. Then, begin laying down the border course,
cutting the field pavers to fit inside if necessary.
LAYING
All concrete pavers are made to perfectly interlock when placed along a straight line. Therefore, it
is essential that you begin laying your pavers from a perfect 90 degree angle, preferably from one of
the corners. Do not assume that all corners, even pre-existing building corners, are 90 degrees.
Check! Once this is established, a series of strings or snapped chalk every 5 or 6 feet will help
“keep you in line.” Think gravity and start at the lowest ground first. Always work from the
surface that has already been paved, leaving the bedding sand undisturbed.
6
Step
Nantucket Pavers, Inc.
...4
Nantucket Pavers
INSTALLATION GUIDE
/