Page is loading ...

4. TECHNICAL DESCRIPTION
3. INTRODUCTION
5. IMPORTANT
5.1 IMPORTANT INFORMATION
- Recommended Water Pressure: 0.5 -12
bar. In higher pressure areas, use a
pressure reducer.
- Recommended Operating Temperature:
4° to 60°. It is recommended to remove the
timer from the tap during colder months and
when temperatures drop below 4°. The
timer should not be subjected to freezing
temperatures or frost.
- Recommended Water Source: Use cold
mains water only. If you are using a gravity
fed watering system, ensure that you use a
tap filter.
Do not use any bore or unfiltered water. Do
not use any kind of pump to draw water. Do
not use if the water supply is unstable. Do
not use any liquids other than water.
6. INSTALLATION
6.1 INSTALLING BATTERIES
- 2x AA Alkaline batteries required.
- On the back of the timer unit you will see a
small door. Remove the door and insert the
batteries. Replace the door and you're
ready to start setting up your watering
program.
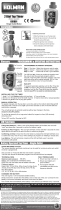
7. TIMER FEATURES
7.1 DIAL
SET CLOCK: Set current day/time
SET RUN DAY: Which days to water?
SET START TIME: 1 or 2 intervals per day?
SET MINUTES: How long to water for?
SET TIME DELAY: In the event of rain!
MANUAL: Manual override of set program
OFF: Turns unit off
AUTO: The set program will run its course.
8. DIAL FUNCTIONS
8.1 OFF
- Turn the DIAL to OFF
- A 10 second countdown will be displayed on
the LCD screen.
- The timer will switch off after 10 seconds.
7.2 BUTTONS : LEFT / OK / RIGHT
1. TITLE PAGE
1.1 INTRODUCTION:
USER MANUAL FOR:
ELECTRONIC BALL VALVE
WATER TIMER
Stock no. 36750 Part no. WTBV1
1.2 REVISIONS:
As our user manuals are continually updated, users should
make sure that they use the very latest version.
Downloads are available from:
http://www.drapertools.com/manuals.pgm
DRAPER TOOLS LIMITED, HURSLEY ROAD,
CHANDLER’S FORD, EASTLEIGH, HAMPSHIRE, SO53
1YF, UK
WEBSITE: drapertools.com
PRODUCT HELPLINE: +44 (0) 23 8049 4344
GENERAL FAX: +44 (0) 23 8026 0784
1.3 UNDERSTANDING THIS
MANUALS SAFETY CONTENT:
WARNING! Information that draws attention to the risk of
injury or death.
CAUTION! Information that draws attention to the risk of
damage to the product or surroundings.
1.4 COPYRIGHT © NOTICE:
Copyright © Draper Tools Limited. Permission is granted to
reproduce this publication for personal & educational use only.
Commercial copying, redistribution, hiring or lending is
prohibited. No part of this publication may be stored in a
retrieval system or transmitted in any other form or means
without written permission from Draper Tools Limited. In all
cases this copyright notice must remain intact.
Date first published August 2019
3.1 SCOPE
This timer allows setting watering time easy
dial with manual on/off and clear digital display
3.2 SPECIFICATION
Stock No................................................36750
Part No. ...............................................WTBV1
Inlet................................ 1"BSP Female with a
............ ¾"BSP female adaptor ring with filter.
Outlet.......................... ¾" BSP Male with a ½"
............................................... hose connector
3.3 HANDLING & STORAGE
Do not drop this machine.
Store out of the reach of children.
- The Draper Water Timer is best suited to a
cold mains fed system.
- The timer connects to the tap using the 1"
connector or ¾" reducer supplied.
- Using a hose connector (not supplied),
connect the hose directly to the timers, ½"
connector.
- Set the required watering time on the dial
before timing the water on.
SET
MINUTES
SET
START TIME
SET
RUN DAY
SET
CLOCK
AUTO
OFF
MANUAL
SET
TIME DELAY
OK
36750
ELECTRONIC BALL VALVE
WATER TIMER
These instructions accompanying the product are the original instructions. This document is part of the product, keep it for the
life of the product passing it on to any subsequent holder of the product. Read all these instructions before assembling,
operating or maintaining this product.
This manual has been compiled by Draper Tools describing the purpose for which the product has been designllowing all the
general safety instructions contained in this manual, it will ensure both product and operator safety, together with longer life of
the product itself.
All photographs and drawings in this manual are supplied by Draper Tools to help illustrate the operation of the product.
Whilst every effort has been made to ensure the accuracy of information contained in this manual, the Draper Tools policy of
continuous improvement determines the right to make modifications without prior warning.
2. WARRANTY
2.1 WARRANTY
Draper tools have been carefully tested and inspected
before shipment and are guaranteed to be free from
defective materials and workmanship.
Should the tool develop a fault, please return the
complete tool to your nearest distributor or contact
Draper Tools Limited, Chandler's Ford, Eastleigh,
Hampshire, SO53 1YF. England.
Telephone Sales Desk: (023) 8049 4333 or Product
Help Line (023) 8049 4344.
A proof of purchase must be provided with the tool.
If upon inspection it is found that the fault occurring is
due to defective materials or workmanship, repairs will
be carried out free of charge. This warranty period
covering labour is 12 months from the date of purchase
except where tools are hired out when the warranty
period is 90 days from the date of purchase. The
warranty is extended to 24 months for parts only. This
warranty does not apply to any consumable parts, any
type of battery or normal wear and tear, nor does it
cover any damage caused by misuse, careless or
unsafe handling, alterations, accidents, or repairs
attempted or made by any personnel other than the
authorised Draper warranty repair agent.
Note: If the tool is found not to be within the terms of
warranty, repairs and carriage charges will be quoted
and made accordingly.
This warranty applies in lieu of any other warranty
expressed or implied and variations of its terms are not
authorised.
Your Draper warranty is not effective unless you can
produce upon request a dated receipt or invoice to
verify your proof of purchase within the warranty period.
Please note that this warranty is an additional benefit
and does not affect your statutory rights.
Draper Tools Limited.
Note: This tool is intended for domestic use only.

11.1 DISPOSAL
- At the end of the machine’s working life, or
when it can no longer be repaired, ensure
that it is disposed of according to national
regulations.
- Contact your local authority for details of
collection schemes in your area.
In all circumstances:
• Do not dispose of power tools with domestic
waste.
• Do not incinerate.
• Do not abandon in the environment.
• Do not dispose of WEEE* as
unsorted municipal waste.
* Waste Electrical & Electronic Equipment.
9. SETTING UP YOUR
WATERING PROGRAM
PLEASE NOTE: If you make a mistake while
setting any of the following functions, simply
turn the DIAL back one click and then forward
one click
and you can start programming that function
again.
9.1 SET CLOCK
- To set the current day and time, turn the
DIAL to SET CLOCK.
- Press LEFT and RIGHT buttons to set the
day of the week, then press OK.
- Press LEFT and RIGHT buttons to set the
current time, then press OK.
- The current day and time is now set.
- Please note: Clock will need resetting when
clocks go forward and back for daylight
saving
9.2 SET RUN DAY
- Turn the DIAL to SET RUN DAY.
- Press LEFT and RIGHT buttons to select
the days. Press OK to select that day. A
black line will appear underneath.
- Continue to select other days as required.
To cancel a selected day, move to the
selected day and then press OK.
9.5 AUTO
- Turn the DIAL to AUTO and your watering
program will now run its course.
- In AUTO mode the display will automatically
cycle through your set watering program so
you can see what has been programmed.
9.6 SET TIME DELAY
- If it rains or you wish to delay your set
program for any reason then you can use
this function.
- When using this function, the next session
will start after the programmed time delay
has passed. Your timer will then revert to
your pre-set program.
- Turn the DIAL to SET TIME DELAY
- Press LEFT and RIGHT buttons to set the
time delay. Press OK.
- Turn the DIAL to AUTO.
9.3 SET START TIME
- Turn the DIAL to SET START TIME
- Press LEFT and RIGHT buttons to select 1
or 2 watering sessions per day. Press OK.
- You will then be asked to enter the time(s)
that you wish watering to commence.
- It is recommended that new batteries are
installed if you are going away for a long
period of time.
- Make sure you only use new alkaline
batteries.
- To prevent corrosion, always remove the
battery when the timer is not in use for long
periods of time or when the battery is low.
- Keep clear of any dirt or debris which may
block the valve and cause the timer to
malfunction.
- Disassembling the timer improperly will void
all warranties.
8.2 MANUAL
- Overrides the set program for manual
control.
- Turn the DIAL to MANUAL
- Press the LEFT and RIGHT button to select
ON or OFF. Press OK.
ON OFF
TIME DELAY
9.7 LOW BATTERY INDICATOR
- When the screen is blank and you see a
flashing red battery symbol, it is time to
change the battery.
- The timer will shut down automatically and
close the valve before the battery becomes
completely flat, thus conserving accidental
water wastage.
SUN MON TUE WED THU FRI SAT
SUN MON TUE WED THU FRI SAT
9.4 SET MINUTES
- To indicate how many minutes each
watering session will last.
- Turn the DIAL to SET MINUTES
- Press LEFT and RIGHT BUTTONS to set
how long you wish to water for. Press OK.
- Your watering program is now complete.
11. DISPOSAL
10. TIMER CARE &
MAINTENANCE
SET
MINUTES
SET
START TIME
SET
RUN DAY
SET
CLOCK
AUTO
OFF
MANUAL
SET
TIME DELAY
8.3 AUTO
- By turning the DIAL to AUTO, your set
watering program will begin to run.
- The display will automatically cycle through
your set watering program so you can see
what has been programmed.
- After 30 seconds the display will
automatically switch off to conserve battery
life.
- If you haven't yet set a watering program,
please follow the instructions in “SETTING
UP YOUR WATERING PROGRAM”.
/