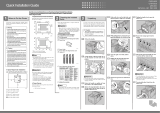
Page is loading ...

Read this manual carefully before you use this machine and keep it handy for future reference. For safe and correct use, be sure to read the Safety Information
before using the machine.
10
8
9
Guide to the Printer
Setting Up
Connecting the Printer
Configuration
Installing the Printer Driver
Paper and Other Media
Replacing Consumables
Cleaning and Adjusting the Printer
Troubleshooting
Removing Misfed Paper
Appendix
1
2
3
4
5
6
7
11
Operating Instructions
Hardware Guide

Trademarks
Microsoft, Windows and Windows NT are registered trademarks of Microsoft Corporation in the United States
and/or other countries.
Adobe
®
, PostScript
®
, Acrobat
®
, PageMaker
®
and Adobe Type Manager are registered trademarks of Adobe
Systems Incorporated.
PCL
®
is a registered trademark of Hewlett-Packard Company.
Apple, AppleTalk, EtherTalk, Macintosh, Mac OS, and True Type are trademarks of Apple Computer, Inc.,
registered in the U.S. and other countries.
IPS-PRINT Printer Language Emulation Copyright© 1999-2000 Oak Technology, Inc., All rights reserved.
NetWare is a registered trademark of Novell, Inc.
Other product names used herein are for identification purposes only and might be trademarks of their respective
companies. We disclaim any and all rights to those marks.
The proper names of the Windows operating systems are as follows:
* The product name of Windows
®
95 is MicrosoftR Windows
®
95.
* The product name of Windows
®
98 is MicrosoftR Windows
®
98.
* The product name of Windows
®
Me is MicrosoftR Windows
®
Millennium Edition (Windows Me).
* The product names of Windows
®
2000 are as follows:
Microsoft
®
Windows
®
2000 Professional
Microsoft
®
Windows
®
2000 Server
Microsoft
®
Windows
®
2000 Advanced Server
* The product names of Windows
®
XP are as follows:
Microsoft
®
Windows
®
XP Home Edition
Microsoft
®
Windows
®
XP Professional
* The product names of Windows Server
™
2003 are as follows:
Microsoft
®
Windows Server
™
2003 Standard Edition
Microsoft
®
Windows Server
™
2003 Enterprise Edition
Microsoft
®
Windows Server
™
2003 Web Edition
* The product names of Windows NT
®
4.0 are as follows:
Microsoft
®
Windows NT
®
Workstation 4.0
Microsoft
®
Windows NT
®
Server 4.0
Some illustrations in this manual might be slightly different from the machine.

TABLE OF CONTENTS
Positions of WARNING and CAUTION labels...............................................................................................4
Manuals for This Printer......................................................................................................................................6
How to Read This Manual.................................................................................................................................7
Symbols...........................................................................................................................................................7
Names of Major Options..............................................................................................................................7
Description for the Specified Model.................................................................................................................9
1. Guide to the Printer
Exterior: Front View..........................................................................................................................................11
Exterior: Rear View...........................................................................................................................................12
Inside.................................................................................................................................................................13
Control Panel....................................................................................................................................................14
Options.............................................................................................................................................................16
External Options..........................................................................................................................................16
Internal Options...........................................................................................................................................17
2. Setting Up
Where to Put the Printer...................................................................................................................................19
Space Required for Installation...................................................................................................................19
Installing the Toner bottle.................................................................................................................................22
Loading Paper..................................................................................................................................................26
Loading Paper into Tray 1 (Tandem Tray).................................................................................................26
Loading Paper into Tray 2 and 3...............................................................................................................27
Turning the Power On......................................................................................................................................29
Selecting the Display Language......................................................................................................................31
Test Printing.......................................................................................................................................................33
3. Connecting the Printer
Network Connection........................................................................................................................................35
Reading the LED Lamps...............................................................................................................................36
USB Connection...............................................................................................................................................37
Parallel Connection..........................................................................................................................................38
4. Configuration
Ethernet Configuration.....................................................................................................................................39
Using DHCP - Detecting the Network Address Automatically.................................................................41
Making Network Settings for Using Netware...........................................................................................43
1

Setting the Ethernet Speed..........................................................................................................................44
IEEE 802.11b (Wireless LAN) Configuration................................................................................................47
Setting SSID..................................................................................................................................................49
Setting a WEP key.......................................................................................................................................50
5. Installing the Printer Driver
Quick Install......................................................................................................................................................53
Install the Operating Instructions.....................................................................................................................55
6. Paper and Other Media
Paper and Other Media Supported by This Printer.......................................................................................57
Paper Recommendations.................................................................................................................................59
Loading Paper..............................................................................................................................................59
Storing Paper................................................................................................................................................59
Types of Paper and Other Media..............................................................................................................59
Paper Not Supported by this Printer...........................................................................................................61
Print Area......................................................................................................................................................61
Loading Paper..................................................................................................................................................63
Loading Paper into Tray 1 (Tandem Tray).................................................................................................63
Loading Paper into Tray 2 and 3...............................................................................................................66
Loading Paper into the A3 / 11" × 17" Tray Unit....................................................................................72
Loading Paper into the Large Capacity Tray (LCT)...................................................................................73
Loading Paper in the Interposer (optional)................................................................................................74
7. Replacing Consumables
Replacing the Toner bottle...............................................................................................................................77
Adding Staples.................................................................................................................................................81
Finisher SR841.............................................................................................................................................81
Finisher SR4000..........................................................................................................................................83
Finisher SR4000 (Saddle Stitch).................................................................................................................86
8. Cleaning and Adjusting the Printer
Cautions to Take When Cleaning...................................................................................................................91
Adjusting Tray Registration..............................................................................................................................92
9. Troubleshooting
Error & Status Messages on the Display Panel..............................................................................................95
When Call-light Is Lit or Blinking...................................................................................................................104
2

When the Machine does Not Print...............................................................................................................106
Checking the port connection...................................................................................................................107
Other Printing Problems.................................................................................................................................108
Additional Troubleshooting...........................................................................................................................113
Pausing Print When Using Finisher...............................................................................................................115
Removing Jammed Staples...........................................................................................................................116
Finisher SR841..........................................................................................................................................116
Finisher SR4000........................................................................................................................................118
Finisher SR4000 (Saddle Stitch)..............................................................................................................120
Removing Staple Waste................................................................................................................................123
Removing Punch Waste.................................................................................................................................124
Finisher SR841..........................................................................................................................................124
Finisher SR4000........................................................................................................................................125
10. Removing Misfed Paper
Removing Misfed Paper................................................................................................................................127
Remove Misfeed A, U: Internal................................................................................................................127
Remove Misfeed B-F: Internal..................................................................................................................130
Remove Misfeed Q: Interposer................................................................................................................135
Remove Misfeed R: Finisher......................................................................................................................137
11. Appendix
Moving and Transporting the Printer............................................................................................................147
Disposal..........................................................................................................................................................148
Consumables..................................................................................................................................................149
Toner bottles..............................................................................................................................................149
Specification...................................................................................................................................................150
Mainframe.................................................................................................................................................150
Options.......................................................................................................................................................152
INDEX...........................................................................................................................................................163
3

Positions of WARNING and CAUTION labels
This machine has labels for
WARNING and CAUTION at the positions shown below. For safety,
please follow the instructions and handle the machine as indicated.
AST006S
4

AST007S
1. The inside of this printer becomes very hot. Do not touch parts with this label (indicating a hot surface).
Touching these parts will result in burns.
2. Do not touch this section of the machine. It could cause injury.
3. Do not touch this section of the machine. It could cause injury.
4. Do not touch this section of the machine. It could cause injury.
5. High temperature - Do not touch this cover when removing misfed paper.
6. Do not touch the paper exit section of the finisher. It could cause injury.
7. Do not touch the paper exit section of the finisher. It could cause injury.
5

Manuals for This Printer
For particular functions, see the relevant parts of the manual.
Safety Information
Provides information on safe usage of this machine.
To avoid injury and prevent damage to the machine, be sure to read this.
Hardware Guide (This manual)
Contains information about paper and procedures such as installing options, replacing consumables,
responding to error messages, and resolving jams.
Software Guide (HTML)
Contains procedures for using this machine in a network environment, utilizing the software, and using
security functions.
Note to Administrator
Contains administrators' notes, such as information about administrators' hidden menus and hard disk
overwrite functions.
Administrators must store this manual carefully.
6

How to Read This Manual
Symbols
The following set of symbols is used in this manual.
This symbol indicates a potentially hazardous situation that might result in death or serious injury when you
misuse the machine without following the instructions under this symbol. Be sure to read the instructions, all
of which are described in the Safety Information section.
This symbol indicates a potentially hazardous situation that might result in minor or moderate injury or
property damage that does not involve personal injury when you misuse the machine without following the
instructions under this symbol. Be sure to read the instructions, all of which are described in the Safety
Information section.
*The statements above are notes for your safety.
If this instruction is not followed, paper might be misfed, originals might be damaged, or data might be
lost. Be sure to read this.
This symbol indicates precautions for operation, or actions to take after abnormal operation.
This symbol indicates a reference.
[ ]
Keys that appear on the machine's display.
Keys and buttons that appear on the computer's display.
[ ]
Keys built into the machine's control panel.
Keys on the computer's keyboard.
Names of Major Options
Major options of this machine are referred to as follows in this manual:
• [Large Capacity Tray] [LCT]
• [3000 sheet 100 sheet staple Finisher] Finisher SR841
7

• [Booklet Finisher] Finisher SR4000
8

Description for the Specified Model
In this manual, the following items explain about the printer for the specified models:
This explains about the 220 - 240 V model printer.
Read if you purchase this model.
This explains about the 120 V model printer.
Read if you purchase this model.
• You can identify the printer's model by checking the label on its inside as shown.
AST162S
9

10

1. Guide to the Printer
Exterior: Front View
AST001S
1. Call- light
Notifies you of errors during printing, such as paper jam and out of paper.
2. External Tray (optional)
Printed paper is delivered here.
3. Power Switch
Switches the power of the printer to On or Stand by mode.
4. Control Panel
Contains keys for the printer operation and a panel display that shows the printer status.
5. Front Cover
Open this cover to replace some parts or remove paper misfeed.
6. Paper tray (trays 1 to 3)
Feed paper loaded.
11
1

Exterior: Rear View
AST002S
1. Ethernet Port
Use a network interface cable to connect the printer to the network.
2. USB port
Use a USB cable to connect the printer to the host computer.
3. Ventilation
Prevents overheating. Place no objects against or near these holes.
4. Controller Board
Attach the interface cable, network interface cable or the USB interface cable here.
1. Guide to the Printer
12
1

Inside
AST003S
1. Fusing Unit
Fuses the image onto paper.
When "Replace Fusing Unit" message appears on the panel display, replace the fusing unit.
For details about replacing this unit, contact your sales or service representative.
2. Toner
When "Add toner" message appears on the display panel, replace a toner bottle.
3. Duplex Unit
Prints on both sides of paper.
Inside
13
1

Control Panel
AST004S
1. Display
Shows the current status of the printer and error messages.
2. [Job Reset] key
When the printer is online, press this key to cancel any ongoing print jobs.
3. Online Indicator/[Online] key
Indicates whether this machine is online or offline. Press this key to switch the machine between online and offline.
If online, the machine is ready to receive data, and the lamp is lit.
If offline, the machine is not ready to receive data, and the lamp is unlit.
Pressing this key during any settings returns the machine to the default screen.
4. [Form Feed] key
When the printer is offline, press this key to print all data left in the printer's input buffer.
You can use this key to force the printer to print data received in the online status when the paper size or type
does not match the size or type actually set.
5. [Menu] key
Press this key to make and check the current printer settings.
6. Power indicator
Is lit while the printer power is on.
Is unlit when the power is turned Stand by or while the printer is in the Energy Saver mode.
7. Error indicator
Blinks or lights whenever a printer error occurs.
When this light is lit in red, take action based on the message displayed on the control panel.
8. Data In indicator
Blinks while the printer is receiving data. Is lit if there is data to be printed.
9. [Escape] key
1. Guide to the Printer
14
1

Press this key to return to the previous condition on the display.
10. [ Enter] key
Press this key to confirm or apply settings to proceed to the subsequent steps.
11. [ ] [ ] keys
Press these keys to increase or decrease displayed values when making settings. Keep pressed to quicken
scrolling, and increase or decrease values displayed in increments of 10.
Control Panel
15
1

Options
This section introduces the names and functions of main optional parts.
External Options
This section provides explanations about external options.
AST005S
1. Output Jogger
Attached to the Finisher SR4000 to tidy the printout.
2. Output Jogger
Attached to the Finisher SR841 to tidy the printout.
3. External Tray
Printed paper is delivered here.
4. Large Capacity Tray (LCT)
Holds 4,000 sheets of paper.
5. Extension unit
Attached to the LCT and holds 2,500 sheets of B4 JIS or 8
1
/
2
" × 11" sized paper.
6. Finisher SR4000
The saddle stitch function can staple the copies in the centre and fold them into booklets.
*1: Finisher upper tray
*2: Finisher shift tray
*3: Finisher booklet tray
7. Finisher SR841
Sorts, stacks, staples and punches print.
*4: Finisher shift tray
*5: Finisher upper tray
1. Guide to the Printer
16
1

8. Interposer
Inserts cover or slip sheets into the printed.
9. A3/11" × 17" tray unit
You can load A3 or 11" × 17" paper in tray 1 using this unit.
10. LCT Connection Unit
Connect the LCT to the printer.
Internal Options
This section provides explanations about internal options.
• IEEE 1284 Interface Board
Connects to the IEEE 1284 cable.
• IEEE 802.11b Interface Unit
Allows you to install the wireless LAN interface.
• Gigabit Ethernet Board
Allows you to communicate with 1000 BASE-TX.
• Remove the machine's Ethernet and USB ports before connecting the Gigabit Ethernet Board.
• If you want to install the unit, contact your sales or service representative.
Options
17
1

1. Guide to the Printer
18
1
/