Page is loading ...

AQUA STAR
KIT # HRR502
WARRANTY
Herr Engineering Corp. guarantees this kit to be free from defects in both materials and workmanship at the time of
purchase. This warranty does not cover any component damaged buy use or modification. In no case shall Herr
Engineering Corporation’s liability exceed the original cost of the purchased kit. Further Herr Engineering Corp.
reserves the right to change or modify this warranty without notice.
In that Herr Engineering Corporation has no control over the assembly or use, no liability shall be assumed or
accepted for any damage resulting from the use by the user during construction of the kit or the use of the final user
assembled product. By the act of building this kit and/or using the final user assembled product, the user accepts all
liability.
If the buyer and/or user is not prepared to accept all of the liability associated with this product, he is advised to
immediately return this kit in new and unused condition to the place of purchase for a full refund.
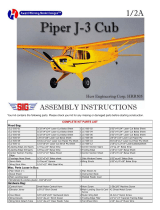
Assembly Instructions
Herr Engineering Corp.
Award Winning Model Designs
™
A Division of SIG Mfg. Co., Inc.
P.O. Box 520 • Montezuma, Iowa 50171-0520
Phone: (641)623-5154 • Website: www.iflyherr.com

Notes about the laser cut parts
1...The first thing that you need to do is to identify and mark the part numbers on the laser cut parts using the drawings on the
following pages as a guide.
2...It is possible that several of the laser cut parts may not be completely cut through. If this is the case you can free the part from the sheet
quickly using an X-acto knife.
3...The slight discoloration on the edges of the laser cut parts may be removed by lightly sanding the edges with 400 grit sandpaper.
Kit Contents:
Your kit contains the following parts. Please check your kit for any missing or damaged parts before starting construction.
Wood Bag:
Qty. . . . . . . . . . .Name . . . . . . . . . . . . . . . . . . . . . . . . . . . . .Description
1 . . . . . . . . . . . .LC-502-01 . . . . . . . . . . . . . . . . . . . . . . . . .3/32” x 4” x 24” Laser Cut Balsa Sheet
1 . . . . . . . . . . . .LC-502-02 . . . . . . . . . . . . . . . . . . . . . . . . .3/32” x 4” x 24” Laser Cut Balsa Sheet
1 . . . . . . . . . . . .LC-502-03 . . . . . . . . . . . . . . . . . . . . . . . . .3/32” x 4” x 24” Laser Cut Balsa Sheet
1 . . . . . . . . . . . .LC-502-04 . . . . . . . . . . . . . . . . . . . . . . . . .3/32” x 4” x 24” Laser Cut Balsa Sheet
1 . . . . . . . . . . . .LC-502-05 . . . . . . . . . . . . . . . . . . . . . . . . .3/32” x 3” x 12” Laser Cut Balsa Sheet
1 . . . . . . . . . . . .LC-502-06 . . . . . . . . . . . . . . . . . . . . . . . . .3/32” x 3” x 12” Laser Cut Balsa Sheet
1 . . . . . . . . . . . .LC-502-07 . . . . . . . . . . . . . . . . . . . . . . . . .3/32” x 3” x 12” Laser Cut Balsa Sheet
1 . . . . . . . . . . . .LC-502-08 . . . . . . . . . . . . . . . . . . . . . . . . .3/32” x 3” x 12” Laser Cut Balsa Sheet
1 . . . . . . . . . . . .LC-502-10 . . . . . . . . . . . . . . . . . . . . . . . . .1/16” X 1 1/2” X 4” Laser Cut Birch Ply
1 . . . . . . . . . . . .Wing Tips . . . . . . . . . . . . . . . . . . . . . . . . . .3/4” Balsa Triangle x 12”
1 . . . . . . . . . . . .Float Brace . . . . . . . . . . . . . . . . . . . . . . . . .1/4” sq. x 6” Balsa Strip
1 . . . . . . . . . . . .Tip Float L/E & T/E . . . . . . . . . . . . . . . . . .1/2” sq. x 7” Balsa Strip
2 . . . . . . . . . . . .Tip Float Mount . . . . . . . . . . . . . . . . . . . . .1/16” x 1 1/4” x 5 3/4” Birch Ply
1 . . . . . . . . . . . .Pylon Block . . . . . . . . . . . . . . . . . . . . . . . .3/4” x 2” x 4 1/2” Balsa Block
1 . . . . . . . . . . . .Fuselage Nose Block . . . . . . . . . . . . . . . . .2” x 2” x 1 3/4” Balsa Block
1 . . . . . . . . . . . .Hatch . . . . . . . . . . . . . . . . . . . . . . . . . . . . .1/2” x 3” x 3” Balsa Block
1 . . . . . . . . . . . .Fuselage Rear Bottom . . . . . . . . . . . . . . . . .3/32” x 3” x 3 1/2” Balsa Sheet
Wood (Loose in Box)
Qty. . . . . . . . . . .Name . . . . . . . . . . . . . . . . . . . . . . . . . . . . .Description
1 . . . . . . . . . . . .LC-502-09 . . . . . . . . . . . . . . . . . . . . . . . . .3mm x 6” x 9” Laser Cut Poplar Ply
2 . . . . . . . . . . . .Leading Edge . . . . . . . . . . . . . . . . . . . . . . .1/4” sq. x 24” Balsa Strip
4 . . . . . . . . . . . .Main Spar . . . . . . . . . . . . . . . . . . . . . . . . . .1/4” sq. x 24” Balsa Strip
4 . . . . . . . . . . . .Leading Edge Strips . . . . . . . . . . . . . . . . . .3/32” sq. x 24” Balsa Strip
2 . . . . . . . . . . . .Trailing Edge . . . . . . . . . . . . . . . . . . . . . . .1/4” x 1” x 24” Tapered Balsa Trailing Edge
4 . . . . . . . . . . . .1/16” Balsa Sheet . . . . . . . . . . . . . . . . . . . .1/16” x 3” x 18” Balsa Sheet
Misc. Parts Loose in Box
Qty. . . . . . . . . . .Name . . . . . . . . . . . . . . . . . . . . . . . . . . . . .Description
1 . . . . . . . . . . . .Plan Sheet #1
1 . . . . . . . . . . . .Plan Sheet #2
1 . . . . . . . . . . . .Decal Sheet
1 . . . . . . . . . . . .Instruction Book
1 . . . . . . . . . . . .Windshield . . . . . . . . . . . . . . . . . . . . . . . . ..005” x 3 1/4” x 6” Acetate
1 . . . . . . . . . . . .Pushrod . . . . . . . . . . . . . . . . . . . . . . . . . . . .1/16” x 36” Music Wire (“Z” Bend on each end)
Hardware Bag
Qty. . . . . . . . . . .Name . . . . . . . . . . . . . . . . . . . . . . . . . . . . .Destruction
2 . . . . . . . . . . . .Control Horn . . . . . . . . . . . . . . . . . . . . . . . .Small Nylon Control Horn
4 . . . . . . . . . . . .Horn Screw . . . . . . . . . . . . . . . . . . . . . . . . .2-56 x 3/8” Machine Screw
1 . . . . . . . . . . . .Elevator Joiner . . . . . . . . . . . . . . . . . . . . . .1/8” x 3” Birch Dowel
2 . . . . . . . . . . . .Wing Dowels . . . . . . . . . . . . . . . . . . . . . . .3/16” x 3 3/4” Birch Dowels
1 . . . . . . . . . . . .Windshield Filler . . . . . . . . . . . . . . . . . . . .3/8” sq. x 2 3/4” Balsa Strip
1 . . . . . . . . . . . .Tip Float Dowel . . . . . . . . . . . . . . . . . . . . .1/8” x 1 1/2” Birch Dowel
Page 2

Additional Items Required ( Not Included in Kit)
Note: These are parts that we have used and are familiar with. There are many other brands available and you may substitute other items that you are more
comfortable with or have on hand.
Qty. . . . . . . . . . .Name . . . . . . . . . . . . . . . . . . . . . . . . . . . . .Description
1 . . . . . . . . . . . .Engine . . . . . . . . . . . . . . . . . . . . . . . . . . . .Norvel Big Mig .049 or Norvel Big Mig .061
3 . . . . . . . . . . . .Hinges . . . . . . . . . . . . . . . . . . . . . . . . . . . .Sig Easy Hinges # SH-710 or Du-Bro # Kwik Hinge # 537
1 . . . . . . . . . . . .Motor Mount . . . . . . . . . . . . . . . . . . . . . . .Dave Brown # 0506
4 . . . . . . . . . . . .Motor Mount Screws and Blind Nuts . . . . .4-40 x 3/4” Machine Screws and Blind Nuts Sig # SH-111 or Du-Bro # 129
1 . . . . . . . . . . . .Servo Mount Tape . . . . . . . . . . . . . . . . . . . .Sig SH-119 or Du-Bro # 634
1 . . . . . . . . . . . .Throttle Pushrod Assembly . . . . . . . . . . . . .Sig # SH-559 or Du-Bro # 165 ( if using throttle control)
1 . . . . . . . . . . . .Fuel Tank . . . . . . . . . . . . . . . . . . . . . . . . . .Sullivan 1oz. # SS-1 or 2oz. # SS-2
1 . . . . . . . . . . . .1/2-A Fuel Line . . . . . . . . . . . . . . . . . . . . .Sig # SH-288 or Du-Bro # 221
2 . . . . . . . . . . . .Servo Connectors . . . . . . . . . . . . . . . . . . . .Sig # SH-736 or Du-Bro # 121 ( 3 Reqd. if using Throttle)
1 . . . . . . . . . . . .White Covering Material . . . . . . . . . . . . . . .1 Roll Top Flite Monokote, Jet White # TOPQ0204
1 . . . . . . . . . . . .Red Covering Material . . . . . . . . . . . . . . . .1 Roll Top Flite Monokote, Missile Red # TOPQ0201
1 . . . . . . . . . . . .Propeller . . . . . . . . . . . . . . . . . . . . . . . . . . .Grish Tornado 6-3 Nylon Propeller # GRIQ1050
8 . . . . . . . . . . . .Rubber Bands (wing & float attach) . . . . . .Sig # SH-340
1 . . . . . . . . . . . .Switch Mount . . . . . . . . . . . . . . . . . . . . . . .Du-Bro # 203
Page 3

Page 4

Building Instructions:
General Note: Cover the plans with wax paper before assembling your model to prevent the parts from sticking to the plan.
Building the Tail Surfaces:
1...Join R-1 and R-2 together over the plan. Temporarily hinge the rudder to the fin. Do not glue the hinges at this time.
2...Join parts S-2 to each end of S-1.
3...Join the elevators (S-3) using the 1/8” dowel. Use the plan and part S-1 as a guide. Trim the dowel as required to achieve
the proper length.
4...Temporarily hinge the elevators to the stabilizer. Do not glue the hinges at this time.
5...Sand the tail surfaces smooth and round all of the edges except the bottom edge of the fin.
Building the Fuselage:
6...Glue parts F-2 to the front of the fuselage sides (F-1).
7...Glue F-3 into position on the fuselage sides. Be careful to make one right and one left hand side.
8...Glue parts F-5 and F-5A together as shown on the plan.
9...Place the right fuselage side on the building board and place formers F-4, F-5 and F-6 into position. These formers should
be 90 degrees to the Fuselage side. Glue the formers to the fuselage side.
10...Glue the left fuselage side into position on the formers. The formers should also be 90 degrees to this fuselage side.
11...Put former F-11 into position and clamp the aft end of the fuselage together with two clothes pins. Align the joint at the
rear of the fuselage 90 degrees to the fuselage top and glue the sides together. Now glue F-11 into position.
12...Place F-10 into position and carefully squeeze the fuselage sides into contact with F-10 and glue in position.
13...Place the aft fuselage top (F-12) into position. Glue F-12 to the top of formers F-6, F-10 and F-11. Gently squeeze the
fuselage sides into contact with the top and glue together.
14...Glue F-13 into position.
15...Place F-7 into position and squeeze the fuselage sides into contact with F-8. Glue F-8 and F-7 into place.
16...Place F-9 into position by placing the tab on F-9 into the notch in F-8 and rotating F-9 down into position. Glue F-9 into
place.
17...Glue the keel (F-14) into position in the slots in the bottom of the formers.
18...Using a fore and aft motion, sand the bottom edge on the fuselage sides to match the angle on the bottom of the formers.
19...Cut one of the 1/16” x 3” x 18” sheets in half to make two strips 1 1/2” wide. Use these pieces to sheet the bottom rear of
the fuselage between F-5A and F-11. The joint between the two pieces of sheet should be centered on the keel. When the
glue is dry, sand the bottom sheet flush with the fuselage sides.
20...Use the 3/32” x 3” x 3” sheet to sheet the bottom of the fuselage from F-11 to the end. Trim and sand the sheet to match
the fuselage bottom and sides.
21...Cut another 1/16” x 3” x 18” sheet in half to make the forward bottom fuselage sheet. Use these two pieces to sheet the
bottom of the fuselage between F-8 and F-5. Center the joint on the keel as you did the aft sheet. Trim flush with the fuse
lage sides, F-8 and F-5.
22...Glue F-15 and F-16 into position on the forward top of the fuselage. Sheet the fuselage top between these two formers with
1/16” sheet. You may wet the outside of this sheet to help form the curved shape. Trim the sheet flush with the front of
F-15 and flush with the rear of F-16.
23...Tack glue the hatch block into position using one small drop of glue at each corner where the hatch rests on F-9. Sand the
hatch to match the curve of F-8 and F-15.
24...Glue the nose block to the front of the fuselage. Trim the block to match the top profile shown on the plan first. Then trim
the block to match the side profile. Now round the top to match the hatch and then sand the bottom to match the angles of
the fuselage bottom.
25...Glue F-17 to the front of F-4. Glue the 3/8” sq. fairing block into position on top of F-17 and sand to shape.
26...Sand the entire fuselage smooth with 320 grit sand paper.
Page 5

Building the Left Wing:
27...Pin the lower 1/4” sq. spar and the trailing edge to the left wing plan.
28...Cut the lower 1/16” sheet for the lower inboard end of the wing and glue in place between the trailing edge and the spar.
29...Glue the lower plywood dihedral brace to the front of the lower spar. Place the first W-1 rib into position. Use the dihedral
gauge to angle the top of this rib toward the tip and glue the rib into position
30...Glue the other W-1 rib and all of the W-2 ribs into position. These ribs should be 90 degrees to the building board.
31...Glue the aft center rib (W-4) into position.
32...Glue the top 1/4” sq. spar into position. The inboard end of the spar should end in the middle of W-4.
33...Glue the top plywood dihedral brace to the front of the top spar.
34...Glue the leading edge and the 3/32” sq. strips to the leading edge.
35...Add the 1/16” sheet to the inboard end of the wing between the spar and the trailing edge. Use three pieces of 1/16” sheet
to sheet the inboard top of the wing from the spar to the leading edge. These pieces go between the 3/32” sq. strips and not
on top of them.
36...Remove the wing from the plan and add the lower 1/16” sheet to the inboard end between the spar and the leading edge.
37...Trim and sand the spars, leading edge and the trailing edge flush with the last W-2 rib.
38...Glue the forward center rib W-5 into position.
Building the Right Wing:
39...Place the left wing into position on the end of the right wing plan. Place a spacer under the last W-2 rib to raise the tip
3 1/4” above the building board. The lower 1/16” plywood dihedral brace for the right wing should be flat against the plan.
Pin the left wing into this position.
40...Pin the lower spar and the trailing edge into position for the right wing. Glue the spar to the dihedral brace and glue the
trailing edge to the left wing.
41...Add the lower rear inboard sheet to the right wing and finish assembling the right wing as you did the left.
NOTE: When you sheet the top of the right wing you want to butt the sheet against W-4 and W-5. This will leave two slots
in the center of the wing for the engine pylon to plug into.
42...When the right wing is finished, sand the entire wing smooth and sand the leading edge round.
43...Cut the 3/4” triangle for the wing tips in half and glue to the ends of the wing. The front of the tip block should be flush
with the leading edge, and the bottom should be flush with the bottom of the W-2 rib. Sand the tip blocks to match the air
foil section of the ribs and then sand them smooth.
Building the Engine Pylon:
44...Place your engine mount on the firewall (P-3) and drill the mounting holes in the firewall. Place blind nuts into the holes and
secure with thin C/A glue being careful not to get any into the threads.
45...Glue P-3 to the front of P-1. You should have a small amount of right thrust (2 or 3 degrees). Down thrust is automatically
provided by the angle on the front of F-1.
46...Glue parts P-2 to each side of the pylon.
47...Place a small dot or square of masking tape over the back of the blind nuts in the left side of the firewall and glue the pylon
block into position. Sand the block to shape and sand the front and rear edges of the F-2 pieces round.
48...Test fit the pylon to the wing. It should fit all of the way into the slots with the bottom edges of the P-2 pieces making
contact with the wing center sheeting.
Building the Tip Floats:
49...Make the center keel of the tip floats by gluing parts T-1 and T-2 together.
50...Glue pieces T-3, T-4, T-5 and T-6 into the notches in the bottom of T-2. These parts should be 90 degrees to F-2 when
viewed from the bottom.
51...Glue one part T-7 to each side of the tip float. The front and rear should be flush with T-3 and T-6.
52...Sheet the bottom of the tip float with one piece of 1/16” sheet. Sheet the top with two pieces (one on each side) of 1/16”
sheet. Sand the sheet flush with the sides and the front and back of the float.
53...Cut the 1/2” sq. strip into 4 pieces and glue them to the front and rear of the tip floats. Sand the blocks to shape.
54...Round the four corners of the tip float mount plates (T-8).
55...Cover the tip floats and the mount plate with iron on covering.
Page 6

56...Mark the mounting plates where the tip floats will attach and remove the covering from this location. Glue the tip floats to
the mounting plates. Cut the 1/4” sq. strip to make triangular braces and glue into position.
57...Cut the 1/8” dowels to length. Remove the covering from the mount plate at the dowel location and glue the dowels into
position. Paint the dowels to seal the wood.
Pre-Cover Assembly:
58...Glue the stabilizer to the fuselage.
59...Glue the fin to the fuselage and to the stabilizer. Glue R-4 to the bottom of the fuselage.
60...Temporarily hinge the elevators and then the rudder to the model. Cut the slot for the lower rudder hinge. Do not glue the
hinges at this time.
61...Install the control horns onto the rudder and elevator.
62...Cut the 1/16” wire pushrod in half. Attach the “Z” bend end of the pushrods to the control horns and insert into the fuse
lage. ( you will have to remove the horns to insert the push rods). Bend the aft end of the pushrods to eliminate any binding
at the exit.
63...Mount the elevator and rudder servos to the fuselage side with servo tape. ( For the tape to stick securely you should lightly
clean the side of the servo with alcohol to remove any oil. Remove the paper backing from the tape and apply two strips of
servo tape to the servo. Remove the paper backing from the tape on the servo and lightly coat the exposed face of the tape
with thick C/A glue. Press the servo into position on the inside of the fuselage side and hold securely until the glue dries.)
Attach the pushrods to the servos with pushrod connectors.
64...Cut the windshield using the pattern on the plan and test fit to the fuselage.
Covering:
65...Remove the engine, Control surfaces and other items. Sand the entire model smooth with 320 grit sandpaper. Remove the
hatch from the model and cover it separately.
66...Cover the model with your choice of iron on covering materials. Cover the engine pylon at this time.
67...Apply the decals and other markings as desired. An ultra fine Sharpie Marker can be used to draw panel lines and other
details. Paint the wing hold down dowels.
Final Assembly:
68...Install the elevators and then the rudder to the model and glue the hinges in place.
69...Install the pushrods and control horns and connect the pushrods to the servos.
70...Glue the wing hold down dowels into position.
71...Glue the windshield into position. Seal the windshield around the dowels.
72...Cut the covering material fron the slots in the top of the wing. Glue the engine pylon into position on the wing. Install the
engine mount to the firewall and bolt the engine to the mount.
73...Install the throttle cable. Use a “U” shaped piece of wire imbedded and glued into the pylon block to restrain the throttle cable
housing. Drill a hole in the wing and glue the lower end of the housing in place.
74...Mount the throttle servo on the bottom of the wing with servo tape.
75...Assemble the fuel tank. The tank mounts on it’s side so position the vent and pickup tubes properly. Clean the pylon side of
the tank and the pylon with alcohol and mount the tank to the pylon with servo tape. You can add small hooks and rubber
bands to help secure the tank if you wish.
76...Run the fuel and vent lines to the tank.
77...Install the receiver and battery pack so that the model balances at the point shown on the plan. Wrap the battery and
receiver with foam rubber. If necessary, add weight to the nose or tail until the model balances at the point shown on the plan
with the fuel tank empty. The battery may need to be forward under the hatch. The hatch is then sealed with clear tape or
matching covering material. The tip floats should be rubber banded to the wings when you balance the model.
78...Attach the wing to the model with a minimum of 4 rubber bands on each side. Set the control throws to the measurements
shown on the plan.
79...Verify that the model balances at the point shown on the plan before flying. Verify that the control throws are set and that the
controls move in the proper direction.
80...Always pre-flight your model thoroughly before each flight. It is your responsibility to verify that your model is airworthy.
Always follow established safety guidelines while starting and operating the engine, radio and while flying the model.
Page 7

Herr Engineering Corp.
Aqua Star Ad
ditional Instructions
These optional chine rails can be added to
your model to enhance the water handling and
improve water take-offs.
Materials are not supplied with the kit.

1/2-A Motor Operating Notes:
Our experience is that with proper handling, the Norvel and other small motors will perform very well. Most of the problems that we have seen
are a result of not reading the instructions and understanding that these motors have some specific requirements that you have to follow to get the
best performance.
To g
et the best performance from Norvel motors:
1...Use the Big Mig version not the AME. The AME motors are designed for competition while the Big Mig is a sport motor. The Big Mig has
plenty of power and is much more user friendly and will idle much better than the AME version.
2...
Use the Freedom glow plug and head. Do not use the stock glow plug P/N-100138 . The stock plug is a very cold plug and and is not very
user friendly for the sport flyer. Do use the optional Freedom glow plug P/N-110138 and head. This plug will start very easily with the standard
battery and runs very well. At some time in the middle of 1998, Norvel will be switching over and start shipping all motors with the freedom glow
plug. If the parts list with your motor shows the part number for the glow plug as 110138 then your motor came from the factory with the Freedom
glow plug as standard equipment.
To get the best performance from all small motors:
3...Break the motor in properly. When using high nitro fuel, break in the motor with two gaskets under the glow head. For a proper break in
you need to start the motor, adjust the needle valve and throttle for a fairly high power setting (but still rich) and let it run for 2 to 3 minutes. Then
stop the motor and let it cool down. Repeat this procedure several times, leaning out the mixture a little more each time. With about 30 minutes
running time (10 three minute runs) you will be able to lean the motor for full power. It should start very easy, run very reliably and be ready to fly.
After the motor is broken in you may remove one of the gaskets from under the glow head for more power.
4...
Use 25% nitro fuel. The high nitro content will produce a very smooth, consistent running motor. If you must use a lower nitro fuel do not go
below 15%. If you break in the motor following the above advice and the motor is not running properly then try switching to a different fuel. Don’t
cheat yourself by using a cheap fuel. Also, for motors that have a muffler like the Norvel, connect the muffler pressure to the vent on the tank. They
run better and produce a more consistent run using muffler pressure.
The fuels that we have used with good results are:
SIG Champion 25 K & B 1000 Norvel Fuel Byrons 1/2A Fuel Cox Super Power Cox Racing Fuel
Our best results have been with a fuel that has some or all castor oil in the mix.
There are other fuels available that will work just as well as the ones listed above. These are just the ones we have tried.
Herr Engineering Corp. Kit #502 Aqua-Star Correction Sheet, Re
vision #5
#1...Be sure to mount the engine far enough forward on the mount so the rear of the muffler does not interfere with the firewall.
#2...Several of the rudder / fin parts are numbered wrong on the sheet layouts on page 4 of the instruction book, but you should have no difficulty
identifying them by laying them on the plan.
#3...After the model is covered do not remove all of the covering from the rear pushrod exits. This can allow excess water to enter the fuselage. Just
make a single slit with your knife down the center of the exit and allow the covering material to form a semi-seal around the pushrod. Adding thin
foam tape to the wing saddle area will help prevent water from entering the model in this area. If your model gets much water inside, remove the
wing and allow the wood to dry before flying. Water in the back end of the model can cause the balance point to move too far back.
#4...If the nose of your model “plows under” during takeoff, try removing some or all of the down thrust by adding washers between the firewall and
the bottom of the motor mount. This should not be a problem if you stay with the recommended engine sizes. Putting a bigger or more powerful
engine than a .061 Glow engine will produce disappointing results. Most .10 engines only put out about 20% more power than the Norvel .061 but
weigh almost 3 times as much. You will actually lose performance with a .10 engine, and the additional weight that high on the model will cause
handling problems on the water.
#5...The “Z” Bend pushrods have now been replaced with 18” rods with small clevises.
#6...The 3/4” triangle wing tip blocks are shorter than the last wing rib. Glue them flush with the leading edge and taper the trailing edge forward to
be flush with the aft end of the block. This taper is shown on the wing plan but is not described in the instruction book.
#7...The proper technique to initiate water take offs is: Point the model directly into the wind. With the engine at idle, hold full up elevator. Slowly
advance the throttle ( 5 seconds from idle to full throttle ). As speed builds up the model will come up on the step. Then relax the pressure on the
elevator stick slowly to neutral or just slightly up. Once take off speed has been achieved, apply a small amount of up elevator to climb out.
/