Page is loading ...


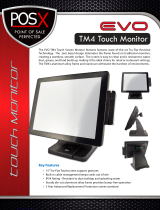
International Point of Sale: CornerStore POS
3
1-866-468-5767 or 201-928-0222 International Point of Sale
How to attach the VFD Rear Display
Step 1: First you must disassemble the computer from the stand (if you have not done so already)
Step 1a: Loosen the Thumb Screw [1] and slide the stand towards the panel on the bottom. To
attach the stand back, reverse the steps mentioned.

International Point of Sale: CornerStore POS
4
1-866-468-5767 or 201-928-0222 International Point of Sale
Step 2: Attach the VFD to the stand by fastening the screws [2], as shown below
Step 3: Run the cable through the slot shown above.
Step 4: Connect the cable onto the COM 4 slot (Mark with 12V in red color) on the panel under the
monitor.
Step 5: Put the Monitor back onto the stand.

International Point of Sale: CornerStore POS
5
1-866-468-5767 or 201-928-0222 International Point of Sale
Installing the Drivers for the VFD
Step 1: Download the file:
http://cornerstorepos.com/downloads/hardware/EVO-RD4-VFD%20Config.zip
Step 2: Open the application P07303II_AIO
Step 3: Click on Scan Device.

International Point of Sale: CornerStore POS
6
1-866-468-5767 or 201-928-0222 International Point of Sale
Step 4: Make sure the device is plugged into the computer before proceeding. Click on Auto-Scan.
It should produce a message at the top of the screen when done looking similar to this.
Take note of the COM number.


International Point of Sale: CornerStore POS
8
1-866-468-5767 or 201-928-0222 International Point of Sale
Step 6: Open up Corner Store and go to Setup -> Hardware Setup -> Pole Display.
Step 7: Select General and select the COM port that was noted earlier. Click Save & Exit. You have now
set up the POSX Rear Display with CornerStore.

International Point of Sale: CornerStore POS
9
1-866-468-5767 or 201-928-0222 International Point of Sale
Magnetic Swipe Reader (MSR) – The MSR is a “plug-and-play” hardware, you do not
need any drivers.
How to attach the MSR onto the monitor
Step 1: Remove the screws [2] from the Dummy Cover on either side (your choice)
Step 2: Connect the cable from the MSR into the connected on the side (as shown below)
Step 3: Insert the reader in place and fasten the screws [2] to keep it secure (as shown above)


International Point of Sale: CornerStore POS
14
1-866-468-5767 or 201-928-0222 International Point of Sale
Step 7: Click on POSPrinter, then click Add New Device.
Step 8: For Device Name select Thermal, For Device Type select Thermal U, Click OK.
Step 9: Select Add New LDN and enter in a name for your printer. Click OK.

International Point of Sale: CornerStore POS
15
1-866-468-5767 or 201-928-0222 International Point of Sale
Step 10: Click on Cash Drawer then click Add New Device. For Device name select Standard, For Device
Type select StandardU. Click OK.
Step 11: Click on the Cash Drawer and select Add New LDN, enter in a name for the cash drawer and
click OK..
Step 12: Click on the Thermal Printer, then click Device Details. Click Printer Test And Setting.

International Point of Sale: CornerStore POS
16
1-866-468-5767 or 201-928-0222 International Point of Sale
Step 13: Click Printer Test, a test page should come out of the printer. Click Close, then OK.
Step 14: Click on the Cash Drawer and click Device Details. Then click on Printer Test And Setting.

International Point of Sale: CornerStore POS
17
1-866-468-5767 or 201-928-0222 International Point of Sale
Step 15: Put Open Level to High, and Pin No to 5 only if you are using a POSX cash drawer. If you are
using any other cash drawer do nothing. Click on Printer test, the cash drawer should open. Click close
then OK.


/