Wolf Range WWD30O Installation guide

Type
Installation guide

This manual is also suitable for

Warming Drawer Installation Guide
WARMING DRAWER
Contents
3 Warming Drawer
4 Specications
7 Installation
7 Troubleshooting
Features and specications are subject to change at any
time without notice. Visit wolfappliance.com/specs for the
most up-to-date information.
2
|
Wolf Customer Care 800.222.7820
Important Note
To ensure this product is installed and operated as safely
and efciently as possible, take note of the following types
of highlighted information throughout this guide:
IMPORTANT NOTE highlights information that is especially
important.
CAUTION indicates a situation where minor injury or product
damage may occur if instructions are not followed.
WARNING states a hazard that may cause serious injury or
death if precautions are not followed.
IMPORTANT NOTE: Throughout this guide, dimensions in
parentheses are millimeters unless otherwise specied.
IMPORTANT NOTE: Save these instructions for the local
electrical inspector.
SAVE THESE INSTRUCTIONS
wolfappliance.com
|
3
WARMING DRAWER
Product Information
Important product information including the model and
serial number are listed on the product rating plate. The
rating plate is located on the left front oor area of the inner
cabinet. The drawer must be open to view the rating plate.
Refer to the illustration below.
If service is necessary, contact Wolf factory certied service
with the model and serial number. For the name of the
nearest Wolf factory certied service or for questions
regarding the installation, visit the contact & support section
of our website, wolfappliance.com or call Wolf customer
care at 800-222-7820.
Rating plate location.
RATING
PLATE
4
|
Wolf Customer Care 800.222.7820
Installation Requirements
The warming drawer must be installed with a Wolf drawer
front, avail able through an authorized Wolf dealer. For local
dealer information, visit the nd a showroom section of our
website, wolfappliance.com. Specic installation instruc-
tions are included with the drawer front.
The warming drawer can be installed in a standard or ush
inset application (excludes L series drawer front).
Finish the edges of the opening. They may be visible when
the drawer is open.
For standard installations, face trim will overlap stiles and
rails. Refer to the chart below.
For ush inset installations, a minimum
1
/8" (3) reveal is
required on all sides. To ensure consistent reveals, each
corner of the opening must be exactly 90°.
An anti-tip block must be installed to prevent the warming
drawer from tipping forward when opened.
Model WWD30O is CSA approved for outdoor installations.
INSTALLATION REQUIREMENTS
BASE SUPPORT MIN
Warming Drawer 200 lb (90 kg)
TRIM OVERLAP
Top, Bottom and Sides
5
/8" (16)
SPECIFICATIONS
Electrical
Installation must comply with all applicable electrical codes.
Locate the electrical supply ush with the back wall and
within the shaded area shown in the illustrations on the
following pages. For ease of installation, the electrical
supply for the warming drawer can be placed in an adjacent
cabinet within reach of the power cord.
IMPORTANT NOTE: When installed outdoors, a ground fault
circuit interrupter (GFCI) is required to reduce the risk of
electrical shock.
ELECTRICAL REQUIREMENTS
Electrical Supply grounded, 120 VAC, 60 Hz
Service 15 amp dedicated circuit
Receptacle 3-prong grounding-type
Power Cord 3'
(.9 m)
Rating plate location.
RATING
PLATE
wolfappliance.com
|
5
SPECIFICATIONS
Warming Drawer
STANDARD INSTALLATION
FRONT VIEW
SIDE
VIEW
TOP VIEW
NOTE: Location of electrical supply within opening may require additional cabinet depth.
23" (584)
OPENING
DEPTH
E
28
5
/8" (727)
OPENING WIDTH
9
1
/8" (232)
OPENING
HEIGHT
ANTI-TIP BLOCK
6
|
Wolf Customer Care 800.222.7820
SPECIFICATIONS
Warming Drawer
FLUSH INSET INSTALLATION
FRONT VIEW
SIDE
VIEW
TOP VIEW
*W
ill be visible and should be finished to match cabinetry.
**
Dimension provides minimum reveals.
NOTE: Location of electrical supply within opening may require additional cabinet depth.
24" (610)
FLUSH INSET
DEPTH
A
DRAWER
FRONT
DEPTH
10
5
/8"
(270)
FLUSH INSET
HEIGHT**
30
1
/8" (765)
FLUSH INSET WIDTH**
3
/4"(19)
3
/4"(19)
3
/4"(19)
E
E
FINISHED
CLEATS*
ANTI-TIP BLOCK
DRAWER FRONT DEPTH
M / E SERIES DRAWER FRONT A
Transitional / Professional 1
1
/8" (29)
Professional (2" thick) 2
1
/8" (54)
Contemporary 1
3
/8" (35)
Custom front panel depth is dependent on panel thickness.
wolfappliance.com
|
7
Troubleshooting
IMPORTANT NOTE: If the warming drawer does not operate
properly, follow these troubleshooting steps:
Verify electrical power is supplied to the warming drawer.
Verify proper electrical connections.
If the warming drawer does not operate properly, contact
Wolf factory certied service. Do not attempt to repair
the warming drawer. Wolf is not responsible for service
required to correct a faulty installation.
Wolf, Wolf & Design, Wolf Gourmet, W & Design and the color red as applied to knobs are registered trademarks and service marks of Wolf Appliance, Inc. Sub-Zero,
Sub-Zero & Design, Dual Refrigeration, The Living Kitchen, Great American Kitchens The Fine Art of Kitchen Design, and Ingredients are registered trademarks and service marks
of Sub-Zero, Inc. All other trademarks or registered trademarks are property of their respective owners in the United States and other countries.
Preparation
Remove and recycle packing materials. Do not discard the
package containing two screws provided for installation.
Install an anti-tip block against the rear cabinet wall. Verify
screws are adequately secured and do not penetrate elec-
trical wiring or plumbing.
Installation
1 Turn power off to the electrical outlet.
2 Slide the left corner of the warming drawer into the
opening. If the electrical supply is located in the opening,
plug the power cord into the receptacle. If it is located in
an adjacent cabinet, guide the power cord through the
hole in the cabinet wall. Coil excess power cord behind
or beside the unit.
3 Slide the unit back into the opening until the trim
meets the cabinet front. Avoid pinching the power cord
between the unit and cabinet wall.
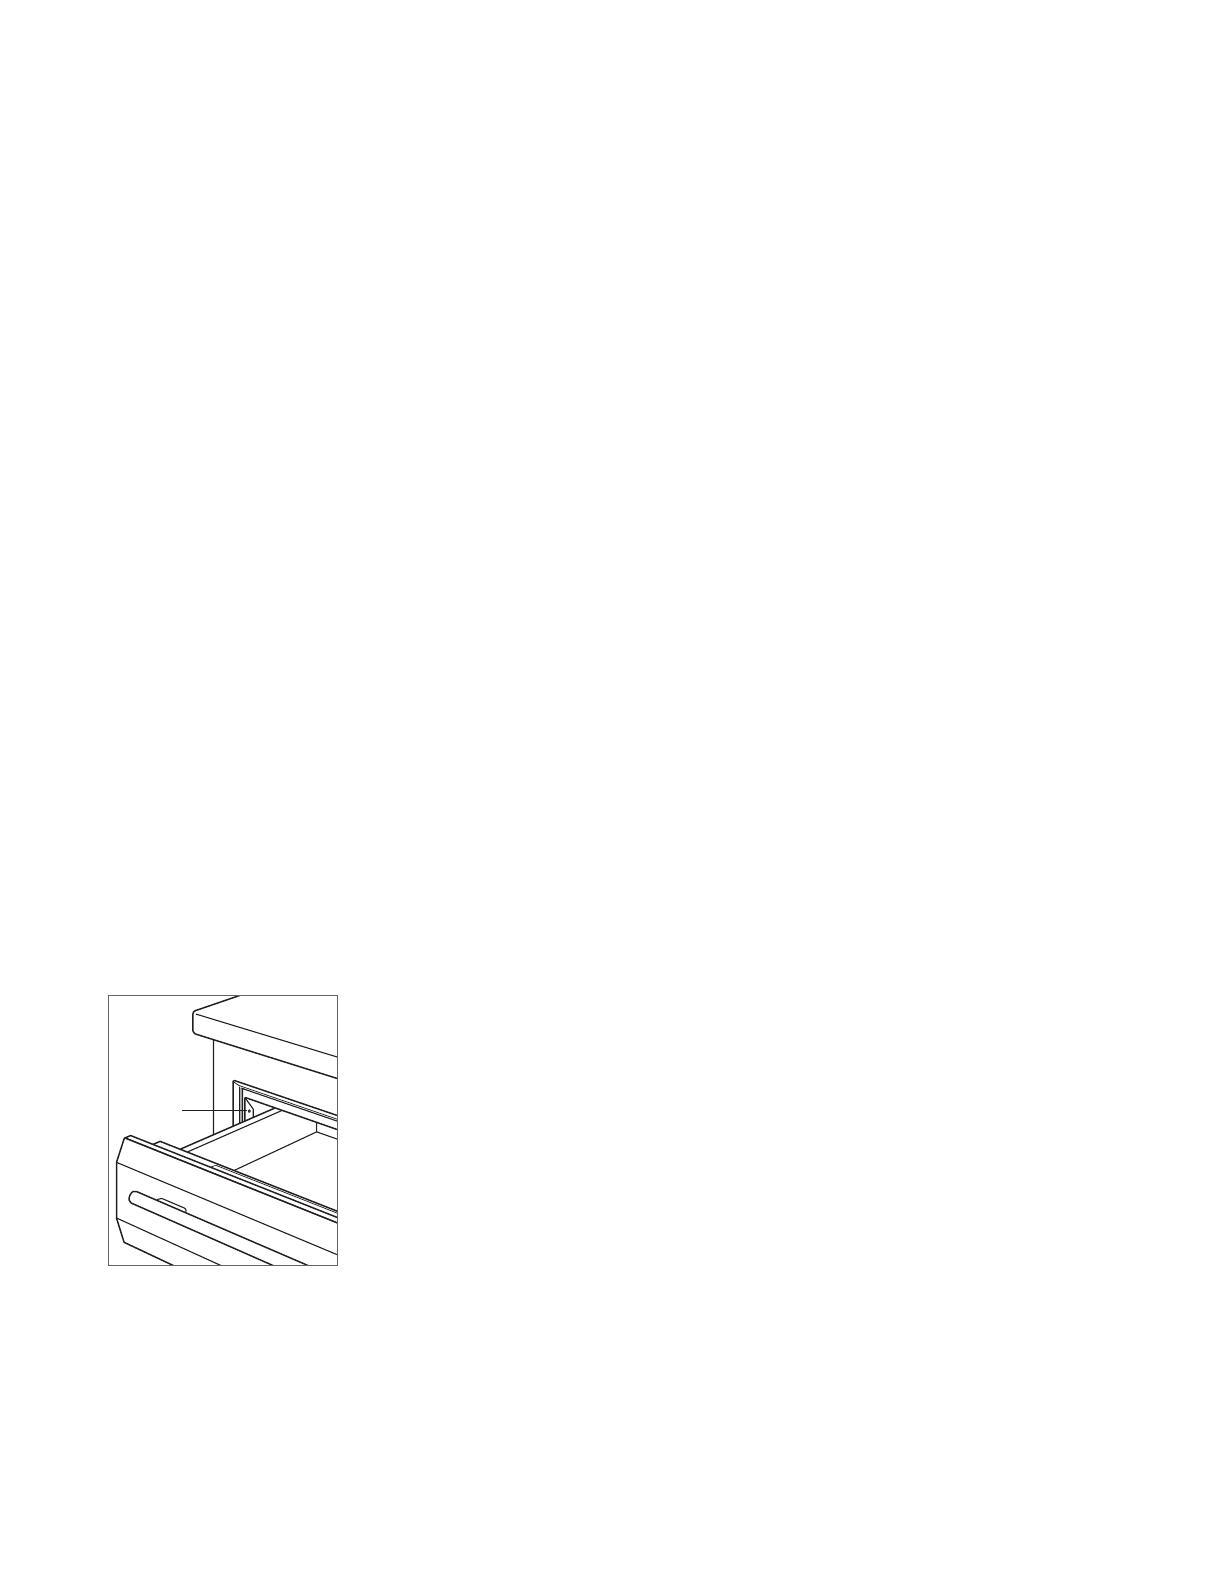
4 Open the warming drawer to full extension. Drill a pilot
hole in each mounting hole, located at the front, on each
side of the unit. Refer to the illustration below.
5 Mount the warming drawer using two screws provided.
6 Turn power back on to the electrical outlet.
INSTALLATION
MOUNTING
HOLE
Mounting hole.
6
|
Atención al cliente de Wolf 800.222.7820
ESPECIFICACIONES
Cajón calentador
INSTALACIÓN EMPOTRABLE
VISTA FRONTAL
VIST
A LATERAL
VISTA SUPERIOR
*S
erá visible y debe tener un acabado que haga juego con los gabinetes.
**L
a dimensión especifica los márgenes mínimos.
NOTA: es posible que la ubicación del suministro eléctrico al interior de la abertura requiera de un gabinete de mayor profundi
dad.
24"
(610)
PROFUNDIDAD
DE LA
INSTALACIÓN
EMPOTRABLE
A
PROFUNDIDAD
DE LA PARTE
FRONTAL DEL
CAJÓN
10
5
/8"
(270)
ALTURA DE LA
INSTALACIÓN
EMPOTRABLE
**
30
1
/8" (765)
ANCHO DE LA INSTALACIÓN
EMPOTRABLE**
3
/4"(19)
3
/4"(19)
3
/4"(19)
E
E
CORNAMUSAS
TERMINADAS*
BLOQUEO
ANTIVUELCO
PROFUNDIDAD DE LA PARTE FRONTAL DEL CAJÓN
PARTE FRONTAL DEL CAJÓN SERIE M / E A
Profesional y de transición 1
1
/8" (29)
Profesional (2" de grosor) 2
1
/8" (54)
Contemporánea 1
3
/8" (35)
La profundidad del panel frontal personalizado depende del grosor del panel.
WOLF APPLIANCE, INC. P.O. BOX 44848 MADISON, WI 53744 WOLFAPPLIANCE.COM 800.222.7820
9001600 REV-A 7/2015
  • Page 1 1
  • Page 2 2
  • Page 3 3
  • Page 4 4
  • Page 5 5
  • Page 6 6
  • Page 7 7
  • Page 8 8
  • Page 9 9
  • Page 10 10
  • Page 11 11
  • Page 12 12
  • Page 13 13
  • Page 14 14
  • Page 15 15
  • Page 16 16
  • Page 17 17
  • Page 18 18
  • Page 19 19
  • Page 20 20

Wolf Range WWD30O Installation guide

Type
Installation guide
This manual is also suitable for

Ask a question and I''ll find the answer in the document

Finding information in a document is now easier with AI