Genius G-Shot P533 Owner's manual

Category
Security cameras
Type
Owner's manual

This manual is also suitable for

English
-1-
FCC STATEMENT
This device complies with Part 15 of the FCC Rules. Operation is subject to the following two
conditions:
(1) This device may not cause harmful interference, and
(2) This device must accept any interference received, including interference that may cause
undesired operation.
Note:
This equipment has been tested and found to comply with the limits for Class B digital devices,
pursuant to Part 15 of the FCC rules. These limits are designed to provide reasonable protection
against harmful interference in a residential installation. This equipment generates uses and can
radiate radio frequency energy and, if not installed and used in accordance with the instructions,
may cause harmful interference to radio communications.
However, there is no guarantee that interference will not occur in a particular installation. If this
equipment does cause harmful interference to radio or television reception, which can be
determined by turning the equipment off and on, the user is encouraged to try to correct the
interference by one or more of the following measures:
Reorient or relocate the receiving antenna
Increase the separation between the equipment and receiver
Connect the equipment into an outlet on a circuit different from that to which the receiver is
connected
Consult the dealer or an experienced radio/TV technician for help
Use of shielded cable is required to comply with Class B limits in Subpart B of Part 15 of the
FCC rules.
Do not make any changes or modifications to the equipment unless otherwise specified in the
manual. If such changes or modifications should be made, you could be required to stop
operation of the equipment.
READ THIS FIRST
1. The bundled driver, software, design, specifications and user’s manual that were packaged
with the camera are subject to change without notice.
2. The accessories that come with the camera may vary between regions.
3. For driver updates, you can check the “Download” section of our website,
www.geniusnet.com.tw.
English
-2-
4. We are not liable whatsoever for any compensation arising from errors in descriptions in this
user’s manual.
WARNING
Do not use the camera if it is emitting smoke, becomes unusually hot to be touched, emitting
any unusual odor or noise, or if it is in any other abnormal state. Operating the camera in any
of these situations may cause a fire or an electrical shock. Stop using the camera
immediately, turn the camera off, and then disconnect the power source (batteries or AC
power adapter). If you are using the AC power adapter, unplug the adapter from the AC
power outlet after you have disconnected the camera. After checking that smoke is no longer
being emitted, contact your dealer or a local authorized service facility and request repairs.
Never attempt to repair the camera yourself, as this will terminate the warranty.
Do not use the camera if any foreign objects have entered the camera. Turn the camera off,
and disconnect the power source (batteries or AC power adapter). If you are using the AC
power adapter, unplug the adapter from the AC power outlet after you have disconnected the
camera. Then contact your dealer or a local authorized service facility. Do not continue to
use the camera as this may cause a fire or an electrical shock.
If the camera has been dropped or if the camera case has been damaged, turn the camera
off, and then disconnect the power source (batteries or AC power adapter).If you are using
the AC power adapter, unplug the adapter from the AC power outlet after you have
disconnected the camera. Then contact your dealer or a local authorized service facility. Do
not continue to use the camera as this may cause a fire or an electrical shock.
Do not place the camera in any unstable locations such as on a wobbly table or sloping
surface where the camera may fall or tip over and cause injury.
Do not expose the camera to moisture and make sure that there is no water getting into the
camera. Take particular care when using the camera under extreme weather conditions such
as rain or snow, or when operating the camera at the beach on near water. Water in the
camera may cause a fire or an electrical shock.
Do not attempt to modify the camera. This may cause a fire or an electrical shock.
Do not remove the camera casing. This may cause an electrical shock. Your dealer should
only carry out internal inspection, maintenance and repairs or a local authorized service
facility.
Do not touch the power plug during a thunderstorm if you are using the AC power adapter.
This may cause an electrical shock.
English
-3-
CAUTION
Do not place the camera in damp or dusty locations. This may cause a fire or an electrical
shock.
Do not place the camera in a location affected by oil fumes or steam, such as near a
cooking stove or humidifier. This may cause a fire or an electrical shock.
Do not cover or wrap the camera or the AC power adapter with a cloth or quilt. This may
cause heat to build up and distort the case and cause a fire. Always use the camera and its
accessories in well-ventilated locations.
Handle the camera carefully and do not bump the camera into any hard object. Handling
the camera roughly may cause a malfunction.
Do not move the camera while it is switched on. (If you are using the AC power adapter,
unplug the adapter from the AC power outlet after you have switched off the camera.)
Ensure that any connector cords or cables to other devices are disconnected before moving
the camera. Failure to do so may damage the cords or cables and cause a fire or an
electrical shock.
When leaving the camera unused for long periods, such as during a vacation, always
remove the batteries from the camera or unplug it from the power source (AC power
adapter) for safety. If you are using the AC power adapter, unplug the adapter from the AC
power outlet after you have disconnected the camera. Failure to do so could result in a fire.
Do not use batteries other than those specified for use with the camera. The use of
unsuitable batteries may result in the batteries splitting or leaking and causing a fire, injury,
or soiling of the battery compartment.
When placing the batteries into the camera, check the polarity markings on the battery (-
and +) to ensure that you insert the battery correctly. Incorrect battery polarity may result in
the batteries splitting or leaking and causing a fire, injury, or soiling of the battery
compartment.
Remove the batteries if the camera will not be used for an extended period of time. The
batteries may leak and cause a fire, injury or soiling of the battery compartment. If the
batteries leak, clean and wipe the battery compartment carefully and install new batteries.
Wash your hands carefully if you touch the battery fluid.
English
-4-
CONTENTS
INTRODUCTION 6-7
Overview
Package contents
Optional Accessories
GETTING TO KNOW THE
CAMERA
8-13
Front view
Rear view
Mode dial
Viewfinder LED indicators
LCD monitor information
GETTING STARTED 14-16
Installing the batteries
Charging the Battery
Inserting an SD memory card
Attaching the strap
TAKING
PHOTOGRAPHS
16-28
Photography in the Auto Capture
Mode
Using the Viewfinder
Using the LCD Monitor
LCD Monitor Display (Capture Mode)
Using the Optical Zoom
Using the Digital Zoom
Using the Self-timer
Using the Flash
Changing the Focus
Changing the Exposure Compensation
Setting the Image Size and Quality
Photography in the Program Mode
Photography in the Shutter
Speed-priority Mode
Photography in the Aperture-priority
Mode
Photography in the Full Manual
Mode
Photography in the Portrait Mode
Photography in the Sports Mode
Photography in Night Scene Mode
Making Movie
CHANGING THE PRESET
CONDITIONS
(IN CAPTURE MODE)
29-35
Picture setting
Size
Quality
Sharpness
Contrast
Color
Function setting
Capture Mode
Voice Memo
LCD Brightness
Digital Zoom
Preview
Interval/Count
AE/AWB setting
White Balance
Metering
ISO
English
-5-
Auto Power Off
Manual WB
Custom Setting
PLAYING BACK
Date/Time
IMAGES
35-42
System Reset
Playing Back Photographed images
(Single-Frame Playback)
Language
Video Output
Voice Record
System Information
Playing Back Movies
TRANSFERRING RECORDED
IMAGES/MOVIES TO YOUR
COMPUTER
47-50
Thumbnail Display
Zoom Playback
Slideshow Display
DPOF (Digital Print Order Format)
Step 1: Installing the USB Driver
Protect
Step 2: Connecting the Camera to Your
Computer
LCD Brightness
LCD Monitor Display (Playback Mode)
Step 3: Downloading Images/Movies
ERASING IMAGES 42-43 INSTALLING
Erasing Single Image
PHOTOSUITE
50
Erasing All Images
INSTALLING
Erasing Selected Image
PHOTOVISTA
51
SET-UP MODE 43-47
CONNECTING THE
Basic Setting
CAMERA TO OTHER
Card Information
DEVICES
52
Frame Number Reset
CAMERA
Format
Sound
SPECIFICATIONS
52-53
Beep
English
-6-
INTRODUCTION
Overview
Your new digital camera delivers high quality, 2560 x 1920 resolution images using a 5.25 Mega
pixels CCD imager. Using either the optical viewfinder or the 1.5” TFT color image LCD monitor,
you can compose images and then examine them in detail. An auto-flash sensor automatically
detects the shooting (lighting) conditions and determines whether the flash should be used. This
feature helps ensure that your images turn out right.
SD Memory Card is storage medium for saving images that you have photographed. Even if the
camera’s power is turned OFF, the images saved on the SD Memory Card are not erased. SD
Memory Card can be repeated read and written.
Images you have taken can be downloaded to your computer using the USB cable (USB driver
required for Win 98 and Mac OS 8.6). You can enhance and retouch your images on your
computer by using the provided editing software, or image editing software you may have
already owned. You may share your images with your friends via e-mail, in a report, or on a
website.
DPOF functionality allows you to print your images on a DPOF compatible printer by simply
inserting the memory card.
Note:
The memory card testing results for 512MB are based on Toshiba, Panasonic and Sandisk SD
Memory Card.
Package contents
Carefully unpack your package and make sure that you have the following items. In the event
that any item is missing or if you find any mismatch or damage, promptly contact your dealer.
Digital camera USB cable
Video cable Software CD-ROM
User’s manual Camera strap
English
-7-
Quick guide Camera pouch
Two Rechargeable Lithium Ion
Batteries
A 32MB SD memory card
Rechargeable Lithium Ion Battery
Charger
Rechargeable Lithium Ion Battery
Charger Power Cord
AC Plug Adaptor for EU to US
Note:
Accessory and components may vary by different retailer.
English
-8-
GETTING TO KNOW THE CAMERA
Front view
1. Self-timer/AF support LED
2. Optical viewfinder
3. Built-in flash
4. Shutter button
5. Lens/lens cover
6. POWER Power button
7. MIC Microphone
8. Mode dial
9. DC IN 5V terminal
10. USB/A/V OUT terminal
English
-9-
Rear view
1. Diopter adjustment dial
2. Viewfinder
3. Viewfinder LED
4. Zoom button
5. Speaker
6. Menu button
7. Display button
8. Strap attachment
9. Command dial
10. Delete button
11. Tripod socket
12. Battery/SD Memory Card
cover
13. LCD monitor
1.
Arrow button (up)
/
Focus button/macro
2.
Arrow button (left)
Exp./back light
3.
Set button
4.
Arrow button (right)
/
Flash button
5.
Arrow button (down)
Self-time button/interval
English
-10-
Mode Dial
1.
Auto
7.
Sports mode
2.
Program mode
8.
Night scene mode
3.
Tv (Shutter Speed priority)
9.
Movie mode
4.
Av (Aperture priority)
10.
Set-up mode
5.
Manual mode
11.
PC mode
6.
Portrait mode
12.
Playback mode
English
-11-
Viewfinder LED Indicator
Description
Color State
Photography
Mode
Setup Mode
Charge
Mode
PC Mode Battery
Green On
AE or AF is
locked with the
Shutter button
held half
down.
In standby
mode.
In
communication
to PC. (SD
Memory Card
is inserted.)
Under
charging
On
Writing to SD
Memory Card
in progress.
Accessing of
SD Memory
Card in
progress
In connecting
to PC. (SD
Memory Card
is inserted.)
Error
Red
Flashing
When the
image is not in
focus.
Interval
timer
standing
by
On
Processing
images
Charging of
flash in
progress
Disconnection
(SD Memory
Card is
inserted.)
No battery
Orange
Flashing
Hardware malfunction
SD Memory
Card is not
inserted.
English
-12-
LCD Monitor Information
AUTO capture mode
Program/Tv/Av/Manual/Portrait/Sports/Night scene mode
English
-13-
Movie mode
Playback mode (Standard)
Playback mode (Detailed information)
English
-14-
GETTING STARTED
Installing the Battery
1. Make sure the camera power is off.
LED INDICATION AC INPUT
2. Open the battery/SD Memory Card cover.
3. Insert the battery in the correct orientation shown.
Tilt the battery lock lever toward the strap
attachment and then insert the battery following
the orientation of the arrow on the battery’s label.
Insert the battery as far as it can go.
4. Close the battery/SD Memory Card cover.
To remove the battery:
Open the battery/SD Memory Card cover and then release the battery lock lever. After
the battery is slightly ejected, pull out the battery slowly.
NOTE
Use only the specified battery type (Lithium Ion).
If you are not going to use the battery for an extended period of time, remove it from the
camera to prevent leakage or corrosion.
Never use different type of battery.
Avoid using battery in extremely cold environments as low temperatures can shorten the
battery life and reduce the camera performance.
Charging the Battery
English
-15-
1. Insert the battery, noting correct polarity (+ and -).
Input Voltage:100-240V/50-60Hz
Output Voltage:4.2V/750mA
2. LED Indicator:
Status LED Indication Battery Charge Condition
Battery not installed Green OK
Battery installed Green Fully charged
Battery installed Red Charging
Battery installed/not
installed
Off Battery/charger defective
3. Notice:
A. Before you use a new battery, it should be charged for 3 hours the first time.
B. If the green LED is on when power is connected, it indicates the battery charger is
operating normally and ready for battery charging.
C. When the battery is put into the battery charger, the LED indicator changes from green
to red, indicating the battery is being charged.
D. If the LED indicator is not on when the power is connected, it indicates that the battery
charger is defective. The user should turn AC power off.
E. If the battery has been charged over 3 hours and the LED indicator is still red, this
means the battery is faulty. The user should remove the battery.
F. If it is necessary to charge a backup battery, the user should wait until the charging
battery is completely charged. Then remove the charged battery and charge the
backup battery.
NOTE
Never use the battery unspecified for the camera.
Do not place the camera in hot temperature. Use it at room temperature.
Inserting an SD Memory Card (Optional)
All images and video clips taken by the camera can be stored in an SD (Secure Digital) Memory
Card. Even if the camera’s power is OFF, the images saved in the SD Memory Card are not
erased. An SD Memory Card can be repeated read and written. You may also expand the
memory capacity up to 512MB so that you can store additional
images and video clips.
1. Make sure the camera is off.
2. Slide the battery/SD Memory Card cover in the direction of
the [OPEN] arrow.
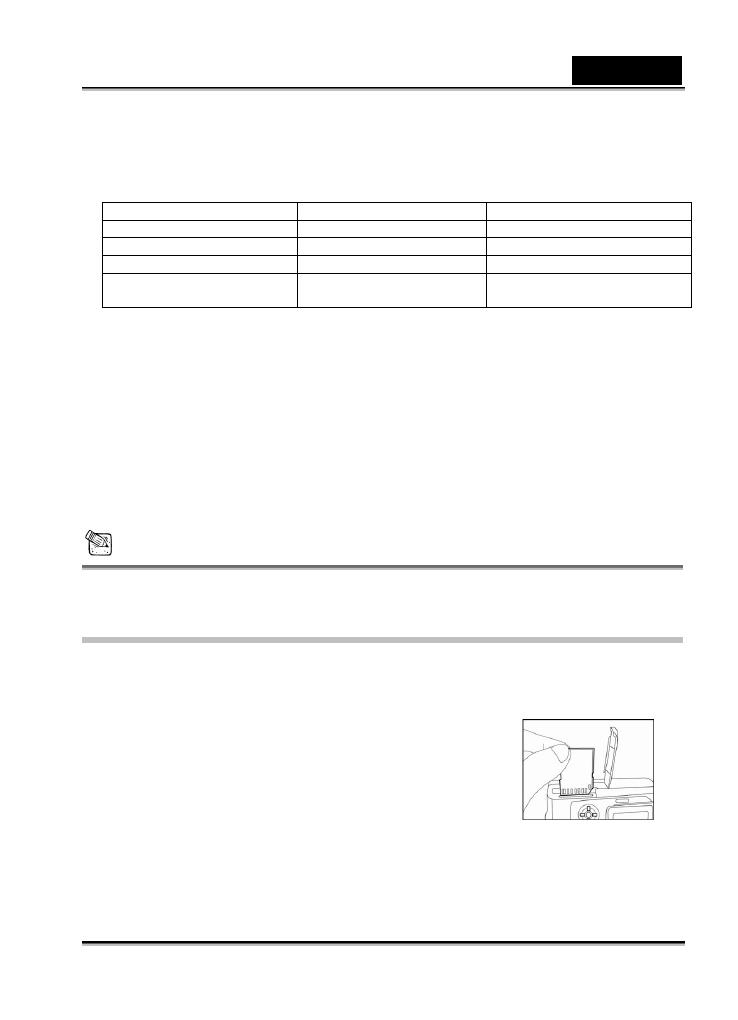
3. Insert an SD Memory Card :
The front side of the memory card (printed arrow)
should face towards the front side of the camera.
If the card cannot be inserted, check the orientation.
4. Close the battery/SD Memory Card cover.
To remove the SD Memory Card, make sure the camera is off. Open the battery/SD
Memory Card cover. Press lightly on the edge of the memory card and it will eject.
English
-16-
NOTE
If the camera is powered-on without the card, the “NO CARD” message appears on the LCD
monitor.
To prevent valuable data from being accidentally
erased from an SD Memory Card you can slide the
write-protected tab (on the side of the SD Memory
Card) to “LOCK”.
To save, edit or erase data on an SD Memory Card,
you must unlock the card. MMC Card can not be
accepted to use.
Please format an SD Memory Card by this camera before use.
Attaching the Strap
To prevent accidental slippage during the use, always use the strap.
Attach the hand strap as follows:
1. Thread the small loop of the hand strap through the strap eyelet
on the camera.
2. Pull the large loop through the small loop until the strap is firmly
secured.
TAKING PHOTOGRAPHS
Photography in the Auto Capture Mode [ ]
Your camera provides a single image capturing,
continuous image capturing and auto exposure
bracketing capturing. It is equipped with both an optical
viewfinder and a 1. 5” full color TFT LCD monitor to
compose images. Taking images by using the optical
viewfinder will conserve more battery power. If your
battery is in low level, it is recommended to compose
images by using the viewfinder. The LCD monitor can
help you accurately compose the pictures and examine
all details. However, this may also consume you more battery power.
English
-17-
Using the Viewfinder
1. Turn the camera on by pressing the POWER button.
2. Set the mode dial to [
].
3. Compose your shot in the viewfinder.
Turn the “diopter adjustment dial” until
the image appears clearly within the
viewfinder.
4. Press the shutter button down halfway, and
then press it down fully.
The viewfinder LED indicator lights red
while the camera is processing a
captured image.
NOTE
Voice memo is starting to record at still image capture mode just after the photograph is
taken in case of activating this function. It provides 10 seconds for recording and only can be
done once. To terminate recording, press the shutter button down fully.
Using the LCD Monitor
1. Turn the camera on by pressing the POWER button.
2. Set the mode dial to [
].
By default, the LCD monitor setting is "ON".
3. Compose the picture in the LCD monitor.
4. Press the shutter button down halfway (the camera
adjusts the exposure and the focus), then press it down
fully.
The viewfinder LED indicator lights red while the
camera is processing a captured image.
LCD Monitor Display (Capture Mode)
The [
] Display button can select display format. Whether in “Still Image” or “Movie” mode,
preview image with full OSD is displayed.
OSD (on-screen-display) full display OSD display OFF LCD monitor OFF
English
-18-
NOTE
The image in the LCD monitor darkens in strong sunlight or bright light. This is not a
malfunction.
Using the LCD monitor for an extended period of time will decrease the number of images
you can take. To increase the shots and conserve battery power, it is recommended to turn
the LCD monitor off and use the viewfinder instead.
Using the Optical Zoom
The lens moves during the zoom photography. Zoom photography allows you to take telephoto
and wide-angle shots. The subject appears closer by pressing the [
] button and appears
farther away by pressing the [
] button.
1. Set the mode dial to one of [
], [ ], [ ], [ ], [ ], [ ], [ ], [ ], [ ] and
power on the camera.
2. If required, turn on the LCD monitor by pressing
the [
] button.
3. Compose the picture by using the [
]/[ ]
button.
Pressing the [
] button zooms in on the
subject, and enlarges the subject on the LCD
monitor.
Pressing the [
] button provides a wider angle picture. The lens position moves
according to the zoom button setting.
4. Press the shutter button down halfway, and then press it down fully.
Using the Digital Zoom
By using the digital zoom, images can be enlarged so that the subject appears closer. However,
the more the image is enlarged, the grainer the image will become. The digital zoom function is
only available when you set the LCD monitor and the digital zoom to ON. To capture a digitally
zoomed image, perform the following steps:
1. Set the mode dial to one of [
], [ ], [ ], [ ], [ ], [ ], [ ], [ ], [ ] and
power on the camera.
2. If required, turn on the LCD monitor by pressing
the [
] button.
3. To enable the digital zoom is as follows:
English
-19-
a. Press the MENU button.
b. Press the
or button to select Function page.
c. Press the
or button to select Digital Zoom, and press the SET button.
d. Press the
or button again to select ON, and press the SET button.
e. Press the MENU button.
f. To activate the digital zoom, press the [
] button completely and hold it until the
image on the LCD monitor expands.
4. Press the shutter button to capture a “zoomed” image.
NOTE
The camera has 1X to 3X optical zoom and 1X to 4.0X electrical zoom function.
Digital zoom function is terminated when user selects LCD off mode.
Using the Self-timer
The [ ] self-timer button can select the capturing mode between “OFF” (default) and “Self
timer (2 sec., 10 sec., 10+2 sec. or Interval)”.
[2 sec.] The camera automatically takes a picture after two seconds delay.
[10 sec.] The camera automatically takes a picture after ten seconds delay.
[10+2 sec.] The camera automatically takes a picture after ten seconds delay, and
takes again after two seconds.
In case of flash light capacitor is not charged up, the second take can
be done at two second after charged.
[Interval] The camera automatically takes a picture every preset time till media
full or battery empty.
To activate the self-timer by pressing the shutter button. After selecting this mode, self-timer
icon displays on LCD monitor and then LED on the front panel blinks fast for the last 3 seconds.
Using the self-timer allows you to get into the scene when taking
group images.
1. Secure the camera to a tripod or place it on a stable
surface.
2. Set the mode dial to one of [
], [ ], [ ], [ ], [ ],
English
-20-
[ ], [ ], [ ], [ ] and power on the camera.
3. Press the [
] button.
When you toggle the self-timer button, the following are displayed in the accordingly
order:
Off 10 sec 2 sec 10+2sec Interval
4. Compose the picture.
5. Press the shutter button down halfway, and then press it down fully.
The self-timer function is activated. The photograph is then taken after the preset time.
When the photographs are taken using the LCD monitor, the count down is displayed.
NOTE
After an image is taken using self-timer, the self-timer mode is turned off.
The self-timer is not possible in the continuous capture mode.
The self-timer is only available for 2 or 10 seconds delay at [
] mode. The camera
automatically starts to recording after 2 or 10 seconds.
Using the Flash
The flash is designed to function automatically when lighting conditions warrant the use of flash.
You can take an image using a suitable flash mode to your circumstances. If you change the
flash mode, the camera will retain that setting even if the camera is turned off.
1. Set the mode dial to one of [
], [ ], [ ], [ ], [ ] and power on the camera.
2. Press the [
] button repeatedly until your desired flash mode appears.
When you toggle the flash button at [
] mode, the available flash modes are
displayed in the following order.
[ No display ] Auto
Red-Eye Forced Flash
[
] Suppressed Flash [ ] Forced Flash
3. Compose the picture and press the shutter button down halfway, then press it down fully.
NOTE
  • Page 1 1
  • Page 2 2
  • Page 3 3
  • Page 4 4
  • Page 5 5
  • Page 6 6
  • Page 7 7
  • Page 8 8
  • Page 9 9
  • Page 10 10
  • Page 11 11
  • Page 12 12
  • Page 13 13
  • Page 14 14
  • Page 15 15
  • Page 16 16
  • Page 17 17
  • Page 18 18
  • Page 19 19
  • Page 20 20
  • Page 21 21
  • Page 22 22
  • Page 23 23
  • Page 24 24
  • Page 25 25
  • Page 26 26
  • Page 27 27
  • Page 28 28
  • Page 29 29
  • Page 30 30
  • Page 31 31
  • Page 32 32
  • Page 33 33
  • Page 34 34
  • Page 35 35
  • Page 36 36
  • Page 37 37
  • Page 38 38
  • Page 39 39
  • Page 40 40
  • Page 41 41
  • Page 42 42
  • Page 43 43
  • Page 44 44
  • Page 45 45
  • Page 46 46
  • Page 47 47
  • Page 48 48
  • Page 49 49
  • Page 50 50
  • Page 51 51
  • Page 52 52
  • Page 53 53

Genius G-Shot P533 Owner's manual

Category
Security cameras
Type
Owner's manual
This manual is also suitable for

Ask a question and I''ll find the answer in the document

Finding information in a document is now easier with AI