Page is loading ...

Page 1 of 9
TITLE:
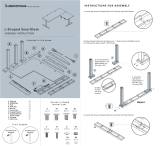
SABRE 408 Y-Axis Lead Screw Replacement Procedure
Gerber FastFact #:
2018
Supplied by:
Gerber Hardware Support
Last Modified:
Updated on December 8, 2009 (June 19, 2007)
Summary:
The following procedure explains how to replace the Y-Axis lead screw on a
Sabre 408 Router.
Tools used:
Metric Allen Wrench set – “Long-L” type
Metric Allen Wrench set – “T handle” type
Torque Wrench – INCH POUND
Socket for Torque Wrench – 15mm for Lead screw bolts, ¼” for Chapman bits
Metric Chapman Drive set
Light duty thread locking compound. LocTite 222 or equivalent and LocTite 245
or equivalent
Medium duty thread locking compound. LocTite 242 or equivalent
Isopropyl alcohol for clean-up
Referencing 0,0 position
The encoder pulse must be set to its original position after a new lead screw is installed. Before removing the
old lead screw, it is advised to use the pen tool to draw a line in the X direction on the table top. You can then
use this in setting the new lead screw’s 0 position.
Note: In the case of an inoperable lead screw, see fast fact #2041, “Establishing the Y-Axis encoder pulse
position.”
To Reference 0,0 position
1 Turn the Sabre on at the controller.
2 Orient system.
3 Place pen tool in spindle motor (without moving beam from position it stopped at when it finished
orienting).
4 Lower Pen tool to Table top to depress spring in pen so it can draw on table top.

Page 2 of 9
5 Slew pen in X direction leaving a line 1” long.
Removing the front cover
To Remove the front cover
1 Remove the T-Vac T handles from the front of the router by pulling them off the valves.
2 Support the front panel and remove the four screws (3mm) attaching the T-Vac panel to the end
covers and the two screws (2.5mm) attaching the T-Vac panel to the leg covers.

Page 3 of 9
3 Remove the four ball valve mounting bolts (6mm) from the center ball valve and rotate it toward you
and out of the way of the lead screw block.
Removing the Y-Axis lead screw from the router
To Remove the Y-Axis lead screw from the router
1 Unbolt the two (6mm x 25mm) cap screws that secure the front lead screw support block/bushing
assembly from the tie beam using a 5mm Allen wrench. This will be transferred to the replacement
lead screw during installation.
2 Remove the three (4mm x 20mm) screws and flat washers that attach the lead screw nut to the tie
beam using a 3mm Allen wrench and manually move the beam to the rear of the table.

Page 4 of 9
3 Remove the 17mm x 45mm hex-head bolts and flat washers from the front and rear of the lead screw
using the 17mm socket. Then loosen the two (5mm x 30mm) clamping screws in each of the front and
rear lead screw clamps (split blocks) using a 5mm Allen wrench to free the lead screw.
4 Unplug the front limit switch and free the wires from the tie-wrap. Remove the four (6mm x 45mm)
cap screws and flat washers from the front lead screw clamp using a 6mm Allen wrench and slide it
off the lead screw with the limit switch attached.
5 Carefully slide the lead screw/nut/bushing assembly out of the front of the table.
6 Support lead screw and place onto router front skirt.

Page 5 of 9
7 Using the beam as a carrier, carefully slide lead screw forward out of the table.
Installing the Y-Axis lead screw
To install the Y-Axis lead screw
1 Orient the replacement lead screw and nut assembly so the machined flats in the lead screw are at the
rear. If necessary, rotate the lead screw nut to position it approximately 16 from the front of the lead
screw. Carefully slide the lead screw through the tie beam/spindle and insert the rear of the lead
screw into the rear clamp. Using the beam as a carrier, move the lead screw to the end of the table.
Support the front of the lead screw and move the beam forward past the center of the table. Slide the
front lead screw support block/bushing assembly onto the lead screw. Leave it loose until the lead
screw nut is secured.
Note: Be careful not to drag the lead screw threads through the beam/spindle assembly to prevent damage to the
threads.

Page 6 of 9
2 Clean the four 8mm x 45mm cap screws with alcohol, install the flat washers, apply a dab of Loctite
242 to the threads. Slide the front clamp onto the lead screw and reinstall the clamp to the frame
leaving the mounting screws and clamping screws finger tight.
3 Position the lead screw so that there is an equal length of it inserted into the front and rear clamps.
Note: The ends of the lead screw must be recessed from the exterior faces of the clamps.
4 Move the beam towards the front of the table until it contacts the lead screw nut flange. Clean the
three 4mm x 20mm screws with alcohol, install the flat washers, apply a dab of Loctite 222 to the
threads and secure the nut to the tie-beam spindle using a 3mm Allen wrench, tightening them
manually.
5 Check the fit of the front bushing to the lead screw. Hold the bracket/bushing assembly 90 degrees
rotated from the position it would normally be when attached to the beam. The assembly should just
slowly rotate back down to the bottom. If it is too loose, you can turn the adjusting screw on the
bushing to slightly tighten it. If it is too tight and won’t rotate down, you can turn the adjusting screw
to slightly loosen it. If the bushing is too loose you can get a rumble or vibration, if it is too tight a
squealing noise will result. Clean the two (6mm x 25mm) cap screws with alcohol, install the flat
washers, apply a dab of Loctite 242 to the threads and install the front bushing & support to the tie
beam leaving the screws finger tight.
6 Tighten the front clamp mounting screws to the frame with a 6mm Allen wrench using a crossing
pattern, and apply 212 inch-lbs. of torque. Reinstall front limit switch by plugging into connector.
Tighten the clamping screws (5mm) on the rear lead screw clamp to lock in the lead screw.

Page 7 of 9
7 Clean the two (17mm x 45mm) hex-head bolts with alcohol, install the flat washers and apply a dab
of Loctite 242 to the threads. Insert the bolts/washers into each end of the lead screw. Tighten finger
tight. Torque the front lead screw hex head bolt to 156 inch-lbs. using the 17mm socket. Then tighten
the front lead screw clamping screws to 88 inch-lbs. of torque using a 5mm Allen wrench. Loosen the
rear clamping screws, torque the rear lead screw hex bolt to 156 inch-lbs. using the 17mm socket and
retighten the rear lead screw clamping screws to 88 inch-lbs. of torque using a 17mm Allen wrench.
8 Tighten the attaching screws for the lead screw support block/bushing assembly to the tie beam to 88
inch-lbs. of torque using a 5mm Allen wrench. Make sure that the bushing is not contacting the lead
screw.

Page 8 of 9
Installing the front cover
To install the front cover
1 Rotate the center ball valve back towards the front of the router. Install the four ball valve mounting
bolts (6mm) on the center ball valve.
2 Support the front panel while you install the four screws (3mm) attaching the T-Vac panel to the end
covers and install the two screws (2.5mm) attaching the T-Vac panel to the leg covers.
3 Install the T-Vac handles to the front of the router by popping them into place.
Verifying the encoder pulse position
To verify the encoder pulse position
1 Plug in and turn on the router.
2 Slew the beam to approximately 1" from the front of the table. Slew the carriage to approximately 1"
from the left side of the table.
3 Push the A key on the keypad to orient the router.
4 Once the Sabre has oriented without moving the beam place pen tool in Spindle. Lower pen tool to
tabletop and depress spring so pen will draw. Slew pen in X direction. If new pen mark is in same
place as original, encoder pulse is ok. If pen line is off in either direction of original pen line follow
steps below.

Page 9 of 9
5 You will need to go under the machine and remove the four screws (5mm) from the motor cover on
the y-axis motor housing with a 5mm Allen wrench. (The beam will be at the front of table so it will
require someone to crawl under the machine.) When under the table, loosen the clamp screw (2.5mm)
on the motor pulley.
6 Manually rotate the pulley belt so the beam moves the pen over the original registration mark.
Tighten the motor pulley clamp. Do not align the slot in the motor pulley clamp with the slots in the
motor pulley.
7 Turn off the router, and then perform Steps 2-6 until the Y orientation is correct. You may have to do
this several times to get the correct position.
/