HP DF770 User manual

Category
Digital photo frames
Type
User manual
1
English
FCC Compliance Statement
Note: This equipment has been tested and found to comply with the
limits for a Class B digital device, pursuant to Part 15 of the FCC
Rules. These limits are designed to provide reasonable protection
against harmful interference in a residential installation. This equipment
generates, uses, and can radiate radio frequency energy and, if not
installed and used in accordance with the instructions, may cause
harmful interference to radio communications. However, there is no
guarantee that interference will not occur in a particular installation. If
this equipment does cause harmful interference to radio or television
reception, which can be determined by turning the equipment off and
on, the user is encouraged to try to correct the interference by one of
the following measures:
– Reorient or relocate the receiving antenna.
– Increase the separation between the equipment and receiver.
– Connect the equipment into an outlet on a circuit different from that to
which the receiver is connected.
– Consult the dealer or an experienced radio/TV technician for help.
FCC Caution: To assure continued compliance, only use shielded
interface cables when connecting to computer or peripheral devices.
Any changes or modifications not expressly approved by the party
responsible for compliance could void the user’s authority to operate
this equipment.
This device complies with Part 15 of the FCC Rules. Operation is subject
to the following two conditions: (1) this device may not cause harmful
interference, and (2) this device must accept any interference received,
including interference that may cause undesired operation.
2
English
Table of Contents
FCC Compliance Statement
What’s in the Box?
Getting Started
Remote Control
Initial Setup
Setup Menu
Key Features
Selecting a Memory Source
Picture Options
Picture Rotate and Zoom
Copying and Deleting Pictures
Music Playback
Video Playback
Calendar and Clock Display
Specifications
Frequently Asked Questions
Cleaning and Care Tips
Getting Help
1
3
4
6
7
9
10
11
12
13
14
17
18
20
23
24
25
26
3
English
What’s in the Box
Qty Item Image
1 Digital Picture Frame
1
Remote Control
Replacement Battery = CR2025
PULL
1 Universal Power Adapter
1
USB 2.0 Cable
( For PC Connection )
1 User Manual
1 Quick Start Guide
1 Warranty Document
IMPORTANT: Please keep this document for
technical support contact information.
2 Interchangeable frames
1
USB Adapter
( for thumbdrive )
4
English
1. Connect the power cord into the DC input of the digital picture frame and plug the
adapter into a power outlet as illustrated below.
DC IN
POWERMUTEMENU
MS SD/MMC/XD
CF
DC IN
2. The HP Digital Picture Frame is preloaded with pictures that illustrate the basic
features of this product. If you want to view these pictures, turn the frame on as
illustrated in step 4. The slideshow will begin in a few seconds. However, if you wish
to immediately view your own pictures, go to the next step (step 3).
3. Insert a memory card or USB storage device (external memory) containing desired
pictures, music, and/or video into the appropriate card slot or USB port as illustrated
below. Note: Memory cards and USB storage devices must be orientated correctly.
CF
POWER
MUTE
MENU
POWER
MUTE
MENU
MS
SD/MMC/XD
Getting Started
5
English
4. Power on the digital picture frame.
DC IN
POWERMUTEMENU
MS SD/MMC/ XD
CF
POWER
A slideshow of your pictures will begin automatically in a few seconds. If music tracks
are available on the same external memory device, the slideshow will be displayed with
background music unless disabled in the SETUP MENU. Enjoy it and have fun!
5. In addition to the remote control, the digital picture frame has basic control buttons on
the back as illustrated below.
DC IN
POWERMUTEMENU
MS SD/M MC/ XD
CF
Power
Mute
Next/Forward
Play/Pause/Select
Previous/Return
Menu
6
English
Remote Control
MENU: Press to access main menu mode or card selection mode
TIME SET: Press this button in the time mode to set up the date and time
SLIDESHOW: Press this button to begin a picture slideshow.
VIDEO PLAYBACK: Press this button to playback video files.
UP: Press to move up in thumbnail mode and Setup menu. Press to
increase value in TIME SET mode.
NEXT or FORWARD: Press to move right/forward in Photo Browse,
Thumbnail, menu mode, and TIME SET mode.
PLAY/PAUSE or SELECT: Press to change display mode (slide show,
browse, or thumbnail). Press to play or pause music or video files. Press
to make selections in menu or settings mode.
PREV or RETURN: Press to move left in browse, thumbnail or menu
mode, or return to previous screen in slide show mode.
DOWN: Press to move down in thumbnail mode and Setup menu. Press
to decrease value in TIME SET mode.
COPY/DEL: Press this button in Photo Browse mode or MUSIC mode to
initiate the copy or delete process.
ROTATE: Press to rotate the picture in Photo Browse mode.
ZOOM: Press to enlarge picture in Photo Browse mode.
VOL + / - : Press the + button to increase and the – button to decrease
audible playback volume.
BRIGHTNESS/CONTRAST/TINT/COLOR: Press this button during picture
browse mode to adjust basic appearance controls.
7
English
1. Pull tab from remote control to activate.
PULL
Should your remote control require a new battery, please purchase a 3 volt lithium
CR2025 model for replacement. The remote control has battery replacement
instructions stamped into the back side as illustrated below.
2. Power on the picture frame and allow the picture slideshow to begin. Press
button once to view the MAIN MENU as illustrated below.
Initial Setup
8
English
3. Press or to highlight the icon. Press the to open the
SETUP MENU as illustrated below
4. LANGUAGE setting will be highlighted in blue. Press the button to display
additional language selections. Note: If desired language is already selected, go to
step 6.
5. Use or to highlight the desired On-Screen-Display language (OSD) and
press to select the language. Press to return to the setup menu.
6. Press or to highlight other options and press to select. Continue
to use or to highlight and to select the desired settings. Read
the next section titled SETUP MENU for details of these options.
9
English
Setup Menu
Option Description
Language
Choose from 7 On Screen Display languages. Options
are: English, German, French, Spanish, Portuguese, Italian,
and Dutch.
The factory default is “English”.
Display Image Size
Select “ORIGINAL” to display pictures with their original
properties. Display picture in full height in normal aspect
ratios. Many pictures may not fill the screen, and leave
space on both sides.
Select "OPTIMAL" to display pictures so that they fill the
entire screen. Pictures will likely be cropped on the top and
bottom to accomplish this feature.
The factory default option is “ORIGINAL.
Slideshow Transition
Choose from 6 options and select the preferred transition.
Options are: Normal, Random, Fade, Curtain, Open_Door,
and Cross_Comb.
The default option is set to “RANDOM”.
Slideshow Speed
Select the desired picture display duration. Options are:
5, 10, 30, 60 Seconds, I Hour, and 24 Hours. The default
option is “5” Seconds.
Slideshow Music
Select ON to allow playback of mp3 music during the
picture slideshow. Note: you must have mp3 file(s) on the
memory source.
The factory default is set to “ON”.
Slideshow Shuffle
Select ON to display pictures in a random order. Pictures
will not repeat until all have been displayed. Select OFF to
display pictures in sequential order.
The factory default is set to “OFF”.
Power Saving
This feature will automatically turn off the LCD to save
valuable energy. You can choose from 4 settings. Options
are: 2, 4, 8 hours or No Power Saving.
If you want to turn the LCD back on, press any button on the
photo frame or remote control.
The factory default is set to “No Power Saving”.
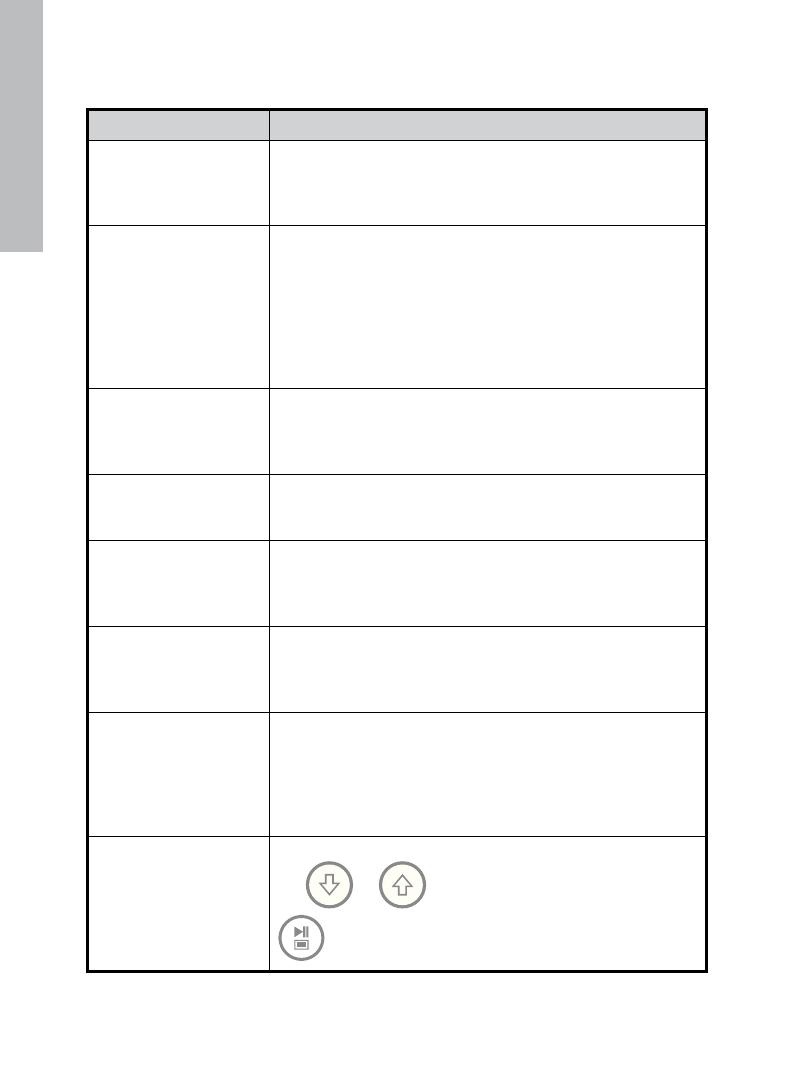
Restore Default
If you wish to restore ALL the settings to the factory default,
use or to highlight YES and then press the
button.
10
English
Key Features
Features
Automatic picture rotation to match frame orientation.
Picture slideshow with or without music.
• 6 different picture transition options
• Shuffle mode option
Multiple picture viewing options.
• View individual pictures in Browse mode (see later section)
• View Pictures in thumbnail mode
• Zoom and rotate individual pictures
Playback music/audio tracks
• Music tracks must be in an mp3 file format
Playback video clips
• Video clips must be in an MPEG-1, MP4, or Motion JPEG file formats
Brightness, contrast, tint, and color adjustments in photo browse mode.
PC connection allows for adding pictures (as well as music and video files) to internal
or external memory. (see section titled Picture Options for details)
Add or delete pictures and mp3 music from memory sources.
7 on screen display languages
• English, French, Spanish, Italian, German, Dutch, and Portuguese
11
English
The HP Digital Picture Frame can play back content from internal and external memory
devices such as USB flash drives and memory cards typically used with digital cameras.
More than one external memory device can be inserted at any given time. However,
content from only one memory source can be selected for playback.
To select the desired picture source, there are many methods to get to the memory
source selection menu.
1. In slideshow or browse mode: Press button twice.
2. In MAIN MENU mode: Press button once.
This will display the memory source screen as illustrated below. Note:
The screen may differ depending on type and number of external
memory devices that are inserted. Connect USB flash drives with
receptacle USB cable and then connect to digital photo frame.
or
SD/MMC Card only
SD/MMC card, Compact Flash, and USB
Flash Drive inserted.
3. Use or to highlight the desired memory source icon. Press
to select. This will bring up the MAIN MENU for the memory source just
selected.
Selecting a Memory Source
12
English
Slideshow modes
Slideshow mode will begin automatically a few seconds after the frame is powered on
or when an external memory card/USB Flash drive is inserted. There are two slideshow
modes, one with background music and the other without. Review the Initial Setup and
Setup Menu sections of this document for details on how to change desired settings.
Photo Browse mode
To exit slideshow mode, press once. “Browse mode” will be displayed on the
lower right of the screen for a few seconds. This allows forward and previous picture
viewing.
Press to return to slideshow mode.
Thumbnail mode
To view pictures in a thumbnail mode, press TWICE when in slideshow or ONCE
when in browse mode as illustrated below.
Use the arrow buttons to navigate to a picture. Press to view the selected
picture.
Picture Options
13
English
Picture Rotation
Pictures will be automatically rotated based on the frame orientation.
Pictures can be manually rotated by pressing the button in Photo Browse mode.
Note: each press of this button will rotate the picture by 90 degrees to the right.
Picture Zoom
Pictures can be zoomed to 5X by pressing the button in Photo Browse mode.
Note: each press of this button will increase the zoom by 1X until 5X. At 5X zoom, press
this button ONCE to return to the original view.
Picture Rotate and Zoom
14
English
Copying pictures onto frame internal memory
From an external memory device: Insert an external memory device with pictures
you wish to copy. A slideshow of these pictures will begin shortly. Press
once to enter photo browse mode or twice to enter thumbnail mode. Select the
picture you wish to copy and press to display the copy/delete menu as
shown below.
‘Copy picture to’ will be highlighted in blue. Press to display Internal
Memory. Press again to copy the desired picture onto the frame’s
internal memory. A Finished text box will be displayed indicating the picture is
now in the internal memory as illustrated below.
Finished
Use or to select another picture and repeat above step to copy to
internal memory.
Press to resume slideshow.
From a PC/laptop: For the first connection, it is recommended to remove all
external memory sources.
Power on the HP Digital Picture Frame. Connect the HP Digital Picture Frame to
your Windows™ 2000 (with service pack 4 or greater), Windows™ XP (with
Service Pack 2 or greater), or Windows™ Vista PC/notebook by using the USB
cable provided with the product. 3 new drive letters should appear in Windows
Explorer. These new drive letters represent the Digital Picture Frame’s internal
memory, memory card slot 1, and memory card slot 2. (see illustration below):
Copying and Deleting Pictures
15
English
The digital picture frame will display the graphic below:
1 of the 3 new drive letters is the HP Digital Picture Frame’s internal memory and
labeled HP df770. Drive letter assignment MAY vary from PC to PC.
Use standard Windows™ explorer file copy and paste procedures to move
content onto the frame’s internal memory.
To check the picture frame's available memory, right click on the HP df770
drive letter and select Properties. A properties menu will appear displaying the
available/free space (in Mega Bytes [MB]).
When finished copying pictures, disconnect the PC/laptop by double-clicking on
the Safely Remove Hardware icon in the lower right on the screen of the
PC/Laptop. This will display the menu as illustrated below.
16
English
Highlight the HP df770 drive and then click on the Stop button. After
notification, unplug the USB 2.0 cable from both the PC/Laptop and the
picture frame.
Deleting pictures from internal or external memory
Before deleting a picture or pictures, it is important to select the desired memory
source (see Selecting a Memory Source section for details).
Select the desired picture to be deleted and press the button to display
the copy/delete menu. Press to highlight ‘Delete picture’ text. Press
to display the YES and NO text. Use to highlight the desired
action. If YES is highlighted, press to delete the desired picture from
memory. The picture will disappear and the next picture (if additional pictures are
available) will be displayed.
If the frame is connected to a PC or laptop as previously described in Copying
pictures - From a PC/laptop section, pictures can be deleted using standard
Windows™ explorer file delete procedures.
17
English
Go to the MAIN MENU (see Initial Setup section). Note: make sure the desired memory
source is selected (see Selecting a Memory Source section for details).
Use or to highlight the icon then press .
The frame will display a list of music/audio files found on the selected memory source as
illustrated below.
The first music track in the list will be highlighted. Press to begin playback.
• The default playback mode is to play from first to last track then repeat from
the first track.
• Press to adjust volume.
• Press or to playback other tracks (if available).
Copying and Deleting Music
The process for copying or deleting music onto or from the frame internal and external
memory sources is the same as described in the previous section titled Copying and
Deleting Pictures. Please refer to this section for details
Supported audio format: .mp3
Music Playback
18
English
There are two methods to playback video files on a memory source. Note: make sure the
desired memory source is selected (see Selecting a Memory Source section for details).
1. Press
to begin play back of compatible video clip(s).
• The default playback mode is to play from first to last clip then repeat
until stopped.
• Press to adjust volume.
• Press to pause playback.
• Press to view the list of compatible video clips.
2. Go to the MAIN MENU (see Initial Setup section).
Use the or to highlight the icon then press .
The frame will display a list of supported video clips/files found on the selected
memory source as illustrated below.
Video Playback
19
English
Use the or to highlight a desired video clip. Press to start
playback.
• The default playback mode is to play from first to last clip then repeat
until stopped.
• Press to adjust volume.
• Press to pause playback.
• Press to return to the list of video files.
Copying and Deleting Videos
Video clips CANNOT be copied or deleted using the feature.
However, if connected to a PC or Laptop, video clips can be managed using the same
procedures as described in the Copying pictures – From a PC/laptop section.
Supported Video formats: MPEG-1, MP4, and Motion JPEG
20
English
Go to the MAIN MENU (see Initial Setup section).
Use or to highlight the icon then press .
The frame will display the calendar and clock screen similar to the illustration below.
Initially, the calendar and clock will display an incorrect date and time until they are
properly set up. To adjust the date and time, press the button to display the
TIME SET menu as shown below.
Setting the Calendar and Clock:
• The Set Clock option will be highlighted. Press the or button to open
the Set Clock screen as shown below.
Calendar and Clock Display
  • Page 1 1
  • Page 2 2
  • Page 3 3
  • Page 4 4
  • Page 5 5
  • Page 6 6
  • Page 7 7
  • Page 8 8
  • Page 9 9
  • Page 10 10
  • Page 11 11
  • Page 12 12
  • Page 13 13
  • Page 14 14
  • Page 15 15
  • Page 16 16
  • Page 17 17
  • Page 18 18
  • Page 19 19
  • Page 20 20
  • Page 21 21
  • Page 22 22
  • Page 23 23
  • Page 24 24
  • Page 25 25
  • Page 26 26
  • Page 27 27
  • Page 28 28
  • Page 29 29
  • Page 30 30
  • Page 31 31
  • Page 32 32
  • Page 33 33
  • Page 34 34
  • Page 35 35
  • Page 36 36
  • Page 37 37
  • Page 38 38
  • Page 39 39
  • Page 40 40
  • Page 41 41
  • Page 42 42
  • Page 43 43
  • Page 44 44
  • Page 45 45
  • Page 46 46
  • Page 47 47
  • Page 48 48
  • Page 49 49
  • Page 50 50
  • Page 51 51
  • Page 52 52
  • Page 53 53
  • Page 54 54
  • Page 55 55
  • Page 56 56
  • Page 57 57
  • Page 58 58
  • Page 59 59
  • Page 60 60
  • Page 61 61
  • Page 62 62
  • Page 63 63
  • Page 64 64
  • Page 65 65
  • Page 66 66
  • Page 67 67
  • Page 68 68
  • Page 69 69
  • Page 70 70
  • Page 71 71
  • Page 72 72
  • Page 73 73
  • Page 74 74
  • Page 75 75
  • Page 76 76
  • Page 77 77
  • Page 78 78
  • Page 79 79
  • Page 80 80
  • Page 81 81
  • Page 82 82
  • Page 83 83
  • Page 84 84
  • Page 85 85
  • Page 86 86
  • Page 87 87
  • Page 88 88
  • Page 89 89
  • Page 90 90
  • Page 91 91
  • Page 92 92
  • Page 93 93
  • Page 94 94
  • Page 95 95
  • Page 96 96
  • Page 97 97
  • Page 98 98
  • Page 99 99
  • Page 100 100
  • Page 101 101
  • Page 102 102
  • Page 103 103
  • Page 104 104
  • Page 105 105
  • Page 106 106
  • Page 107 107
  • Page 108 108
  • Page 109 109
  • Page 110 110
  • Page 111 111
  • Page 112 112
  • Page 113 113
  • Page 114 114
  • Page 115 115
  • Page 116 116
  • Page 117 117
  • Page 118 118
  • Page 119 119
  • Page 120 120
  • Page 121 121
  • Page 122 122
  • Page 123 123
  • Page 124 124
  • Page 125 125
  • Page 126 126
  • Page 127 127
  • Page 128 128
  • Page 129 129
  • Page 130 130
  • Page 131 131
  • Page 132 132
  • Page 133 133
  • Page 134 134
  • Page 135 135
  • Page 136 136
  • Page 137 137
  • Page 138 138
  • Page 139 139
  • Page 140 140
  • Page 141 141
  • Page 142 142
  • Page 143 143
  • Page 144 144
  • Page 145 145
  • Page 146 146
  • Page 147 147
  • Page 148 148
  • Page 149 149
  • Page 150 150
  • Page 151 151
  • Page 152 152
  • Page 153 153
  • Page 154 154
  • Page 155 155
  • Page 156 156
  • Page 157 157
  • Page 158 158
  • Page 159 159
  • Page 160 160
  • Page 161 161
  • Page 162 162
  • Page 163 163
  • Page 164 164
  • Page 165 165
  • Page 166 166
  • Page 167 167
  • Page 168 168
  • Page 169 169
  • Page 170 170
  • Page 171 171
  • Page 172 172
  • Page 173 173
  • Page 174 174
  • Page 175 175
  • Page 176 176
  • Page 177 177
  • Page 178 178
  • Page 179 179
  • Page 180 180
  • Page 181 181
  • Page 182 182
  • Page 183 183
  • Page 184 184
  • Page 185 185
  • Page 186 186
  • Page 187 187
  • Page 188 188
  • Page 189 189
  • Page 190 190
  • Page 191 191
  • Page 192 192
  • Page 193 193
  • Page 194 194
  • Page 195 195
  • Page 196 196
  • Page 197 197
  • Page 198 198
  • Page 199 199
  • Page 200 200
  • Page 201 201
  • Page 202 202
  • Page 203 203
  • Page 204 204
  • Page 205 205
  • Page 206 206
  • Page 207 207
  • Page 208 208
  • Page 209 209
  • Page 210 210
  • Page 211 211
  • Page 212 212
  • Page 213 213
  • Page 214 214
  • Page 215 215
  • Page 216 216
  • Page 217 217
  • Page 218 218
  • Page 219 219
  • Page 220 220
  • Page 221 221
  • Page 222 222
  • Page 223 223
  • Page 224 224
  • Page 225 225
  • Page 226 226
  • Page 227 227
  • Page 228 228
  • Page 229 229
  • Page 230 230
  • Page 231 231
  • Page 232 232
  • Page 233 233
  • Page 234 234
  • Page 235 235
  • Page 236 236
  • Page 237 237
  • Page 238 238
  • Page 239 239
  • Page 240 240
  • Page 241 241
  • Page 242 242
  • Page 243 243
  • Page 244 244
  • Page 245 245
  • Page 246 246
  • Page 247 247
  • Page 248 248
  • Page 249 249
  • Page 250 250
  • Page 251 251
  • Page 252 252
  • Page 253 253
  • Page 254 254
  • Page 255 255
  • Page 256 256
  • Page 257 257
  • Page 258 258
  • Page 259 259
  • Page 260 260
  • Page 261 261
  • Page 262 262
  • Page 263 263
  • Page 264 264
  • Page 265 265
  • Page 266 266
  • Page 267 267
  • Page 268 268
  • Page 269 269
  • Page 270 270
  • Page 271 271
  • Page 272 272
  • Page 273 273
  • Page 274 274
  • Page 275 275
  • Page 276 276
  • Page 277 277
  • Page 278 278
  • Page 279 279
  • Page 280 280
  • Page 281 281
  • Page 282 282
  • Page 283 283
  • Page 284 284
  • Page 285 285
  • Page 286 286
  • Page 287 287
  • Page 288 288
  • Page 289 289
  • Page 290 290
  • Page 291 291
  • Page 292 292
  • Page 293 293
  • Page 294 294
  • Page 295 295
  • Page 296 296
  • Page 297 297
  • Page 298 298
  • Page 299 299
  • Page 300 300
  • Page 301 301
  • Page 302 302
  • Page 303 303
  • Page 304 304
  • Page 305 305
  • Page 306 306
  • Page 307 307
  • Page 308 308
  • Page 309 309
  • Page 310 310
  • Page 311 311
  • Page 312 312
  • Page 313 313
  • Page 314 314
  • Page 315 315
  • Page 316 316
  • Page 317 317
  • Page 318 318
  • Page 319 319
  • Page 320 320
  • Page 321 321
  • Page 322 322
  • Page 323 323
  • Page 324 324
  • Page 325 325
  • Page 326 326
  • Page 327 327
  • Page 328 328
  • Page 329 329
  • Page 330 330
  • Page 331 331
  • Page 332 332
  • Page 333 333
  • Page 334 334
  • Page 335 335
  • Page 336 336
  • Page 337 337
  • Page 338 338
  • Page 339 339
  • Page 340 340
  • Page 341 341
  • Page 342 342
  • Page 343 343
  • Page 344 344
  • Page 345 345
  • Page 346 346
  • Page 347 347
  • Page 348 348
  • Page 349 349
  • Page 350 350
  • Page 351 351
  • Page 352 352
  • Page 353 353
  • Page 354 354
  • Page 355 355
  • Page 356 356

HP DF770 User manual

Category
Digital photo frames
Type
User manual

Ask a question and I''ll find the answer in the document

Finding information in a document is now easier with AI