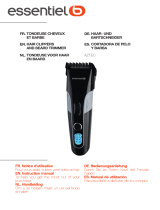
Tristar TR-2547 Owner's manual

Category
Hair trimmers & clippers
Type
Owner's manual

This manual is also suitable for

20
Blade Slide
On/Off switch
Bottom blade
PART NAME
GUIDE FOR CUTTING HAIR AT HOME
Never use the product to cut wet hair,
It is designed to work in dry condition only.
Before you begin
Make sure that your clipper is clean, properly oiled and perfect
working condition.
Place a towel around the neck of the person to prevent hair from falling
down inside the collar.
Position the person whose hair is to be cut on a chair so that his/her
head is at your eye's level.
Comb the hair to remove all tangles, hold the clipper in a relaxed;
comfortable grip. This will help you to maintain an accurate cutting
control.
CUTTING HAIR WITH THE ATTACHMENT COMBS
(For medium to long cut)
To attach combs, hold comb with teeth up, snap comb attachment
Blade lever
Top blade
ACCESSORIES
Attachment Combs
21
firmly to the bottom of the clipper blade,
Attachment comb #1 --- leaves hair approx. Blending in length
Attachment comb #2 --- leaves hair approx. 1/4" in length
Attachment comb #3 --- leaves hair approx. 1/2" in length
Attachment comb #4 --- leaves hair approx. 3/4" in length
Special angle comb is available.
At the beginning, cut only a small amount of hair until you become
accustomed to the length each attachment comb leaves the hair.
It is suggested to try the longest attachment comb on the clipper
first, then use the shorter one if the desired length is shorter.
For uniform cutting, never push or force the clipper through
the hair at a fast rate. The clipper works most efficiently
when it works at its own speed.
Start by combing the hair in its natural direction,
Place the largest, attachment comb onto your clipper and
start by trimming the sides from the bottom upwards.
Hold the clipper lightly against the hair with teeth of the
attachment comb pointing up but flat against the head.
Slowly lift the clipper up and outward through the hair,
cutting only a small amount at a time.(Fig. 1)
Repeat around sides and back of head.(Fig.2)
If you desire shorter hair, either change to a lower
number attachment comb or apply more pressure and
less lift away from head with the present attachment
comb.
This entire procedure requires practice, and it is always
better to leave too much hair the first few haircuts.(Fig.3)
For the top of the head, you will give a fairly short cut if
Fig.1
Fig.2
Fig.3
Fig.4
22
you use the #4 attachment comb. With the teeth flat
against the head, slowly start trimming from the front to
the back. Again, it is better to leave the hair longer the
first few haircuts.(Fig.4)
Outlining
Outlining requires no attachment. Take the clipper and
push the lever up to the close-cut position.
Comb hair into the style. Position clipper between the
side burns and the ear.(Fig. 5)
Make sure the comer edge of the blade is against the
hairline. With the outline of the hair as your guide, slowly
move the clipper over, around, and behind the
ears.(Fig.6)
For the back of the neck and the sideburns, hold the
clipper upside down, (see sketch), and holding it against
the skin at the length desired, move downwards.
Short cuts to perfect flat tops, crew cuts.
Always cut from the back of the neck to the crown, using
the longest attachment comb. Holding it flat against the
head, slowly move the clipper up through the hair.
Use the same technique for the sides, cutting from the
bottom to the upper side of the head.
(Fig.7)
For the front to the crown, cut the hair against the
direction in which it grows. Then even it up with the
sides.(Fig.8)
For a flat top, use a flat comb, not the
attachment comb. Just cut hair on top of the head over it.
To taper hair down to the neckline, use closer cutting
attachment combs. Comb hair and check for uneven
spots and outline sideburns and neckline.(Fig.9)
Fig.5
Fig.6
Fig.7
Fig.8
Fig.9
23
If a short tapered cut on the sides and back is desired, follow the diagram below:
The four basic areas illustrated on the hair cutting guide are your "road map" to easy do-it-
yourself hair cutting.
MAINTENANCE
Your clippers were carefully examined to ensure that the blades were
oiled and aligned before leaving our factory.
Blades must be realigned if they have been removed for cleaning or
replacement.
To realign the blades, simply match the upper and bottom blades teeth
up, point for point.
(End of top blade teeth)
should be approximately
1.2mm back from bottom blade.
Compare your clipper blades
with the sketch)
If blade alignment is incorrect, add a few
drops of oil to the blades, turn clipper on for a
few moments, turn off and unplug. Loosen
screws slightly and adjust. Tighten screws
after blade is aligned.
Oil
To maintain your clipper in peak condition,
the blades should be oiled every few
haircuts.
Do not use hair oil, grease, oil mixed with
kerosene or any solvent. As the solvent will
evaporate and leave the thick oil which may
slow down the blades motion.
Adjustable lever
The lever is conveniently located near your thumb (if you're right-
handed) so it can easily be adjusted while the clipper is in your hand.
The lever adds versatility to your clipper by allowing you to gradually
change the closeness of your cut without an attachment comb.
24
When the lever is in the uppermost position, the blades will give you the
closest cut and leave the hair very short. Pushing the lever downward
gradually increases the cutting length.
In its lowest position, the lever will leave the hair approximately the same
length as a #1 comb.
The lever will also extend the use of
your blades since a different cutting
edge is used in each setting.
In addition, if extremely heavy hair
cutting has jammed the blades, it will
help you remove hair that has
become wedged between the two
blades without removing the blades.
While the clipper is running, rapidly move the lever from "close cut" to
"longer cut" a couple of times. Doing this each time after you have
finished using your clipper will help to keep the blades clear of cut hair. If
your clipper stops cutting and this does not help, your cutting blades are
dulled. Replace them with new blades.
Storage
Keep the product in soft and ventilated place unreached by children.
IMPORTANT SAFEGUARDS
When using electrical appliances, especially when children are present, basic safety precautions
should always be followed, including the following:
To reduce the risk of death or injury by electric shock:
Unplug this appliance before cleaning.
Do not place or store appliance where it can fall or be pulled into a tub
or sink.
Do not use while bathing or in a shower,
Do not place in, or drop into, water or other liquid.
Do not reach for an appliance that has fallen into water. Unplug
immediately.
To reduce the risk of burns, electrocution, fire, or injury to persons:
Use this appliance only for its intended use as described in this manual.
Do not use attachments not recommended by the manufacturer.
This appliance should never be left unattended when plugged in.
Close supervision is necessary when this appliance is used by, on, or
near children or invalids.
Never operate this appliance if it has a damaged cord or plug, if it is not
working properly.
Keep the cord away from heated surfaces.
Longer cut
25
Do not pull, twist, or wrap line cord around appliance.
Never drop or insert any object into any opening on this appliance.
Before use, make certain blades are aligned properly.
Do not place appliance on any surface while it is operating.
Do not use this appliance with a damaged or broken comb nor with teeth
missing from the blades as injury may occur.
Do not use outdoors or operate where aerosol (spray) products are being
used or where oxygen is being administered.
Any other servicing should be performed by an authorized service
representative.
If the supply cord is damaged it must be replaced by the manufacturer or
its service agent or a similarly qualified person in order to avoid a hazard.
***
MANUAL DE INSTRUCCIONES
MAQUINA DE CORTE ELECTRICA
SOLO PARA USO DOMESTICO
MODELO: TR-2547
F
AVOR DE LEER CON CUIDADO TODAS LAS INSTRUCCIONES ANTES DE USAR LA MAQUINA Y GUARDAR ESTE
MANUAL PARA FUTURA REFERENCIA
DESCRIPCION GENERAL
Palanca de ajuste
Interruptor ON/OFF
Cuchilla de abajo
de abajo
Cuchilla de arriba
Plancha
Español
42
AANWIJZINGEN TER BES
CHERMING VAN HET MIL
IEU
Dit product mag aan het einde van zijn levensduur niet bij het normale huisafval
worden gedeponeerd, maar dient bij een speciaal inzamelpunt voor het hergebruik
van elektrische en elektronische apparaten te worden aangeboden. Het symbool op
artikel, gebruiksaanwijzing en verpakking attendeert u hier op. De gebruikte
grondstoffen zijn geschikt voor hergebruik. Met het hergebruik van gebruikte
apparaten of grondstoffen levert u een belangrijke bijdrage voor de bescherming
van ons milieu. Informeer bij uw lokale overheid naar het bedoelde inzamelpunt.
RENSEIGNEMENTS POUR
LA PROTECTION DE L’E
NVIRONNEMENT
Ce produit ne devrait pas être mis dans les chets ménager à la fin de son
existence mais doit être remis à une point de ralliement pour des produits
électroménager et électronique. Ce symbole sur article, mode d’emploi et boite
vous indique ce recyclage. Les matières de cet article sont appropriées pour
recyclage. Par le recyclage des appareils ou de ses matières premières vous
contribuez à la protection de notre environnement.
Renseignez-vous auprès les autorités locales pour cet endroit de rassemblement.
HI
NWEISE ZUM UMWELTSCH
UTZ
Dieses Produkt darf am Ende seiner Lebensdauer nicht über den normalen
Haushaltsabfall entsorgt werden, sondern muss an einem Sammelpunkt für das
Recycling von elektrischen und elektronischen Geräten abgegeben werden. Das
Symbol auf dem Produkt, der Gebrauchsanleitung oder der Verpackung weist
darauf hin. Die Werkstoffe sind gemäß ihrer Kennzeichnung wieder verwertbar. Mit
der Wiederverwendung, der stofflichen Verwertung oder anderen Formen der
Verwertung von Altgeräten leisten Sie einen wichtigen Beitrag zum Schutze unserer
Umwelt. Bitte erfragen Sie bei der Gemeindeverwaltung die zuständige
Entsorgungsstelle.
GUIDELINES FOR PROTE
CTION OF THE ENVIRON
MENT
This appliance should not be put into the domestic garbage at the end of its useful
life, but must be disposed of at a central point for recycling of electric and electronic
domestic appliances. This symbol on appliance, instruction manual and packaging
puts your attention to this important issue. The materials used in this appliance can
be recycled. By recycling used domestic appliances you contribute an important
push to the protection of our environment. Ask your local authorities for information
regarding the point of recollection..
  • Page 1 1
  • Page 2 2
  • Page 3 3
  • Page 4 4
  • Page 5 5
  • Page 6 6
  • Page 7 7
  • Page 8 8
  • Page 9 9
  • Page 10 10
  • Page 11 11
  • Page 12 12
  • Page 13 13
  • Page 14 14
  • Page 15 15
  • Page 16 16
  • Page 17 17
  • Page 18 18
  • Page 19 19
  • Page 20 20
  • Page 21 21
  • Page 22 22
  • Page 23 23
  • Page 24 24
  • Page 25 25
  • Page 26 26
  • Page 27 27
  • Page 28 28
  • Page 29 29
  • Page 30 30
  • Page 31 31
  • Page 32 32
  • Page 33 33
  • Page 34 34
  • Page 35 35
  • Page 36 36
  • Page 37 37
  • Page 38 38
  • Page 39 39
  • Page 40 40
  • Page 41 41
  • Page 42 42
  • Page 43 43

Tristar TR-2547 Owner's manual

Category
Hair trimmers & clippers
Type
Owner's manual
This manual is also suitable for

Ask a question and I''ll find the answer in the document

Finding information in a document is now easier with AI