Page is loading ...

MODEL T10025
16" PLANER BLADE
SHARPENING JIG
INSTRUCTION SHEET
COPYRIGHT © NOVEMBER, 2007 BY GRIZZLY INDUSTRIAL, INC.
WARNING: NO PORTION OF THIS MANUAL MAY BE REPRODUCED IN ANY SHAPE
OR FORM WITHOUT THE WRITTEN APPROVAL OF GRIZZLY INDUSTRIAL, INC.
#JB10090 PRINTED IN CHINA
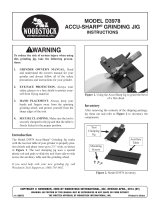
The Model T10025 16" Planer Blade Sharpening
Jig
for the Model T10010 Wet Grinder sharpens
planer, jointer, and other blades up to 16" long.
Figure 1. T10025 Accessory Kit.
Introduction
Inventory (Figure 2)
A. 16" Planer Blade Jig ................................... 1
B.
Flange Screw M6-1 x 16 (support leg) ....... 1
C. Flat Washers 8MM (mounting posts) ......... 2
D. Hex Bolt M8-1.25 x 100 (support leg) ........ 1
E. Hex Bolt M8-1.25 x 35 (support leg opt.) ... 1
F. Hex Nuts M8-1.25 (mounting posts) ...........
2
G. Thin Hex Nut M8-1.5 (support leg) .............
1
H. Attachment Posts w/Adjusting Wheels .......
2
I. Support Leg ................................................
1
Unpacking
The Model T10025 16" Planer Blade Sharpening
Jig was carefully packed when it left our ware
-
house. If you discover any parts are damaged
after you have signed for delivery, please imme
-
diately call Customer Service at (570) 546-9663
for advice. Save the containers and all packing
materials for possible inspection by the carrier or
its agent. Otherwise, filing a freight claim can be
difficult. When you are completely satisfied with
the condition of your shipment, you should inven-
tory the contents.
Figure 2. Inventory.
B
C
D
E
A
F
G
H
I
Adhere to all safety warnings outlined in the
Model T10010 Wet Grinder user manual. If
you are not familiar with the proper usage
of the Model T10010 Wet Grinder, review the
procedures and safety warnings covered in
that manual. Failure to do so could result in
damage to the machine or personal injury.

-2-
T10025 16" Planer Blade Sharpening Jig
Installation
7.
Position the jig over the mounting posts and
secure it with the M8-1.25 hex nuts (Figure
5).
To install the 16" planer sharpening jig:
1. DISCONNECT GRINDER FROM POWER!
2. Remove the universal support from the Model
T10010 Wet Grinder.
3. Insert the attachment posts in the vertical
support mounts on the grinder, and turn the
adjusting wheels as necessary so that the
two posts are at equal heights (Figure 3
).
4. Tighten the mounting knobs, making sure the
knob threads tighten against the flat portion
of the attachment post.
5. Place one 8mm flat washer onto each mount-
ing post.
6. Slide the blade clamp, as shown in Figure
4, to expose the post mounting holes. Adjust
the end stop clamps if necessary to attain the
necessary clearance.
8. Thread the thin M8-1.25 hex nut onto the M8-
1.25 x 100 hex bolt, then thread the hex bolt
into the support leg until it stops (Figure 6
).
Figure 3. Mounting posts.
Attachment Post
Mounting Knob
Adjusting Wheel
8mm Flat Washer
Figure 4. Post mounting holes.
End Stops
Blade Clamp
Post Mounting Holes
Figure 5. Securing sharpening jig.
M8-1.25 Hex Nuts
Figure 6. Support leg.
Support Leg
Thin M8-1.25 Hex Nut
M8-1.25 x 100 Hex Bolt

T10025 16" Planer Blade Sharpening Jig
-3-
Operations
9. Attach the support leg to the sharpening jig
using the M6-1 x 16 flange screw through
the indicated hole (Figure 7
).
10. Adjust the M8-1.25 x 100 hex bolt so that it
touches the bench surface and slightly sup
-
ports the jig, then secure it by tightening the
thin M8-1.25 hex nut against the support leg
(Figure 8).
Figure 7. Support leg attachment.
Support Leg
M6-1 x 16
Flange Screw
Figure 8. Support leg adjustment.
Thin M8-1.25 Hex Nut
M8-1.25 x 100 Hex Bolt
Support Leg
To raise or lower the sharpening jig:
1. DISCONNECT GRINDER FROM POWER!
2. Loosen the hex nut on the support leg and
both mounting knobs on the vertical support
mounts (Figure 9).
3. In small increments, turn the hex bolt on
the support leg and the adjusting wheels on
both attachment posts, always keeping equal
pressure on all three.
4. Once the desired position is reached, tighten
both mounting knobs on the vertical support
mounts and the hex nut on the support leg
.
Figure 9. Height adjustment.
Hex Nut
Hex Bolt
Support Leg
Adjusting Wheel
Mounting Knob

-4-
T10025 16" Planer Blade Sharpening Jig
To set the grinding angle of the blade:
1. DISCONNECT GRINDER FROM POWER!
2. Turn the angle adjusting knob to adjust the
grinding angle (Figure 11). Once the desired
angle is attained, re-adjust the height as out
-
lined in Step 5 in the previous instructions
"To mount a blade in the blade clamp."
3. Check the grinding angle again and re-adjust
if necessary.
Figure 11. Angle adjusting knob.
3. Loosen the blade clamp knobs so that the
blade can be inserted into the blade clamp.
4. Slide the blade into the clamp and evenly
tighten all of the clamping knobs.
5. Carefully rotate the blade clamp downward
until it comes to a stop.
—If the blade touches the grinding wheel,
then raise the support leg and both mount
-
ing posts equally until space can just
be seen between blade and the grinding
wheel.
—If the blade doesn't touch the grinding
wheel and is more than
1
⁄16" above the
wheel, then lower the support leg and both
mounting posts equally until open space
can just be
seen between the blade and
the grinding wheel.
To set the end stops:
Slide the blade clamp back and forth along the jig
to see if the entire blade surface passes over the
grinding wheel.
—If the blade does not travel far enough, then the
end stop must be adjusted outward. Loosen the
end stop knob and slide the end stop outward.
Refer to Figure 11 for end stop identification.
—If the blade travels too far and passes the
grinding wheel entirely, then the end stop must
be adjusted inward. Loosen the end stop knob
and slide the end stop inward.
The ideal end stop position allows the entire sur
-
face of the blade to cross the grinding wheel but
never leaves more than half of the grinding wheel
untouched.
To mount a blade in the blade clamp:
1. DISCONNECT GRINDER FROM POWER!
2. Rotate the blade clamp to the upright position
(Figure 10).
Figure 10. Blade mounting.
Blade Clamp Knobs
Blade Clamp
Blade
Angle Adjusting Knob
End Stop
Use gloves whenever handling blades and
during the blade mounting and adjusting
procedures outlined in these instructions.
Additionally, adhere to all safety warnings
outlined in the Model T10010 Wet Grinder
user manual. Failure to do so could result in
personal injury.

T10025 16" Planer Blade Sharpening Jig
-5-
4. Grasp the blade clamp knobs, rotate the
blade clamp up so the blade is clear of the
grinding wheel, connect the grinder to power,
and turn it
ON.
5. When the grinding wheel has reached full
speed, grasp the blade clamp knobs and
lower the blade onto the wheel. Reposition
your hands as shown in Figure 13 and imme
-
diately begin sliding the blade clamp back-
and-forth in a smooth and steady motion,
from one end stop to the other. (It is not nec
-
essary to put pressure on the blade clamp as
the weight of the clamp and blade will provide
sufficient pressure.) Continue this motion until
the blade clamp stop comes to rest on the
angle adjusting knob, then immediately lift
the blade clamp and turn the grinder OFF.
To sharpen a blade:
1. DISCONNECT GRINDER FROM POWER!
2. Be sure the sharpening jig height and grind-
ing angle are properly set according to the
previous instructions, and make sure that
the blade is securely mounted in the blade
clamp.
3. Lower the height of the sharpening jig approx-
imately
1
⁄8". The blade should rest directly on
the grinding wheel, and a small gap should
exist between the angle adjusting knob and
the blade clamp stop (Figure 12). This gap
allows the blade to lower as it is sharpened.
Figure 13. Proper hand position.
6. DISCONNECT GRINDER FROM POWER.
7. Inspect blade. If further grinding is required,
repeat Steps 3-7 until blade is completely
sharpened.
Figure 12. Adjusting knob gap.
Blade Clamp Stop
Angle Adjusting Knob
Small Gap

T10025 Parts Breakdown and List
REF PART # DESCRIPTION REF PART # DESCRIPTION
1 PT10025001 ANGLE ADJUSTING KNOB 14 PT10025014 SLIDER BLOCKS
2 PT10025002 COMPRESSION SPRING 15 PT10025015 SLIDER RAIL
3 PB87M HEX BOLT M8-1.25 X 15 16 PN03M HEX NUT M8-1.25
4 PSB28M CAP SCREW M6-1 X 15 17 PT10025017 MOUNTING PLATE
5 PT10025005 HINGE PLATE 18 PT10025018 ATTACHMENT POST
6 PT10025006 COMPRESSION SPRING 19 PT10025019 ADJUSTING WHEEL
7 PT10025007 BLADE STOP SPACER 20 PW01M FLAT WASHER 8MM
8 PT10025008 BLADE CLAMP 21 PN01M HEX NUT M6-1
9 PT10025009 FEMALE KNOB M6-1 22 PT10025022 SUPPORT LEG
10 PT10025010 WING KNOB M6-1 X 12 23 PT10025023 THIN HEX NUT M8-1.25
11 PT10025011 END STOP 24 PB45M HEX BOLT M8-1.25 X 100
12 PSB115M BUTTON HD CAP SCR M6-1 X 16 25 PB20M HEX BOLT M8-1.25 X 35
13 PT10025013 JIG 26 PSBS09M BUTTON HD CAP SCR M6-1 X 12
/