Page is loading ...

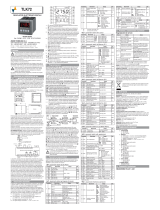
Ascon Tecnologic - ATNfcSoft - USER MANUAL - PAG. 1
ATNfcSoft
ATNFCSOFT
PROGRAMMING SOFTWARE
FOR ATT1 TRANSMITTERS
User anual
Code : ISTR-MATNFCSOFTENG00 • Vr. 00 (ENG)
Ascon Tecnologic S.r.l.
Viale Indipendenza 56, 27029 Vigevano (PV) - ITALY
Tel.: +39 0381 69871/FAX: +39 0381 698730
www.ascontecnologic.com
e-mail: [email protected]
1 GENERAL DESCRIPTION
The program allows to congure the transmitters of the ATT1
family according to the customer’s needs.
Having prepared a conguration, it is possible to store it in
the computer, send it to another user or transfer it to one or
more transmitters.
The program also allows to prepare, store on PC or send to
one or more transmitters the special linearisations (custom)
prepared by the customer himself.
This manual explains the functionality of the program and
the steps necessary for the correct use of the same.
1.1 Hardware requirements
The program requires a PC running Windows XP or higher.
To transfer the congurations and / or custom linearizations
to one or more ATT1, an AFC1 must be installed.
2 AFC1 INSTALLATION
Connect the unit to a computer USB port. Wait for the Oper-
ating System to indicate that it has been installed. The AFC1
installation does not require specic drivers.
3 PROGRAM INSTALLATION
3.1 Program download
ATNfcSoft can be freely downloaded from our internet site:
ftp://atftp.ascontecnologic.com/ATT1_PC_Configurator/
Download the ATNfcSoft program on the PC hard disk.
Note: It is strongly recommended to install theATNfcSoft pro-
gram only after the AFC1 transmitter has been installed.
3.2 Installing the ATNfcSoft program
Once the installation program has been downloaded, move
to the download directory, the using the left button of the
mouse, double click on the installation Icon:
InstallATNfSoft.exe
InstallATNfSoft.exe
InstallAtNfcSoft.exe
the PC shows the image that follows::
Launch the installation procedure clicking:
Install
.
Once the installation procedure is running, the system show
the welcome page that follows:

Ascon Tecnologic - ATNfcSoft - USER MANUAL - PAG. 2
Click on the
Next >
button, the system now displays a page
in which the user can specify the position, on the hard disk,
in which the program is to be installed.
Specied the installation position, press
Install >
to start the
installation process.
m When the AtNfcSoft program is already installed, the
Computer asks to the user to conrm if the new instal-
lation must be terminated erasing the old one.
At the end of the installation process the System displays the
page that follows.
Press the
End
button to exit the installation procedure. The
icon to run the ATNfcSoft program is copied o the Desktop.
ATNfcSoft
ATNfcSoft
4 HOW TO USE THE PROGRAM
When the ATNfcSoft is launched, the default screen with the
PT100 2 wires connection is displayed on the PC monitor.
_ X
AT NFC SOFT
Error OutFilterConnection
absent disabled 2 wires
3,8 mA mid 3 wires
21 mA strong 4 wires
Min. inputMax. input
-200,00 -800,0
°C °C
Min. outputMax. output
4,000 -20,000
mA mA
OffSet Gain
0,01,0000
°C %
Serial number:
00000
Product code:
ATT1N----OP10101----
ID Device:
------
ID Tag:
-----
Hardware Input Probe
RTD
TC
mV
OHM
PT 100
Open
Save
Read
Write
Calibration
°C - °F
Custom
About
2
6
54
3
1
Vdc
+Out
mA
AB
B1 A1
Tc
NFC
-
+
PWR
7..30Vdc
RTD
OUT
4... 20 mA
4.1 How to read the configuration
present in an ATT1 transmitter
To read the conguration stored in an ATT1 transmitter,
place the ATT1 on the antenna of an AFC1 unit. The an-
tenna zone is shown by the symbol:
Click on teh key Read
The PC asks:
Press .
If the read process fails, the Computer shows the following
error message:
In this particular case, proceed as follows:
1. Check that the NFC unit placed on the AFC is an ATT1;
2. Sconnect and reconnect the AFC1 from/to the PC;
3. Remove the ATT1 from the AFC1 unit and carefully place
it again correctly on the AFC1 antenna;
4. Start a new Read session.
When the read process end in tha correct way, theSystem
displays the following message:
Press to continue.

Ascon Tecnologic - ATNfcSoft - USER MANUAL - PAG. 3
The system returns to the main screen showing the data
present in the ATT1 transmitter:
_ X
AT NFC SOFT
Error OutFilterConnection
absent disabled 2 wires
3,8 mA mid 3 wires
Cold junction
disabled
enabled
21 mA strong 4 wires
Min. inputMax. input
-200,00 -800,0
°C °C
Min. outputMax. output
4,000 -20,000
mA mA
OffSet Gain
0,01,0000
°C %
Serial number:
2324
Product code:
ATT1N----F0-----------
File open:
ATT1N----F0-----------
ID Device:
8F60E0026
ID Tag:
Hardware Input Probe
RTD
TC
mV
OHM
TC J
Open
Save
Read
Write
Calibration
°C - °F
Custom
About
2
6
54
3
1
Vdc
+Out
mA
AB
B1 A1
Tc
NFC
-
+
PWR
7..30Vdc
TC
OUT
4... 20 mA
+
4.2 How to read a configuration saved
in the PC
To read a conguration previously saved in the Persona
Computer follow the sequence that follows:
1. Click on the button Open , the system displays the Open
menu:
Select the position (disk/directory) where the congura-
tion has been saved;
2. Click on the le name of the desired conguration and
click on the Open button;
3. The program returns to the main screen, showing the set-
tings present in the selected conguration le:
_ X
AT NFC SOFT
Error OutFilterConnection
absent disabled 2 wires
3,8 mA mid 3 wires
Cold junction
disabled
enabled
21 mA strong 4 wires
Min. inputMax. input
-200,00 -800,0
°C °C
Min. outputMax. output
4,000 -20,000
mA mA
OffSet Gain
0,01,0000
°C %
Serial number:
2324
Product code:
ATT1N----F0-----------
File open:
ATT1N----F0-----------
ID Device:
8F60E0026
ID Tag:
Hardware Input Probe
RTD
TC
mV
OHM
TC J
Open
Save
Read
Write
Calibration
°C - °F
Custom
About
2
6
54
3
1
Vdc
+Out
mA
AB
B1 A1
Tc
NFC
-
+
PWR
7..30Vdc
TC
OUT
4... 20 mA
+
Note: In the lower part of the screen the system displays the
name of the le loaded in the program.
4.3 First time setting
The rst time the program is activated it is suggested to
make some initial settings.
4.3.1 Calibration
Press the
Calibration
button, the System displays a mask with
which the user can select the type of correction is to be applied.
Per fare questo, premere Calibration , il sistema presenterà la
maschera con cui l’utente potrà selezionare il tipo di correzi-
one che desidera effettuare(the two selections are mutually
exclusive). Once the selection has been made, press Exit.
Off
On
EXIT
Select 2 Point Calibration
Select Gain OffSet Calibration
System Error Correction
If the “Gain OffSet Calibration” has been selected, the main
screen shows in the numeric data area:
OffSet Gain
0,0 1,0000
E.U. %
In which OffSet is a constant value applied to the whole
input eld while the Gain is a multiplicative factor applied to
the linearization curve.
Or, if the “2 point calibration” has been selected:
OffSet min. Calib min.
0,0 -200,0
E.U. %
OffSet max. Calib. max.
0,0 -800,0
E.U. %
This screen allows to modify the calibration by dening an
OffSet applied to the beginning of the range to be used and a
second OffSet that is to be applied to the end of range.
4.3.2 How to select the temperature unit
In the main screen, click on
°C - °F
to access the Unit of
measurement selection menu (the two selections are mutu-
ally exclusive).
EXIT
Select Celsius Degrees
Select Fahrenheit Degrees
Unit of measurement
Off
On
At the end of the selection press Exit.

Ascon Tecnologic - ATNfcSoft - USER MANUAL - PAG. 4
4.4 How to change a configuration
The main screen contains all the parameters that can be set.
_ X
AT NFC SOFT
Error OutFilterConnection
absent disabled 2 wires
3,8 mA mid 3 wires
21 mA strong 4 wires
Min. inputMax. input
-200,00 -800,0
°C °C
Min. outputMax. output
4,000 -20,000
mA mA
OffSet Gain
0,01,0000
°C %
Serial number:
00000
Product code:
ATT1N----OP10101----
ID Device:
------
ID Tag:
-----
Hardware Input Probe
RTD
TC
mV
OHM
PT 100
Open
Save
Read
Write
Calibration
°C - °F
Custom
About
2
6
54
3
1
Vdc
+Out
mA
AB
B1 A1
Tc
NFC
-
+
PWR
7..30Vdc
RTD
OUT
4... 20 mA
In particular, in the upper part it is possible to select the
probe family be used and the specic type:
_ X
AT NFC SOFT
Error OutFilterConnection
absent disabled 2 wires
3,8 mA mid 3 wires
21 mA strong 4 wires
Min. inputMax. input
-200,00 -800,0
°C °C
Min. outputMax. output
4,000 -20,000
mA mA
OffSet Gain
0,01,0000
°C %
Serial number:
00000
Product code:
ATT1N----OP10101----
ID Device:
------
ID Tag:
-----
Hardware Input Probe
RTD
TC
mV
OHM
Open
Save
Read
Write
Calibration
°C - °F
Custom
About
2
6
54
3
1
Vdc
+Out
mA
AB
B1 A1
Tc
NFC
-
+
PWR
7..30Vdc
RTD
OUT
4... 20 mA
PT 100
PT 100
NI 100
PT 1000
Custom 400
Custom 4000
_ X
AT NFC SOFT
Error OutFilterConnection
absent disabled 2 wires
3,8 mA mid 3 wires
21 mA strong 4 wires
Min. inputMax. input
-200,00 -800,0
°C °C
Min. outputMax. output
4,000 -20,000
mA mA
OffSet Gain
0,01,0000
°C %
Serial number:
00000
Product code:
ATT1N----OP10101----
ID Device:
------
ID Tag:
-----
Hardware Input Probe
RTD
TC
mV
OHM
Open
Save
Read
Write
Calibration
°C - °F
Custom
About
Cold junction
disabled
enabled
2
6
54
3
1
Vdc
+Out
mA
AB
B1 A1
Tc
NFC
-
+
PWR
7..30Vdc
TC
OUT
4... 20 mA
+
TC K
TC K
TC S
TC R
TC J
TC T
TC E
TC N
TC B
TC Custom
_ X
AT NFC SOFT
Error OutFilterConnection
absent disabled 2 wires
3,8 mA mid 3 wires
21 mA strong 4 wires
Min. inputMax. input
-200,00 -800,0
°C °C
Min. outputMax. output
4,000 -20,000
mA mA
OffSet Gain
0,01,0000
°C %
Serial number:
00000
Product code:
ATT1N----OP10101----
ID Device:
------
ID Tag:
-----
Hardware Input Probe
RTD
TC
mV
OHM
Open
Save
Read
Write
Calibration
°C - °F
Custom
About
2
6
54
3
1
Vdc
+Out
mA
AB
B1 A1
Tc
NFC
-
+
PWR
7..30Vdc
mV
OUT
4... 20 mA
+
mV
mV
or
_ X
AT NFC SOFT
Error OutFilterConnection
absent disabled 2 wires
3,8 mA mid 3 wires
21 mA strong 4 wires
Min. inputMax. input
-200,00 -800,0
°C °C
Min. outputMax. output
4,000 -20,000
mA mA
OffSet Gain
0,01,0000
°C %
Serial number:
00000
Product code:
ATT1N----OP10101----
ID Device:
------
ID Tag:
-----
Hardware Input Probe
RTD
TC
mV
OHM
Open
Save
Read
Write
Calibration
°C - °F
Custom
About
2
6
54
3
1
Vdc
+Out
mA
AB
B1 A1
Tc
NFC
-
+
PWR
7..30Vdc
POT
OUT
4... 20 mA
Pot 400
Pot 400
Pot 4000
For all the choices the drawing on the left shows how to con-
nect the wires for the selection made.
In the central part we nd the settings related to the input:
Error OutFilterConnection
Cold junction
absent disabled 2 wires disabled
3,8 mA mid 3 wires enabled
21 mA strong 4 wires
Where:
Error output
Denes the transmitter output signal when an incorrect
input signal is detected (sensor break or out of range);
Filter This is a rst order lter applied to the measurement
input where:
Disabled: No lter at all;
Mid: Medium lter means a 2 seconds lter;
Strong: Strong lter means a 4 seconds lter.
Connection
For the measurements with PT100, Ni100 and 400 W
potentiometer it is possible to select the type of con-
nection to be used. The drawing, just above indicates
the correct connection.
Note: For PT 1000 and the 4000 (W) potentiometer can only
be connected with the 2-wire technique.
Could junction
Denes whether Cold Junction compensation is active
or not during a thermocouple measurement. Cold
Junction compensation is displayed when a Thermo-
couple (TC) input has been selected.
Note: The reference junction compensation must be ex-
cluded when:
• A differential measurement is made between 2 TCs;
• When using the TC Custom selection to linearize an
input signal in mV.
Under the Input settings part there is the Output settings area:
Min. input Max. input
-10,00 70,0
E.U. E.U.
Min. output Max. output
4,000 -20,000
mA mA
OffSet Gain
0,0 1,0000
E.U. %
Where:
Min. output
Denes the beginning of the electric retransmission
scale.
Note: This value can not be lower than 4 mA.
Max. output
Denes the end of the electric retransmission scale.
Note: This value can not be higher than 20 mA.
Min. input
Denes the value of the input eld associated to the
programmed “Min. output” value.
E.g. I have to measure a temperature with a 3-wire PT100
probe that has an input range of -200... +800°C. The
connected control unit is an old model with a 4... 20 mA
input range which corresponds to a displayed meas-
urement ranging of 0... 500°C. This parameter allows
to adapt the “Min. output” value (4 mA in this example)
to correspond to the 0°C measurement
(Min. input 0°C instead of -200°C by default).
Max. input
Denes the value of the input eld associated to the
programmed “Max. output” value.
Continuing the example at the previous parameter, the
parameter allows to adapt the max output value (20 mA
in this example) Max output = 20 mA) to correspont to
the 500 ° C measurement (Max. Input = 500°C).
The OffSet and Gain parameters are dened at Paragraph 4.3.
To change a value click on the pencil icon and enter the
desired number.

Ascon Tecnologic - ATNfcSoft - USER MANUAL - PAG. 5
In the lower part of the screen are present some information
about the programming ATT1 unit:
Serial number:
2324
Product code:
ATT1---F0-----------
ID Device:
8FB60E0026
ID Tag:
test1
File open:
manual-1-j-reduced.rnd
Where:
Serial Number
ATT1 Serial Number;
Product code
Order code of the product;
File open
If a saved conguration has been read, this eld
shows the name of the le read;
ID Device
Similar to Serial number, but indicates the NFC micro-
processor number inside the transmitter.
ID Tag
ATT1 unit name (up to 20 characters) often used to
indicate the position of the transmitter in the plant.
4.5 How to save in the PC a just
prepared configuration
Click on the Save icon, the System shows the save menu:
Select the position where the le is to be saved, assign a
name to the le and click on
Save
.
4.6 Sending the current configuration
to one or more transmitters
After having tuned up the conguration, click on the button
Write , the System displays the following screen:
4.6.1 Sending the configuration to only one
transmitter
In order to send the current conguration (in the PC memory)
to a single ATT1, click on the
button without enabling
the “Fast device configutration” option:
If the transfer procedure is OK, the PC displays:
Otherwise in the event of an error:
In the case proceed as follows:
1. Make sure that the NFC unit on the AFC1 is an ATT1;
2. Disconnect and reconnect the AFC1;
3. Remove ATT1 from the AF1 and reposition it correctly;
4. Resume the writing action.
4.6.2 Sending the configuration to more
ATT1s
Enable the “Fast device configutration” option by clicking on
the box and displaying the check mark
Then click on the button, the System displays the
screen that follows:
EXIT
Multiple Devices
Configuration
Production
Written Ok
14
Not written
0
In this screen is reported the number of successful writing
processes and those that have been completed with errors.
Place the unit to be programmed in correspondence with the
drawing:
After a few seconds the successful writing counter should
increase, remove the newly programmed unit and move on
to the next one.
When a write generates an error the PC displays:
EXIT
Multiple Devices
Configuration
Production
WAIT
Written Ok
14
Not written
1
Rimuovere l’unità e procedere con la successiva.
Note: The program temporarily holds the last serial number
of the unit to which it has transferred the conguration
to avoid rewriting the same ATT1 continuously.
To reset the counters click on the button.
Once all the transmitters have been congured, click on
EXIT.

Ascon Tecnologic - ATNfcSoft - USER MANUAL - PAG. 6
5 CUSTOM LINEARIZATIONS
5.1 When using custom linearizations
When a non-standard or uncommon sensor is used, it is
often almost impossible to “talk” to it with standard units pur-
chased from a different supplier.
E.g.: The W5 thermocouple (0... 2300°C) is not so common
and may be not foreseen by the instrumentation to be
used. But, by storing in an ATT1 the mV/°C table of
this thermocouple, it is possible to interface the W5 to
any instrument (provided with 4... 20 mA input) of any
manufacturer.
5.2 How to prepare a custom
linearization
The ATT1 can perform 4 types of measurements: TC, RTD,
mV and Ohm (W), but the difference between the TC and the
mV measurements consists in the measurement of the Cold
Junction (measuring the mV, the value of the Cold Junction
measurement is meaningless and not considered).
A similar argument applies to the measurement from RTD
which in practice is a measure in Ohm (W).
For these reasons, the custom linearizations are only 3:
–TC Custom (which without Cold Junction compensation
become mV);
–RTD custom 400 (400W full scale);
–RTD custom 4000 (4000W full scale).
In order to prepare a custom linearization, rst select the
type of input to be linearized by following these rules:
1. To linearize a TC, select an input from TC and the TC
Custom type. Make sure the reference junction compen-
sation is enabled and click on
Custom
;
2. To linearize a mV input, select an input from TC and the
TC Custom type. Make sure the reference junction com-
pensation is disabled and click on
Custom
;
3. To linearize an RTD, select RTD type input then choose
between custom 400 and 4000 depending on the maxi-
mum value we will assign to the points in the linearization
table. If you have chosen a custom 400, select the type
of connection (2, 3 or 4 wires), then click on
Custom
;
4. To linearize a variable resistance, select RTD type input
then choose between custom 400 and 4000 depending
on the maximum value we will assign to the points in the
linearization table. If you have chosen a custom 400,
select the type of connection (2, 3 or 4 wires), then click
on
Custom
.
Once the
Custom
button has been pressed, the System
shows a screen like the following
:
X
EDIT CUSTOM TC
Open
Save
Read
Write
New
Min. Value
-1000
-32767 ÷ 32767
Num. Step
5
2 ÷ 96
Step Value
2000
Max. Value
7000
-32767 ÷ 32767
Decimal
2
0 ÷ 3
Apply
1-10000
210000
330000
450000
570000
The mask is divided in 3 distinct regions:
A. Output data area (linear zone);
B. Measurements area: table of measurements referred
to the pre-xed output points (non linear input);
C. Menu (Save, Read, Write, etc. commands area).
Below, to clarify each step, we are going to report an exam-
ple related to a TC (type W5), but the logic is the same for
the different types of sensors.
In the main screen, select an input from TC and the TC Cu-
stom type. Make sure the reference junction compensation
is enabled:
_ X
AT NFC SOFT
Error OutFilterConnection
absent disabled 2 wires
3,8 mA mid 3 wires
21 mA strong 4 wires
Min. inputMax. input
-200,00 -800,0
°C °C
Min. outputMax. output
4,000 -20,000
mA mA
OffSet Gain
0,01,0000
°C %
Serial number:
00000
Product code:
ATT1N----OP10101----
ID Device:
------
ID Tag:
-----
Hardware Input Probe
RTD
TC
mV
OHM
Open
Save
Read
Write
Calibration
°C - °F
Custom
About
Cold junction
disabled
enabled
2
6
54
3
1
Vdc
+Out
mA
AB
B1 A1
Tc
NFC
-
+
PWR
7..30Vdc
TC
OUT
4... 20 mA
+
TC K
TC K
TC S
TC R
TC J
TC T
TC E
TC N
TC B
TC Custom
click on
Custom
;
Then, to dene the linearization, operate as described in the
following steps. In the A. region of the “EDIT CUSTOM TC”
mask:
A.1 In the Min. Value eld specify the “Start of range” in
use (in our example 0°C).
Note: The value that is to be inserted in this eld must multi-
plied per 10n where n is the no. decimal set (here 101);
A.2 In the Max. Value eld specify the “End of range” in
use (in our example 2000°C);
Note: The value that is to be inserted in this eld must
multiplied per 10n where n is the no. decimal set (Max.
Value = 20000 in this example);
Note: The value that is to be inserted in this eld must multi-
plied per 10 (Max. Value = 20000 in this example).
A.3 In the Decimal eld specify the number of decimal
digits that we are going to display (20000 = 2000.0
then 1 decimal digit);
A.4 Dene the number of calibration points that we are
going to insert in the table.

Ascon Tecnologic - ATNfcSoft - USER MANUAL - PAG. 7
In our example, we set 41 points (number of segments
+ 1). Remember that to divide an element into 3 seg-
ments, we have to dene 4 points that are: beginning,
rst intermediate, second intermediate, last point.
A.5 Clic on the
Apply
icon
.
At this point, the program automatically calculates the Step
Value. This parameter indicates the “distance” between
each calibration point to be inserted in the table.
For our example, the program calculates that hour calibration
points must be spaced by 500 units (value that must be divided
by 10 to obtain the engineering unit) namenly every 50.0°C.
The program also prepares the (empty) table in which the
values are to be entered (in the B. zone).
X
EDIT CUSTOM TC
Open
Save
Read
Write
New
Min. Value
0
-32767 ÷ 32767
Num. Step
41
2 ÷ 96
Step Value
500
Max. Value
20000
-32767 ÷ 32767
Decimal
1
0 ÷ 3
Apply
10
2
●
0
41 0
B.1 The rst value of the table must be the value in mV
generated by the TC at the “Start of range” value (in
our example, 0 mV).
The other values represent the mV value generated by
the TC when the TC temperature is equal to:
(Start of range value) + ([Step value]) * [(Step no.) -1]
B.2 In hour example, the Point number 2 (second) is:
0 + (50.0)*(2 - 1) = 50°C.
.
.
B.21 Following the same logic, at step 20 in the table must
be instered the mV value generated by the TC when
the TC temperature is equal to:
0 + 50 * (20 - 1) = 50 * 19 = 950°C.
.
.
Once all the measured values have been inserted in the table
of the B. zone, it is possible, using the Menu (C. zone) to spe-
cify which usage must be done of the linearization made.
C.1 Save the linearization on the PC hard disk (click on
the Save button and specify the le_name.LIN) and/
or transfer the new linearization to a transmitter (click
on the Write button).
m
To use the custom linearization just made, the trans-
mitter must receive all the values inserted in the B.
zone table. This means that, prior it can be used,
the linearization must be written in the ATT1 with
the Write command. Therefore, if the lineariza-
tion is saved only on the PC hard disk, when it must
be used by ATT1, it must be read from disk ( Read
command) and written in ATT1 ( Write command)
before it can be used.
Once the linearization has been transferred to the ATT1, it is
necessary to return to the main screen (click on the X in the
high-righ end of the mask), select the custom measurement
(in our example the TC Custom) and send this conguration
to ATT1.
The new conguration will become active the next time the
ATT1 is turned ON.
m
For the thermocouples only, the linearization table
must contain the values to be assigned to the meas-
urement of the Cold Junction of the specic TC.
Example no. 2:
As a second example, we need to transmit the position on a
300 mm rail, measured through a non-linear 250W full scale
potentiometer.
Min Value = 0 (mm);
Max. Value = 30000 (mm);
Decimal digits = 2;
Number of Steps = 21;
The result is a Step Value = 1500 (15 mm).
In the table we have to insert the resistance, measured every
15 mm, in tenths of W (W/10).
5.3 Program Information
When a support is to be requested, one of the important
information that is to be given to the customer support de-
partment is the Version of the program installed.
To obtain this information, press on the About menu entry.
The System shows the info screen:
NEAR FIELD COMMUNICATIONS
www.ascontecnologic.com
Software developed to configure
and read ATT1 NFC instruments
Version 1.0.0.7
Ascon Tecnologic s.r.l. is not responsible for any direct, indirect and
consequential damages derived by the use of this program and the connected
periferals.
Viale Indipendenza, 56 - 27029 Vigevano (PV) Italy
+39 0381 69871
+39 0381 698730

Ascon Tecnologic - ATNfcSoft - USER MANUAL - PAG. 8
/