For more information, please visit our website:
www.edifier.com
@Edifier_Global @Edifier_Global@Edifierglobal
Model: EDF200068
Edifier International Limited
P.O. Box 6264
General Post Office
Hong Kong
www.edifier.com
2022 Edifier International Limited. All rights reserved.
Printed in China
NOTICE:
For the need of technical improvement and system upgrade,
information contained herein may be subject to change from time to
time without prior notice.
Products of EDIFIER will be customized for different applications.
Pictures and illustrations shown on this manual may be slightly
different from actual product.
If any difference is found, the actual product prevails.
IB-200-NEOBUS-00 V1.0
勞餘Hㆌ⯕Ꜥ晜紺
䊨蒌抪姻⿿⽪ⵘ
㽯㼄YNN
곜侨㼆䫔䩧ꛐ
⯎ꨵ渱覇荈⹛堤կ
羭堤佞Ⰶ⯎ꨵ渱ꡠ覇荈⹛ꡠ堤կ
CN
ꡠ堤
ꂁ㼩
羭堤㖲佞縨㖈⯎ꨵ渱Ⰺկ
Ꟁ䭽⯎ꨵ渱䭽꒳秉猲鹍Ⰶ诜暅ꂁ㼩⯎
ꨵ渱-&%教㼞䗄橇䖰䊩ⵌ〸❭饰涸教佪կ
鏤⪓䵂程&%*'*&3/FP#VET4鼆乵鸭
䱹կ
껷妃ꂁ㼩
⯎ꨵ渱覇荈⹛堤䖔湬䱹鹍Ⰶ诜暅ꂁ㼩⯎ꨵ渱-&%教㼞䗄橇
䖰䊩ⵌ〸涸教佪կ
鏤⪓䵂程&%*'*&3/FP#VET4鼆乵鸭䱹կ
鏽
䊺剣ꂁ㼩鎹ꏖ䖔殹羭堤㖈⯎ꨵ渱Ⰺ⚂覇儗㼞荈⹛㔐鸭剒鵛鸭
䱹麔涸鏤⪓կ
䊩〸羭鸭䱹ꅾ縨
羭堤㖲佞縨㖈⯎ꨵ渱Ⰺկ
乹⯎ꨵ渱䭽꒳鹍Ⰶ䊩〸羭ꂁ㼩⚛幡ꤑꂁ
㼩鎹ꏖ⯎ꨵ渱-&%教㼞䗄橇䖰Ⰾ⩎ⵌ⚥
❭饰涸教佪կ
♧傉䊩〸羭鸭䱹䧭⸆ꅾ倝鹍Ⰶ诜暅
ꂁ㼩垷䒭կ
䱽ⵖ
鏽
꧱羭⢪欽랾钡垷䒭ⴗ䳕帿䏞꣭㐾⿺橇㞯耪垷䒭կ
㋲羭⢪欽랾钡垷䒭ⴗ䳕垥彋꣭㐾⿺橇㞯耪垷䒭կ
〳鷳麔&EJFS$POOFDU"QQ♳鹍遤⦐䚍⻊乼䱽鏤縨կ
劥铝僈剅⚥涸㕭晙㖲捀爙䠑㕭〳腊莄㻜暟剣⨊䊵կ
䊩鍹䱽匣 〸鍹䱽匣
䭷爙教 䭷爙教
䭷爙教
56 57 58 59 60
Snapdragon Sound is a product of Qualcomm Technologies, Inc. and/or its
subsidiaries. Snapdragon and Snapdragon Sound are trademarks or registered
trademarks of Qualcomm Incorporated.
Input: 5V 200mA(Earbuds)
5V 1A(Charging case)
Declaration for EU
Frequency Band: 2400Mhz - 2483.5Mhz
There is no restriction of use.
FCC statement:
This device complies with Part 15 of the FCC Rules. Operation is subject to the following
two conditions:
(1) this device may not cause harmful interference, and (2) this device must accept any
interference received, including interference that may cause undesired operation.
IC statement:CAN ICES-003(B) / NMB-003(B).
FCC ID: Z9G-EDF178
IC: 10004A-EDF178
Hereby, Edifier International Limited declares that the radio equipment type
EDF200068 is in compliance with Directive 2014/53/EU. The full text of the EU
declaration of conformity is available at the following internet address:
https://www.edifier.com/int/eu-doc.html
210-180494
/$$耪僈
》䖤㻣뀿阮僈⛓⡛⸆桧㼘걽㐼勞ꬋ竤呍ⲥⰖծ㉁贪䧴
⢪欽罏㖲♶䖤乲荈隶刿걽桧ծ⸈㣐⸆桧䧴隶刿⾲鏤鎙⛓暵䚍
⿺⸆腊կ⡛⸆桧㼘걽㐼勞⛓⢪欽♶䖤䕧갠굳菔㸝Ⰼ⿺䎁仟ざ
岁鸑⥌竤涮植剣䎁仟植韌儗䥰用⽰⨢欽⚛佖㊤荛搁䎁
仟儗倰䖤糒糵⢪欽կ鶣ざ岁鸑⥌䭷⣜ꨵ⥌盗椚岁鋊㹁⡲
噟⛓搁箁ꨵ鸑⥌կ⡛⸆桧㼘걽㐼勞갭䗽「ざ岁鸑⥌䧴䊨噟ծ
猰㷸⿺ꄳ派欽ꨵ岚鱖㼘䚍ꨵ堤鏤⪓⛓䎁仟կ
Edifier Connect
6FDQDQGGRZQORDG
(GLILHU&RQQHFW$SS
Edifier Connect
App Store
Download on the
Get It on
Note:
Images are for illustrative purposes only and may differ from the actual product.
Brand App
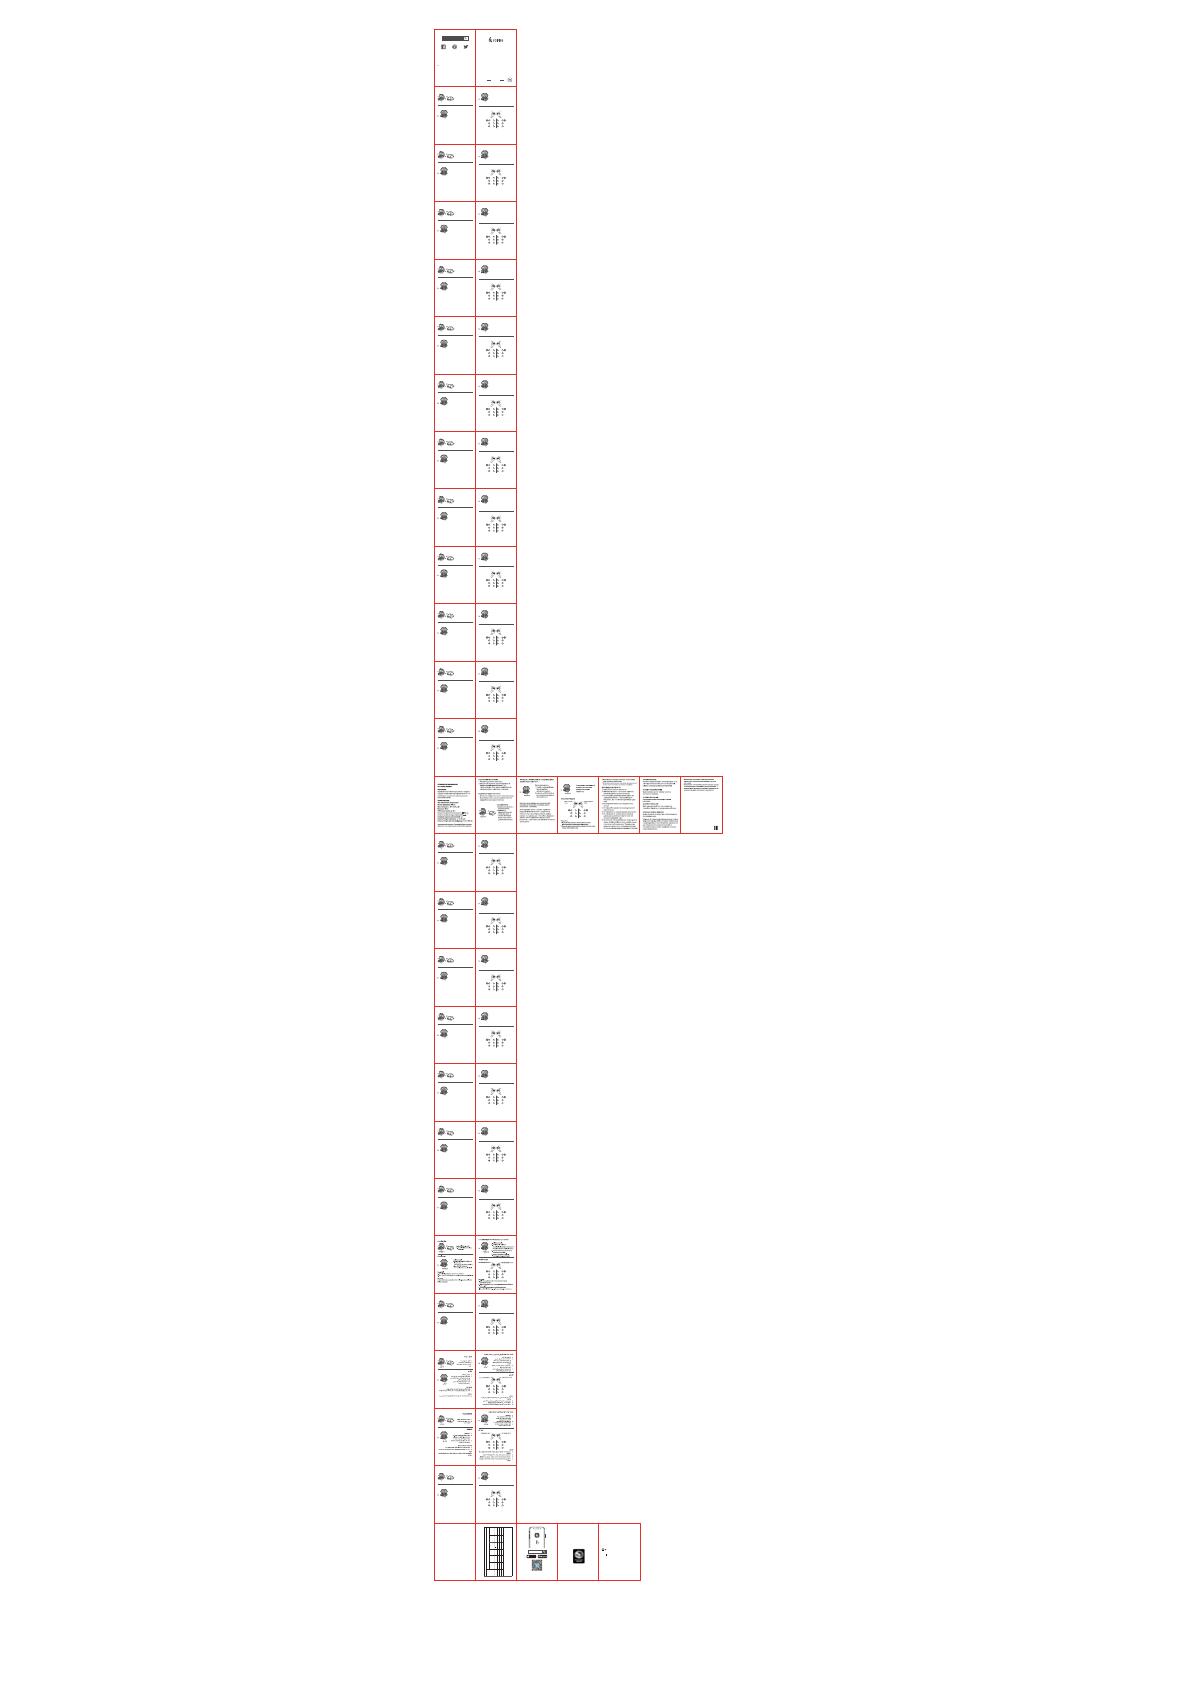
5SVF8JSFMFTT/PJTF$BODFMMBUJPO*O&BS)FBEQIPOFT
NeoBuds S
.BOVBM
1. Power ON when the case is
opened.
2. Power OFF when placed in the
case and the case is closed.
EN
Power ON/OFF
Pairing
1. Placed in the case.
2. Press and hold the button on the case for
around 3s. LEDs will be lit one by one from
left to right in a circulating pattern.
3. Select "EDIFIER NeoBuds S" in your device
setting to connect.
1st Pairing
1. Open the case. LEDs will blink from left to right.
2. Select "EDIFIER NeoBuds S" in your device setting to connect.
Note:
For subsequent use, the earbuds will auto-connect to device used last time.
Left & Right connection/Reset
1. Placed in the case.
2. Press 3 times the button on the case to
enter left & right connection and to clear
pairing records.
3. LEDs will be lit one by one from sides to
center in a circulating pattern.
4. After the earbuds are connected, it will enter
pairing mode automatically.
Controls
Note:
1. Both Earbuds mode switch: High noise cancellation mode & ambient
sound mode.
2. Single Earbud mode switch: Normal mode & ambient sound mode.
3. Customized controls via Edifier Connect App.
4. Images are for illustrative purposes only and may differ from the actual
product.
Left Touch Panel Right Touch Panel
Indicators
3s
Indicators
x3
Indicators
12
x2x2
x2 x2
x3 x3
CZ
Zapnutí/Vypnutí
Párování
Párování (prvnímu)
Poznámka:
Připojení levého a pravého sluchátka/Znovunastavení
Ovladače
Poznámka:
Ukazatele
3s
Ukazatele
x3
Ukazatele
17 18
x2x2
x2 x2
x3 x3
otwarcia etui.
PL
Włączanie/Wyłączanie zasilania
Parowanie
Pierwsze parowanie
Uwaga:
Połączenie lewej i prawej słuchawki/Zerowanie ustawień
parowania.
parowania.
Regulacja
Uwaga:
rzeczywistego produktu.
Lewy Panel Dotykowy Prawy Panel Dotykowy
Kontrolki
3s
Kontrolki
x3
Kontrolki
15 16
x2x2
x2 x2
x3 x3
؛٦أָֻהꨵ彂ָؔ
ٝחזתׅկ
؛٦أחְגꟗׄה
ꨵ彂ָؔؿחזתׅկ
JP
ؔٝؔؿ
ل،ؚٔٝ
؎َمٝ؛٦أחⰆתׅկ
؛٦أךنةٝ秉T䬃׃גֻׁ
ְկ-&%ָ䊩ַ〸חא׆א갫ח
䗄橇׃ג挿抧׃תׅկ
䱹竳鏤㹁ׅرغ؎أדչ&%*'*&3
/FP#VET4պ鼆䫛׃תׅկ
ⴲ㔐ךل،ؚٔٝ
؛٦أֹתׅկ-&%ָ䊩ַ〸ח挿徦׃תׅկ
䱹竳鏤㹁ׅرغ؎أדչ&%*'*&3/FP#VET4պ鼆䫛׃
תׅկ
岤
䖔ך⢪欽ךחծ؎َمٝכ㔐⢪欽׃رغ؎أח荈
⹛䱹竳׃תׅկ
䊩〸ך䱹竳ٔإحز
؎َمٝ؛٦أחⰆתׅկ
؛٦أךنةٝ㔐䬃׃גծ䊩〸
ך䱹竳חⰆծل،ؚٔٝ鎹ꐯ
ؙٔ،׃תׅկ
-&%ָ⩎ַ溫⚥חא׆א갫
ח䗄橇׃ג挿抧׃תׅկ
؎َمٝ䱹竳䖔ծ荈⹛涸חل،ٔ
ٌؚٝ٦سחⰆתׅկ
؝ٝزٗ٦ٕ
岤
تـٕ؎َمٌٝ٦سأ؎حثع؎ظ؎ؤٍؗٝإٕ
ٌ٦س،ٝؽؒٝز؟ؐٝسٌ٦س
ءؚٕٝ؎َمٌٝ٦سأ؎حث鸑䌢ٌ٦س،ٝؽ
ؒٝزٌ٦س
&EJFS$POOFDU،فٔח״ؕأة؎و؎ؤ盗椚
歘⫸כ撑欽דׅկ
䊩ךةحثػطٕ 〸ךةحثػطٕ
؎ٝآ؛٦ة٦
3s
x3
13 14
x2x2
x2 x2
x3 x3
1. Ligado quando o estojo for
aberto.
2. Desligado quando forem
colocados no estojo e este for
fechado.
PT
Ligar/Desligar
Pareamento
1. Colocados no estojo.
2. Pressione e mantenha pressionado o botão
no estojo por cerca de 3s. Os LEDs irão
acender um a um da esquerda para a direita
em um padrão circular.
3. Selecione "EDIFIER NeoBuds S" na
configuração do seu dispositivo para conectar.
1º Emparelhamento
1. Abra o estojo. Os LEDs irão piscar da esquerda para a direita.
2. Selecione "EDIFIER NeoBuds S" na configuração do seu dispositivo
para conectar.
Nota:
Para uso posterior, os fones de ouvidos se conectarão automaticamente
ao dispositivo utilizado na última vez.
Conexão esquerdo e direito/Reiniciar
1. Colocados no estojo.
2. Pressione o botão no estojo 3 vezes para
entrar na conexão dos fones de ouvido
esquerdo e direito e para apagar os registros
de emparelhamento.
3. Os LEDs irão acender um a um das laterais
para o centro em um padrão circular.
entrarão no modo de emparelhamento
automaticamente.
Controles
Nota:
1. Botão de modo dos dois fones de ouvido: Modo de cancelamento de
2. Botão de modo de fone de ouvido único: Modo normal e modo de som
ambiente.
3. Controles personalizados por meio do Edifier Connect App.
4. As imagens são apenas ilustrativas e podem diferir do produto real.
Painel de Toque Esquerdo Painel de Toque Direito
Indicadores
3s
Indicadores
x3
Indicadores
11 12
x2x2
x2 x2
x3 x3
1. Accensione quando la custodia
di ricarica è aperta.
2. Spegnimento quando posizionati
nella custodia di ricarica e quando
quest'ultima è chiusa.
IT
Accensione/Spegnimento
Accoppiamento
1. Posizionati nella custodia.
2. Premere e tenere premuto il pulsante sulla
custodia per 3s. I LED si accendono uno
dopo l'altro da sinistra a destra in uno schema
circolare.
3. Selezionare "EDIFIER NeoBuds S" nel proprio
dispositivo per effettuare la connessione.
Prima associazione
1. Aprire la custodia. I LED lampeggeranno da sinistra a destra.
2. Selezionare "EDIFIER NeoBuds S" nel proprio dispositivo per effettuare
la connessione.
Nota:
Per il successivo utilizzo, gli auricolari si connetteranno automaticamente
al dispositivo utilizzato l'ultima volta.
Collegamento sinistro e destro/Ripristino
1. Posizionati nella custodia.
2. Premere 3 volte il pulsante sulla custodia per
accedere al collegamento sinistro e destri e
per eliminare i record di accoppiamento.
3. I LED si accendono uno dopo l'altro dai lati
al centro in uno schema circolare.
4. Dopo che gli auricolari sono collegati,
entreranno automaticamente in modalità
accoppiamento.
Comandi
Nota:
1. Selettore modalità entrambi gli auricolari: Modalità di cancellazione del
rumore elevato e modalità di suono ambientale.
2. Selettore modalità singolo auricolare: Modalità normale e modalità
suono ambientale.
3. Comandi personalizzati tramite Edifier Connect App.
4. Le immagini sono solo a scopo illustrativo e possono differire dal
prodotto reale.
Pannello Touch Sinistro Pannello Touch Destro
Indicatori
3s
Indicatori
x3
Indicatori
910
x2x2
x2 x2
x3 x3
1. Schalten sich beim Öffnen des
Ladekoffers ein.
2. Schalten sich aus, wenn sie in
den Ladekoffer gelegt werden
und der Ladekoffer geschlossen
wird.
DE
Einschalten/Ausschalten
Kopplung
1. In den Ladekoffer einlegen.
2. Halten Sie zum die Taste am Koffer ca. 3 s
gedrückt. Die LEDs leuchten dann nacheinander
von links nach rechts in einem kreisförmigen
Muster auf.
Geräteeinstellungen, um eine Verbindung
herzustellen.
Kopplung (erste)
1. Ladekoffer öffnen. Die LEDs blinken von links nach rechts
eine Verbindung herzustellen.
Hinweis:
Für die spätere Verwendung werden die Ohrhörer automatisch mit dem
zuletzt verwendeten Gerät verbunden.
Linke und rechte Verbindung/Zurücksetzen
1. In den Ladekoffer einlegen.
2. Drücken Sie die Taste am Koffer 3 mal, um
in linke und rechte Verbindung einzutreten
und die Kopplungsaufzeichnungen zu löschen.
3. Die LEDs leuchten nacheinander von der
Mitte her in einem kreisförmigen Muster auf.
4. Nach dem Anschließen der Ohrhörer wechselt
das Gerät automatisch in den Paarungsmodus.
Steuerelemente
Hinweis:
1. Moduswahltaste für beide Ohrhörer: Modus für hohe
Geräuschunterdrückung & Umgebungsgeräusche
2. Moduswahltaste für einen Ohrhörer: Normaler Modus und Modus für
Umgebungsgeräusche
3. Kundenspezifische Steuerelemente via Edifier Connect App.
4. Die Abbildungen dienen ausschließlich zur Veranschaulichung und
können vom tatsächlichen Produkt abweichen.
Linkes Touchpanel Rechtes Touchpanel
Indikatoren
3s
Indikatoren
x3
Indikatoren
78
x2x2
x2 x2
x3 x3
1. Se enciende cuando se abre la
funda.
2. Se apaga cuando se coloca en
ES
Encendido/Apagado
Emparejamiento
1. Puesto en la funda.
aproximadamente 3s. Los LED se iluminarán
circular.
3. Seleccione "EDIFIER NeoBuds S" en la
1r Emparejamiento
1. Abra la funda. Los LED parpadearán de izquierda a derecha.
para conectar.
Nota:
Para usos posteriores, los auriculares se conectarán automáticamente
al último dispositivo usado.
Conexión izquierda y derecha/Restablecer
1. Puesto en la funda.
y para borrar los registros de emparejamiento.
3. Los LED se iluminarán uno a uno de los
4. Cuando se hayan conectado los auriculares,
accederán al modo emparejamiento
automáticamente.
Controles
Nota:
ruidos elevada y modo de sonido ambiente.
2. Conmutador de modo de un auricular: Modo normal y modo de sonido
ambiente.
3. Controles personalizados mediante la App Edifier Connect.
4. Las imágenes aparecen con un fin meramente ilustrativo y pueden
variar del producto final.
Panel Táctil Izquierdo Panel Táctil Derecho
Indicadores
3s
Indicadores
x3
Indicadores
56
x2x2
x2 x2
x3 x3
FR
Allumer/Éteindre
Appairage
environ 3 s Les LED s'illumineront les unes
après les autres de gauche à droite en cycle.
les paramètres de votre appareil pour vous
connecter.
1ère Association
appareil pour vous connecter.
Remarque:
Connexion à gauche et à droite/Réinitialiser
activer la connexion Gauche et Droite et
effacer les enregistrements d'association.
3. Les LED s'illumineront les unes après les
Commandes
Remarque:
mode de son ambiant.
pas correspondre au produit.
Zone Tactile Gauche Zone Tactile Droite
Indicateurs
3s
Indicateurs
x3
Indicateurs
34
x2x2
x2 x2
x3 x3
3s
x3
54 55
x2x2
x2 x2
x3 x3
݂ວᓠᎺ৾ᇯᓚ࠲ළݰૌ
鏤⪓ぜ珖Equipment name溫搁箁㕕꣭㐾羭堤
!!!!!ġġġ
㘗贪㘗䒭Type designation (Type)EDF200068
ꣳ欽暟颶⿺Ⱖ⻊㷸痗贪
Restricted substances and its chemical symbols
㋲⯋
Unit
ġ
ꊋ
Lead
(Pb)
ġġ
ꆄ㿂ꨪ⟝
馄ⴀ
ġ
0.1 wt %
ġ
㝕芢ꨪ⟝
ӧ
ӧ
ӧ
ġ
ꨵ紛
ġ
ꨵ騟匣⯋⟝
ӧ
Ⱉ⭆ꋈ
Hexavalent
chromium
(Cr )
+6
ӧ
ӧ
ӧ
ġġ
⪓鏽֊馄ⴀXU⿺֊馄ⴀXU⤙䭷ꣳ欽暟颶⛓涰ⴔ嫱ゎꆀ馄ⴀ涰ⴔ嫱ゎꆀ㛇彋⧩կ
Note 1
reference percentage value of presence condition.
⪓
鏽
֊ӧ⤙䭷鑪갪ꣳ欽暟颶⛓涰ⴔ嫱ゎꆀ劢馄ⴀ涰ⴔ嫱ゎꆀ㛇彋⧩կ
ġ
⪓
鏽
֊⤙䭷鑪갪ꣳ欽暟颶捀䱗ꤑ갪湡կ
Note 2 “indicates that the percentage content of the restricted substance does not exceed the percentage of reference value of presence
ġ
Note 3
寏
Mercury
(Hg)
ӧ
ġ
ӧ
ӧ
ӧ
ꓸ
Cadmium
(Cd)
ӧ
ӧ
ӧ
ӧ
㢴徃耡薅
(PBB)
ӧ
ӧ
ӧ
ӧ
㢴徃✳薅ꄍ
(PBDE)
ӧ
ӧ
ӧ
ӧ
biphenyls
Polybrominated
diphenyl ethers
Polybrominated
SK
Zapnutie/Vypnutie
Párovanie
1. Umiestnite do puzdra.
doprava v kruhovom vzore.
Prvé párovanie
Poznámka:
Pripojenie ľavého/pravého slúchadla / Resetovať
1. Umiestnite do puzdra.
stredu v kruhovom vzore.
Ovládače
Poznámka:
Ukazovatele
3s
Ukazovatele
x3
Ukazovatele
19 20
x2x2
x2 x2
x3 x3
x3
x2x2
x2 x2
x3 x3
RU
3s
26 27 28 29 30 31
GR
Ενεργοποίηση/Απενεργοποίηση
Ζεύξη
1η σύζευξη
Σημείωση:
Αριστερή και δεξιά σύνδεση/Επαναφορά
εργοστασιακών ρυθμίσεων
Έλεγχος
Σημείωση:
ambient sound.
3s
x3
23
25
24
x2x2
x2 x2
x3 x3
UKR
Живлення ВКЛ/ВИКЛ
Парування
1-ше парування
"EDIFIER NeoBuds S".
Примітка:
Парування лівого та правого навушників/Скидання
Елементи управління
Примітка:
3s
x3
21 22
x2x2
x2 x2
x3 x3
konuma gelir.
TR
Güç AÇIK/KAPALI
Eşleştirme
1.Eşleştirme
Not:
Sol ve Sağ bağlantı/Sıfırlama
3. LED'ler sirkülasyon düzeninde yanlardan
Kontroller
Not:
ortam sesi modu.
Sol Dokunmatik Panel
Göstergeler
3s
Göstergeler
x3
Göstergeler
32 33
x2x2
x2 x2
x3 x3
BG
Включване/Изключване на захранването
Сдвояване
1-во сдвояване
Забележка:
Лява и дясна връзка/Нулиране
Контроли
Забележка:
3s
x3
34 35
x2x2
x2 x2
x3 x3
1. Gaat AAN als de cassette
wordt geopend.
2. Gaat UIT wanneer ze in de
cassette worden geplaatst en
de cassette wordt gesloten.
NL
Aan/uit zetten
Koppelen
1. In de cassette geplaatst.
2. Druk de knop op de cassette in gedurende
van links naar rechts branden in een
circulerend patroon.
3. Selecteer "EDIFIER NeoBuds S" in de
instellingen van uw apparaat om verbinding
te maken.
1 ste koppeling
1. Open de cassette. De LED's zullen knipperen van links naar rechts.
2. Selecteer "EDIFIER NeoBuds S" in de instellingen van uw apparaat
om verbinding te maken.
Opmerking:
De volgende keren zullen de oortjes automatisch verbinden met het
apparaat dat het laatst werd gebruikt.
Links en rechts verbinden/Resetten
1. In de cassette geplaatst.
2. Druk 3 keer op de knop op de cassette om
de linker- en rechterverbinding te openen
en de koppelgeschiedenis te wissen.
naar het midden branden in een circulerend
patroon.
4. Nadat de oortjes met elkaar zijn verbonden,
wordt de koppelingsmodus automatisch
geopend.
Bedieningselementen
Opmerking:
1. Modus schakelaar van beide oortjes: Hoge ruisonderdrukkingsmodus
en omgevingsgeluid modus.
2. Modus schakelaar van een oortje: Normale modus en omgevingsgeluid
modus.
3. Aangepaste bediening via Edifier Connect App.
4. Afbeeldingen dienen alleen ter illustratie en kunnen afwijkend zijn van
het werkelijke product.
Linker Aanraakpaneel Rechter Aanraakpaneel
Indicatoren
3s
Indicatoren
x3
Indicatoren
36 37
x2x2
x2 x2
x3 x3
1. Tænd, når etuiet åbnes.
2. Sluk, når produktet sættes i
etuiet og når det lukkes.
DK
Tænd/sluk
Parring
1. Sat i etuiet.
2. Hold fingeren på knappen på etuiet i ca. 3
sek. LED-indikatorerne lyser en for en fra
venstre til højre i et cirkulært mønster.
3. Vælg "EDIFIER NeoBuds S" i din
enhedsindstilling for, at oprette forbindelsen.
Første parring
1. Åbn etuiet. LED-indikatorerne blinker fra venstre til højre.
2. Vælg "EDIFIER NeoBuds S" i din enhedsindstilling for, at oprette
forbindelsen.
Bemærk:
Herefter oprette ørepropperne automatisk forbindelsen til den sidst f
orbundne enhed.
Venstre og højre forbindelse/Nulstil
1. Sat i etuiet.
2. Tryk 3 gange på knappen på etuiet for, at
åbne venstre og højre forbindelse og slette
parringsoplysningerne.
3. LED-indikatorerne lyser en for en fra siden
til midten i et cirkulært mønster.
4. Når ørepropperne er tilsluttede, aktiveres
parringstilstanden automatisk.
Betjeningsknapper
Bemærk:
1. Funktionsknap til begge ørepropper: Høj støjreduktionsfunktion og
omgivende lydfunktion.
2. Funktionsknap til en øreprop: Normal funktion og omgivende lydfunktion.
3. Tilpas betjeningsknapperne i appen Edifier Connect.
4. Billederne er kun til illustrerende formål og kan afvige fra det egentlige
produkt.
Venstre Trykpanel Højre Trykpanel
Indikatorer
3s
Indikatorer
x3
Indikatorer
38 39
x2x2
x2 x2
x3 x3
1. Ström PÅ när fodralet öppnas.
2. Ström AV när den placeras i
fodralet och fodralet är stängt.
SV
Strömmen PÅ/AV
Ihopparning
1. Placerad i fodralet.
2. Håll knappen intryckt på fodralet i cirka 3
sekunder. Lysdioderna tänds en efter en från
vänster till höger i ett cirkelformat mönster.
3. Välj "EDIFIER NeoBuds S" i din
enhetsinställning för att ansluta.
1st ihopparning
1. Öppna fodralet. Lysdioderna blinkar från vänster till höger.
2. Välj "EDIFIER NeoBuds S" i din enhetsinställning för att ansluta.
Anmärkning:
För senare användning ansluts öronpropparna automatiskt till den enhet
som senast användes.
Vänster och höger anslutning/Återställa
1. Placerad i fodralet.
2. Tryck tre gånger på knappen på fodralet för
att ange vänster och höger anslutning och
för att rensa befintliga ihopparningar .
3. Lysdioderna tänds en efter en från sidorna
till mitten i ett cirkelformat mönster.
4. När öronsnäckorna är anslutna kommer de
att gå in i parkopplingsläge automatiskt.
Kontroller
Anmärkning:
1. Växlingsläge för båda hörlurar: Brusreducering för högt ljud och
omgivande ljudläge.
2. Växlingsläge för en hörlur: Normalt och omgivande ljudläge.
3. Anpassade kontroller via appen Edifier Connect.
4. Bilderna är endast illustrerande och kan skilja sig från den verkliga
produkten.
Vänster Pekpanel Höger Pekpanel
Indikatorer
3s
Indikatorer
x3
Indikatorer
40 41
x2x2
x2 x2
x3 x3
1. BT ngun khi m hp.
2. TT ngut tai nghe
vào hp.
VN
BẬT/TẮT nguồn
Ghép nối
t tai nghe vào hp.
2. Nhn và gi nút trên hp trong khong 3
sáng ln lt t trái
sang phi theo kiu vòng tun hoàn.
3. Chn "EDIFIER NeoBuds S" trong phn cài
t thit b ca b kt ni.
Ghép nối lần 1
1. M h nháy t trái sang phi.
2. Chn "EDIFIER NeoBuds S" trong pht thit b ca b
kt ni.
Ghi chú:
s d tng kt ni vi thit b
dng gt.
Kết nối Tai trái và Tai phải/Đặt lại
t tai nghe vào hp.
2. Nhn nút trên v 3 l vào phn kt
ni tai trái và tai phn ghi
i.
sáng ln lt t hai bên
chy vào gia theo kiu vòng tun hoàn.
c kt ni vi nhau,
tng chuyn sang ch
ni.
Điều khiển
Ghi chú:
1. Chuyi ch Hai bên: Ch kh ting n cao và ch âm
thanh xung quanh.
2. Chuyi chn: Ch bình thng và ch
âm thanh xung quanh.
u khin tùy ch!nh thông qua "ng dung Edifier Connect.
4. Hình nh ch!t minh h khác vi sn ph#m
thc t.
$%&'%&"()&$*+, $%&'%&"()&/3,
3s
x3
44 45
x2x2
x2 x2
x3 x3
XUG䀴㢨㏘⪰G㜨⮨G㤸㠄㢨G䁐
GGG㬅⏼␘U
YUG䀴㢨㏘㜄G≗ḔG䀴㢨㏘⪰G
GGGG␟㡰⮨G㤸㠄㢨G㬅⏼␘U
KR
헒풞뫃믗삶
펂잏
XUG䀴㢨㏘㜄G≗㡰㐡㐐㝘UG
YUG䀴㢨㏘㢌Gⶸ䏰㡸G㚱GZ㸼ᴸG⌸⪹⏼␘U
GGGGslkᴴG㵜⥴⦐G㞰㯱㜄㉐G㝘⪬㯱㡰
GGGG⦐G䚌⇌㙝G䁐㬅⏼␘UG
ZUG㜤ᷤ䚌⥘⮨GὤὤG㉘㥉㜄㉐GIlkpmplyG
GGGGuiGzIG⪰G㉔䈑䚝⏼␘U
쩖ퟆ펂잏
XUG䀴㢨㏘⪰G㜱⏼␘UGslkᴴG㞰㯱㜄㉐G㝘⪬㯱㡰⦐Gᾐⵉ㢨᷀G
GGGG╝⏼␘UG
YUG㜤ᷤ䚌⥘⮨GὤὤG㉘㥉㜄㉐GIlkpmplyGuiGzIG⪰G㉔䈑
GGGG䚝⏼␘U
몮
⇌㩅㢌G㇠㟝㡸G㠸䚨G㢨㛨ⶸ☐⏈G⫼㫴⫽㡰⦐G㇠㟝═G㣙㾌㜄G
㣄┍㡰⦐G㜤ᷤ╝⏼␘U
홚푾펾멾핺컲헣
XUG䀴㢨㏘㜄G≗㡰㐡㐐㝘UG
YUG㧀V㟤G㜤ᷤG㫸㢹GⵃG䓌㛨⫵Gὤ⦑㡸G
GGGG㇡㥐䚌⥘⮨G䀴㢨㏘㢌Gⶸ䏰㡸GZ䟀G
GGGG⌸⪹⏼␘UG
ZUGslkᴴG㵜⥴⦐G㽕⮨㜄㉐G㩅㚍㡰⦐G
GGGG䚌⇌㙝G䁐㬅⏼␘U
[UG㢨㛨ⶸ☐ᴴG㜤ᷤ╌⮨G㣄┍㡰⦐G䓌
GGGG㛨⫵G⯜☐⦐G☘㛨ᵅ⏼␘U
헪펂
몮
XUG㛅㯱G㢨㛨ⶸ☐G⯜☐G㏘㠸㾌aG⋆㡴G㣕㢀G㥐ᶤG⯜☐GⵃG㨰ⷴG
GGGG㇠㟨☐G⯜☐
YUG䚐㯱G㢨㛨ⶸ☐G⯜☐G㏘㠸㾌aG㢰ⵌG⯜☐GⵃG㨰ⷴG㇠㟨☐G⯜☐U
ZUGlGjG㚥㡸G䋩䚐G⬒㻘G㥐㛨U
[UG㢨㫴⏈G⓸䚨G⯝㤵㡰⦐⬀G㥐ḩ═Gᶷ㢨⮤G㐘㥐G㥐䖼ḰG␘
GGGG⪰G㍌G㢼㏩⏼␘U
㞰㯱G䉤㾌G䑜≄ 㝘⪬㯱G䉤㾌G䑜≄
䖐㐐☥G
3s
䖐㐐☥G
x3
42 43
x2x2
x2 x2
x3 x3
THAI
3s
x3
46 47
x2x2
x2 x2
x3 x3
HEB
3s
x3
52 53
x2x2
x2 x2
x3 x3
SA
3s
x3
50 51
x2x2
x2 x2
x3 x3
2. Daya MATI saat dimasukkan
ke casing dan casing ditutup.
ID
Daya NYALA/MATI
Pemasangan
1. Dimasukkan ke casing.
2. Tekan dan tahan tombol pada casing selama
sekitar 3 detik. LED akan menyala satu per
satu dari kiri ke kanan dalam pola berulang.
3. Pilih "EDIFIER NeoBuds S" di pengaturan
perangkat Anda untuk menghubungkan.
Pasangan pertama
1. Buka casing. LED akan berkedip dari kiri ke kanan.
2. Pilih "EDIFIER NeoBuds S" di pengaturan perangkat Anda untuk
menghubungkan.
Catatan:
Untuk penggunaan selanjutnya, earbud akan terhubung secara otomatis
ke perangkat yang digunakan terakhir kali.
Koneksi Kiri & Kanan/Reset
1. Dimasukkan ke casing.
2. Tekan tombol pada casing 3 kali untuk
masuk ke koneksi kiri & kanan dan untuk
menghapus rekaman pemasangan.
3. LED akan menyala satu per satu dari
samping ke tengah dalam pola berulang.
4. Setelah terhubung, earbud akan memasuki
mode berpasangan secara otomatis.
Kontrol
Catatan:
1. Beralih mode kedua Earbud: Mode peredaman bising tinggi & mode
suara sekitar.
2. Beralih mode satu Earbud: Mode normal dan mode suara sekitar.
3. Kontrol yang disesuaikan melalui Edifier Connect App.
4. Gambar disediakan hanya sebagai ilustrasi dan mungkin berbeda
dengan produk yang sesungguhnya.
Panel Sentuh Kiri Panel Sentuh Kanan
Indikator
3s
Indikator
x3
Indikator
48 49
x2x2
x2 x2
x3 x3

