GDWPLED2P Poly Shield
Thank you for buying RAB lighting xtures. Our goal is to design the best
quality products to get the job done right. We’d like to hear your comments.
Call the Marketing Department at 888-RAB-1000, or email: marketing@
rabweb.com
IMPORTANT
READ CAREFULLY BEFORE INSTALLING FIXTURE. RETAIN THESE
INSTRUCTIONS FOR FUTURE REFERENCE.
RAB xtures must be wired in accordance with the National
Electrical Code and all applicable local codes. Proper grounding
is required for safety. This product must be installed in
accordance with the applicable installation code by a person
familiar with the construction and operation of the product and the
hazards involved.
WARNING: Make certain power is OFF before installing or
maintaining xture.
CLEANING
Clean glass lens with nonabrasive glass cleaning solution.
CAUTION: Be sure xture temperature is cool enough to
touch. Do not clean or maintain while xture is energized.
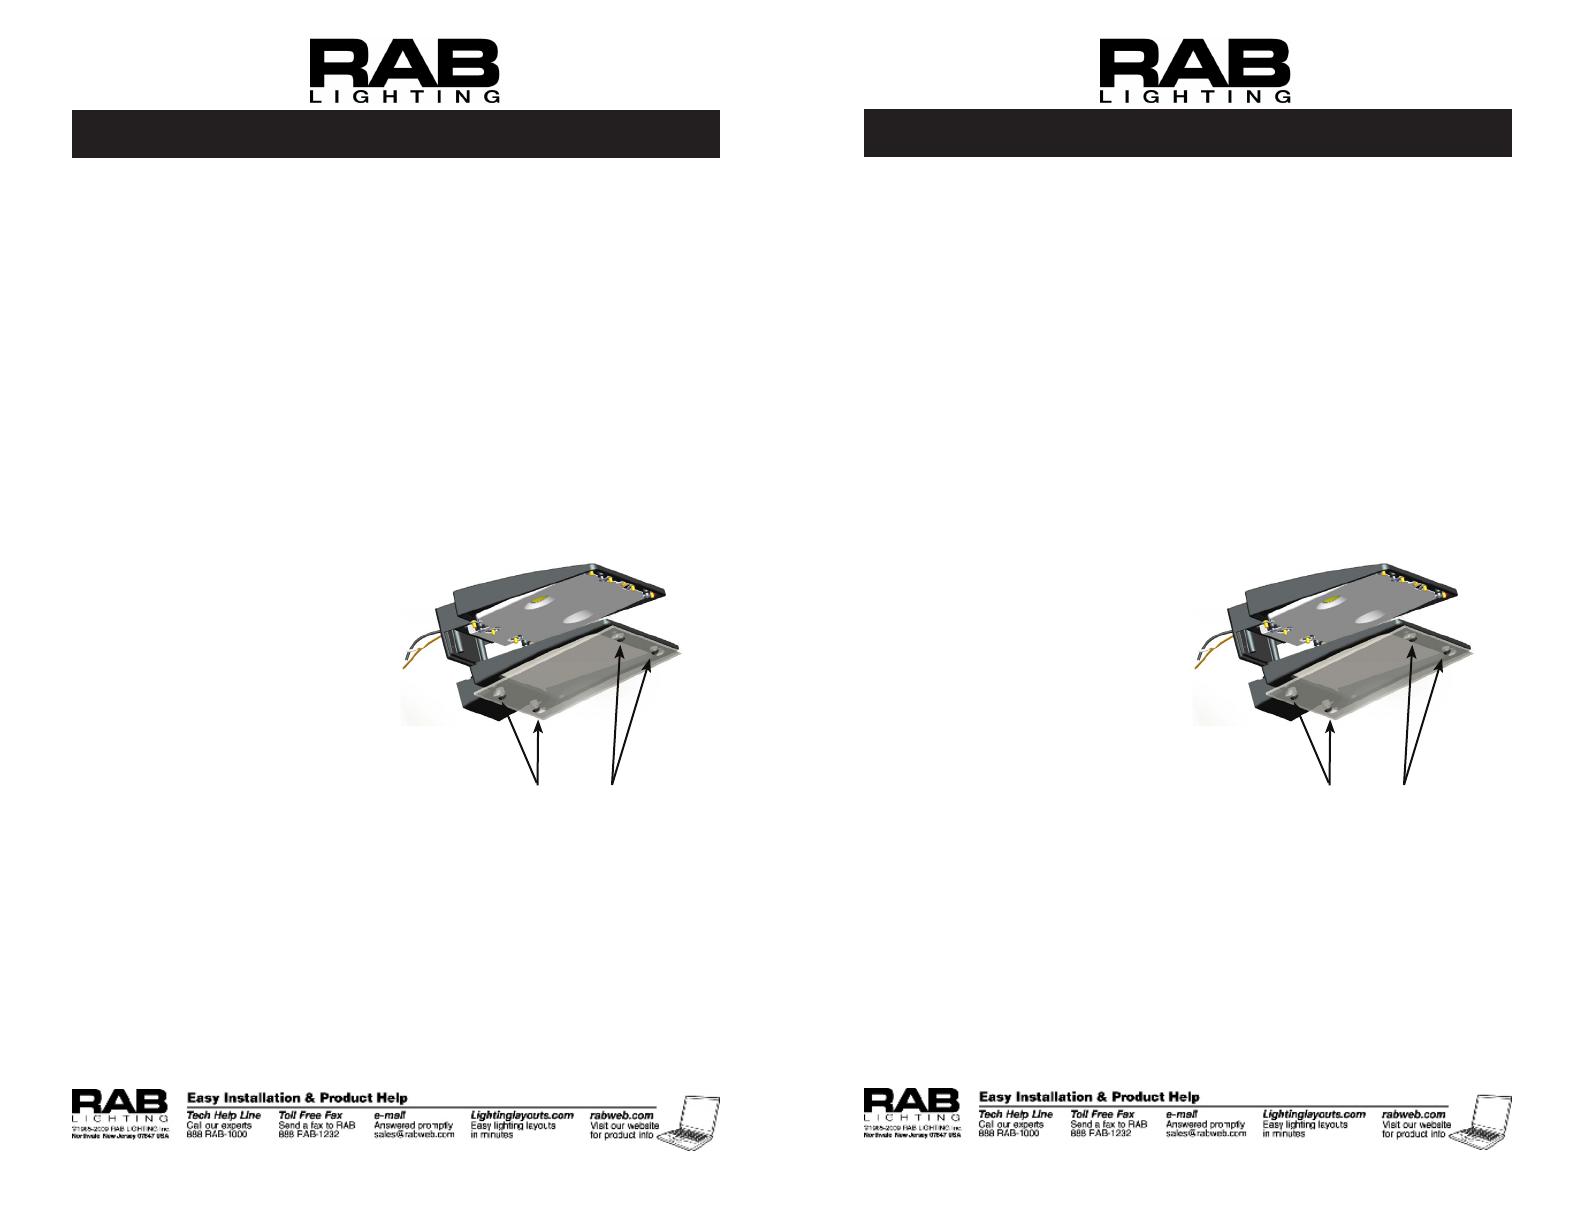
Installation
1. Remove existing door
2. Re-mount door with Poly
Shield already installed to
housing
3. Tighten four Lens Screws
4. Check that door gasket is
fully sealed
CLEANING
Clean glass lens with nonabrasive glass cleaning solution.
CAUTION: Be sure xture temperature is cool enough to
touch. Do not clean or maintain while xture is energized.
Note: These instructions do not cover all details or variations in equipment
nor do they provide for every possible situation during installation, operation
or maintenance.
®
®
Installation
1. Remove existing door
2. Re-mount door with Poly
Shield already installed to
housing
3. Tighten four Lens Screws
4. Check that door gasket is
fully sealed
GDWPLED2P-IN-0710 GDWPLED2P-IN-0710
(4) Lens Screws
(4) Lens Screws
Note: These instructions do not cover all details or variations in equipment
nor do they provide for every possible situation during installation, operation
or maintenance.


